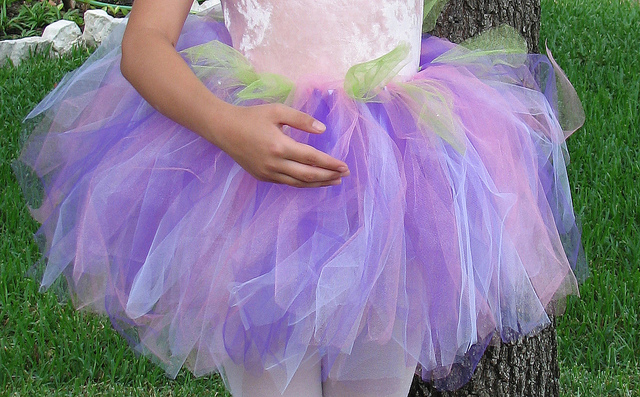
Did you know you and your little ballerina can whip up a DIY tutu without ever breaking out the needle and thread? The best part is, they can customize everything from color to length to level of POOFINESS, which is the crucial measure of any and all tutus. Follow these easy steps and your tiny dancer will be spinning pretty in no time!
photo: The Paessel Family via Flickr
What You Need
Scissors
Approx 50 yards of tulle on a 6-inch spool
Ribbon ( enough to wrap around the waist and tie a bow)
Tape
photo: diynetwork.com
Step 1
Figure out how long you want your tutu to be. Find a large piece of cardboard or even a big coffee table book and wrap the tulle around it as your guide to cutting the strips. You should have about 50 strips for a toddler or small child’s tutu.
photo: diynetwork.com
Step 2
Lay the ribbon out on a table or the floor and tape each end of it down. Tie the tulle onto the ribbon in slipknots. To do so, fold the tulle strip in half. Put the folded end under the ribbon and stick the other ends up and through it to make a slipknot. Repeat the process until the tulle-covered ribbon is full enough to reach around your waist. Make sure to pull the knots tight so that the waist doesn’t get lumpy. You can alternate colors, or do all one color at first and then go back to add a second color in between.
photo: Courtney Rhodes via Flickr
Step 3
Push the tulle together and keep adding more strips until you get the desired fullness. If you want a really full tutu, use 3 or 4 strips at a time and tie them all in the same knot. Go through with the scissors and shape it a bit by cutting off a little from the top layer to tier it a bit.
Find an instructional video and inspirational images to soup up that tutu right here on DIYnetwork.com.
Have you made a tutu for your little dancers?
—Erin Feher
Need some fresh ideas?
Related reads


