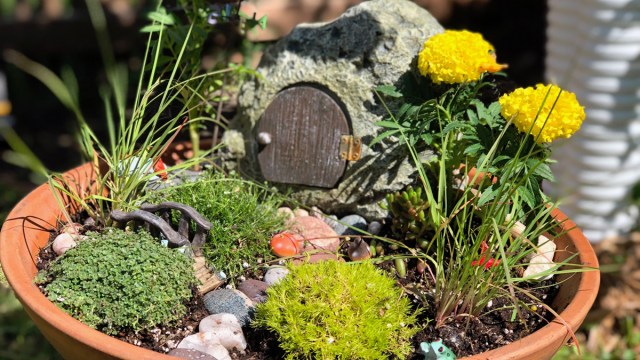
Your little one is no stranger to enchantments: from peering under rocks to fashioning wings and wands, the kingdom of the fairy is a magical place perfect for budding imaginations. What better way than to combine a love of the fae with a little small-scale gardening, of the little people, by the little people, and for the little people! We’ve got an easy tutorial on how to make a fairy garden for kids right here. For more seasonal fun, try a different gardening project for kids or giggle at a few spring jokes.
What You Need to Make a Fairy Garden for Kids
A garden pot. Preferably one that is wide and/or bowl-shaped, so you have more room for all the tiny things, but any will do. Don’t forget the potting soil!
Plants. You can use annuals like lobelia, violets, or marigolds, or use succulents/sedum or other dwarf ground covers. If you want to get elaborate, get some bonsai trees. If your garden is indoor-only, look for teeny-tiny house plants, which you can pick up at a garden center for only a few dollars. Be sure and water the plants when you bring them home and before planting.
Shortcut: no plants or place to really grow them? Try a little florist moss for a woodland effect without the woods!
Little Things. Here’s where you can get creative. Decorate your fairy garden with little items found or created. Pinecones trees, stick teepees, and stones for benches or garden paths all give the fairy garden an au naturel feeling. Many nurseries now carry miniature “fairy house” items, but you can scour your toy boxes for the just-right accessory: a petite teacup could become a fountain or reflection pool, little flags from hors d’oeuvres designate fairy territory, large marbles become garden globes. We love this popsicle stick house (and table and chair set). Also, try aquarium stores for tiny castles and similar structures. And don’t forget LEGO bricks!
Create Your Fairy Kingdom
Fill your pot with soil. If you have any larger “structural” items, such as a tiny house, put that in place before you plant. Designate an area where you will put your garden path. Most of the smaller items can be added after, or in some cases, on top of the plants.
Make sure your plants have been watered but aren’t still soaking wet.
Tip: Layout your plants and larger garden decor in the pattern you’d like before you remove the plants from their pots. That way, you can rearrange them a bit before deciding exactly where they’ll go.
Plant your plants with enough space in between them for them to grow. As a rule of thumb, plant the largest plant you have first (i.e. the bonsai tree) and anything that might trail over or creep a bit closer to the edge of the pot. Before you accessorize, be sure you are happy with the placement of your plants. You can move them a bit after planting if necessary, but it’s best to avoid this too much as it will traumatize the plants and they may not thrive.
Tip: If you aren’t using live plants, you still need to create an elevated surface in your pot. If you prefer to skip the dirt, you could try using small pebbles to create a relatively flat surface on which to create your garden.
Now place in an area where fairies are sure to visit: garden, deck, porch, bedroom windowsill, or dresser near a window.
