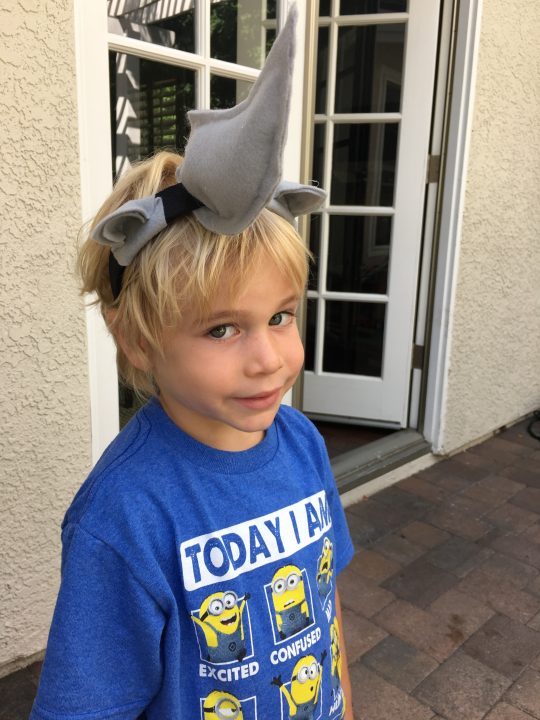
What’s a rhino without its horn? Considering the name itself stems from the Greek — “rhin,” meaning nose, and “ceros,” meaning horn, you can’t really impersonate a rhino properly without one. So get your little rhino-lover up and running with this DIY one-horned rhino headband.
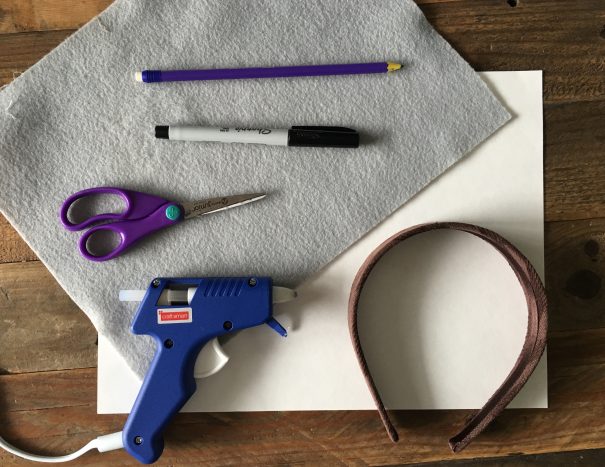
What you’ll need:
Grey felt (two sheets)
pen/pencil
headband
scissors
paper for tracing
glue gun
cotton balls (not pictured)
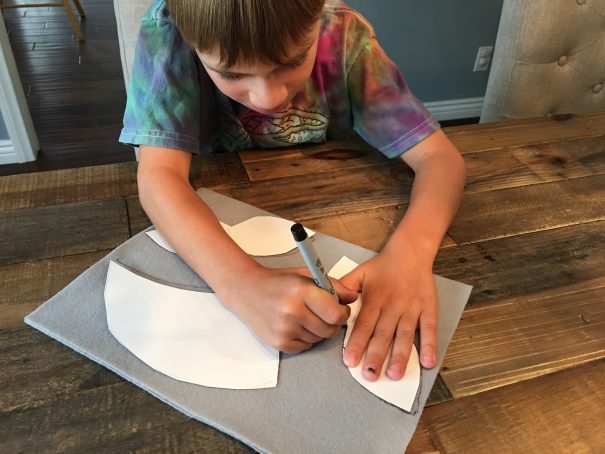
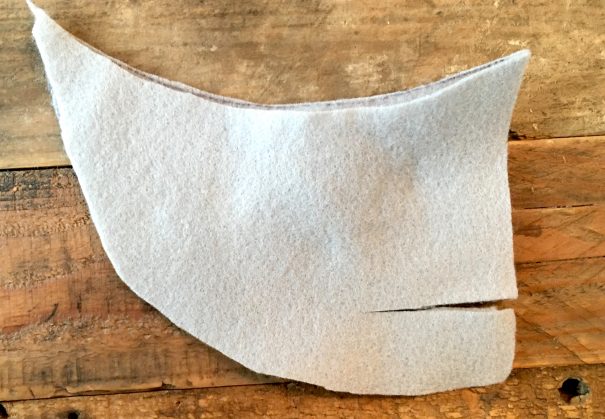
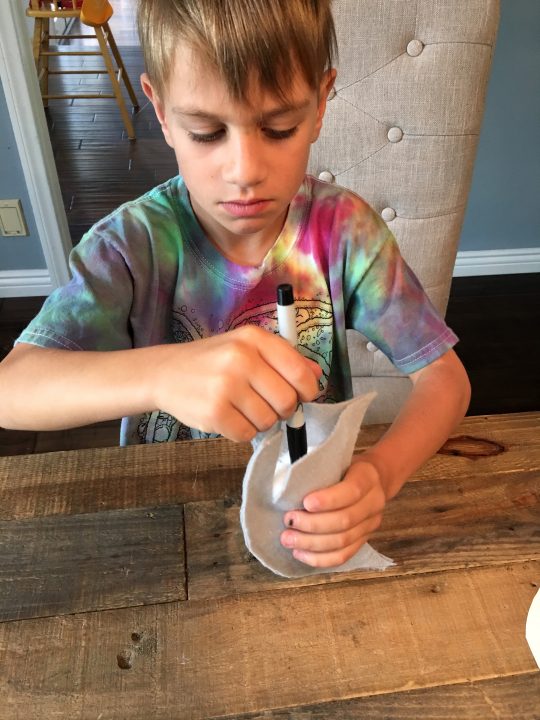
Step One: Make stencils for the ears and horn
You can draw this freehand — or find some rh-inspiration here. Make sure the front and back of the ears are connected in the middle so you’ll be able to wrap them around your headband.
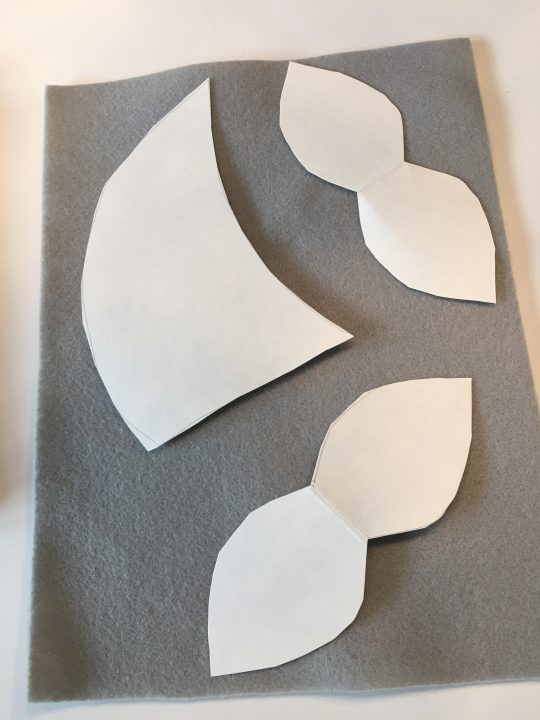
Step Two: Cut out the pieces
Trace your stencils onto the felt and cut to create the shapes that will become your rhino horn and ears. (Note: Make two horn cut-outs; you’ll need to glue them together later.)
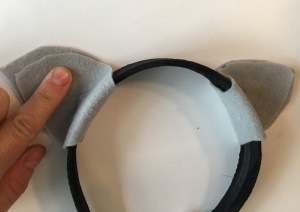
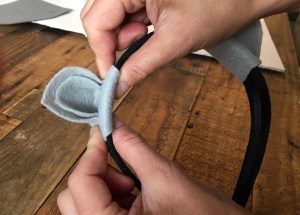
Step Three: Glue and shape the ears
Wrap those adorable ears around your headband. Using (ideally) a hot glue gun, glue the front and back of the ears together (Note: It’s OK if the edges don’t line up perfectly.) Then, glue the outer bottom edges of the ears down so that the ears curl inward a bit.
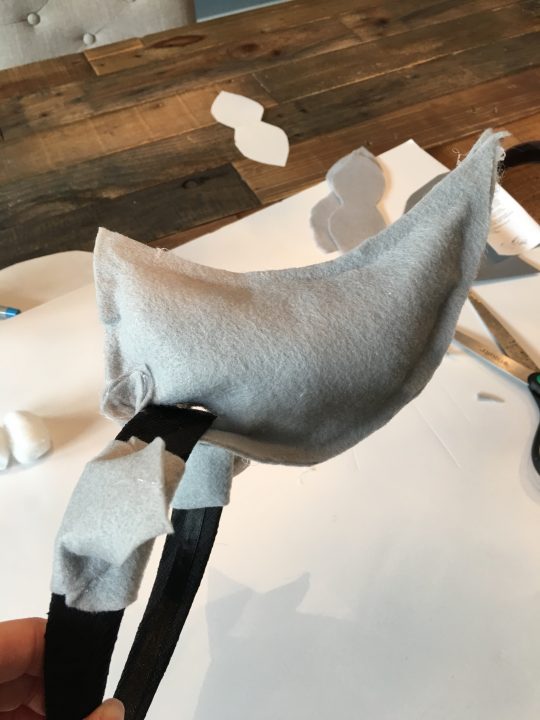
Step Four: Now, for the horn
Using a hot glue gun, glue your two horn-shaped pieces of felt together, excluding the flat side. Be sure to apply the glue only to the inside edges; you’ll need to leave the middle empty so you’ll have space to stuff it. Once the glue is dry, cut a slit into the open side of the horn. This will be used to attach the horn to your headband.
Step Five: Stuff it up
Use the top of a pen to push cotton balls into the horn until it’s filled up like a pillow (don’t worry about stuffing the bottom flap). Then, glue up the open side so that your “pillow” is sealed.
Step Six: Attach your horn
Slide the headband into the slit of the horn, then use your hot glue gun to attach the bottom flap to both the underside of the headband and the upper part of the horn. If needed, dab glue all around the edges so the horn doesn’t slide around.
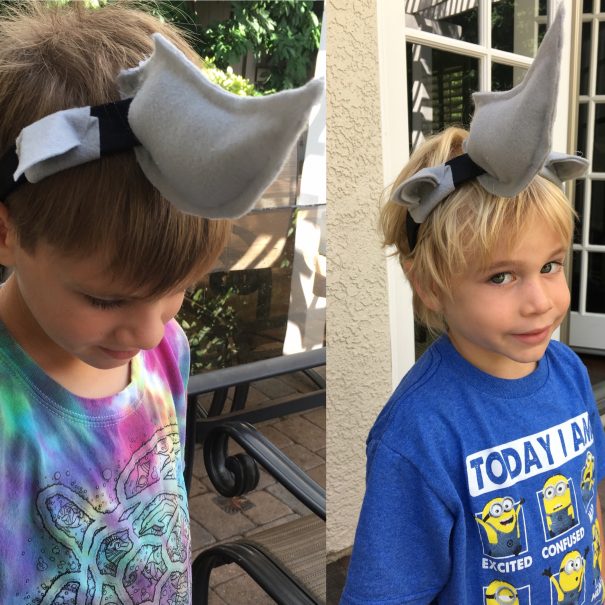
You’re done! Put on your horn and do your best rhino-charge. Or, sit back and enjoy this thrilling video of the real thing.
Got a better way to get in the rhino spirit? Share your ideas below!
— all photos and copy by Melissa Heckscher