Crafting and cooking may be two of the messiest things you can do with your kids, but when it comes to making a gingerbread house it’s totally worth it. Bree from Baked Bree (and mom of three) shares with us her tips and tricks to simplify the gingerbread house building and decorating experience.
I really like making gingerbread houses with my children, but I feel that I must tell you a few things first to prepare you.
1. It will make a giant mess, over the course of a few days.
2. Your children will eat more candy in one sitting than they probably will eat in a month. 3. It will be so much fun that it will be totally worth having dried royal icing all over your house and hyper children.
The first thing that I am going to recommend if this is your first gingerbread house is to start small. I have made many houses before, but this year we invited a friend over to make a house with us and I wanted it to be really fun and not stressful. I found this cute little elf cottage pattern at Simply Recipes (there are some good tips in this article as well). It is the perfect size for children and beginners. There are tons of patterns out there on the ol’ Interweb so take a peek around and find something that you like. I really like the train from Family Fun and have made it a few times. It is also good for beginners.
When you make your dough, it needs to chill for at least 4 hours, better yet, overnight. Print out your pattern. I use card stock so that the pieces are sturdier. Roll out the dough fairly thick and lay the pattern pieces on top. I like to cut out my pieces using a pizza cutter. Put them on a parchment lined cookie sheet and bake them. Leave them on the cookie sheet until they are completely cool. I made 4 houses, so I did this 4 times. Make sure that you have all of your pieces cut out. Double check. Nothing is worse than trying to assemble a house and realizing that you forgot to cut out one side of the house. I should mention that I used 2 batches of gingerbread for these 4 houses. I had just enough. I would make 3 batches if I were doing this again. I would have liked to have made people also.
In a perfect and completely organized world, you would let these sit overnight. You want them to be really solid for building.
Now you need some glue. Otherwise known as royal icing. Use whatever recipe you like, but I like this one:
4 cups sifted powdered sugar
2 Tablespoons meringue powder
5-7 Tablespoons water
Sift the sugar and meringue powder into the bowl of an electric mixer. Add 5 Tablespoons of water. Use the paddle and mix on medium for about 7 to 10 minutes. You want this to be fairly thick. It is going to be what holds the house together. If you need to, add a bit more water. Drops at a time. I know that sounds ridiculous, but it is amazing how royal icing can go from so close to runny in a matter of seconds. Go slowly. Put the icing in a piping bag fitted with a round tip. I used an Ateco #10, it was the perfect size for assembling the house. Royal icing will last overnight as long as it is in an airtight container. However, it will not last if it is in a piping bag overnight. The water will start to separate and it will run. So at the end of the day, pipe whatever is left in the piping bag into the container and start with a fresh piping bag the next day.
Get yourself something to make the house on. I like these 10-inch cake rounds that I got at a bakery supply store. Michaels has them too. I have also used wood. They need to be sturdy as the house can get pretty heavy. I like to start with a right angle. Usually the back piece and one of the sides. I pipe the bottom and put the piece down on it. Then I pipe the seams. Let it rest for a few minutes and start to harden before you move on. I use something (like this little milk jug) to prop them while the dry. Do the other side and let that rest. Add the front. I was making 4 houses, so by the time I got back to the first one, it was set enough to move on. This part is really important as it will make life so much easier when you are decorating. It will not fall apart and the kids will not be freaking out that the roof has caved in.
Let the base dry for a bit before you add the roof. I piped a little scallop on the bottom because it looks cute, but it also adds a bit of structure and stability to the house. When you are ready to add the roof, pipe icing around the edges of one side. Place your cookie piece on the icing and keep for hand on it for a minute or two. You really want it to stick. The roof is always the hardest part for me. When the one side is hard, add the other side.
Your house should be put together. I do this the day before I am going to decorate it. I know that we are now on Day 3 of gingerbread house making, but I did warn you that it would take a few days. If you do not have the time to let it sit, it is not the end of the world. Just be more careful about handling it.
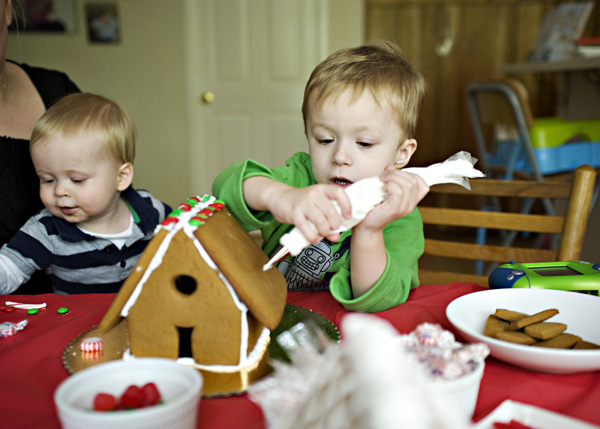
Now for the most fun part, decorating. Do yourself a favor and buy a disposable tablecloth to go over your work area. Have everything set out and ready to go. The piping bags had an Ateco #3 tip on them. We had M&Ms, licorice, Dots, Starlite Mints, gummy bears, sprinkles, coconut, ice cream cones, all kinds of fun stuff. I like to formulate a plan before I start, but the kids just go town.
Any tips or tricks about how to make an awesome gingerbread house you’d like to share with our readers?
Be sure to check out more from our friend Bree at Baked Bree.
Also, for more fun kids craft projects visit our Carefree Crafting page HERE