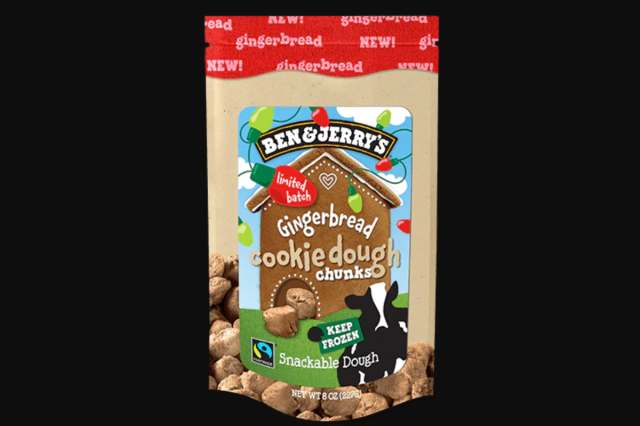
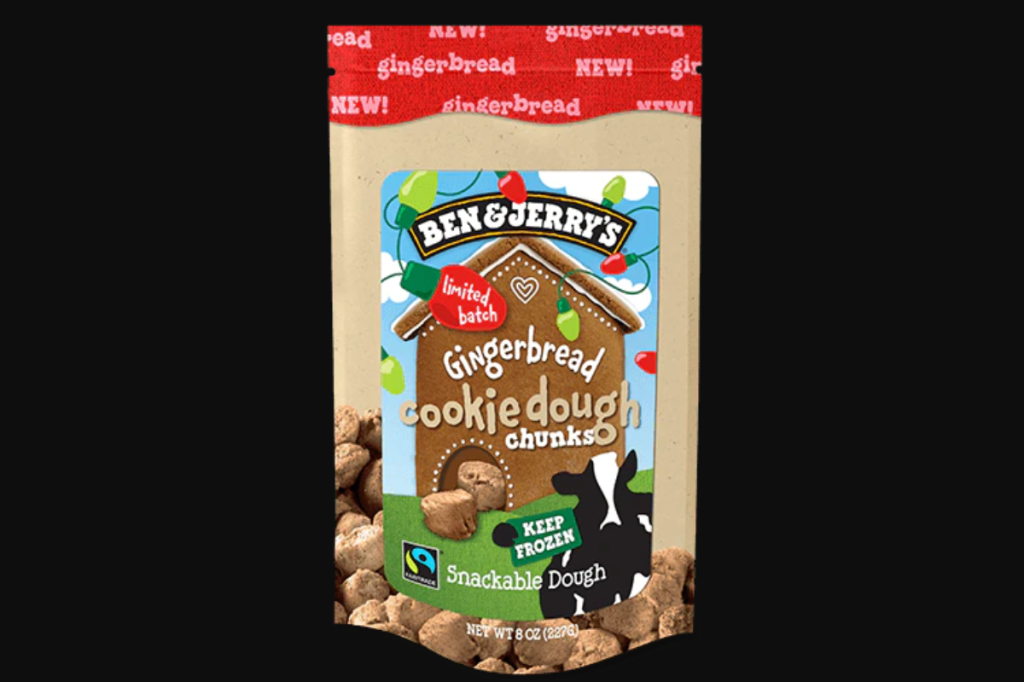
Vermont ice cream company Ben & Jerry’s is beloved by many due to their creative (and delicious) flavors. They are known for their pints inspired by Netflix and late night television to ones with cookie dough cores. Recently, they started selling edible cookie dough bites and now they are introducing two new varieties just in time for fall.
There’s nothing like the scent of warm cinnamon buns baking in the oven. These cinnamony-rich bites are ready to snack on whenever the craving hits.
These bite-size treats are made of snackable dough which is safe to eat without baking because the dough contains pasteurized eggs and heat-treated flour. The new flavors join the original line of cookie dough bites which come in a variety of flavors, including Chocolate Chip, Peanut Butter Chocolate Chip, Vegan Chocolate Chip, Double Chocolate Chip and Half Baked. You can also make Ben & Jerry’s edible cookie dough at home thanks to the recipe they released earlier this summer.
Ben & Jerry’s cookie dough chunks in the freezer section of your favorite grocery stores.
Visit the Ben & Jerry’s website to find out which retailers carry this product and how you can order them online.
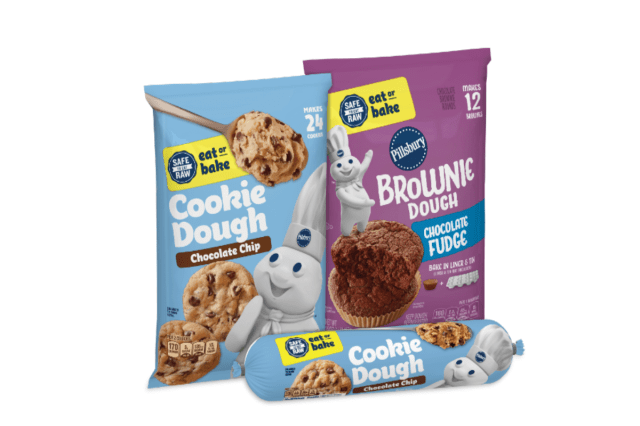
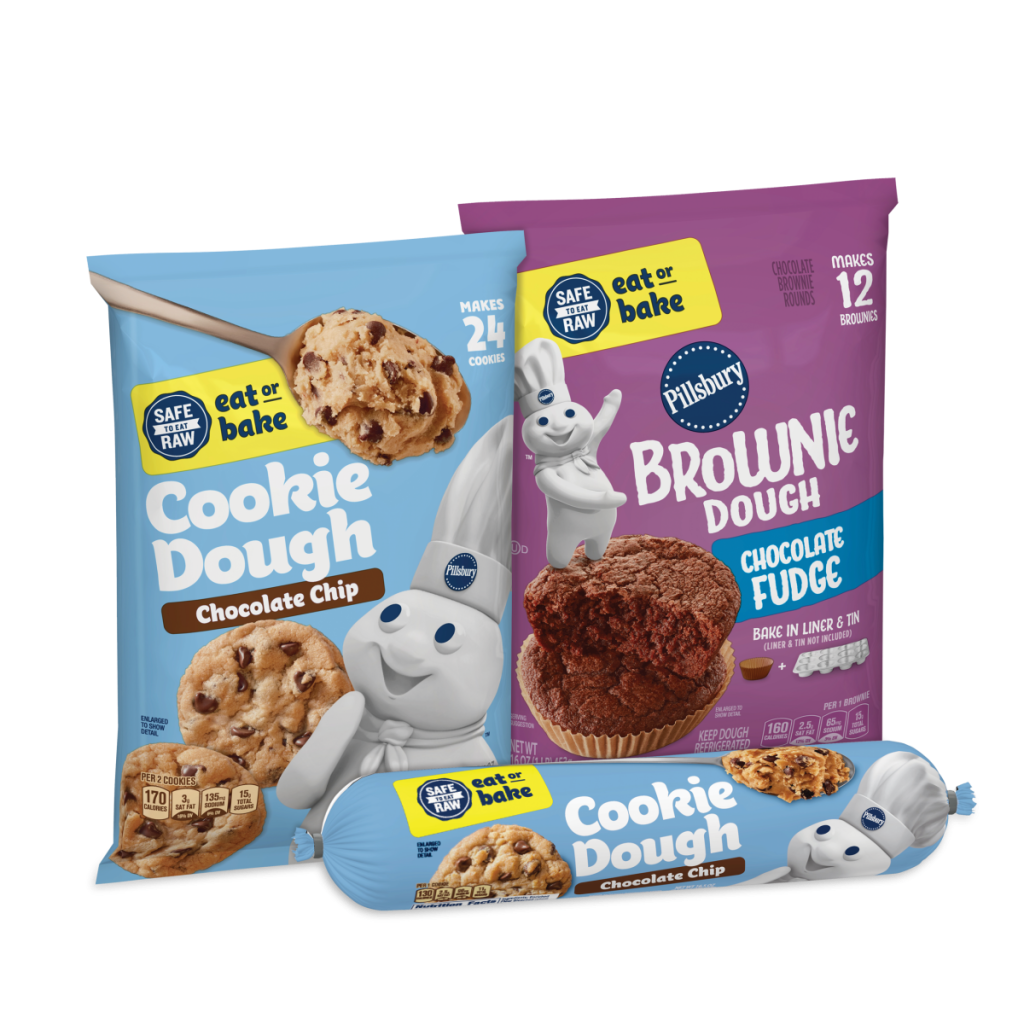
Raw cookie dough has always been a no-no, until now. Pillsbury’s beloved refrigerated cookie and brownie dough products are now safe to eat raw, if it has our seal, and is bakeable as always. To add to the fun Pillsbury has teamed up with Haylie Duff, actress and mom of two, to launch a #SayYesChallenge.
Parents are encouraged to record their kids’ reactions to finally being told “yes!” to eating raw cookie or brownie dough, and then share their video clips on social using #SayYesChallenge and tagging @Pillsbury for a chance to be featured on the brand’s channels.
Pillsbury’s refrigerated cookie and brownie dough are made using the same delicious recipe, except now they use heat-treated flour and pasteurized eggs so families can safely enjoy the dough raw or baked.
People are stuck at home missing their favorite foods. Luckily some brands have been sharing their fan-favorite recipes. Now Ben & Jerry’s is stepping up to satisfy our sweet tooth.
8 tbsp. unsalted butter (1 stick), room temperature
1 cup brown sugar, packed
2 tbsp. heavy cream
1 tsp. vanilla extract
½ tsp. kosher salt
1 cup flour
½ cup chocolate chips
Prep Time: 15 minutes
Total Time: 15 minutes
Total Yield: About 2 cups
Step 1: Gather all your ingredients.
Step 2: First, heat treat the flour to ensure it is safe to eat. Do not skip this step, untreated flour can contain contaminants and is not safe to eat. Place the flour in a microwave safe bowl and microwave on high in 30-second intervals, stirring in between. Use an instant-read thermometer to ensure that the flour reaches 165°F throughout.
Step 3: In a stand mixer or using a hand mixer, beat together the butter and sugar until light and fluffy.
Step 4: Add the vanilla, cream, and salt. Mix to combine. Then add the heat treated flour and mix to incorporate.
Step 5: Fold in the chocolate chips.
Step 6: Serve and enjoy!
Store your uneaten edible cookie dough in an airtight container in the refrigerator for up to one week, or in the freezer for up to six months.
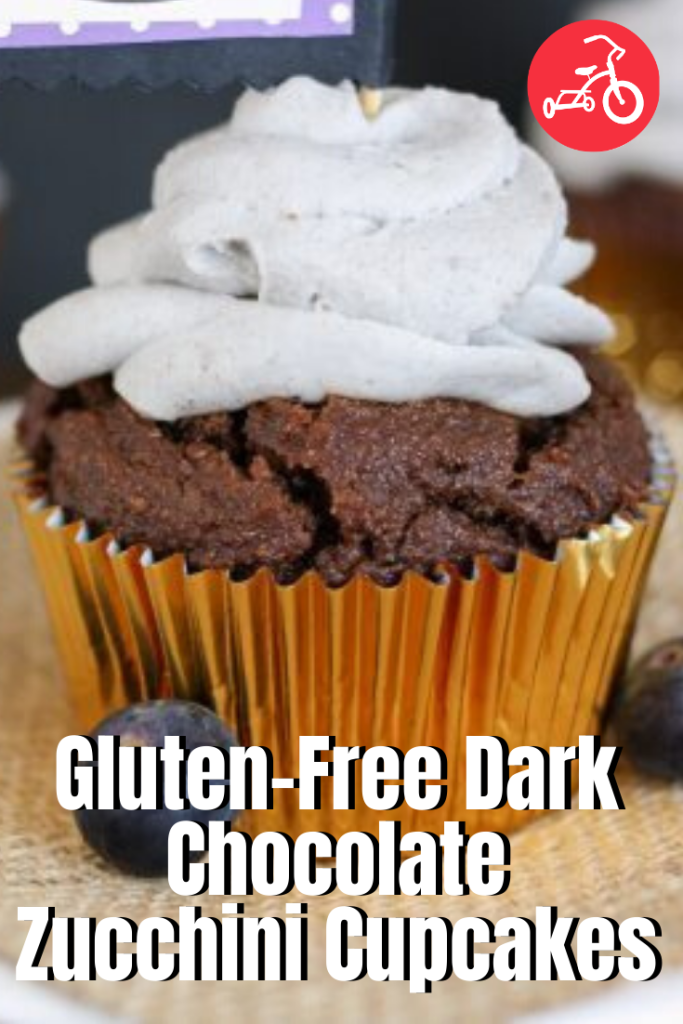
Tender, moist and delicious cupcakes with hidden veggies. Perfect for a morning birthday party or anytime you want to sneak in some extra veggies! They will never know…not to mention that ALL natural colored light and airy whipped frosting. What?!
Makes 12 cupcakes
Ingredients:
Cupcakes:
1 cup sorghum flour
¼ cup potato starch (not the same as potato flour)
¼ cup tapioca starch (same as tapioca flour)
1 ½ teaspoon baking soda
½ teaspoon Himalayan pink salt
3 ounces vegan dark chocolate (85% dark or more)
½ cup coconut butter (room temperature)
1 ½ cups date paste
½ cup full fat coconut milk mixed with 1 teaspoon apple cider vinegar (makes a vegan buttermilk)
½ cup finely grated zucchini
1 tablespoon vanilla extract
Purple Whipped Frosting:
2 tablespoons very cold date paste
top cream layer of 1 can full fat coconut milk (stored in refrigerator for 2-3 days or freezer for 2-3 hours)
1-2 tablespoons juice from frozen blueberries (depending on how dark you want it)
Note from the chef:I made many trials to get the consistency I wanted with these cupcakes, using a variety of flours that would make them nut free but still use a flour with some health benefits, along with being very soft, fluffy and moist. The measuring method I used was to spoon the flours into the measuring container then even it out with a knife. If you pack in the flour you may get a different result. Also, take note that the ingredients for the frosting, except the blueberry juice, are also in the cupcake recipe. Just measure out enough for both when measuring those ingredients. You can buy coconut butter or make it yourself by purely blending unsweetened, preferably not dehydrated, shredded or flaked coconut in a food processor or blender. It takes a while but will eventually turn into smooth coconut butter. There are many sources for directions online. The coconut milk I used was the Thai Kitchen brand. Although it has some guar gum in it, which isn’t my favorite, it is high in fat and creamier than most other brands out there. Make sure the coconut milk and date paste are very cold for the whipped frosting. The very cold date paste helps maintain the structure of the frosting.
Method:
1. Preheat oven to 350. Mix together coconut milk and vinegar to allow it to settle into a buttermilk and set aside. Make date paste if you haven’t, put 2 tablespoons in the freezer to get very cold for the frosting.
2. Combine flours, baking soda and salt in a bowl and set aside. Make sure you break up any clumps, using a whisk works well.
3. In a small bowl melt the dark chocolate with the coconut butter, making sure to melt slowly so you don’t burn it, and mix well. If using the microwave, melt for 30 seconds, then in 10 second increments until fully melted. It took me about 45 seconds. Once melted, add it with the date paste into a large bowl and using a stand or hand mixer, whip until mixed well. Add in “buttermilk,” zucchini and vanilla extract and whip again.
4. Using the paddle attachment on your stand mixer or a spoon, mix in dry ingredients putting in half first, then the rest. Make sure everything is combined well.
5. Place large spoonfuls of the batter into muffin tins lined with baking cups. Fill to just below the top of the cup. I use foil baking cups as they don’t stick like paper does. I also smoothed the batter down on the top by using a moistened finger, this helps them rise evenly as they bake.
6. Bake at 350 for 21 minutes. Depending on your oven, your baking time may vary by a minute or two. Start checking them at 17 minutes and take out when the tops begin to get firm and have a spring to the touch. Let cool in the muffin tins for about 10 minutes. Once cool to the touch, remove and continue cooling on racks until completely cool, about an hour.
7. While cupcakes are baking, take about ½ cup frozen blueberries and defrost enough to be able to squeeze the juice out of them. You still want them cold, if they are warm it will affect the structure of the frosting. If you accidentally get them too warm, just put the juice in the freezer to get cold before putting it in the frosting. Make frosting by placing all ingredients into a large bowl and whipping well using stand or hand mixer. Keep whipping until light and fluffy. The frosting will come out best if both the coconut cream and date paste are very cold. A few hours in the freezer works best. You want it just before it freezes.
8. After cupcakes are cooled, put frosting in a plastic bag, cut off a bit of the corner and squeeze out to frost each cupcake. Enjoy! It’s best to frost right before you eat them because the frosting will soften if it’s too warm outside. If storing, store in the fridge to maintain the frosting.
Sophia DeSantis is the author of Veggies Don’t Bite, a vegan, gluten free and refined sugar free food blog targeted to all types of eaters. She is the mom of two beautiful boys and wife to an amazing husband. Her and her family live a vegan, gluten free and refined sugar free life 90% of the time because she believes that the stress of having to be perfect shouldn’t overpower the benefits that their healthy lifestyle brings. Through her website, she hopes to reach anybody interested in making a positive health change in their life.
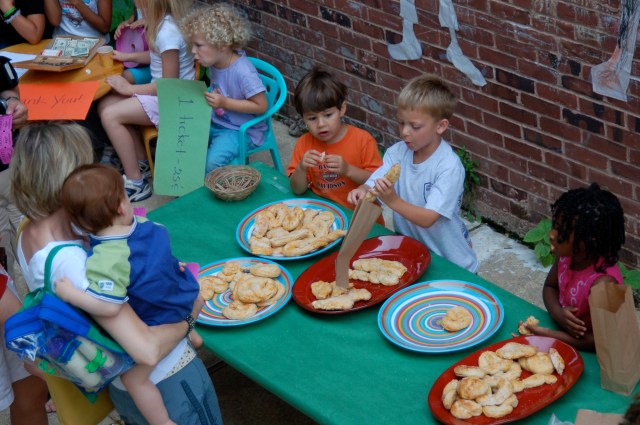
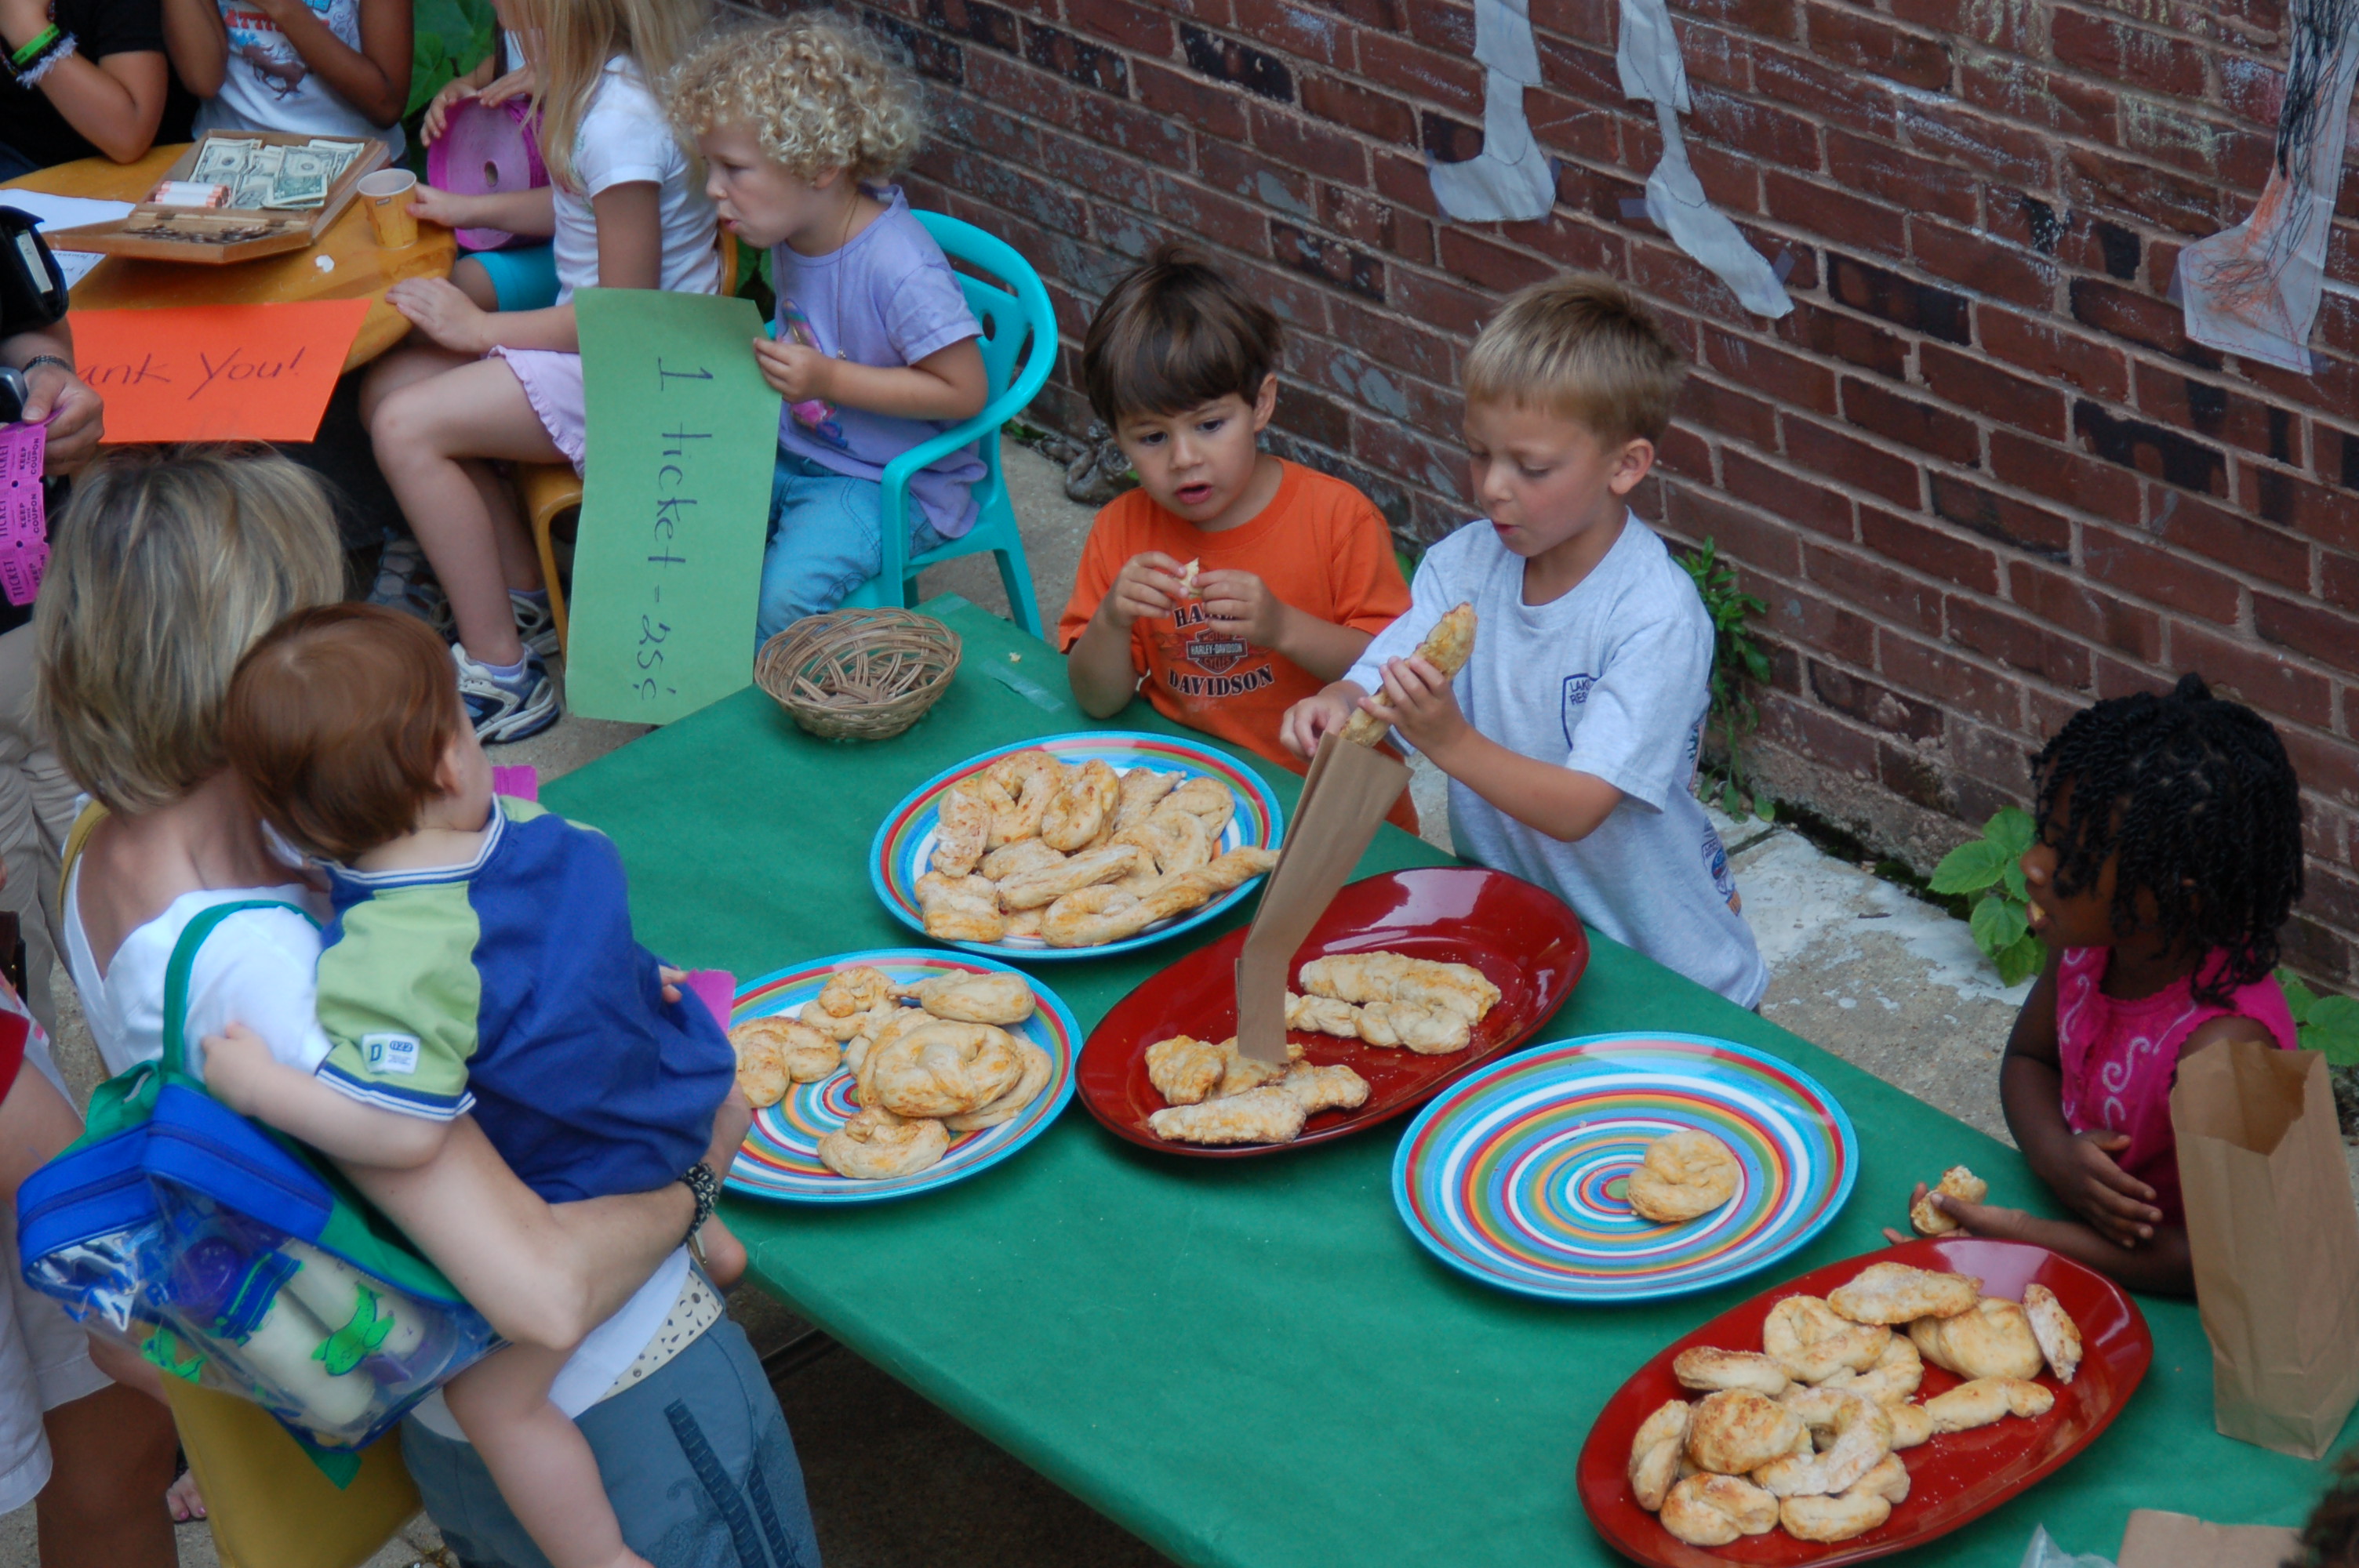
When the text arrived with the pic of a long-ago acquired recipe for “Cheezy Pretzels” from a former Little Folks School parent, Nicole Bagley, I had two reactions. The first was sheer joy at the memory of Nicole and her beautiful family; her two children, Dylan (now age 17) and Ella (now age 12) had attended the Little Folks School when they were young. And secondly, I laughed out loud at her message which stated that after 13 years—while sheltering in place in Colorado—they were finally getting around to making the pretzels!
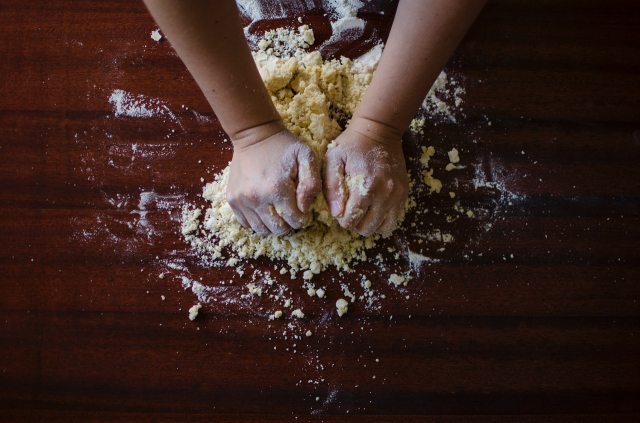
At the Little Folks Summer Camp in Washington, DC, it is an annual tradition to hold a “Pretzel and Lemonade Sale” every July. Besides being a favorite activity that everyone in our community looks forward to, it is loaded with learning. The children work hard to measure out ingredients, to mix and knead the pretzel dough, and then to make it into shapes for baking. Children choose a job: welcoming customers, selling tickets, taking orders for pretzels and lemonade, holding signs, or passing out napkins. Our little bakers and entrepreneurs usually earn enough money to fund special treats at the end-of-camp Music and Art Fair!
Mid-day, family members and friends arrive to purchase the refreshments…and even the recipe!
Each year the campers make more and more pretzels, and no matter how many we make, they are always sold out. Not only is it fun to remember this fantastic event, but it is great to be reminded of this delicious and fun recipe, especially while we are staying at home and looking for activities to pass the time.
Remembering the bright spots from the past, and creating new memories, goes a long way to keep us feeling positive.
Maybe you can make a batch of pretzels and along with some fun memories with your children right now!
LITTLE FOLKS SCHOOL CHEEZY PRETZELS
Ingredients:
4 cups grated cheddar cheese
1 package dry yeast
! tablespoon sugar
1 1/2 cup warm water
1 teaspoon salt
4-5 cups of flour
1 egg
coarse salt
Directions:
Dissolve yeast and sugar in water. Combine salt, 4 cups of flour, and cheese. Stir in yeast mixture, adding more flour if needed to make a stiff dough. Knead 5-10 minutes until the dough is smooth.
For traditional pretzels break off small pieces of dough and shape into a long snake, twisting to make a pretzel shape. It is also fun to makes circles, numbers, letters, etc…
Place pretzels on uncreased pans allowing space between them.
Brush each with beaten egg and sprinkle with coarse salt.
I am a parent and grandparent with over four decades of experience in early childhood education. I share my passion, wisdom and experience, with parents and the people who care for and about children at Little Folks Big Questions, where we're out to answer the questions parents face in today's world.
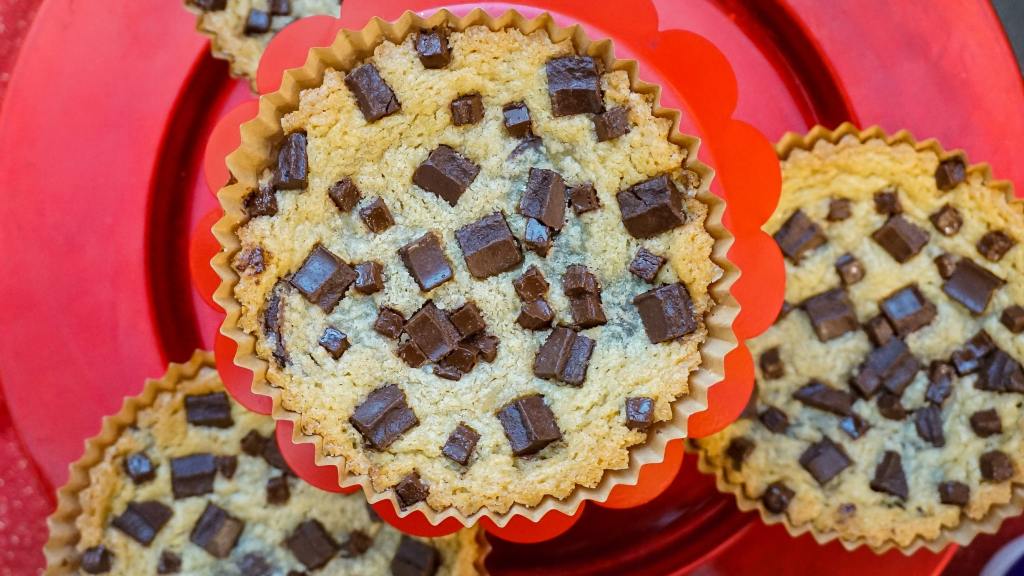
Craving an ooey, gooey chocolate chip cookie? Disney has been releasing tons of magical recipes as of late, and the newest one is a feast for the senses.
Jack-Jack’s Num Num Cookie Recipe was shared last month via Instagram and in case you missed it, we’ve got it right here! The nine-ingredient recipe will whip up a batch just like the ones you’d find at Disneyland’s Pixar Pier, which will hopefully keep you happy until the parks reopen.
photo: Disney
To make Jack-Jacks’ famous treats, gather chocolate chips, flour, butter, baking soda, sugar, eggs, vanilla, salt and brown sugar. Then follow the instructions in Pixar’s Instagram post below!
The American Heart Association recommends that children consume less than 25 grams of added sugar per day. That’s exactly six teaspoons. But kids love sweets, and there’s no need to eliminate them entirely. It’s all about minding the portions.
How can you help your kids be mindful and enjoy sugar in moderation?
One great way is to swap out packaged sweets for home-baked treats and to do the baking together with your kids. Many store-bought foods are overloaded with sugar. But if you bake some of the very same treats with your kids instead, you can control how much—or how little—sugar you use.
Bonus: you get to spend time together. Spending time with your children, especially when baking, is a great way to teach the importance of healthy eating or being mindful of the foods they are placing into your bodies. And it’s fun!
Here are two of my favorite ways to control the sugar in home-baked treats:
1. Measure out smaller amounts of sugar than a recipe calls for.
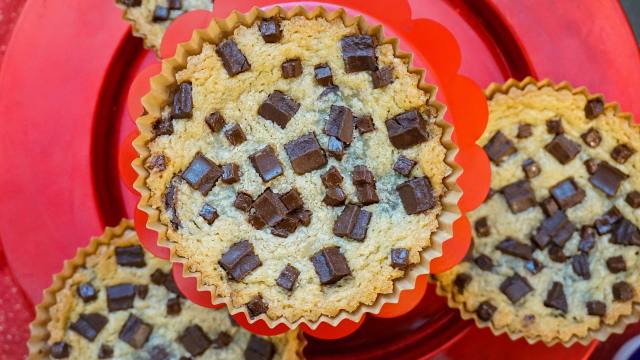
2. Use ingredients that are naturally lower in sugar: Fruits like raspberries and strawberries, for example, and 80% dark chocolate or above.
Ready to try? These three easy recipes are always a big hit to bake, and to eat:
Fruit with Chocolate Shavings:
1 cup of fruit. Fruits that are lower in sugar are raspberries, strawberries, blackberries, kiwi, grapefruit, watermelon, oranges, peaches, cantaloupe.
Add shavings of 80% dark chocolate which contains many health benefits. Dark chocolate is rich in minerals including iron, magnesium, and zinc. The cocoa in dark chocolate also contains antioxidants called flavonoids.
You can even add cool whip for a little fun!On average, 2 tablespoons of cool whip contains only 2 grams of sugar.
Ricotta Cheese Cookies:
Makes 30-40 cookies
1 ricotta (whole)
Two eggs
½ cup of sugar
1 cup of butter at room temperature
1 tablespoon of vanilla
4 teaspoons of baking powder
3.5 cups of flour
Directions:
1. Combine butter, eggs, sugar and vanilla. Beat with mixer until fluffy. Add ricotta and mix together. Add one tablespoon at a time of flour; mix in baking powder and continue to mix batter with beater. Once the mixture has all the added ingredients, use a tablespoon to gather the mixture onto your hands and make a ball. A tip? Add a little water to your hands then work with the batter to form a ball (the batter won’t stick to your hands). Once completed, cover a tray with parchment paper and place the ricotta cookies on the tray. Heat oven to 350 degrees. Bake cookies for 12-15 minutes.
Apple cake
6 eggs
1 cup of sugar
8 ounces of oil
2 cups of flour
1 teaspoon of baking powder
1 teaspoon of cinnamon
4 medium-size apples- peeled and sliced
Directions:
Beat eggs and sugar together until fluffy and then add the rest of the ingredients. Using a glass tray covered with parchment paper, add half of the mixture. Place the sliced apples into the mixture and add the remaining mixture to cover the sliced apples. Heat oven to 350 degrees. Place tray in the oven for 40 minutes. Check with a toothpick to see if the cake is baked through. If the toothpick is dry then the cake is done.
Maria Sofia’s life mission—inspired by her personal struggles with weight loss —is to educate parents and teachers on the importance of teaching nutrition to young children. Maria is a certified Health, Life and Trauma Coach. She is currently working toward her PhD in holistic health and lives in Toronto.
Where we live in Michigan, the Governor has closed schools through the end of the school year. Since being in quarantine, we have definitely done more baking. A few weeks ago, my daughter Lauren made homemade biscuits and Dominic and I have made my mother-in-law’s Sour Cream Kuchen numerous times (we actually have it on the schedule to make today)! This past Sunday, it was the traditional “Bunny Cake.”
Besides our baked goods tasting super duper yummy, I have used the baking “sessions” with Dominic to reinforce life skills, like having him read the recipe and getting all the ingredients out, following directions and measuring out the flour, sugar, etc. Since we had a teeny bit of vanilla frosting leftover from the “Bunny Cake,” I thought making some homemade brownies were in order!
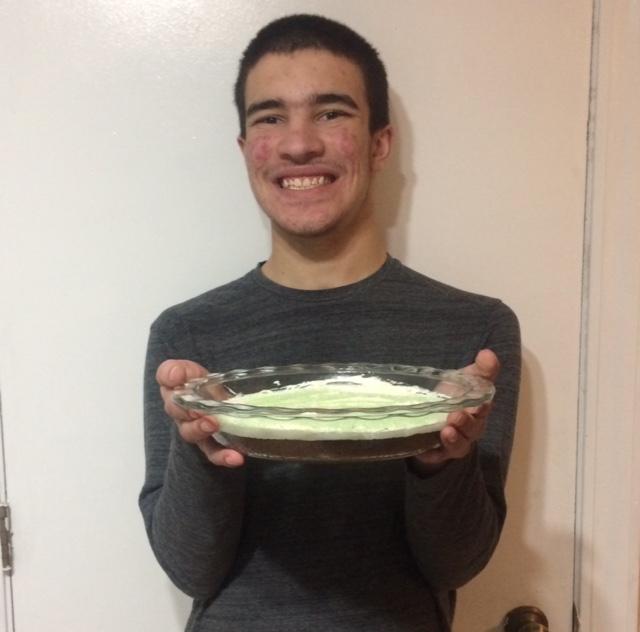
After looking through a few cookbooks, I found the perfect recipe (meaning we had all the ingredients)! Dominic and I made it before dinner, so it could cool while we were eating dinner. We even made it a bit more fancy by adding some green sprinkles! I have made brownies in all different shaped pans, but never in a pie pan. The hubby, Dominic and I ate ours quickly, but I set Lauren’s piece on a plate on the dining room table. When she came looking for it, I told her where it was.
Much to our surprise, there were a couple of bites taken out of it. The culprit was Dominic!!! He had helped himself to her piece when I wasn’t looking, LOL. Guess he wanted a second piece! This morning, we discovered he had eaten two chocolate bunnies out of Lauren’s Easter basket. He’s a sneaky little thing.
Ingredients:
1 cup white sugar
1/2 cup unsalted butter (melted)
2 large eggs
1/2 cup white flour
1/3 cup baking cocoa
1/4 teaspoon salt
1 teaspoon vanilla extract
Directions: Preheat oven to 350 degrees. Spray a 9-inch pie pan with non-stick cooking spray and set aside. In a large bowl, put the sugar and butter and beat until smooth with an electric mixer or by hand. Add the remaining ingredients in the order given and combine them well. Pour into prepared pan and bake for 25-30 minutes or until a toothpick inserted into the middle of the pie comes out clean. Remove from the oven and let cool thoroughly. Sprinkle with powdered sugar, frost or enjoy as is!! Serves eight.
I am a stepmom to one and a mom to two. I have been a stay-at-home mom for almost 24 years. Grew up in Maryland and have lived in Michigan since 2001 when my husband got a job here. My 15-year old son has special needs.
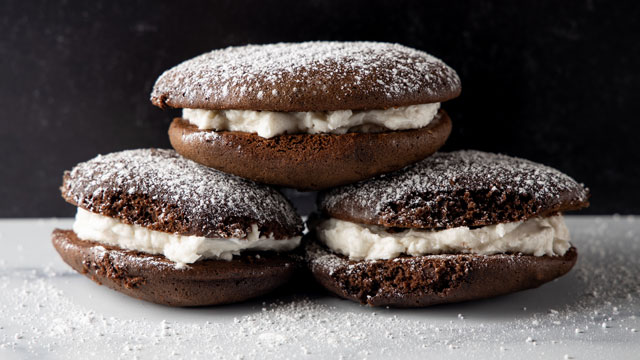
They’re cute, they’re miniature and they are oh-so delicious! Whoopie pies are the perfect-sized dessert for our little sweet tooth. And these orange-infused Nutella whoopie pies will have our little one begging for these homemade goodies again and again. Plus, this dessert makes for a great gift!
Ingredients for Orange-Infused Nutella Whoopie Pies
Cream filling:
1 orange
5 tbsp. unsalted butter
1/4 cup caster/ superfine sugar
1 egg
1/3 cup cream cheese
Whoopie pie:
1 1/4 cups all-purpose flour
1 tsp baking powder
3 tbsp unsalted butter
1/4 cup caster/superfine sugar
1 egg
1/2 cup Nutella
2 tbsp cocoa powder
1/2 cup skimmed milk
a pinch of salt
Method
1. Pre-heat the oven to 350°F
2. Make the cream filling. Finely grate the orange zest and squeeze the juice. Melt the butter in a bain-marie or a bowl over a pan of simmering water. Add the sugar, egg, juice, and zest of the orange. Beat continuously until the mixture thickens. Remove from the heat and leave to cool. Beat in the cheese and chill for 1 hour.
3. Make the whoopie pies. Mix the flour, baking powder, and salt. In a separate bowl, beat together the butter and sugar. Add the egg, Nutella, cocoa powder, and milk. Mix well then add the flour and baking powder mixture.
4. Place 30 small spoonfuls of the mixture on a baking sheet covered with baking parchment. Bake for 10–15 minutes. Remove from the oven, leave to cool on a cooling rack, then sandwich together with the cream filling.
Social distancing with my two teenage boys, my husband and my dog for the last month, has been both a blessing and a curse, as they say. Have I loved binge-watching “Dexter” on a nightly basis while eating popcorn and leftover Easter candy or slices of cake or a bowl of ice cream (yes, the “no-eating in the TV room” rule was discarded weeks ago), all of us snuggled together on the couch (okay, that’s a lie—there’s no snuggling happening, as the three over 6-feet giants with whom I cohabit are not really all that snuggly)? Of course! Doing so is literally the highlight of every day. And have I loved how my husband (enthusiastically) and my children (reluctantly) help with dinner each night? Yes! So fun. The best. And is it a treat to see my kids a bit less stressed by school, extracurricular activities, their social lives, etc? 100%. I’m kind of the anti-helicopter mom, and so seeing them slow down and feel less pressure is indeed a blessing in my world.
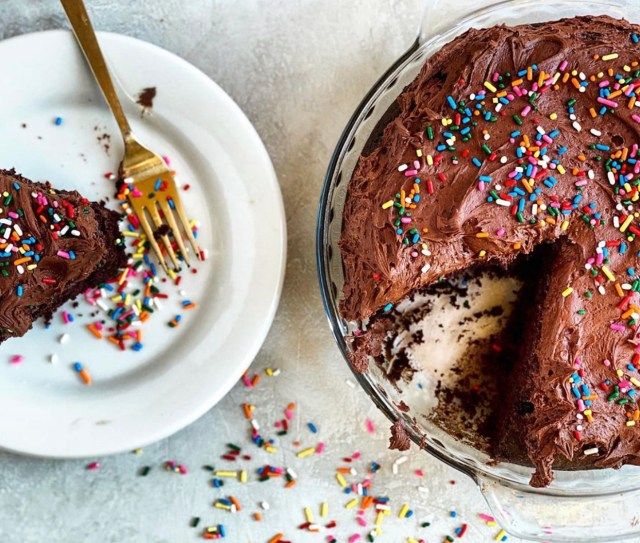
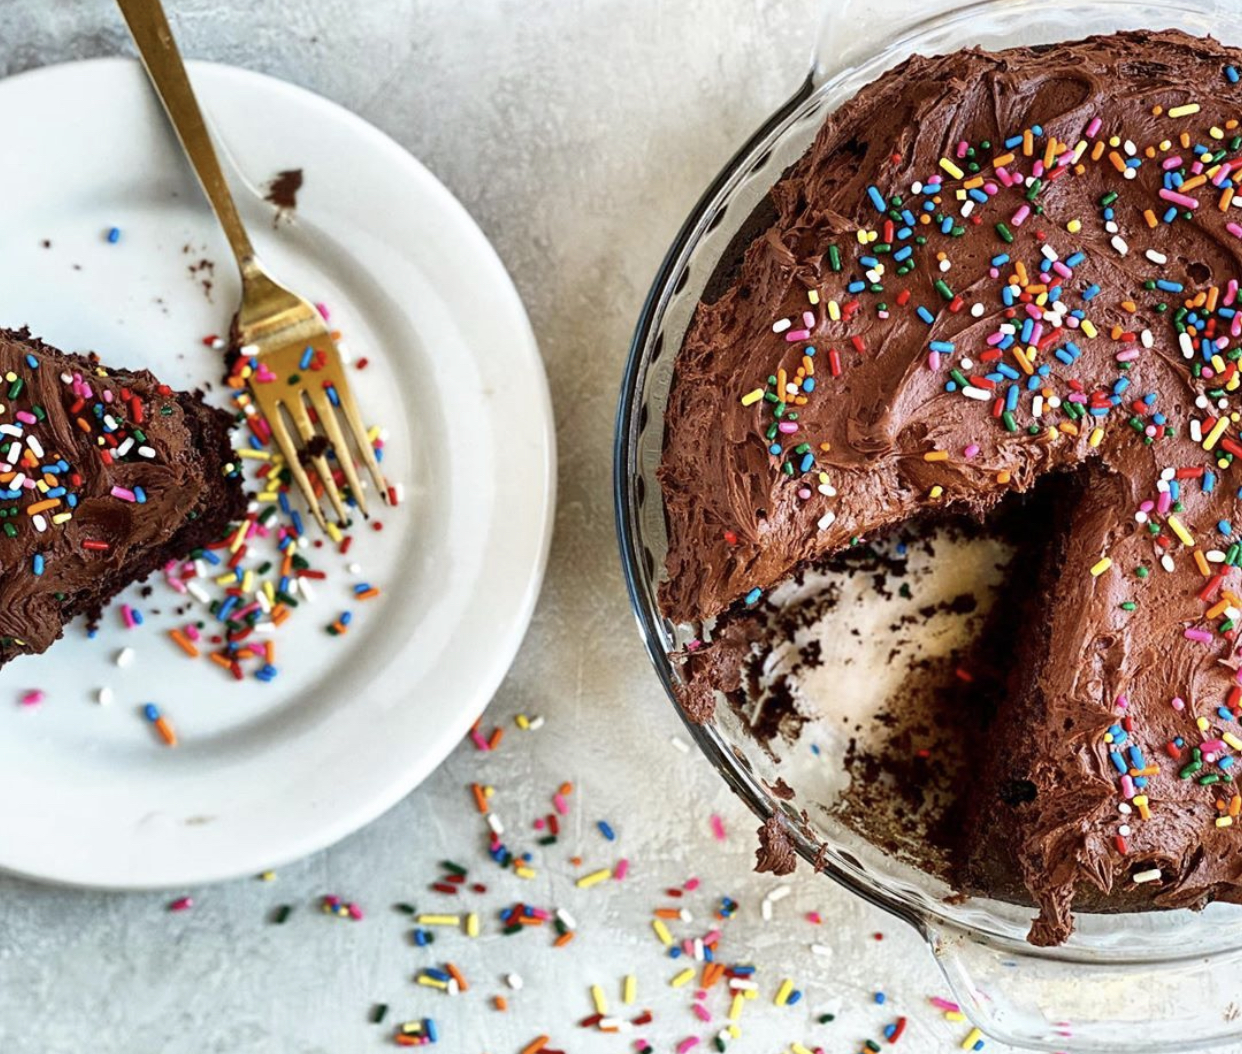
But you know what is very much not a blessing (that’s right, you guessed it—the curse) of all of this? Cooking and preparing food 24/7 for two boys with voracious appetites and a husband who is big on snacking. I mean, of course, I love feeding my family, but every meal, every day, for weeks on end? No thanks. Not to mention the fact that we are trying to go to the grocery store infrequently, and when we do go, we cannot find the majority of items for which we are looking (GoGo Squeeze and toilet paper, I’m looking at you). And, to make matters worse, I make and write about sweets professionally, and items like flour, sugar, and butter are—as many of you can attest to—in short supply. Enter the chocolate “wacky” cake, a blessing, indeed, and a cake that I have always loved to make and eat, but one that is now on permanent rotation in my (cursed) “always-open for business” kitchen.
A “wacky” cake or a “depression” cake, as it is sometimes called, is a cake that is made without butter or eggs or dairy—wacky, I know. Many believe that such cakes, requiring none of the ingredients one usually thinks of when cake-making, rose to popularity when said ingredients were scarce (ie: during the Great Depression). Thus, I think we can all agree that it is not such a huge leap to think about baking up such a cake (or many) right around now, and that is exactly what I have been doing and am hoping you will, too.
My chocolate wacky cake recipe does call for flour, cocoa powder and sugar (you can use granulated or brown—light or dark), so if you cannot find one of those, sadly—for you and your littles—you will not be baking up a wacky cake any time soon. But if you have those items on hand (or can find them in the grocery store), as well as some leavening, vanilla, salt, vegetable oil, and vinegar, well, then you, my friend, are in luck (you also need water, but am hoping (praying?) that it is a given that you’ve got that.
The cake comes together simply in a bowl with a whisk, as I like to think of myself as the “queen” of easy-peasy sweets, and this is the easiest of the peasiest. My recipe also includes ingredients and instructions for a simple chocolate frosting, but it does require butter and heavy cream, and if those prove challenging to find, then skip the frosting altogether—the cake is so moist and deeply chocolatey, that I swear you’ll hardly miss it, and this, coming from a mom who loves frosting as much as her own children. Moreover, without the frosting, the cake is vegan, so there’s that, too.
Vegan or not, however, the cake is delicious—perfect for adults and kids, alike. Moreover, although I am not crazy about baking with my teenagers, and prefer to do it in solitude, actually, if baking with your children is something that brings you joy—or gets them off of their screens, albeit briefly—this cake is for you, as it is one of those baking “projects” that couldn’t be easier or faster to accomplish. The recipe can be found here. Happy baking and Netflix binging to all, and above all else (and in all seriousness) please be safe and well.
Jessie Sheehan is a food writer, recipe developer, and the author of The Vintage Baker. After abandoning an unfulfilling legal career and becoming a mom to her two sons, Jessie found her baking philosophy. Unfussy, old-school American desserts with a modern twist!