Australian dad and chef Adam Liaw has had enough of last-minute classroom celebrations that require parents to bring in baked goods, so he just came up with the best bake sale hack ever! After just one term with a school-aged son, Liaw saw how challenging it can be to always be at the ready with an arsenal of allergy-friendly snacks that are also easy on the wallet, so he took to Twitter to share his genius.

On a recent thread of tweets, Liaw vows to come up with a bake sale item that makes “25 portions…in 5 minutes that can keep unrefrigerated for 8 hours and contains no dairy, nuts or eggs.” Well, Chef Liaw just came through for all of us weary parents in a big way and we couldn’t be more excited.

In a matter of mere hours, Liaw put combined pre-made crispy breadsticks, dark chocolate and sprinkles into what he affectionately calls a “fat Pocky.” All you have to do is melt the chocolate in a bowl or cup, then dip one end of the breadstick in and lay on parchment paper. Cover in sprinkles, allow to dry and voilà, you’re done!

The no-bake treat comes together in less than an hour and is still creative enough to qualify as a homemade treat. The chef goes on to share tons of different styles if you’re feeling extra fancy, and now we can’t wait to try these ourselves!

Not only does this treat meet our needs when it comes to a fast and easy bake sale solution, but Liaw points out a few other fine attributes. The 25-serving snack comes in at roughly $7 for the entire batch, is nut-, egg- and dairy-free, fits in a standard size plastic container, is lightweight so kids can take to school in a cinch and it doesn’t need to be refrigerated!

Checkmate, bake sale.

––Karly Wood

Feature photo: Clem Onojeghuo via Unsplash


RELATED STORIES

How Many Times Do You Say Chugga Before Choo Choo? This Is One Hot Debate

Say Cheese: Kindergartener’s School Photo Goes Viral for Best “Smile” Ever

You’re Stuck on Deserted Island with a Sesame Street Muppet: Who Do You Choose?


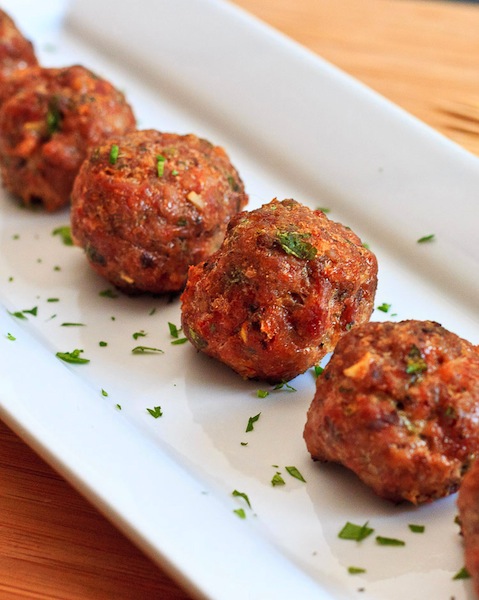
Turkey-Meatballs

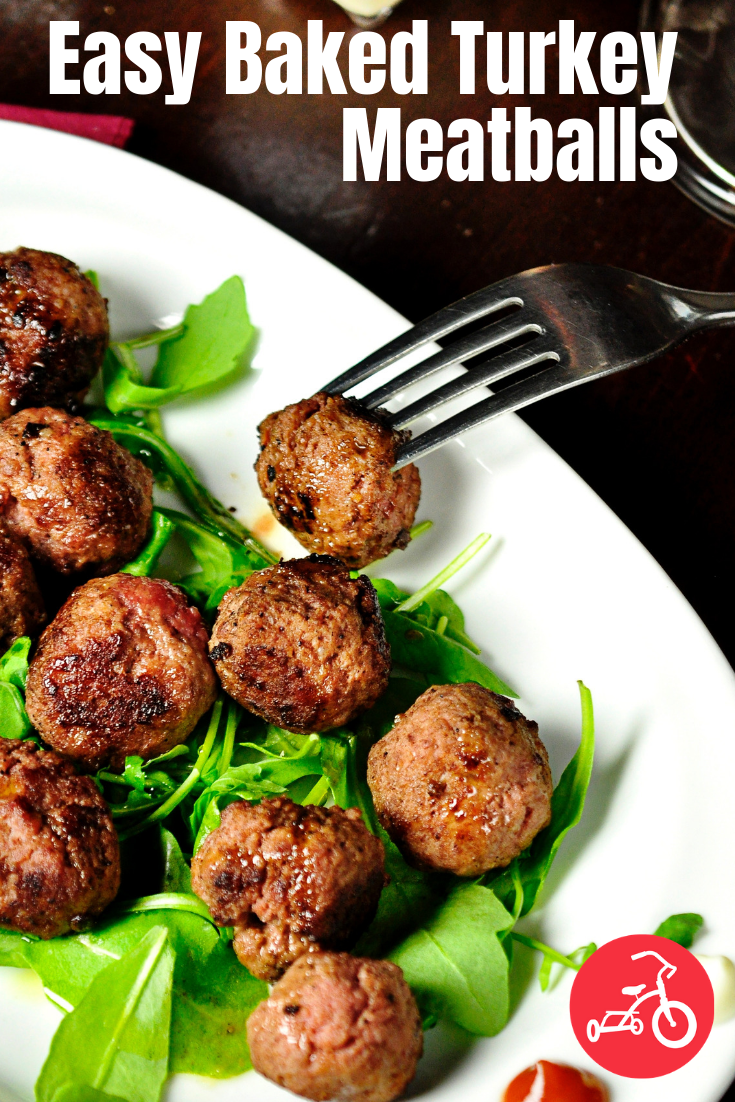
Meat sauce, basil marinara and pesto. There’s only so many ways to dress up (or down) your kids’ favorite pasta dish. Introduce them to what will inevitably become their new favorite addition: baked turkey meatballs. They’ll love the taste (you will too), and you’ll love that the dish is baked and not fried and created in just a few simple steps.

Ingredients:
1 pound ground turkey
1 egg
1/2 cup bread crumbs
1/4 cup chopped parsley
1 clove garlic, finely diced
1/4 cup shallot or onion, finely diced
1 tablespoon tomato paste
1 teaspoon salt, or to taste
1 teaspoon pepper, or to taste

Method:
1. Preheat oven to 400° F. Cover with parchment paper or lightly grease with oil.

2. In a bowl, mix all ingredients together thoroughly with your hands. Roll into about 20 meatballs and place on pan. Bake until golden brown, about 20 minutes or until cooked through and not pink in the middle.

For more kid-friendly recipes click HERE

Recipe and photo courtesy of Barb at Wishful Chef

If your kids love yogurt and fruit, they’re in for a real treat with this easy recipe that calls for only three ingredients! And, what makes these treats even more amazing is that they’re a healthy treat that’s easy to grab while you’re on the run!

Makes: 1 cup yogurt ice cream or yogurt bites

Ingredients:
1 (8-ounce) container vanilla yogurt
½ cup frozen blueberries
½ cup frozen raspberries

Method:
1. In an electric blender at high speed, blend together yogurt and frozen fruit until mixture is smooth and the consistency is of soft ice cream.


2. Scoop the yogurt/berry blend 1 teaspoon at a time into dots on parchment paper or Silpat and flatten lightly with a spoon or finger.

3. Flash-freeze yogurt dots in freezer until frozen, approximately 10 minutes.

4. Place in a container and keep in freezer for up to 2 weeks.

Treat Tips from the Chef!
Even though I use blueberries and raspberries, feel free to use whatever kind of fruit you and your kids like. And, if you do use these berries, you can either blend them together to create one purple color or blend the colors separately to have purple dots and red dots. Rather than forming the yogurt mixture into dots, you can even just place it in a small bowl and eat it like ice cream! It’s delicious, quick, and healthy!

What is your kids’ favorite fruit? Do they love yogurt? Tell us what they think of this recipe in the comment section below!

Excerpted from Kids’ Treats: 50 Easy, Extra-Special Snacks to Make with Your Little Ones Copyright © 2015 by Katie Wyllie and published by F+W Media, Inc. Used by permission of the publisher. All rights reserved. Photos courtesy of Katie Wyllie.

Here’s a new sweet treat for your family to enjoy: a gluten-free snack bar full of healthy ingredients like coconut oil, cranberries and oats. Courtesy of Debbie Adler of Sweet Debbie’s Organic Cupcakes in Los Angeles this simple recipe requires only six ingredients and lasts (almost) forever in the fridge. Now there’s definitely no excuse not to bake these bars for your little summer snackers.

Makes 16 squares

Ingredients:
Sheet of parchment paper slightly larger than 8 x 8 inches
1¾ cups gluten-free oats
⅓ cup all-purpose gluten-free flour
¼ teaspoon fine sea salt
6 tablespoons coconut oil
6 tablespoons maple syrup
¼ cup dried cranberries

Method:
1. Preheat oven to 325°F. Line an 8 x 8-inch square baking pan with parchment paper, with a little extra over the sides.

2. Mix together the oats, flour and salt in a large bowl.

3. Microwave the coconut oil and maple syrup in a measuring cup for 20 seconds and stir to combine. Pour the coconut oil mixture into the oat mixture. Fold in the dried cranberries.

4. Spoon the batter into the prepared pan and smooth it into the corners and on top with a wet baking spatula to cover the pan evenly.

5. Bake for 24 to 25 minutes, or until the oats are a light golden brown. Rotate the pan from front to back halfway through baking.

6. Remove the pan from the oven to a wire rack and let sit for about 15 minutes before putting in the freezer for at least 1 hour.

7. Transfer the parchment paper to a cutting board and cut into 16 bars or divide and roll into 1-inch balls.

8. Wrap each bar or ball individually in parchment paper or bakery tissue paper, place in sealable plastic bag and keep frozen until ready to pack, eat or gift.

Debbie Adler is the owner of the nationally renown bakery Sweet Debbie’s Organic Cupcakes in Los Angeles. Debbie is also the author of the critically acclaimed cookbook, Sweet Debbie’s Organic Treats: Allergy-free & Vegan Recipes from the Famous Los Angeles Bakery.

**This recipe is reprinted from SWEET DEBBIE’S ORGANIC TREATS by Debbie Adler. Published by Harlequin. Copyright Debbie Adler 2013.

For a simple homemade breakfast (or snack) whip up a batch of these puff pastry apple turnovers that take just a few minutes to create, but taste like they were bought from your neighborhood bakery. Don’t like apples? Substitute in blueberries, cherries or whatever fruit is in season at your local market.

Makes 8 turnovers

Ingredients:
2 apples peeled, cored and diced into small cubes
1/8 teaspoon of cinnamon
1 package of frozen puff pastry defrosted
one egg beaten

Method:
1. Preheat oven to 400 degrees F and line a baking sheet with parchment paper.

2. Soften the cubed apples over medium heat on the stove for about 5 minutes. Sprinkle with cinnamon.

3. Flour your counter and roll out the defrosted puff pastry dough so it’s around 12″ by 12″. Cut each sheet so that there are four squares.

4. Place a large spoonful of apple mixture onto each square and then fold the puff pastry dough over to make a triangle. Seal the edges with your fingers or press down with a fork. Brush the top of each triangle with egg wash.

5. Make two small slits on each triangle and transfer to the baking sheet. Bake for 18-20 minutes or until golden brown.

How did your apple turnovers turn out? Tell us below!

photo courtesy of Vegan Baking on Flickr; recipe courtesy of Erin Lem

After the kids have had their fill of miniature milk chocolate lambs and hollow bittersweet bunnies, pile the collective haul into a double boiler.  It all gets melted down and then paired with Spring’s best strawberries for a dipping extravaganza.  With strawberry season coinciding perfectly with Easter, the timing couldn’t be better.

Kids just may delight in watching the magic that happens when heat is applied to chocolate.  It’s important to be sure the berries are thoroughly dried after washing so the chocolate adheres. Opt for organic berries if possible since conventional ones are some of the biggest offenders on the pesticide front.

If you don’t have leftover bunnies, or don’t celebrate Easter, it’s worth scaring up some chocolate for this anyway.  Chocolate dipped berries may be passé in gourmet circles, but in kid circles, they still rank pretty high.  And as far as desserts go, it’s not all bad – a few nutrients, not a ton of calories, and antioxidants if you are opting for dark chocolate.

Ingredients:
8 ounces leftover chocolate
1½ baskets fresh strawberries, washed and thoroughly dried

Method:
1. Cover two cookie sheets with parchment paper.

2. Fill the bottom pot of a double boiler one-third full of water.  Bring to a gentle boil.  Break chocolate up into 1-inch pieces and put in the top of a double boiler.  Melt the chocolate, stirring from time-to-time until smooth.

3. Remove the double boiler from the heat.  Hold each strawberry by its stem, dip it into the chocolate, and set it on the baking sheet to cool.  You may need to reheat the chocolate if it starts hardens up.

4. Allow the chocolate-covered strawberries to cool completely.

5. These are best eaten within a day of when they are made.  Store in the refrigerator

Katie Sullivan Morford is a mom, food writer and registered dietitian. You can find her family-friendly recipes and kitchen wisdom at Mom’s Kitchen Handbook

Photo courtesy of Whole Foods Market

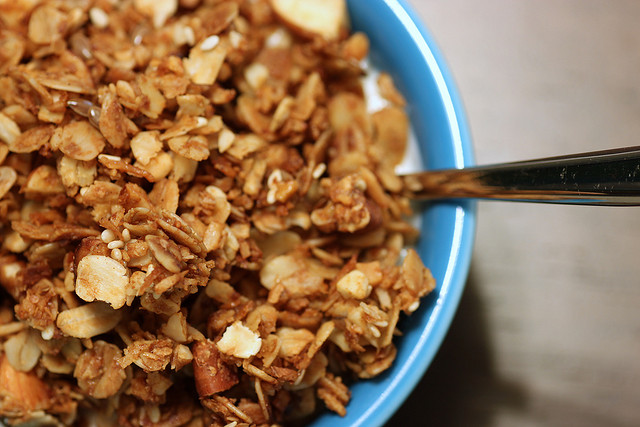
Did you know that granola is one of those foods that’s just as easy to make (if not easier) as buying it at the store? The next time you’re craving a healthy snack whip up a batch of this granola that takes less than five minutes to prep. Customize the ingredients to your taste with nuts, dried fruit and even chocolate chips. Serve with fresh fruit and yogurt or throw it in a ziplock bag for a mid-afternoon snack. You really can’t go wrong.

granola

Ingredients:
3 cups of old fashioned rolled oats
1/3 cup of vegetable oil
2/3 cup of honey
an assortment of dried fruit (we used apricots, cherries and cranberries)
an assortment of nuts (we used 1 cup of sliced almonds)

Method:
1. Whisk together honey and vegetable oil. Mix together rolled oats, nuts (if desired) and oil/honey mixture with a wooden spatula in a bowl until the oats are coated.

2. Spread oats mixture on a parchment paper lined baking sheet and bake between 25-30 minutes at 325 degrees. It’s very important to check and mix the oats every 10 minutes to ensure the mixture won’t burn. If your oven runs on the hot side, you may only need to cook the oats for 20-25 minutes.

3. After the mixture turns a nice, golden brown (about 25-30 minutes) remove the baking sheet from the oven and let cool for 5 minutes.

4. Chop up the dried fruit and any additional nuts and combine. Store in an airtight container.

Have you tried making granola at home? 

A special thanks to Food Network’s Ina Garten — Red Tricycle’s Managing Editor adapted this recipe and has made this granola multiple times recently. It’s delicious mixed with yogurt and fresh fruit. 

photo: notahipster via flickr

Salty or sweet? Can’t choose? Luckily, you don’t have to with these chocolate-covered pretzels that offer a bit of both. Our Editorial Director loves this deceptively simple recipe because the end result will make you look like a pro in the kitchen. Don’t worry–you don’t have to reveal that these little morsels of goodness really only took you 30 minutes to make.

Ingredients:
one bag of pretzels (choose your shape)
two bags of chocolate chips
assorted holiday sprinkles

Method:
1. Line a baking sheet with parchment paper.

2. Over medium heat melt the bag of chocolate chips in a double boiler. If you want a shortcut use your microwave. Stir the chocolate chips to ensure they are all melted.

3. Dip each pretzel with desired amount of chocolate, let the excess drip off and then place the pretzel on the baking sheet. Add holiday sprinkles if desired.

4. Repeat the above step, and then place baking sheet in the fridge if you want the chocolate to harden faster.

Have you made this deceptively simple recipe yet? Fill us in below!

photo: Sharisberries via flickr

Dress up your chicken breast with a filling that’s full of fresh ingredients and flavors. The trick to this easy recipe courtesy of Susan over at Our Family Eats is butterflying the chicken. Simply pile the butterflied chicken with your ingredients and then fold back over and stick it in the oven. Susan likes to serve this dish with roasted grape tomatoes and fresh spinach.

Ingredients
4 boneless, skinless chicken breasts, butterflied
3 ounces feta cheese, crumbled
1/4 cup (packed) fresh parsley, chopped
4 ounces black olives, chopped
2 garlic cloves, minced
2 green onions, thinly sliced, green parts only
1/2 teaspoon dried oregano
salt and pepper to taste
drizzle of olive oil

Method
1. Preheat oven to 425 degrees. Line a baking sheet with parchment paper.

2. Place chicken breasts on your baking sheet and fold back to top portion.

3. In a bowl mix together the remaining ingredients (feta through olive oil). Spoon into chicken breasts, then fold top over. Sprinkle with salt and pepper to taste.

4. Bake for 20 minutes, or until completely done. Serve warm.

Susan Schuman is a working mom with two small kids and a hungry husband. She writes Our Family Eats to share ideas for fun, wholesome meals that anyone can fit into their hectic schedule.  You can connect with Susan on Twitter @ourfamilyeats.