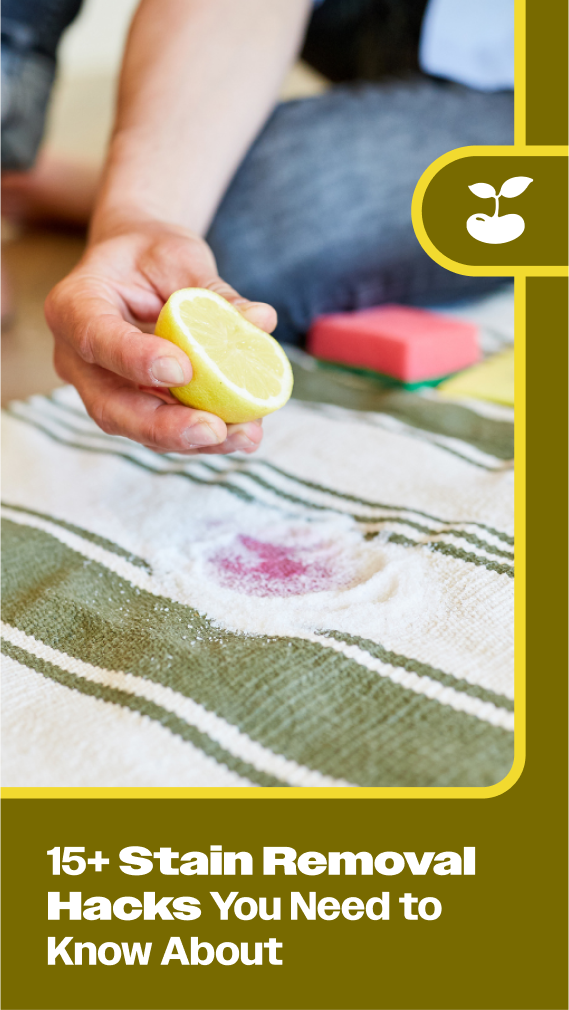
Stains: they are the hallmark of true parenting (and a sure result of a girls-night-in). While you might be able to let a few slide, some of them just could cost you the deposit on your apartment or incite a desire to replace your shag with something more, well, wipeable. We polled our editorial staff—who know a thing or two about stain removal—and got together their best tips. Scroll down for 18 simple ways to keep it clean.

security via Pixabay

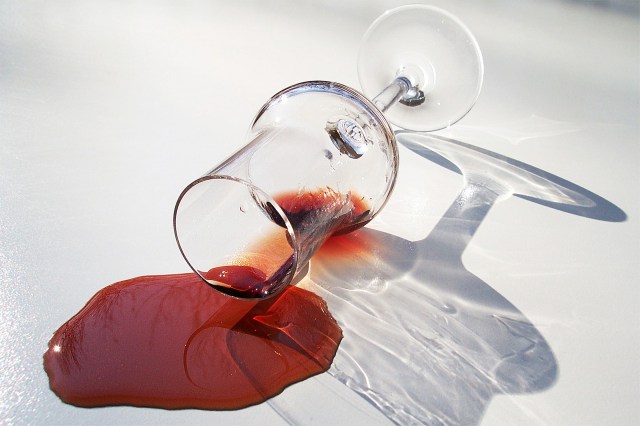
1. Use boiling water for red wine: You might have heard the tried and true soda water/cold water rinse for red wine, but here’s a method our editors swear by—pour boiling water over the red wine stain and blot it up with a cloth (Note: do not blot it before without water).

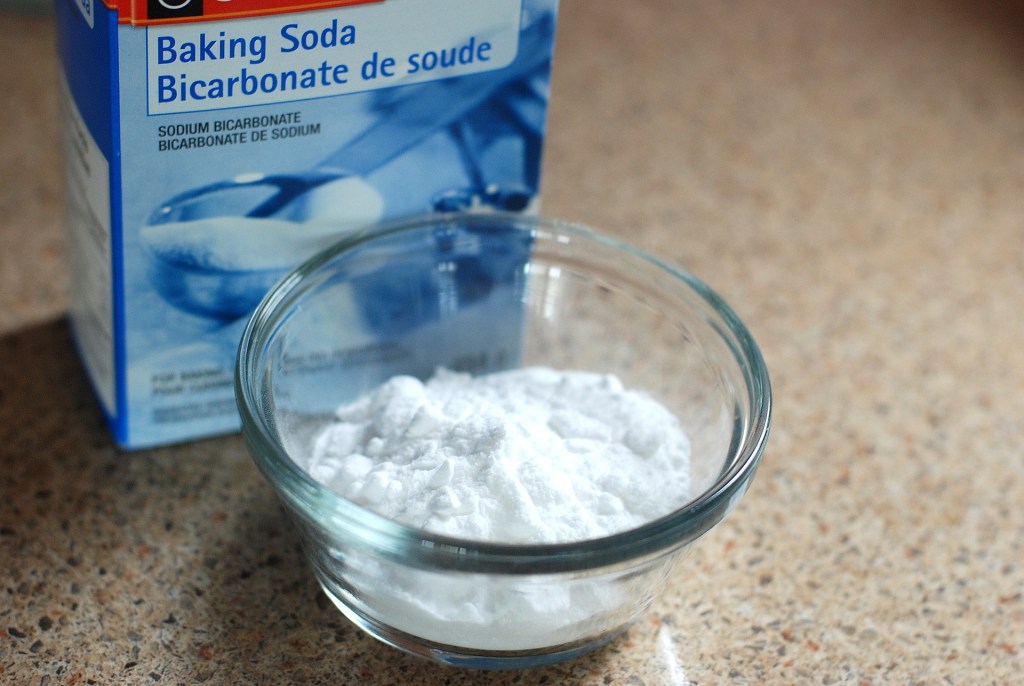
2. Use lemon for sweat rings: Use lemon juice and water on sweat stains. Make a little potion and soak the area. Baking soda and water paste can help remove underarm stains on white clothing.

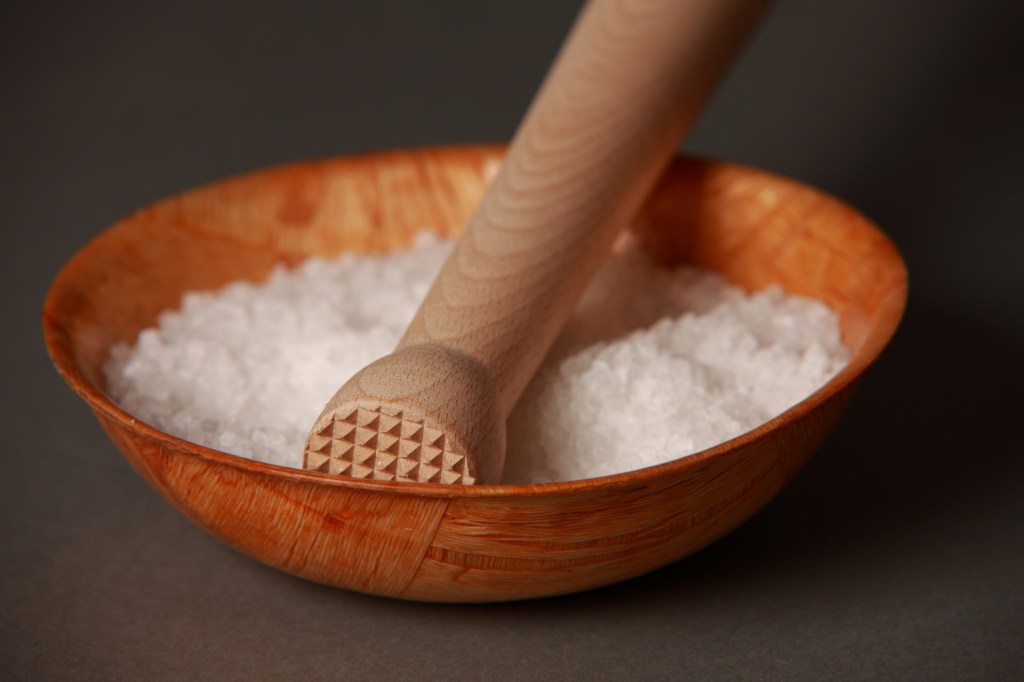
3. Use salt for red wine and grease stain: Pour salt on the stain to soak up any extra wine, then soak in cold water for 30 min. For blood, one hour in cold saltwater. Salt also helps absorb grease stains!

4. Use Shock It Clean. No, we don’t mean singing perfectly on-pitch to "Side to Side" and shocking the crowd. One of our editors turned us on to this product, and we are telling you that it removes every carpet stain ever. Including that weird pee stain you only just now noticed and can’t tell if it’s human or pet.  

5. Use white wine on red wine: Yes, you have to waste a little white wine, but that’s nothing compared to wasting a good Sangiovese (Yes, we realize this is the third wine stain hack. What?).

Tyler Nix via Unsplash

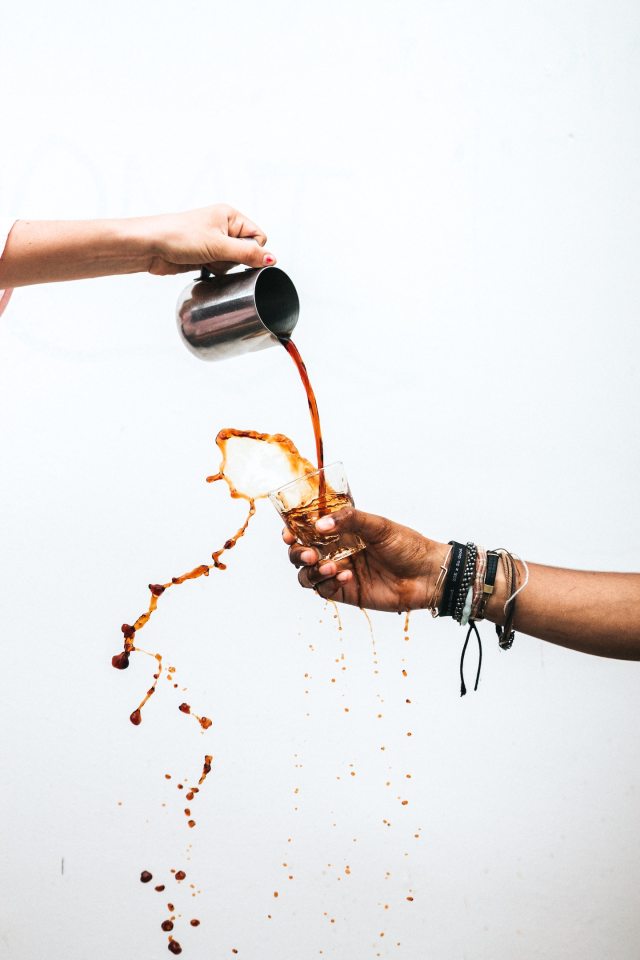
6. Use white vinegar to get out coffee stains: Try white vinegar on coffee stains (on clothing). Soak for at least 8 hrs.

7. Chalk works on oil: Liquid dish soap is the most effective treatment for oil stains, but a stick of chalk can help absorb it quickly. Use a paper towel to blot up as much oil as possible, then rub the chalk stick on it. Wash as soon as possible. 

8. One word: Oxiclean (That's one word, right?). Grass stains have met their match.

9. Use nail polish remover on paint: If you’ve got paint on the jeans you just couldn’t bring yourself to take off before touching up the walls, try shaving it off with a razor. Super stubborn paint stains from the people who painted before you can be combatted with nail polish remover and elbow grease.

10. Aluminum foil works wonder on rust: You can remove rust by lightly scrubbing with aluminum foil. Add a little white vinegar to really scrape off stubborn stuff.

Callum Hill via Unsplash

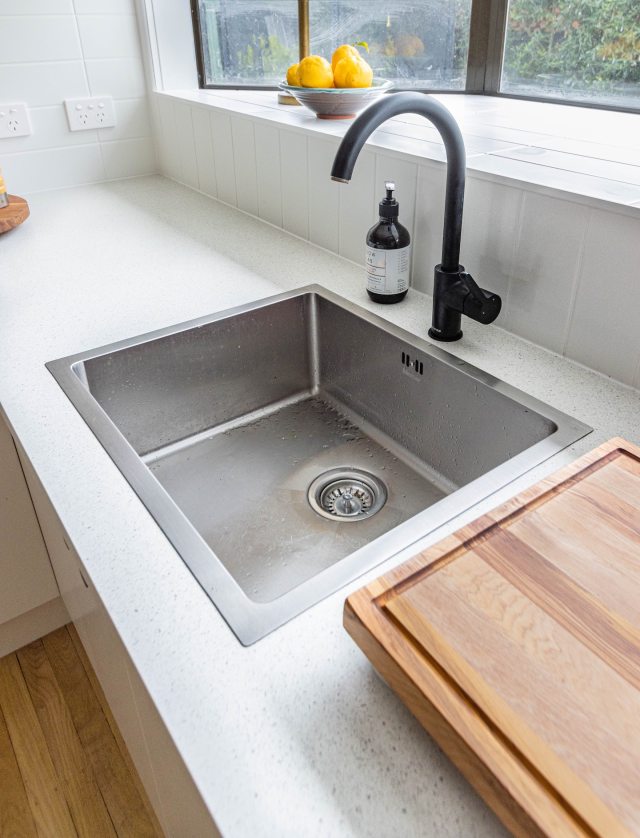
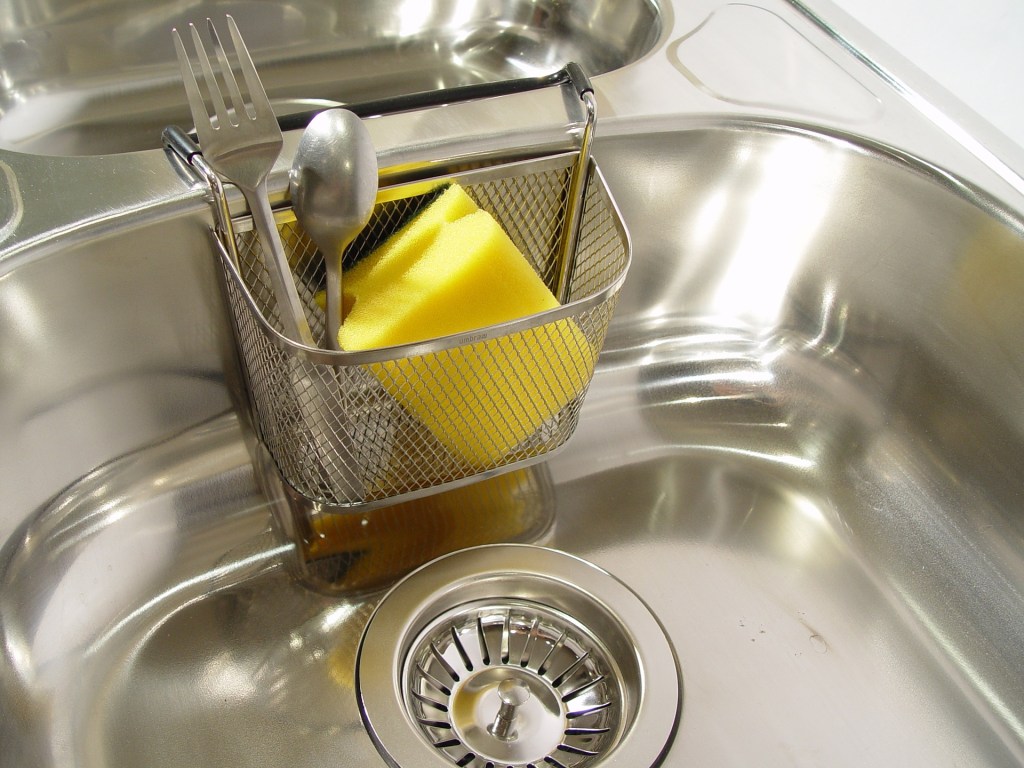
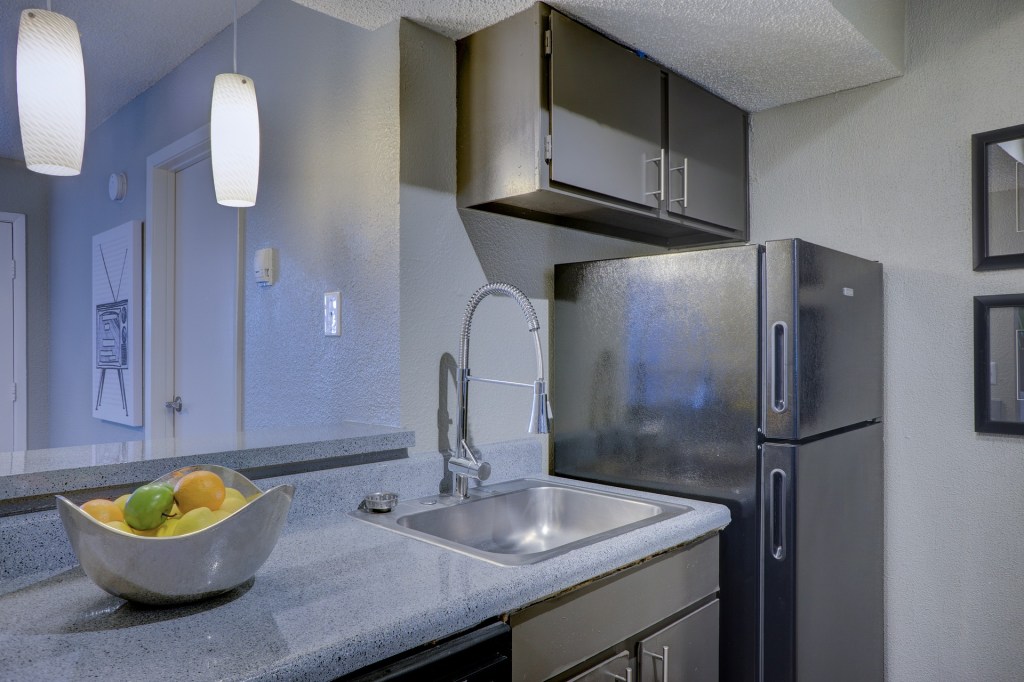
11. Lemons make your sink shine: Clean up the gunk and shine up the chrome of your faucets using lemons. You can use a half-lemon or a wedge to squeeze into narrow spots and it works great to get your stainless steel sink to gleam too.

12. Toothpaste will make your diamonds sparkle: Use toothpaste to polish your silver rings and get rid of those tarnished stains.

13. Take care with rubbing alcohol to get nail polish out of the carpet: If you spill nail polish on the carpet or floor, use a microfiber cloth to absorb as much as you can, then continue blotting with rubbing alcohol and microfiber cloth (Nail polish remover can damage hardwoods and other flooring surfaces, but you can try soaking the microfiber cloth in a bit of remover before washing).

14. Baking soda and white vinegar works on pet messes: To clean up poop, dog or otherwise, from the carpet you'll need white vinegar and baking soda. And a lot of paper towels. And probably gloves. Just let the paste fizz and blot, fizz and blot. It's like a mini-volcano of gross.

lightstargod via Pixabay

15. Cornstarch on a decorated dog: Kids got markers and/or paints and painted your dog? (No, oh, just wait...) If your pooch is light-colored, cornstarch can help lighten the fur back up.

16. Shout also works on pet messes: You can try your average carpet cleaner or "pet stain remover" but we found nothing takes care of the remains of the day like a laundry stain remover, i.e. extra-strength Shout.

17. Soda on garage grease stains. Pour a can of Coke on a greasy stain in your garage. (Diet Coke won't cut it, but you can always try.)

18. If all else fails: Give up (wear dark colors, or beige if you’re preventing spit-up stains; make sure your carpets are artfully swirly; put smocks on your kids every day).


—Edit Team


RELATED STORIES: 
Hate Laundry a Little Less with These 5 White Vinegar Hacks
23 Life-Saving House Cleaning Hacks
How Laundry Balls Changed Our Cleaning Routine & More Household Chore Hacks

We all want our kids to be successful—to be a leap ahead. Not ahead of every other kid, necessarily, but to their full potential.

So, how do we do it? And how do we achieve it (even more importantly) without making them stressed-out and overwhelmed in the process?

First, get a grip on your parenting goals and philosophy.

Is my goal to have my daughters be doctors like me? Why? Because that sounds successful? Not a good enough reason. Is my number one focus for them to be accepted into some highly-acclaimed academic institution? For what purpose? I have to check in with myself about my own motivations.

Instead, I try to make it my goal to raise daughters who 1) are well-adjusted, self-sufficient, confident adults; 2) who love what they do-no matter what that is; and 3) who understand that they have to work hard to achieve their dreams. That is the REAL measure of success.

Allow time for imaginative play to foster a love of learning.

Just because I’m not gunning for Ivy-League admittance for my kids (not that it would be bad if they ended up there, it just isn’t my focus), it doesn’t mean I don’t look for educational opportunities every day. In fact, I do a lot of that. 

But my main goal with the activities is that my kids totally nerd out on whatever it is that THEY think is really cool, even if it’s not in my interest area. I also make sure that they have plenty of free time to play without structure.

For example, my almost-four-year-old is on a Julia Child kick these days. We stumbled upon some old In Julia’s Kitchen With Master Chefs episodes and she was hooked after one show. I noticed that, soon after she started watching, she asked me to pull out ingredients from the cupboard and began making little concoctions with them. 

At first, I asked if she was interested in an Easy Bake Oven, or some other way to actually cook food but she looked at me, appalled, when I suggested it. “Mommy, these are experiments, NOT meals.”

No problem, kiddo.

She then proceeded to narrate her addition of the baking soda to the vinegar (“Ooh, look how it bubbles! It’s making a frothy foam”) and every single other ingredient she added in. She sounded like she was a cooking show host but, apparently, she imagined she was the star of a fancy chemistry presentation.

The counters were a mess. We probably wasted $20 in flour and salt, but she was so content as her little imagination soared. The next time we were at the library, she wanted to know if there were books about other types of mixtures—paints, dirt and water, other types of foods. It was a little magical.

Provide age-appropriate learning opportunities that allow kids to build competence and confidence—but don’t overdo it. 

I care about keeping my priorities straight but I also care about stimulating my daughters’ little neural pathways. In the process of fostering a love of learning, I have to make sure to simplify so we don’t get too overwhelmed.

Why? I’ve seen the effect of over-scheduling kids over and over in my office. The kids are so frantic and so are their parents.

Instead, I recommend focusing on one or two weekly non-school activities per kid per season (3 max!).

Mix it up while they are young, if possible, unless they find something THEY love that they want to stick with. If you can, find one active activity and one more “academic” or community option (think music class, art class). 

For older kids, let THEM choose from a handful of options, versus demanding that they are involved in a specific activity you really care about. If the coach/teacher is a bad fit, that’s one thing but, if at all possible, try to stick with whichever activity you choose through the season, then switch it up if it’s not working out so you can help foster a little perseverance and commitment.

Model resilience and a growth mindset. 

Allow your kids to see you fail and to rebound from your failures. Use family dinner times to talk about the best parts of your day but also about the challenges you faced and the ways you overcame them. 

Have your kids, when they are old enough, share their “Rose and Thorn of the Day” as well. Work on letting them figure things out on their own, waiting to jump in with help until they ask you for it and, even then, assisting mostly by helping them to problem-solve the situation for themselves.

“Well, let’s see, how could you get your book back without yelling if your sister takes it?”

“I could give her another toy and ask if I could trade her.”

“I love that idea! Nice problem-solving.”

In your own work, look for ways you can adjust your attitude to consider yourself a “learner.” When you don’t do as well as you want to do, use it as an opportunity to grow as opposed to looking at each mini failure as a sign of ineptitude.

Approach your kids’ failures in the same way. “I can’t do that” is usually met with a “yet” in my house. “Did you try your best? Ok, then you did a great job!”

Aim for goodness of fit.

When you get involved in activities or make choices on which schools/educational programs are best, look first at how it fits with the personality of your child. Does your child need a warm, supportive environment to thrive, even if it’s not seemingly as rigorous as another option? 

It might just serve you better in the long run. Does your kid need more structure and accountability? An educational program that fits that model may work better. The temperament of your child will often determine their needs and their ability to work well within the system where they go to learn every day,

A leap ahead—that’s my focus for my kids and I bet it is for you, too.  A leap to wherever they want to go. To whatever they want to be. To an understanding that success in life and work is not about fulfilling expectations, it’s about finding the things that ultimately bring them joy and fulfillment.

Whitney Casares, MD, MPH, FAAP
Tinybeans Voices Contributor

I'm a pediatrician and a mama mindset expert. I host The Modern Mommy Doc Podcast, and am a mom to two young girls in Portland, Oregon. I'm also author of The New Baby Blueprint and The Working Mom Blueprint from the American Academy of Pediatrics. 

Spring has arrived and warmer weather is here which means it’s time to get the kids outside and away from their screens. But what can we do to keep kids entertained while still learning and innovating?

Check out these stimulating and fun outdoor STEM activities that can be made with materials you have at home.

Tiny Rocket
This activity is out of this world.

Test different amounts of water and Alka-Seltzer and see how high your rocket can go! When you mix these effervescing tablets with water, a chemical reaction takes place between the citric acid and sodium bicarbonate contained in the tablet and the water. This chemical reaction creates many, many bubbles of carbon dioxide gas. When the lid can’t hold all that gas anymore, the canister goes shooting off! This action can be explained using Newton’s Laws of Motion.

Materials:

– Film canisters

– Alka-Seltzer

– Water

Instructions:

– Fill your film canisters with varying amounts of water.

– Drop ¼ to ½ of an Alka-Seltzer tab into your water and quickly replace the cap and turn it upside down.

– Test different ways to make your rocket go off, just keep faces clear of the exploding canisters!

Exploding Bags 
A new kind of baking soda and vinegar activity.

Watch as your bag explodes! Popping the inner bag releases the vinegar and mixes with the baking soda causing the solution to quickly make bubbles and gas until the bag can’t take it anymore! Try this activity with different measurements and record your findings!

Materials:

– 1 medium to large zip bag

– 1 small to medium zip bag (this bag needs to be smaller than your other bag)

– Baking powder

– Vinegar

Instructions:

– Pour some vinegar into the small bag and zip closed. Make sure there’s some air left in the bag.

– Pour some baking soda in the larger bag, add the smaller bag of vinegar, and close the bag making sure to get out as much air as possible.

– Lay your bag on a flat surface and smack it until you pop the inside bag, shake, and watch as your bag inflates and eventually pops!

Lemon Juice Balloons 
Ever needed a new way to blow up a balloon? 

How big can you make your balloon? When the acidic lemon juice mixes with the baking soda base, it rapidly creates carbon dioxide and blows up the balloon! What combinations make the biggest balloon?

Materials:

– Balloon

– Lemon juice

– Baking powder

– Bottle or jar (the mouth needs to be small enough for a balloon to fit over it)

– Funnel (optional)

Instructions:

– Add lemon juice to your jar.

– Add baking soda to your balloon using a funnel.

– Stretch the opening to your balloon and fit it over the mouth of the bottle. Tip the balloon up and let it fall into the lemon juice.

– Watch the chemical reaction blow up your balloon!

This post originally appeared on Tierra Encantada.
Tierra Encantada is a warm, community-oriented Spanish Immersion Daycare and Preschool headquartered in Minneapolis, MN and currently expanding nationwide. We offer quality child care for children ranging from 6 weeks – 6 years of age. We focus on the growth of the whole child and believe children learn best by doing. Our award-winning bilingual education program fosters early cognitive development and teaches a respect for diversity.

Organizing a kid’s Valentine’s Day party but want it to be fun while infusing a bit of education? Check out these five must-try ideas below.

Love to Read

Read Valentine’s Day books that help foster children’s imagination and creativity. Some classic Valentine’s Day books with notable authors include: Franklin’s Valentines by Paulette Bourgeois, Little Critter: Happy Valentine’s Day, Little Critter! by Mercer Mayer, Amelia Bedelia’s First Valentine by Herman Parish, The Valentines Bears Gift Edition by Eve Bunting, Snowy Valentine by David Peterson and an all-time favorite, Somebody Loves You, Mr. Hatch by Eileen Spinelli.

1 + 1 = You

Create a candy heart pattern worksheet using conversation hearts. Each of the letters on the worksheet (A, B, C) will represent different colored candy hearts. For example, an ABA pattern, where A represents pink and B represents green would look like: pink, green, pink, pink, green, pink, pink, green, pink. Students are encouraged to decide the color and letter of the pattern. Afterwards they can snack on the conversation hearts!

Mad about You

Create Mad Libs with a Valentine’s Day theme. Children can personalize them for their friends and family members, and this gives them a project to take home and share with their loved ones.

Map Your Love

Students tend to struggle with geography so during your Valentine’s Day celebration, bring out a big map of the U.S. and let students take turns placing hearts on the states they know. If their answer is incorrect, take the opportunity to tell them the correct name of the state and provide some fun facts about the state to help them remember it. For example, if they get Illinois wrong, explain it’s the land of Abraham Lincoln—the16th president and home to Chicago, the third-largest city in the USA.

Sweet Science

Do a conversation heart experiment. Let the students observe what happens when they dunk candy hearts into different liquids. Try salt with water, vinegar, honey or baking soda with water. Let the student’s hypothesis the experiments. Or begin a conversation about eco-conservation by handing out Yowie—a chocolate treat that comes with a leaflet picturing a real-life animal, the level of endangerment and fun facts. Kids can go around the room and read the fact sheets about each different type of animal and start a conversation about what they can do to help endangered species.

Organizing a children’s school holiday party and turning the experience into an educational one where they associate learning as fun, is quick and easy!

Cynthia Thayer is the Global Chief Marketing Officer of Yowie Group. She has over 25 years of marketing expertise in key areas including brand architecture development, market research, consumer packaged goods advertising across traditional and digital channels, retail and shopper marketing, licensing, toy design and new product development. 


Photo: Weelicious

Soft, chewy and perfect for snacktime or your kid’s lunchbox, this recipe for fruit and oat crumble bars checks all the boxes. Created by Catherine McCord of Weelicious, we love that there’s no processed sugar and that it’s packed with goodness from wheat germ to old fashioned oats. Read on for the recipe!

Makes 18 bars
Prep time: 5 minutes
Cook time: 35 minutes

Ingredients:

2 cups old fashioned oats
1 cup all purpose flour
2 tablespoons wheat germ
1/2 teaspoon baking soda
10 tablespoons butter
1/3 cup chopped nuts (I used almonds)
1/4 cup honey
2 cups apple butter or preserves

Preparation:

1. Preheat oven to 350 degrees.

2. Place all the ingredients except the apple butter or preserves in a food processor. 3. Pulse until the ingredients are combined and oats and nuts are in small pieces. 4. Press all but 1 cup of the mixture into the bottom of a greased 9 x 9 inch pan lined with parchment paper.  5. Cover the oat mixture with apple butter or preserves. 6. Crumble the remaining 1 cup of oat mixture over the apple butter or preserves. 7. Bake for 30- 35 minutes. 8. Cool, use parchment paper to move bars to a cutting board and cut into bars.*

*For perfectly cut bars, refrigerate for an hour before cutting into squares.

This post originally appeared on Weelicious.

RELATED STORIES:

Easy Shakshuka recipe

Noodle Pancake recipe

Taco Salad Pizza recipe

Catherine McCord is the co-founder of One Potato and the founder of the popular Weelicious brand, a trusted content resource synonymous with family and food. She has written three cookbooks including her latest Smoothie Project. She lives in Los Angeles with her husband and three children.

Calling all Sid the Science Kids and Miss Frizzle fans: It’s time for science fair projects! Whether this is your kiddo’s first time showing off her Bill Nye side or if he’s a seasoned pro, they’ll need a fresh crop of science experiment ideas for this year’s fair. So nab a tri-fold poster board from the craft store, stock your home with plenty of supplies, and help your creative kid start hypothesizing as you check out these easy science fair projects that are easy for kids of all ages to explore.

Make a Volcano Explode

iStock

The quintessential science fair project, you might want to check with classmates to make sure there won't be five volcanos on the big day. Even so, there's a reason why this one is so popular. Not only is it fun to make the volcano, but the overflow of baking soda and vinegar is exciting for everyone. Get a great step-by-step tutorial from The Dad’s Book of Awesome Science Experiments. by clicking here

Make Ice Glow

indoor activities for kids
Mini Monets and Mommies

How can your child make ice glow? Hint: It involves tonic water. If a chemistry exploration is on your child’s to-do list, check out this light-based learning idea. For more fun, check out our glow-in-the-dark science experiments

Grow Sugar Crystals

Little Bins for Little Hands

Explore the science behind how rock candy is made. Grow your own sugar crystals with this super-science activity from Little Bins for Little Hands.

Rainbow Melting Ice

Mini Monets and Mommies

What happens when you gradually add food coloring to water as it freezes? The answer is in this kids’ science experiment. If you’re looking for science fair projects that are easy, this one is a simple STEAM activity for kids in pre-k and up.


Insider tip: create even more rainbows and harness your kids interest in science with these great rainbow science experiments for kids. 

Learn about Light

Hands On As We Grow

Light is more than just something that comes from kiddo’s star-shaped IKEA wall lamp. This science exploration from Hands On As We Grow helps your child to explore and experiment with the sun’s rays (or at least, the artificial version).


Insider tips: take your science experiments with light up a notch with these light-filled science experiments you can do at home. 

Discover and Dissolve

Mam.Papa.Bubba.

Your curious kid constantly asks why the colorful candy shell on their favorite sweets melts away in their sweaty little palms. With this experiment from Mama.Papa.Bubba. your child can explore the science dissolving Gobstoppers.

Cool a Can of Soda

Gepharts3d via Pixabay

Sometimes there’s nothing better on a hot day than a cold drink—but what happens if it hasn’t been chilling in the refrigerator? This experiment helps kids test the quickest way to cool a can. 

Apple Exploration

Pezibear via Pixabay

Most kids love apples, but so many of them won’t touch the fruit once it’s turned brown. So how about an experiment that keeps apples from turning brown? This easy, and fantastically fun, idea from Teach Beside Me has all the answers your child is looking for.


Insider tip: encourage her to play with her food in the name of science and creativity. Check out these fun and creative ways to play with apples. 

Liquids and Evaporation Rate

Conger Design via Pixabay

How does evaporation happen? Explore the way liquid turns into a gas with this awesome evaporation experiment. Get the full details, including materials and how-to steps, here.

Celery Science

Tinker Lab

How can your little learner create brightly-hued celery stalks? Check out this science experiment from Tinker Lab for a how to! Not only will your child dazzle with their new ability to turn the otherwise green veggie into pink, blue or purple pieces, but they’ll also learn about plant science.

Create a Jar of Fireworks

My Big Fat Happy Life

Find out what happens when you combine water, food coloring and vegetable oil! This science project from My Big Fat Happy Life gives your child the chance to explore, experiment and make some completely colorful discoveries. What’s great about this experiment is it’s easy to do with supplies you likely have at home.

Clean a Penny

Olichel via Pixabay

Grab a handful of pennies (or other coins if you have them) sitting around and see which cleaning solution make them shine the best. Kids can use liquids such as baking soda with water, orange juice, toothpaste, lemon juice and dish soap. Use a toothbrush (not yours!) to clean each penny with a different solution, and then little scientists can write down what each coin looked like before and after the cleaning.


Insider tip: feeling crafty? Put those pennies to good use with our lucky penny craft ideas. 

Grow a Gummy Bear

Alexas_Fotos via Pixabay

How, oh how, do gummy bears grow? Simply add a gummy bear to water and wait. This sweet experiment from Tinker Labs gives kids the chance to make comparisons and explore what happens to their favorite tasty treat when it takes a bath.

Common Color M&M's

Fz via Pixabay

Are yellows the dominant color in the M&M bag? Why does it seem like there are so few green pieces? This project is an easy experiment for even the youngest of kids. Buy a few packages of M&Ms, and then have kids sort the colors and count them. Then they can create a chart to track each color.

Force and Motion with Race Cars

Librarianism Chronicles

If your kiddo has Hot Wheel cars sitting around, this experiment is an easy way to test force and motion. With a few books and your child’s fave Hot Wheels, your pint-sized physicist can determine if the slope of the tracks affect the speed of the cars with this experiment from Librarianism Chronicles.

Microwave Popcorn Test

Must Have Mom!

This project is a great experiment if your family is a fan of microwave popcorn. Head to the store and buy three to five boxes of microwave popcorn from different brands, and then find out which one pops the best. Add variety to the experiment by testing butter vs. plain, or organic vs. regular. Get the full how to from Must Have Mom! here.


Insider tip: in the mood for popcorn after this experiment? Try out these unique and unusual popcorn flavors you haven't tried yet. 


Looking for a fun science experiment to keep your little Einsteins busy? This simple baking soda and vinegar experiment is a perfect outdoor activity and demonstrates how a chemical reaction can really get things moving. Read on to find out to discover how to make a baking soda vinegar powered steam boat.

You’ll need: 

– Baking soda

– White vinegar

– Plastic bottles

– Straws

– Sharpeez (optional) for decorating the boat

– Hot glue (not pictured)

– Baby pool or bathtub (not pictured)

Step 1: Decorate your “boat.”

Take the labels off the plastic bottles and let your kids decorate their “boats” using permanent or (oil-based) paint markers. This is optional, but fun—especially if you’ve got more than one little captain at the helm.

Step 2: Drill a hole in the bottom of the boat—then put a straw in it.

Using a drill or soldering tool, make a small hole (the size of a straw circumference) in the bottom edge of your plastic bottle. Caution: Wear safety glasses—and keep kids at a distance—to make sure bits of plastic don’t fly into your eyes). 

Place a three or four-inch straw into the hole so that about an inch of sticks into the bottle and the rest sticks out the back). To secure the straw so that no liquid drips out the sides, apply hot glue around the edges.

Step 3: Fill it up and watch it go!

Turn the bottle sideways, and cover the straw end with your fingertip while you pour about 1 cup of vinegar into the bottle. Then, keeping the bottle flat and the straw side up (so nothing spills out), drop a few spoonfuls of baking soda into the bottle. Make sure to keep the baking soda on one end and the vinegar on the other.

Give the bottle one quick shake, and place it quickly into your pool or tub. And it’s off!

The science of it: What’s happening?

When vinegar (an acid) meets baking soda (an alkali), they react to form a gas (carbon dioxide). This gas must escape the bottle, so it pushes out through the straw, which in turn powers your boat across the pool. Once all the gas has escaped, your boat slows down.

Step 4: Tinker with the steps (and let your kids take over!).

Now that you’ve done the experiment once, it’s time to hand over the ingredients to your kids. Let them try to figure out (on their own, hopefully!) how to get the boats moving as fast as they can. Some things kids can explore include:

Does more baking soda change how fast the boat moves?

Does more vinegar change anything?  

What about how you combine the ingredients? For instance, does a quick shake help things move? Or a slow fizz?

Story and photos by Melissa Heckscher


RELATED STORIES:

Classic Science Experiments for Kids

It’s Alive! Gross (But Cool) Science Experiments for Kids

Mason Jar Science: Slimy, Squishy, Super-Cool Experiments

Easy Science Projects for Kids That Use Water

Science Experiments That Use Candy

Craving an ooey, gooey chocolate chip cookie? Disney has been releasing tons of magical recipes as of late, and the newest one is a feast for the senses.

Jack-Jack’s Num Num Cookie Recipe was shared last month via Instagram and in case you missed it, we’ve got it right here! The nine-ingredient recipe will whip up a batch just like the ones you’d find at Disneyland’s Pixar Pier, which will hopefully keep you happy until the parks reopen.

photo: Disney

To make Jack-Jacks’ famous treats, gather chocolate chips, flour, butter, baking soda, sugar, eggs, vanilla, salt and brown sugar. Then follow the instructions in Pixar’s Instagram post below!

If you want to make a thicker cookie that resembles those you’d find at that parks, just scoop dough into a cupcake pan, chill and bake.

Happy num num noshing!

––Karly Wood


RELATED STORIES

Disney Relaunches 1984 Retro Mickey & Co. Sustainable Apparel Line

All the Disney Recipes You Need to Make Magic at Home

Disney+ Celebrates Star Wars Day with the Mandalorian & More


While I love the idea of turning a cereal box into a guitar and making a race car out of a toilet paper roll, sometimes the best kids projects are the simplest ones. To that end, I checked in with real LA moms to find out which at-home ideas and activities actually worked for them—plus I’m revealing my own biggest #MomWin. Read on for all the sanity-saving tips.

At the Carwash

After attempting DIY spin art with a salad spinner (5 minutes of entertainment, 25 minutes of cleanup) and various other art projects involving spray starch, coffee filters and more, I took a break from forcing crafting on my 3 year old. Ultimately, the activity that kept him occupied the longest was a 'car wash.' Just a bucket of soapy water, some rags, a few dirty outdoor trucks and a towel for drying.

Chalk It Up

Bekki Herzon

With a little painters tape, you can create graphic chalk art on the driveway, a wall or fence, like mom Bekki Herzon. The activity kept her two kids, ages 5 and 7, busy for more than an hour!

Soup's On

This "nature soup" project is the "gift that keeps giving," according to Heather Taylor, founder of linen shop Heather Taylor Home. The idea comes from Meri Cherry. Simply gather sticks, petals, leaves and more on a walk or in your backyard. Put in a pot, add water (colored for more fun), and stir. 

Paint the Town

Julia R.

This might be the ultimate simple-but-oh-so-entertaining activity: "My daughter spent almost an hour 'painting' our fence and everything in the backyard today with water!" says mom Julia R.

Paint the Toys

"Today’s quarantine activity. Painted some toys with washable paint and then transferred everything to the bath to wash everything off," writes Emily V. in her Instagram post. The whole thing took over an hour and involved a lot of independent play, so score.

Stick to It

Ellen Grinberg

"Here’s an idea I came up with that lasted for 45 minutes using stickers from Melissa and Doug," says mom Ellen Gringberg, who did this activity with her three year old. "Do a quick and simple drawing of the sea, a farm, etc., then have kids put the stickers in the right setting." 

Slicing & Dicing

Zoe DiStefano

"I got my daughter toddler knives that protect from cutting fingers off," says mom Zoe DiStefano. "She's obsessed with cutting veggies and helping me with dinner. Which is great because not only does it keep her busy so I can cook, but it gets her excited to eat her veggies!" 

Go Green

Lisa Perilstein

"We made a huge calendar and are having theme days," mom Lisa Perilstein tells us of the routine she's found most helpful. "For example, we have a rainbow day, a Philadelphia Eagles day, a Frozen Or Daniel Tiger Day. We add activities based on the themes (like we made green play dough on green day)." Your day, solved. 

Blast Off!

Amanda Schechter, creator of the maternity collection Formerly Yan, shared this DIY rocket ship, perfect for older kids and aspiring astronauts. "We produced a 🚀 100% handmade of sustainable materials (used plastic water bottle, reusable wine cork, and used printer paper) powered by organic ingredients (1/4c vinegar and 1tbs baking soda)," she shared in her Instragram post. And we have lift off! (Note: This project definitely requires parental supervision, but you'll be as wowed by it as your kids.)

–Shannan Rouss

RELATED STORIES: 

These Are the Printable Templates You Need Right Now

How to Keep Your Routine When the Kids Are at Home

Theme Park Attractions Your Kids Can Ride Virtually

Editor’s note: This story is aimed to lower the chemicals you use in everyday life, such as silver polish, laundry softener, etc. but please follow the CDC guidelines for keeping your home and surfaces disinfected and clean to prevent the spread of COVID-19. 

Everyone loves a clean house, but you don’t always have to use products packed with chemicals to get things to sparkle and . From natural ways to soften your laundry to using lemons to shine your chrome, read on for 12 ways to clean without the chemicals.

photo: fede13 via flickr

Lemon

1. Use lemon juice to polish all that chrome and stainless steel in your kitchen or bathroom. We like to keep an extra bottle of already juiced lemon on hand for just such a reason, but if you’ve made lemonade and have lemon rinds left, you can actually use the lemon half right on corners.

2. You can also use said lemon rind, juice or a wedge to clean a cutting board. The lemon not only disinfects, it removes trace odors left behind from things like onions and garlic.

Vinegar (White)

3. Mix vinegar to water at a 3 to 1 ration (3 cups vinegar to one cup water) for cleaning windows and mirrors.

4. Use straight vinegar in a spray bottle to combat mildew. Spray offending area and leave for 30 minutes before rinsing with hot water.

5. Next time you’re at the grocery store, grab an extra one-gallon jug of white vinegar for your laundry room. Add a good 20 drops of essential oil, shake, and keep on hand for a fabric softener. Just add a half cup to each load (shake the jug to distribute the oils before each use).

6. Almost every hard-surface floor, from vinyl to hardwood, can be effectively cleaned with a simple water and vinegar solution. One cup vinegar to a half-gallon of hot or warm water should do the trick.

photo: evitaochel via pixabay

Baking Soda

7. Use baking soda with a hint of essential oil, like lavender, sprinkled in to deodorize your carpets. Sprinkle, vacuum up, inhale.

8. DIY your own room freshener without all the toxic chemicals. Just put some baking soda in a cute jar, add a few drops of your favorite essential oil (we love the combo of mint + lavender) put the lid on, and shake. Once you’ve got your baking soda + essential oils distributed, remove the lid and place several holes in it to let the freshening begin!

photo: andreas160578 via pixabay

Salt

9. Use a teaspoon of salt to tepid water (not hot or even warm) to clean and disinfect water bottles (and sippy cups). This keeps you from that dreaded soapy water taste and neutralizes any lingering odors in your bottle. You can even soak the lids and sippy attachments in a mild salt solution, just be sure to rinse the heck out of it to flush the salty flavor away. A cotton swab with a salty paste can help get in the nooks and crannies of lids, too.

Oil

10. Cast iron skillet hack: If you properly season your pans, you won’t need to scrub too much but sometimes it happens. (Never, ever use soap and water on a cast iron skillet!) If you have a tricky sticky spot, use coarse salt and a vegetable scrubber dedicated to this purpose with a helping of cooking oil to clean off the gunk. While we recommend seasoning your pans after each use with a helping of cooking oil, try this lazy hack for every once in awhile: wipe your pan clean with a dry cloth and then spray with a cooking spray like Pam before storing.

11. Mix vinegar and oil together to make a furniture polish! Do it a 3 to 1 ration (so 3 tablespoons oil to 1 tablespoon vinegar). Or sub lemon juice for the vinegar. We recommend making this one in small batches (a little goes a long way) and applying with a super soft cloth, not a paper towel.

photo: marthaposemuckle via pixabay

Toothpaste

12. Toothpaste cleans stains and tarnish on any silver surface. If you’ve got a detailed edge on an antique plate, a gentle toothbrush + toothpaste can take the tarnish out of the nook and crannies and is way less harsh than some commercial silver polishes out there (which can actually strip silver plating). Ditto this method for jewelry.

—Amber Guetebier

featured image: Stocksnap via pixabay

RELATED STORIES 

27 Attainable Ways to Reduce Your Plastic Consumption

18 Creative Upcycled Crafts to Try Today 

50 Simple Ways Families Can Save the Planet