Did you know you can make ice cream in a resealable plastic bag without an ice cream maker, make your own candy geode, and bake hygroscopic cookies without any special equipment? Give curious minds at home a boost with these delicious science experiments for kids that’ll add a dash of excitement to your table and bring a whole new meaning to phrase “brain food.” Flip through the slideshow to see all the delicious science projects.
Save these tasty tests to Pinterest. Just click here!
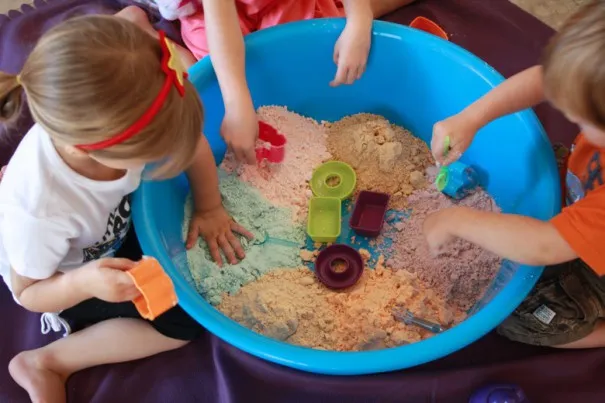
Discover Density
This colorful experiment found on CandyExperiments teaches your little scientist all about density using candy as the main ingredient. What’s not to love about this weighty rainbow!
Brain Boost Factor: The volume of sugar in each colored layer is the key to figuring out why the colors rise or sink.
S'more Solar Oven
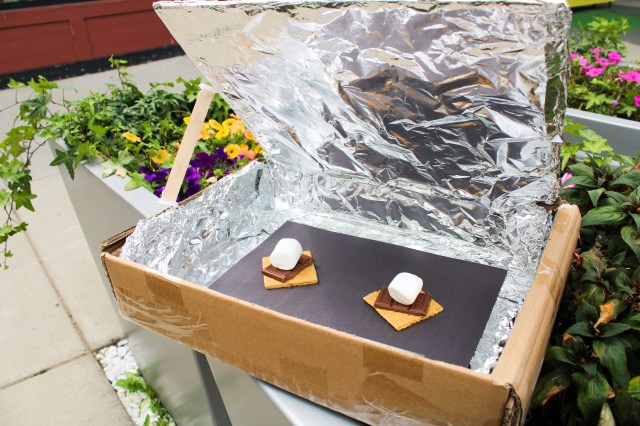
This awesome project from Tierra Encantada can be recreated any time of the year, as long as the sun is shining.
You will need:
- -Cardboard box
- - Aluminum foil
- - Plastic wrap
- - Black construction paper
- - Tape
- - Scissors
- - Something to prop your oven’s lid open (ruler, stick, marker, etc.)
- - S’more goodies - graham crackers, chocolate, marshmallows (you can also reheat cooked food!)
Cover the inside of the box with aluminum foil (use tape to seal tightly). Place black construction paper inside the box to absorb light. Stack your s’more ingredients. Cover opening of box with plastic wrap to conceal heat. Adjust lid to find the best angle to reflect sunlight. Use a stick to keep the lid in place.
Get cooking! Don’t forget to check on your food every few minutes. Depending on the temperature outside and reflection of the sun, it should take about 30 minutes to cook.
Check out the video tutorial here.
Pumpkin Seed Science
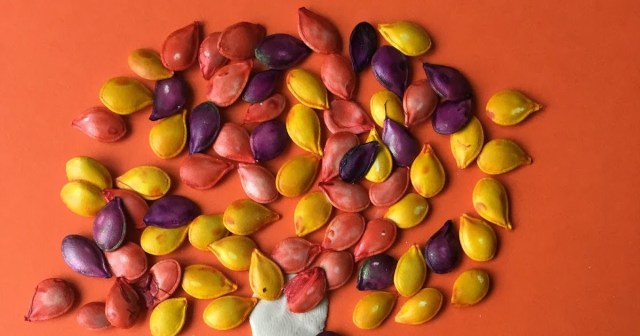
When it's pumpkin time again, do some sciencey fun while you carve your family's jack o'lantern by letting the kiddos explore the ooey gooey goop inside. This sensory activity is ideal for little scientists who are into making hands-on discoveries. Have them close their eyes and describe what the inside of the pumpkin feels like. When they're done, scoop out the seeds and let them dry. Your creative kid can add a few drips of red, orange or yellow food coloring into a bag, toss in the seeds and coat them. When they're dry, the seeds are perfect for making mini mosaics or other types if seasonal art. Not only is this sensory exploration an artsy adventure, but it's also a lesson in the plant life cycle. Discuss why pumpkins need seeds. Save a few seeds and plant them in indoor pots, creating a second fall science activity!
Insider tip: in the mood for Pumpkin recipes? We have pumpkin recipes for every taste bud. Just hop on over to our story for pumpkin recipes here.
Candy Creations
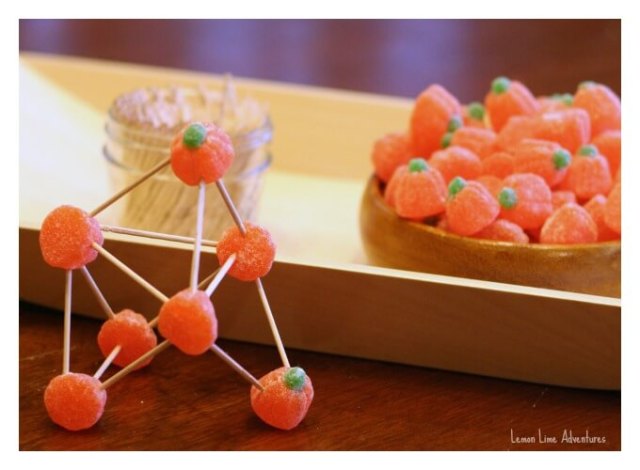
This STEM idea from Lemon Lime Adventures takes autumn engineering to the next level. Your little learner can explore the art of building, getting hands-on with concepts such as form vs. function, balance and weight distribution.
Insider tip: for ways to use up leftover Halloween candy, check out our ideas here.
Pop Corn on the Cob

Break out your favorite family movie and grab the butter to go with homemade popcorn. Find out how to pop your own in this experiment outlined on Tinkerlab.
Brain Boost Factor: This is a simple heating up water experiment. The trick is that the water is inside the corn kernel. Who knew?
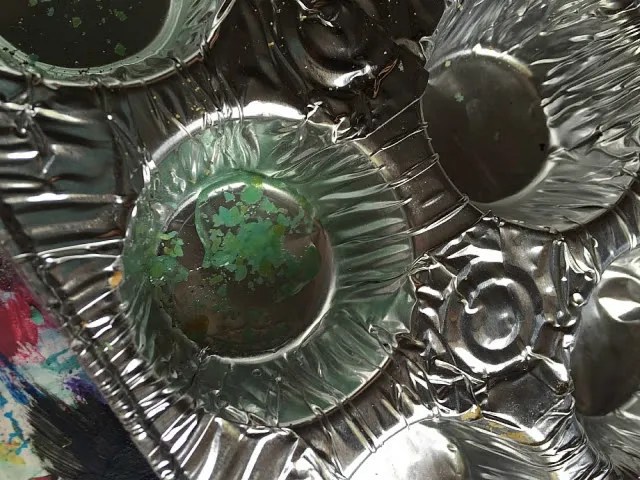
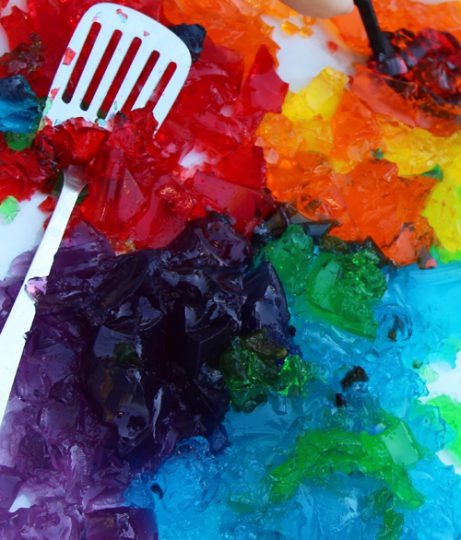
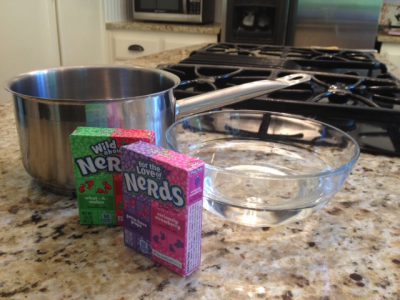
Rock Candy Geodes
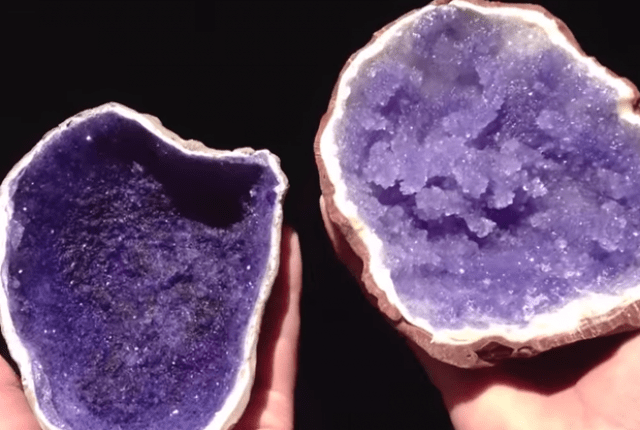
Take the traditional rock candy string experiment to the next level by making these tasty geodes. It’s all about crystallization achieved through total saturation with this experiment. Find out how to make these realistic looking candy creations at How to Cook That. Rock on!
Brain Boost Factor: They'll learn all about how crystals form and this one gives curious cuties the chance to see them life-size without using a microscope.
Churn Butter and Whip Cream
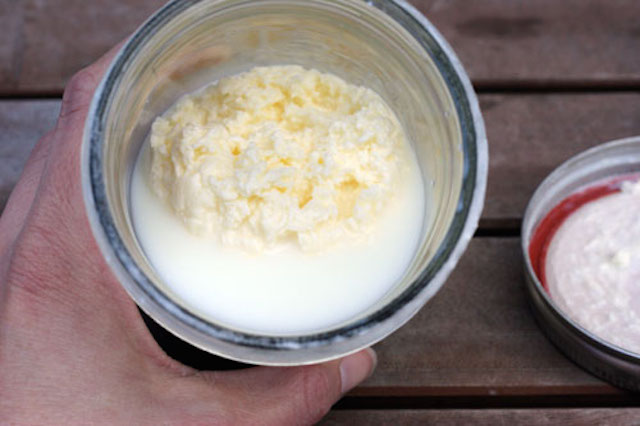
Churn Butter and Whip Cream
When a trip to colonial Williamsburg isn’t on the menu, you and your little chef can make your own homestead-style whip cream or butter by simply shaking and shaking and shaking heavy cream. Make and Takes has everything you need to turn back the clock in your own kitchen.
Brain Boost Factor: Churning butter and whipping cream is all about agitating the fat molecules (those pesky buggers) and getting them to eventually clump together. The longer you shake ‘em up, the stickier they get.
Microwave Marshmallows
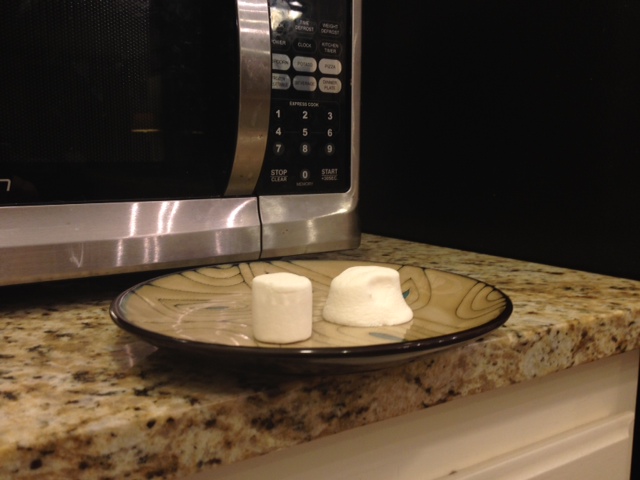
Put marshmallows in the microwave and your little scientists will be amazed at the crazy antics that follow. They puff up. They shrink back down. And they still taste good. The Exploratorium spells out the necessary steps for this simple (tasty) experiment.
Brain Boost Factor: The thrilling combo of sugar, water and air do amazing things when heated up and cooled off quickly.
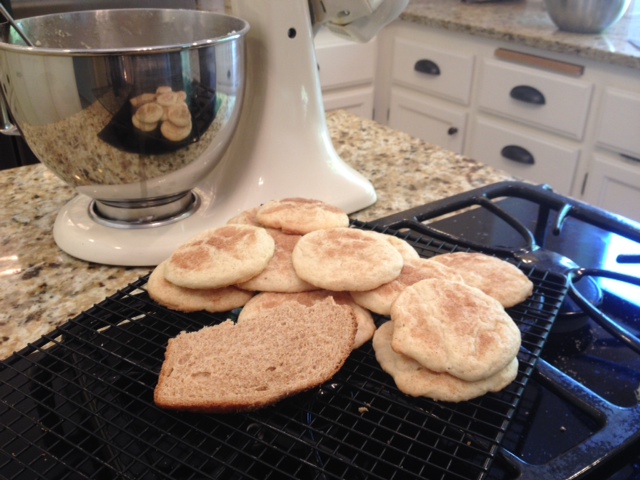
Bake Fresh Bread
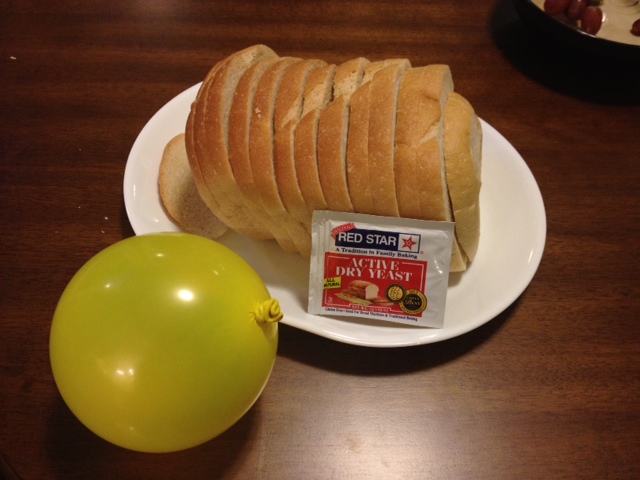
Break out your favorite bread recipe (and that bread machine that’s collecting dust in the cupboard) to cook up a loaf alongside this experiment, explained on Teach Beside Me. It’s an “inner working” visual that will certainly make an impact on your little cooker.
Brain Boost Factor: As yeast munches on the sugars in the bread, the gasses released perk it up, up, up!
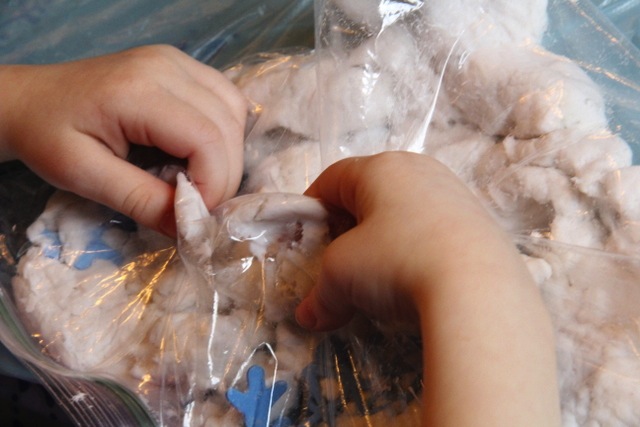
Shake Up Ice Cream
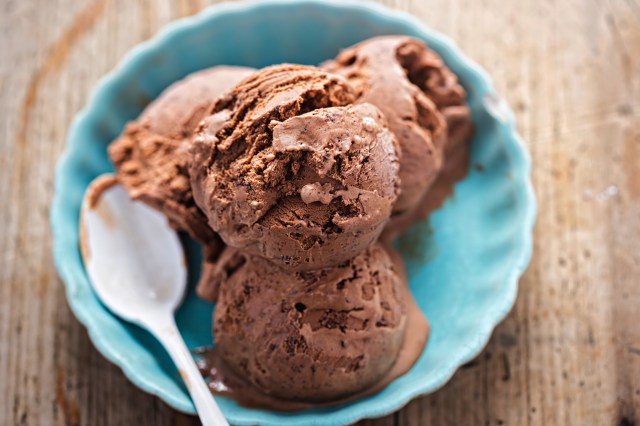
\You don’t need all 31 flavors to start in on this experiment with your kidlet. Get the step-by-step on shaking out single serve scoops in re-sealable plastic bags on Instructables. Be sure to have fresh fruit or other treats ready to mix in when the experiment is over. Yum!
Brain Boost Factor: The salt does most of the work in this frosty experiment. It lowers the freezing point of the outside ice enough so that the milk mixture inside becomes cold and creamy. Delish!
Squeeze an Egg

This egg-cellent experiment described on Science- Sparks will have everyone cringing when little hands put the big squeeze on a fragile egg. Try as you might, that baby won’t break. Until you crack it into a pan to make breakfast for dinner afterward.
Brain Boost Factor: The egg’s shape is clearly stronger than it looks.
Element Cookies

Let your little chemists study the periodic table and make a tasty treat, all at once. Prep a batch of (extra big) sugar cookies, let the kids choose an element at the beginning of the periodic table, then set out frosting and M&Ms to re-create the atomic layout. Easy! Get the details over at Life at Cold Feathers Farm.
Brain Boost Factor: Giving your kids a visual (and tasty) version of nature’s building blocks is an easy intro to the physical sciences.
Test Grape Juice
If you didn’t know grape juice was an indicator before, you will after walking your sidekick through this experiment found on education.com. Simply mix up some juice, add in a few extras and watch what happens. It’s a juicy revelation!
Brain Boost Factor: Recognizing acids and bases is the name of this color-changing game.
Regrow Leftovers
Insert a little plant science into the mix by re-growing food from scraps. Think onions, potatoes, and lettuces for this one (psst… green onions are a super easy, fast option). Get the low down on all that recycled goodness at Mrs. Happy Homemaker. Since plants need water and sunlight to grow, exposing scrap roots to that winning combo helps them recharge.
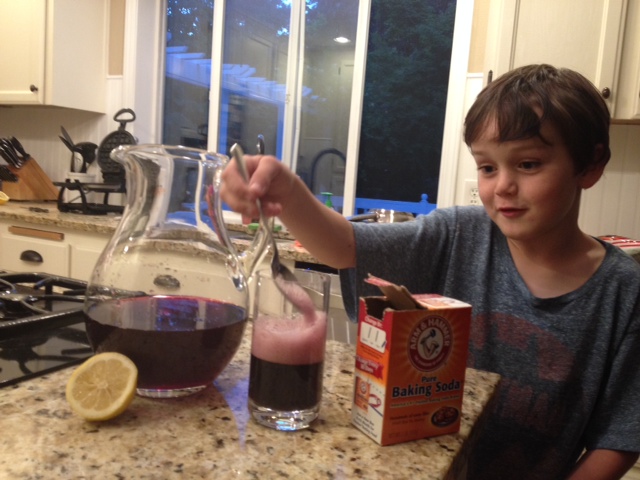
Make Fizzy Lemonade
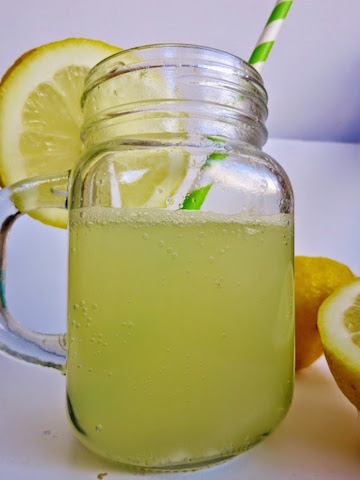
Plain old fresh-squeezed lemonade is so last year. Boost the fun quotient and learn a simple science concept simultaneously when you recreate this edible Fizzy Lemonade drink from Learn With Play at Home. It’s super easy to mix and little sippers report it’s pretty tickly too. A great alternative to the baking soda-vinegar volcano, it shows kids what happens when an acid and base are mixed together.
Gumdrop Structural Challenge
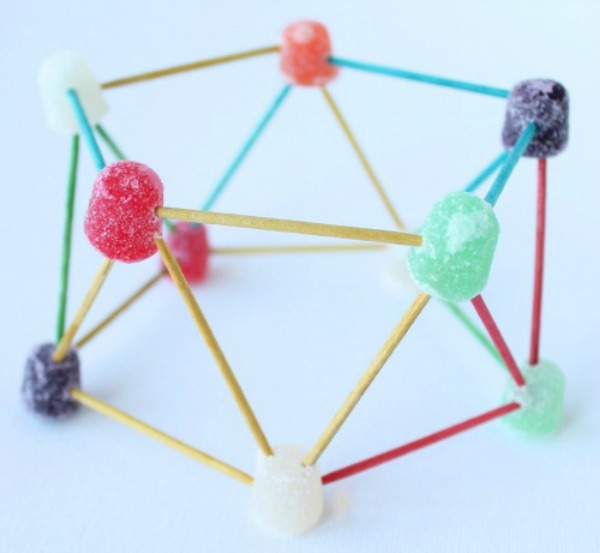
'Tis the season for gumdrops and this classic structural engineering challenge uses just two ingredients: toothpicks and candy. We’re particularly fond of this one from The Homeschool Scientist because it helps you explain what the concepts (engineering, load distribution, physics, shape comparison) are to your kiddos while they are building it. doing it. Visit The Homeschool Scientist to get going. And click here for five more gumdrop-themed challenges.
Bake Hygroscopic Cookies
This simple science experiment is best when you check in on it the next morning. Bake up a batch of cookies, then place them in an airtight container with a piece of fresh bread. Watch as the cookies stay straight-from-the-oven soft thanks to the moisture of the bread (The sugar in the cookies is hygroscopic, which means it absorbs water molecules out of the bread). The best part? Getting to eat the cookies!
Dissolving Candy Hearts

Explore the science of your child's fave Valentine's Day candy and use up those leftovers STAT. Toss them into warm water and wait (and watch, of course) to see what happens. Repeat the science experiment with cool water, veggie oil, milk or any other liquid and record what caused the candy to dissolve the fastest, which took the longest.
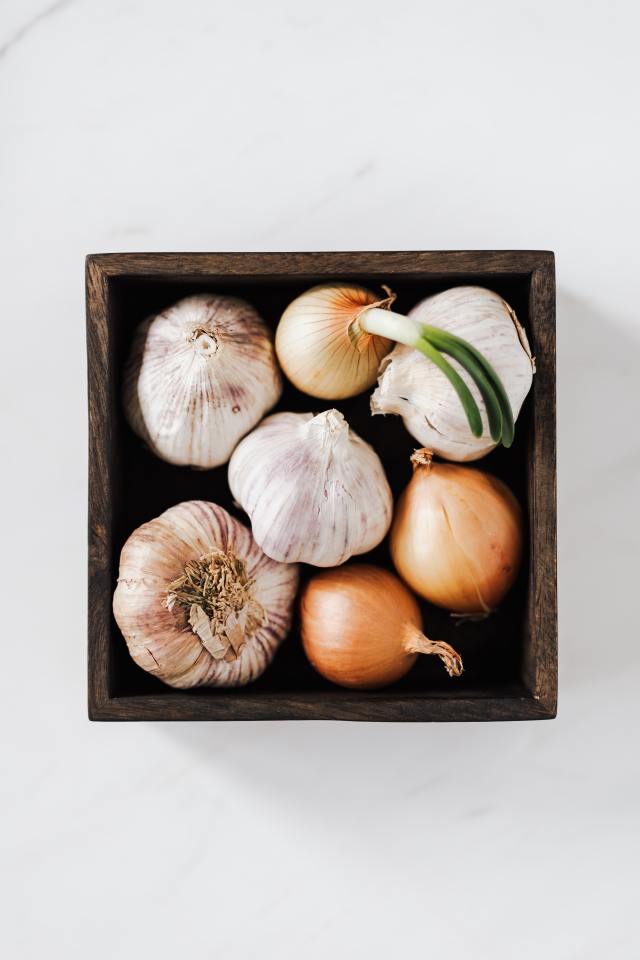
A Smell Challenge
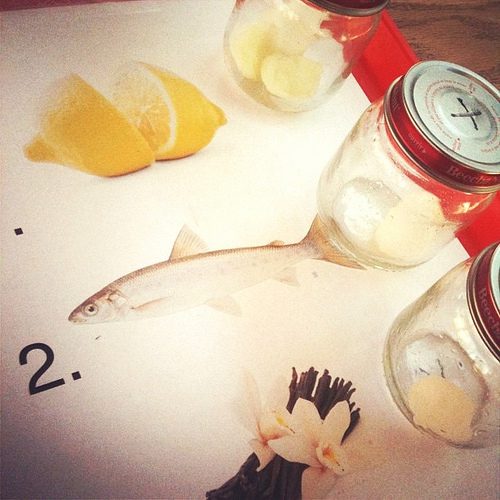
Teach kids the importance of smell with this activity that asks them to use only their noses to identify objects. Can they sniff out the fish oil over the garlic cloves? The lemon juice over the orange oil? Homeschooling blogger Ana has the instructions at Babble Dabble Do.
The Juice-Tasting Challenge

Tummy’s rumbling–it’s time to eat! Did you know that you “eat” with your nose and eyes as well as your mouth? It’s true. Put your family’s snifffers and peepers to the test with this juice-guessing game.
You’ll Need:
Masking tape
4 glasses
Pen and paper
4 flavors of juice
4 food colorings
How to:
1. Stack a piece of tape on the bottom of each glass and number them one to four, making sure your partner can’t see the numbers. Pour one type of juice into each glass.
2. Send your partner out of the room. Drip a different food coloring into each juice and stir so your partner can’t recognize the juice by its color alone. Record the number, juice type, and color in each glass on a piece of paper.
3. Call your partner back. Tell her to hold her nose, sip from each glass, and guess the juice If she’s like most people, she’ll be kind of confused–her eyes and tongue give her two conflicting flavor messages.
4. Ask her to unplug her nose, close her eyes, and sniff the juice before drinking it. Her guesses should be on target now. All hail the mighty schnoz!
Reprinted from Exploralab: 150+ Ways to Investigate the Amazing Science All Around You. Available online. $24.95.
Invisible Licorice
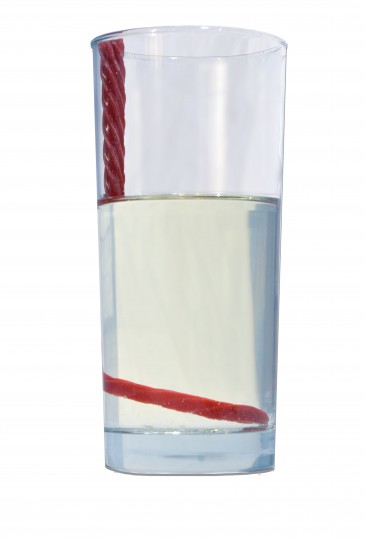
Did the candy melt or disappear? Your sweetums might think it’s magic, but it’s really all about how oil redirects light, causing half the candy to disappear! Click here for the instructions on how to recreate this mind-warping experiment.
Taste Test
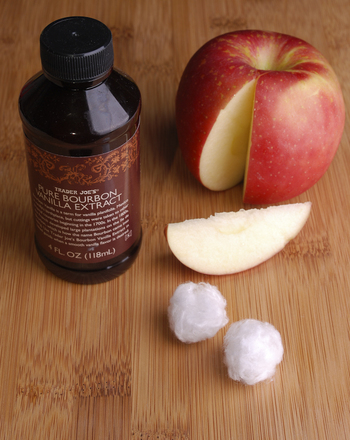
After figuring out this simple experiment your sidekick will want to play Houdini with all her friends. All it takes is an apple, vanilla extract, and a cotton ball to pull one over on her tastebuds. Abracadabra!
Rock Candy
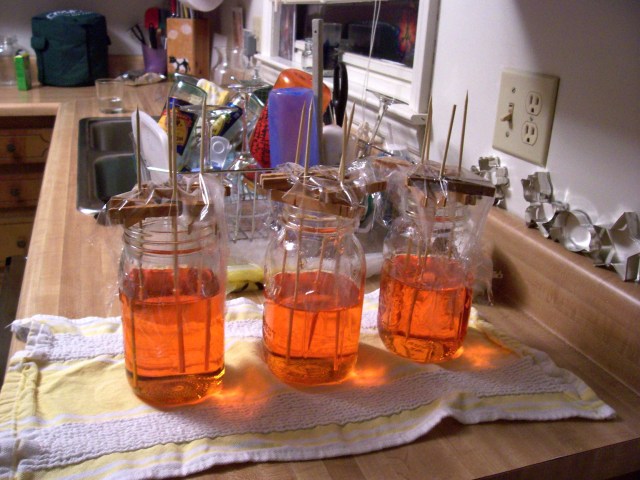
A Lesson in: Crystallization.
Be careful: The water only has the power to make the sugar crystals “invisible” when it’s piping hot. After the water cools down and evaporates, the sugar turns back into a solid. And with a little help of your sugar-soaked string, the crystals will find a home to grow upon and become rock candy. Learn how to make your smart sweets with these instructions from the Exploratorium.
Messiness factor: Two sponges.
Magnetic Cereal
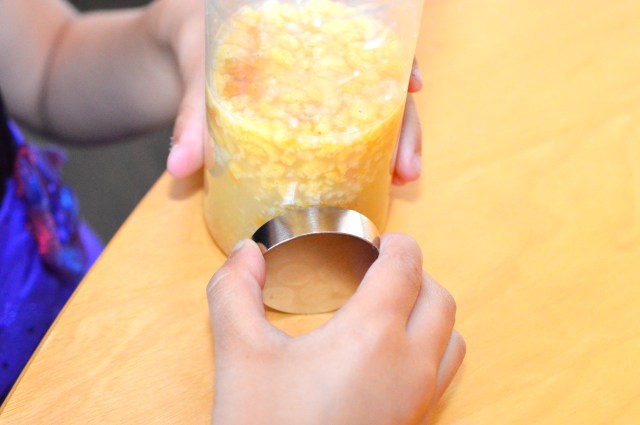
A lesson in: Magnetism.
You’ve probably seen the label that says “fortified with iron” on your cereal box, but how much iron is actually in your cereal? Is there enough to cause a magnetic reaction? This super easy experiment doesn’t require too many fancy ingredients (cereal + magnet) which means you and the kiddos can try it right away. The results may surprise you! Get the how-to at Rookie Parenting and get started!
Messiness Factor: Two sponges.