reading technology

Mandy Chen, a private tutor, creator of ‘Fun with Joy Mandarin,’ and co-host of ‘Chinese Tea podcast,’ has experience teaching kids of all ages—from younger than one year to high school. Given the current environment and interest in home education, she’s sharing her tips on how to structure bilingual learning at home—practical ideas that don’t require formal tutors or teachers.

How do you structure bilingual learning at home? How does one start?   

“The most important element I think is consistency. Even just 30 minutes a day works—as long as it’s consistent. Of course if you have more time, great. But consistency is key.”

As far as the structure goes, I would break it down into 3 simple categories—choose any order you want:

  • Singing and dancing: This could involve anything from nursery rhymes, movie theme songs, pop culture songs, and even topical coronavirus songs going on now.

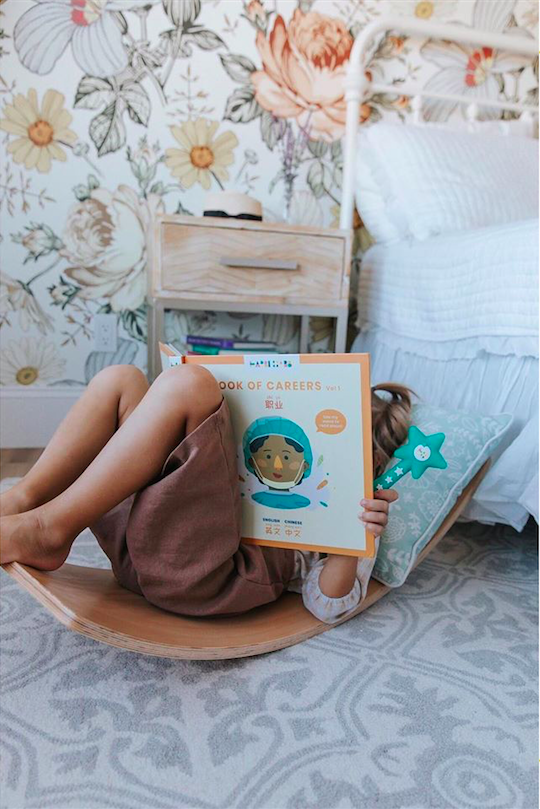
  • Storytime: This could be 1 book or 2 books … it doesn’t matter. It can even be the same book, for young children where they want to repeat the content to learn and remember it. For parents who don’t speak Chinese, there is an increasing number of sound/reading wand/robot products on the market now to help.

  • Interactive activity: This could be something like tracing, arts & crafts, or games.

If the session is only 30 minutes, does this mean each activity is 10 minutes? Is 10 minutes too short?   

“No, as long as you keep it consistent. I don’t think it’s too short. Realistically, the hardest thing is to be consistent, and that’s the most important. Similar to exercise, if you can just keep a regular routine of 30 minutes a day, that is terrific.”

The activities sound like they require a lot of parent engagement. Is it possible to be more independent? Or is that unrealistic?   

“It’s possible for the kids to learn independently. For the singing/dancing, you can just play it on youtube—that doesn’t mean you have to show them the screen—you can just play the audio. Of course, if there are actions or dancing paired with the song, that might be helpful for them to see so they can join along.

For storytime, there are so many products and sound books available—products like Habbi Habbi that allow kids to try to read by themselves. There are also products that can play themselves (like books on tape or those robot toys that have pre-recorded stories or music on them). You can even find bloggers who read Chinese stories or are conducting virtual storytime on Youtube.

For the activity, there are activities kids can do themselves like simple word tracing, pairings, or puzzles. You just need to print it out, and they can color the word.”

A lot of young kids have short attention spans. What activities, based on your experience, work well for kids?   

“I’d suggest building off something they love—a favorite toy, LEGOS, for example, can be used to build 2D or 3D Chinese characters! Integrate the activity with that toy. Also, young kids with short attention spans often have a hard time sitting still because they want to move. So you might integrate the Chinese activity with movement, for example, dancing with the song.

Every kid is different in what they like and what holds their interest. I’d suggest parents try different types of activities and for whichever one that sticks, continue to do more of that activity, with different content.”

We’ve discussed ‘basic exposure’ types of activities. What if you want to go a little bit deeper? 

“There are other activities that can be more involved but are also fun. Fun is important because it’s so important to make sure language learning holds their interest and is not a chore. Some example activities include a Chinese art wall or poster, building their own illustrated Chinese dictionary, or writing their own Chinese story.”

When they create a story, would they write it or speak it? 

Either! It depends on their capability. If they can, I’d encourage them to write it. I’d also encourage them to make their own illustrations. Kids love imagining and building characters, their stories, and the setting.”

Speaking of writing vs speaking, young parents are often focused on teaching speaking because it’s more approachable. How do you even start to think about writing, in a way that doesn’t feel like memorization or worksheets? 

“Start with simple characters, with fewer strokes like 人 or 天. And just like English that starts writing with tracing, you can just start with tracing or coloring the characters. Start with 50 characters, a simple list, and go from there. In my experience, kids think Chinese characters are fun because they look more like drawings than words, so they enjoy coloring them. You don’t have to just focus on pencil tracing, it can be coloring with crayon and markers or even using materials like Playdoh and pipe cleaners.”
H&AL of Habbi Habbi
Tinybeans Voices Contributor

Habbi Habbi Reading Wand & Bilingual Books is the easiest way to start kids on Chinese & Spanish. Just turn on and tap. Every inch is tappable, and our books are as intentional in content as they are beautiful - topics like kindness, emotions, and more. @BeHabbi | habbihabbi.com.


Our pets are happy that we are spending more time with them. Now that the kids are home, they can spend more time doting on them. The American Kennel Club has released fun and educational tools for the young dog lovers in our lives.  

dog

From crafts to books to song and dance, there is something for everyone. They have even created a schedule for parents trying to maintain structure and consistency during the day. 

If your kids love reading and they love dogs, the AKC has curated a list just for them. Maybe they can even take turns reading to the family pet. Reading aloud is a great way for beginning readers to practice, and the animals love the attention.

There are lots of ways for kids to stay active with their dogs from playing catch to running around in the yard. The AKC has come up with a list of fun activities from creating dog art to baking treats.

—Jennifer Swartvagher

Featured photo: Pixabay via Pexels

RELATED STORIES


This time of year can be overwhelming for everyone. And being a separated or divorced mom can create a whole new set of challenges you never could’ve anticipated. Deep breath.This does get easier, I promise. Especially if you keep in mind these tips on how to navigate the holidays with kids…

Tip #1: When in doubt, stick to your parenting plan.

It’s easy to veer off schedule. Even your lawyer said it’s just a “fall-back,” right? Listen, being flexible is great when it’s a two-way street that works for everyone. But sometimes too much flexibility can actually add to your stress instead of taking it away. The more you venture off your plan, the more you’ll need to think about it, and the more room there’ll be for disagreements with your ex (“I said you can have them back to me on the 26th, not the 27th!”).

By sticking to your parenting plan from the get-go, you eliminate the risk of confusion. It may not be perfect, but it is reliable.

If you don’t have a parenting plan in place yet, use the standard parenting holiday schedule in your state or county as your go-by. If you don’t know where to find the plan for your area, call the clerk of your local court.

Tip #2: Remember that it comes out in the wash.

While this isn’t true with all parenting time, it should be with an alternating holiday schedule. Upset that he has the kids the first part of the break? Fair enough, especially if they’re little. But that also means it’s your turn next year. And if you don’t have a parenting order in place yet, keep track— in writing—of how you handled the dates this year, so you can make sure to set up next year accordingly.

We say this a lot at DIGC: Divorce is a marathon, not a sprint. And it calls on a whole different type of strength. If you can stay focused and concentrate on the bigger picture instead of what’s happening right now, it’ll help you see that over the long haul, you’re each going to have the same amount of holiday time.

Moms of young children, we know this is an especially hard time for you. You’ve been with your kids on the first day of Kwanzaa, the last night of Hanukkah, or Christmas morning every year until now. It’s incredibly tough to miss this special time with them. Just do your best to remember that the holidays are about celebrating with your loved ones. The actual dates on which you do it aren’t as important as the fact that you’re celebrating.

Tip #3: Put yourself in your child’s shoes.

It’s easy to get caught up in the unfairness of having to miss out on any time with your children over the holidays. It’s also easy to get bent out of shape about whether the exchange on Christmas Eve will take place at 4 or 5 o’clock. If you were to ask your child what’s worrying her about your family holiday plan, you’re likely to hear something like “I just want to know where I’m waking up Christmas morning” or “I’m worried Santa won’t know which house to go to.”

Kids want consistency. They want to know the plan. (And they want to know that you’ve shared the plan with Santa!). They also take their cues from you. If you’re noticeably upset or unraveled by the schedule, they will be, too.

Friend, give yourself permission to make mistakes along the way. One thing I do know for sure: There is actually a learning curve here, and it does get easier as the years progress. Remember you’re not alone. You’re in good company.

This post originally appeared on Divorce in Good Company.

Divorce in Good Company is a female-focused digital destination dedicated to helping women survive and thrive as they go through divorce. Our vision is to rebrand divorce and dramatically improve the lives of women going through it. We help women find answers, stay positive, and be good to themselves!

It’s well known that nearly half of all marriages in the country end in divorce. The rate is even higher for subsequent marriages. What many people are not as focused on are the children involved and how to best go about co-parenting in a way that will help them grow into well adjusted adults. July is National Child-Centered Divorce Month, making it an ideal time to place the focus of divorce on the children, and what can be done to help ensure they come out of the situation in healthy manner.

“Divorce may seem like it’s something between the adults, but it is really something impacts the whole family,” explains Reena B. Patel, a parenting expert, licensed educational psychologist, and author, who offer virtual workshops. “Children need parents who will commit to working together for the health and development of their child.”

In a study published in the journal called The Linacre Quarterly, researchers shared their findings of reviewing three decades worth of research regarding the impact of divorce on the health of children. Their research found that divorce has been shown to diminish a child’s future competence in all areas of life, including family relationships, education, emotional well-being, and future earning power. Parents can help to counter the negative impact that divorce has on the children by focusing on effective co-parenting that will help ensure their success throughout life.

Children who see their parents continuing to work together are more likely to learn how to effectively and peacefully solve problems themselves. They will also have a healthy example to follow. It’s important for parents to remember that their feelings about their ex does not, and should not, dictate their behavior. It’s better to focus on being a positive example, putting your child’s well being in the spotlight.

Patel offers some tips that will help with ensuring co-parenting success:

  • Commit to making co-parenting an open dialogue with your ex. Arrange to do this through email, texting, voicemail, letters, or face-to-face conversations. In the beginning, it may be hard to have a civil dialogue with your ex. There are even websites where you can upload schedules, share information and communicate so you and your ex don’t have to directly touch base. 


  • The key is consistency. Rules don’t have to be exactly the same between the two households, but you and your ex should establish generally consistent guidelines. They should be mutually agreed upon for both households. For example, meal time, bed time, and completing homework need to consistent. This helps create a sense of belonging and creates a sense of security and predictability for children. Discuss and come to an agreement about each of these issues.


  • Don’t give in to guilt and try and outdo your ex by gifting you child with things, instead agree on discipline. This includes things like behavioral guidelines, rewards, and consequences, so there is consistency in their lives, regardless of which parent they’re with at any given time. Research shows that children in homes with a unified parenting approach have greater well-being.


  • Keep in mind that children will frequently test boundaries and rules, especially if there’s a chance to get something they may not ordinarily be able to obtain. This is why a united front in co-parenting is recommended. 


  • Be flexible and update often. If there are changes at home, in your life, it is important that your child is never the primary source of information.


  • Speak in positive language about your ex. Remember, often times, the marriage is what was the issue, not the parenting st‌yle. Each of you has valuable strengths as a parent. Remember to recognize the different traits you and your ex have – and reinforce this awareness with your children.


  • Children exposed to conflict between co-parents are more likely to develop issues such as depression, anxiety, or ADHD. Keeping this in mind, strive to keep conflict around them to a minimal or none at all.


  • Keep the conversations child-focused. This will leave out problems that you and your ex have with each other. The focus now needs to be on the children.

“Effective and healthy co-parenting may be difficult at first and it make time some time to work everything out,” added Patel. “But getting this part right in the long run is going to have a huge positive impact on your children, so it’s worth it. Also, don’t be afraid to reach out for professional help to put a plan together or determine how to best put co-parenting into action.”


Reena B. Patel (LEP, BCBA) is a renowned parenting expert, guidance counselor, licensed educational psychologist and board-certified behavior analyst. For more than 20 years, Patel has had the privilege of working with families and children supporting all aspects of education and positive wellness.

Calling all chocolate lovers! Your dreams are about to come true. Cadbury is hiring taste testers and yes, you can turn your part-time “hobby” into an actual career.

Mondeléz International (the company behind the Cadbury brand) recently posted a “Chocolate Tester” position on its website. But you should probably know that there’s a bit of a commute: all tester positions are located in the United Kingdom.

photo: Alexas_Fotos via Pixabay 

Just in case you feel like hopping across the pond for this job (or maybe you were planning on a move anyway?), the position requires no experience. According to the job posting, Cadbury will provide training to develop the tester’s taste buds. We can only imagine the chocolate-filled goodness that involves. However, every applicant must possess “a passion for confectionary.”

So what are main responsibilities of a Cadbury taste tester? To start, the lucky hire needs to have the ability to taste chocolate products (check) and give honest feedback (check). The tester also needs to work with a team of other testers, demonstrate consistency, and be able to use Cadbury’s defined vocab to describe its products.

Given the high number of applications for this delicious role, Mondeléz International notes that candidates who don’t hear from the company within 14 days didn’t make the cut.

—Erica Loop


RELATED STORIES

Why You Should Eat More Chocolate

Get Rid of a Bad Cough Once & For All—with Chocolate, New Study Finds

These New Birthday Cake-Flavored Cupcakes Mean the Party Can Go on All Year Long

This easy, make-at-home playdough requires just four ingredients and no equipment or cooking, making it fun for kids of all ages, including toddlers. The salty dough deters eating and you can choose any kind of dye, or no dye at all. We like to use gel food coloring because a little goes a long way. Here’s how to make your own in just a few steps.This recipe makes roughly the equivalent of two standard size containers of commercial playdough. Because of the simple quantities it’s very easy to double or even triple the recipe. 

You will need:

1/2 cup of salt

1/2 cup of water

1 cup of flour (for mixing in the dough) plus 1/2 cup more for sprinkling/kneading

Food coloring (optional)
Measure your ingredients and add them all, except the food coloring, to a large mixing bowl. Mix them with a spoon or spatula until they start to stick together.
If you are making more than one color, divide the dough up into equal parts (depending on how many colors you wish to make). Add the food coloring to the dough. And mix it in a bit with a spoon, just enough to work give it a swirly appearance.

Sprinkle flour onto a dry surface and turn the dough out of the bowl. Knead. Push, pull, punch, knead! This is one of the funnest parts for kids and you can’t over knead it. The kneading is what ultimately distributes the color and you can use the color as an indication that it’s been kneaded enough.

The dough probably won’t have the exact consistency of the store-bought variety, but it gets pretty close. You want to keep adding flour in small pinches and working it in until the dough isn’t sticky but is still pliable. Your dough is ready for playing!Now, they will be super-occupied while you clean up the flour that’s all over the floor. Hand them a bread knife, a few cookie cutters and a garlic press and relax (or do the dishes). Store your playdough in sealable plastic bags. If it gets dried out, sprinkle a bit of water on it and knead it before playing. (And if it feels too sticky, add flour.)

Have you made your own playdough? Let us know if the comments below!

—photos and text by Amber Guetebier


Potty training is a huge milestone in every young child’s life and this is especially true for parents. A potty-trained child means no more diapers, changing tables, or accidents. But every child develops at a different rate, which means there’s no guarantees as to what age your child will be fully potty-trained.

Both girls and boys possess the physical maturity and readiness to potty train starting at age 18-30 months but that doesn’t mean your child will master potty training in this time frame. One of the most important things to keep in mind when starting the potty training process is that every child is different.

Here are some additional tips that worked for me, not only when it came time to potty train my son, but also during my time working in childcare.

1. Be Consistent

Consistency is key whenever it’s time to implement a new routine or schedule with your child. Children thrive on routine. It helps them to feel secure and safe in their environments. This means if you decide to have your child try to use the bathroom every 30 minutes, you need to keep this routine throughout the day – even on the weekends. If your child knows that after breakfast, before and after a nap, and before their afternoon snack that it’s time to sit on the potty, this will help their bodies develop a pattern.

Consistency also helps avoid confusion. That means don’t start a potty training plan and then switch back to old habits of using diapers. Once you make the switch from diapers or pull-ups to underwear, it’s important to stick with it—even in the face of accidents. The hard work will pay off!

2. Use Positive Reinforcement

Positive reinforcement is a huge part of potty training success. Whether this comes in the form of a sweet treat, small toy, sticker chart or additional five minutes of your child’s favorite show, positive reinforcement helps motivate and inspire your child to achieve.

If your child does have an accident, react in a positive and encouraging manner. You can say things like, “It’s okay, we’ll do better next time.” Or remind them to ask or go to the bathroom themselves if they feel the urge to go. Never make your child feel bad or less-than when it comes to accidents. The last thing you want to do is create a negative feeling about the process. Once your child views potty training as a scary or “bad” thing, this can be very difficult to bounce back from.

3. Follow Your Child’s Lead

As I said before, potty training happens at different times for every child. Sure, they might be physically mature by age 18 months but some children might lack interest in using the potty until much later. A young child will often show signs when they’re ready to start training. They might ask questions when you go to the bathroom or even ask to join you. If they begin showing interest, it might be time to purchase a small potty chair or seat for your toilet. You can also have your child pick out their own big boy or big girl underwear. This will give them a sense of independence and involvement in the process.

4. Talk About It

Familiarizing your child with potty training can make the transition much easier. There are countless books available that talk about potty training in fun and informative ways. Get your child excited about the process.

You can even make potty training a game. For small boys, you can place Cheerios in the toilet and have them practice their aim while urinating. Whatever gets them interested in peeing on the toilet instead of in a diaper or underwear is a true mom-win!

5. Be Patient

Like anything in life, achieving potty training success will be worth the wait. That means you’ll need to remain calm and patient throughout the process. Try not to get discouraged or frustrated if things don’t go as quickly as you expected. Your child will sense your tension and can even mistake your impatience with disapproval.

It’s also common for children to master peeing on the potty before they’re willing to go Number 2. This is extremely normal and should be expected. Trust the process and trust in the fact that your child will hit their marks when their body is ready.

6. Lose the Clothes

There is something to be said for allowing your child to safely run around naked in the privacy of your home. This makes it much easier for them to respond to their urge to go, without struggling with underwear or pants. When a child is just learning how to recognize and respond to these feelings, the faster they can get to the potty, the better!

I am fortunate enough to have a pretty secluded backyard. When my son was 2 and a half and it was summertime, we set up a small inflatable pool on our relatively private deck. I also brought out his Lightning McQueen potty seat. He ran around naked, going in and out of the pool until he felt the urge to pee. He ran over to his potty seat and did his business. Just a few minutes later, he said he needed to go Number 2 and he did! Allowing him to stay naked really helped him become aware of his body and react to his natural urges.

Don’t Stress… It WILL Happen!

Don’t stress if your child is not interested in using the potty. Don’t stress if your first child potty-trained sooner or easier than your second. And don’t stress is your friend’s children are potty-training before yours. Each child is unique and special in their own way.

Fight the urge to pressure your child into potty training—you might end up doing more harm than good. Just be patient and one day, your child will wake up ready to jump on the potty train and it will be one of the greatest achievements you two reach together.
Featured Photo Courtesy: PublicDomainPictures/Pixabay

I am a 32 year old mother of a son and wife to an officer. I am honest about both the love and struggle of parenting. I enjoy being active and writing is my passion, second only to my family.

It doesn’t happen overnight. Consistency is key. Be patient with yourself. Don’t give up. These are all things I tell my clients in regards to getting organized, and they are true. Cliché but true, and so far I have found them to be more than applicable to my status as a new mom. For example, today’s lesson is how to bottle-feed a breastfed baby.

Breastfeeding is hard, especially at first! You want your baby to get a good latch. You want to increase your supply, so you should pump a whole lot in between breastfeeding sessions (aka breastfeeding attempts). You don’t want to interfere with the latch, so don’t offer bottles or pacifiers at the beginning. Do this, do that, now do the exact opposite of all of it. Sigh…

When Mason was born, he was a sleepy baby. And that’s an understatement. The lactation consultant would come in to my hospital room, hand the baby to me after I had unsnapped my gown and gotten into position, the baby would open his mouth, boob would go in and….nothing. He would already be asleep! He would stay awake long enough to open his mouth and that was enough for him to call it a day. As my late father-in-law would say, “You’ve got some life, pal.” But I digress.

It was evident that we had our work cut out for us in regards to breastfeeding, but we took it on enthusiastically. And a sleepy baby (which is otherwise a very good thing) wasn’t the only issue.

One of my nipples is flatter, so that required a nipple shield and a lot more work on Mason’s part for getting a good latch. My milk didn’t come in until the 4th day after he was born, so up until that point (and afterwards of course) our day revolved around breastfeeding attempts and pumping sessions. My husband would do everything he could to help – hand me the baby, wash and dry the pumping supplies, burp the baby, etc. We were an amazing team, and it continued on after we got home from the hospital. #smallvictories

Breastfeeding became easier and easier. With each attempt, Mason latched on faster, it hurt less and eventually I didn’t even have to use the nipple shield. Boom! What an amazing feeling of accomplishment I felt every time Mason would effortlessly latch on and drink away. We were straight up breastfeeding champions, and I was super mom! “I totally got this whole parenting thing,” I thought to myself…naively, of course.

As you’re probably guessing, we didn’t remain on cloud nine for very long but it certainly was nice while we were up there.

Weeks went by. Breastfeeding continued to go so well that I didn’t even have to pump that much. Here and there I would remember to give Mason some breast milk in a bottle. He would drink it and then a few more weeks would go by. About 6 weeks before he was due to start day care, I decided I needed to give him the bottle more so he would be able to go the day without me. That’s when the euphoria of breastfeeding success evaporated like the accomplishment itself was an illusion all along. Mason became so comfortable getting his nourishment directly from the source that he was no longer willing to drink from a bottle. Queue my panic and then the advice I received…

“Don’t worry, your baby won’t starve at day care.”

“He can go hours without eating and might just wait until you pick him up to eat. “

“Or he’ll feed at night more…which will keep you up at night…but he’ll get the calories he needs.”

Oh good, then he’ll be keeping me up at night after I’ve returned to work? That’s all great advice and very comforting. Yeah, none of this is what you want to hear when you’re in the thick of trying to get your breastfed baby to take a bottle.

I write this to you today, because I want to bring hope, relief and an actual solution to those who may be as frustrated as I was (well I’m going to say “frustrated” but the proper description is more like a depleted, overwhelmed, sobbing mess).

THE thing that finally worked wasn’t something I read, found online in my endless Google searches, got from another parent, the doctor, a lactation consultant, the day care provider or anywhere else. It wasn’t how we fed him, where we fed, who fed him, what time we fed him, how hungry he was or wasn’t, what bottle we used or ANY other variable we could think of to change in order to get the tiniest smidgeon of a result. Because believe me, we tried it all.

We tried to bottle-feed him morning, noon and night. We tried when he was hungry and when he wasn’t so hungry. I tried, my husband tried, my mom tried, my step mom tried, my mom’s boyfriend tried. We tried it while holding him in the breastfeeding position in the rocking chair (you know, because tricking him might work). I tried breastfeeding him and then slipping in the bottle while his eyes were closed. We tried while he was in the car seat, and it was in no way similar to the breastfeeding position. We tried 10, yes count them, 10 different bottles! We tried every day, multiple times a day, for almost 6 weeks. We tried. We tried. We tried.

Like I said, we tried everything we could think of.

And then it occurred to me. My nipples are NOTHING like the nipples on the bottles. They aren’t even close, so maybe I need to break out the nipple shield again and use it as some sort of transition device. And guess what. It worked!

THE thing that finally made a difference was the nipple shield, and this is how I did it.

When it was time for Mason to eat, I would let him feed on one side. Then when we moved to the other side, the nipple shield would be there. Although he did suck on it, he wasn’t fond of it and that’s when I slipped in the bottle. Boom!

He was taking it down. Instant relief hit me when this worked the first time, because I finally had something to work on that produced a result. It took some time, but I did this at each feeding session until the nipple shield was no longer necessary and he would just take the bottle.

Now, let me interject a quick side note here. Mason did show a preference for certain bottles from certain people. Yes, you read that correctly. He would only take one kind of bottle from me, and he would only take another bottle from his day care provider. I think it’s safe to say he gets that attention to detail from me (I’m a professional organizer so it does make sense). Anyway, in case it helps you, he would only take the Lansinoh Momma bottle from me and the Dr. Brown’s bottle from the day care lady.

To ensure the continued success of both breastfeeding and bottle-feeding, I would switch between the two throughout the day so he would go with either one. And he does it! He’ll breastfeed, he’ll take the bottle, and anyone can feed him at anytime anywhere and in any position. Also now, with some practice, he’ll even use different bottles. Woohoo! We’re back to feeling like champions…for now. #supermom #supermomfornow

Like I said at the beginning of this article, it doesn’t happen overnight. Consistency is key. Be patient with yourself. Don’t give up…but if you’re at the end of your rope like I was, talk to me. Are you also having this problem with your breastfed baby? What have you tried? What’s not working? Did you try my nipple shield solution? How’d it go?  I’m all ears. Leave me a comment and let’s figure this thing out together. :)

I’m a professional organizer, an author, a small business owner, a DIY blogger, an  adoring wife, a smitten mom, a Pug lover, a hula hooping guru, a cheese addict, and a happy napper.

If your kids love yogurt and fruit, they’re in for a real treat with this easy recipe that calls for only three ingredients! And, what makes these treats even more amazing is that they’re a healthy treat that’s easy to grab while you’re on the run!

Makes: 1 cup yogurt ice cream or yogurt bites

Ingredients:
1 (8-ounce) container vanilla yogurt
½ cup frozen blueberries
½ cup frozen raspberries

Method:
1. In an electric blender at high speed, blend together yogurt and frozen fruit until mixture is smooth and the consistency is of soft ice cream.


2. Scoop the yogurt/berry blend 1 teaspoon at a time into dots on parchment paper or Silpat and flatten lightly with a spoon or finger.

3. Flash-freeze yogurt dots in freezer until frozen, approximately 10 minutes.

4. Place in a container and keep in freezer for up to 2 weeks.

Treat Tips from the Chef!
Even though I use blueberries and raspberries, feel free to use whatever kind of fruit you and your kids like. And, if you do use these berries, you can either blend them together to create one purple color or blend the colors separately to have purple dots and red dots. Rather than forming the yogurt mixture into dots, you can even just place it in a small bowl and eat it like ice cream! It’s delicious, quick, and healthy!

What is your kids’ favorite fruit? Do they love yogurt? Tell us what they think of this recipe in the comment section below!

Excerpted from Kids’ Treats: 50 Easy, Extra-Special Snacks to Make with Your Little Ones Copyright © 2015 by Katie Wyllie and published by F+W Media, Inc. Used by permission of the publisher. All rights reserved. Photos courtesy of Katie Wyllie.