Nothing says eating on the run quite like Spring Break: trains, planes and automobiles, hotel rooms and vacations rentals. Isn’t it amazing (and irritating) the way everybody’s hungry all the time when they’re out of their regular routine? Unless you’re one of the lucky few who is poolside sipping something cold and grazing on something that somebody made for you while the kids play “Marco Polo” or weave with banana leaves, you’re probably in snack production mode all day.
Even if you have a kitchen on the road, you’re not going to buy a kitchen full of food for a short stay. So, what are you going to do to make sure all that off-schedule munching isn’t just about sugar, carbs and processed foods?
Without further ado, we present 18 food items that are key to snacking responsibly on the road. If you’re in a hotel, call ahead and ask for a fridge and microwave in your room. And gather up a few knives and spoons for slicing and eating.
Tortillas
Shredded Cheese
Yogurt
Baby carrots
Hummus
Cucumbers
Instant oatmeal
Almonds or walnuts or pecans or pine nuts
Rice cakes
Nut butter
Jam or jelly
Granola
Couscous
Chocolate chips
Raisins or dried cranberries
Raspberries, blueberries or grapes
Bagged, pre-washed salad greens
Box of cereal
If you’ve stocked up on these babies, you can make some healthy magic happen. Here are just a few combinations that work:
Yogurt with granola, chocolate chips and berries.
Rice cakes with peanut/almond butter and chocolate chips.
Couscous with raisins and nuts.
Cheese quesadilla.
Hummus with carrots and cucumber.
Snack mix with nuts, dried cranberries, cereal and chocolate chips.
Oatmeal with dried fruit, nuts, grapes and berries.
Hummus and salad roll-up.
Get the picture? Mix, match and avoid bad pizza. Kids…back away from the vending machine!
The Anti-Cookbook Easy, Thrifty Recipes for Food-Smart Living
We're Shelley Onderdonk and Rebecca Bloom. A veterinarian and a lawyer-turned-writer walk into a kitchen… We aren’t chefs and that’s exactly the point. We have a lot to share about food-smart living with our own young-adult children and other people and their children, too. Together, we wrote The Anti-Cookbook: Easy, Thrifty Recipes for Food-Smart Living.
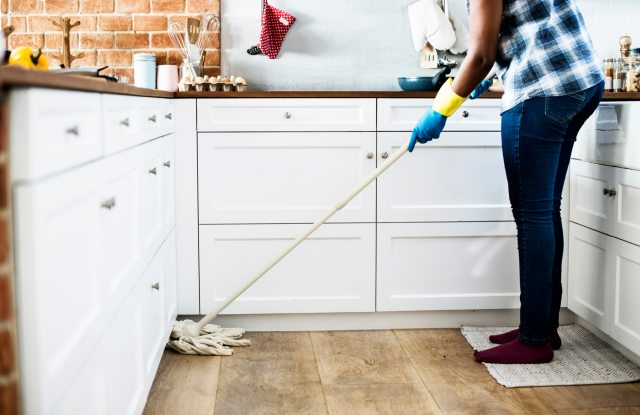
It might be time to rethink your house cleaning strategy. After all, there’s nothing worse than being in the mood to power clean—ready to put those Marie Kondo tips to good use—and realizing you’ve been committing cleaning mistakes that are actually leaving your home dirtier than before. Guilty as charged (we’ve all done it)? Don’t worry, because you’ll also find the best solutions to these cleaning faux pas below!
Solution: Allow chicken to thaw in the refrigerator for up to two days before cooking instead. You should never thaw chicken on the counter at room temperature or in the sink as bacteria will begin to grow when the meat reaches 40 to 140 degrees Fahrenheit.
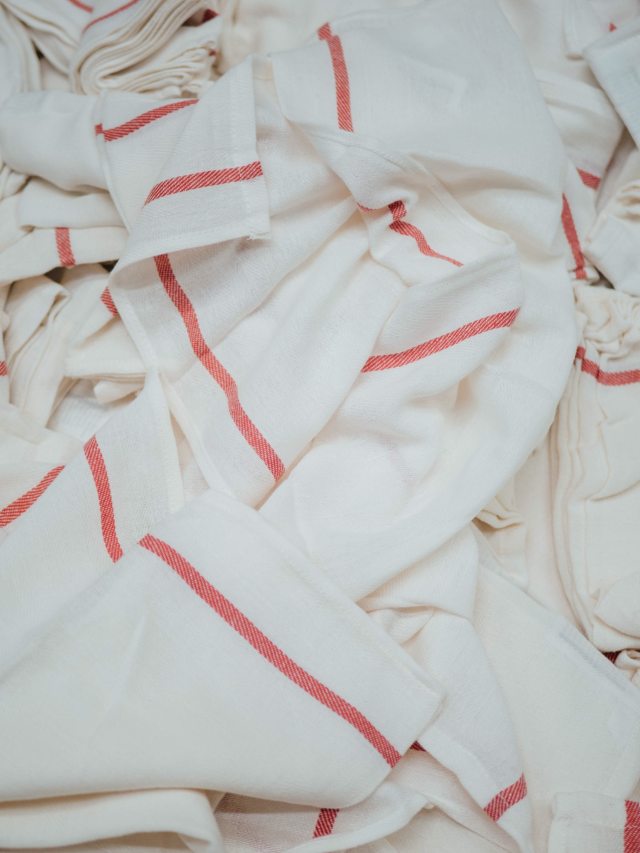
Solution: Use a new paper towel each time you clean a surface or your hands. If you’re on a more eco-friendly cleaning spree, consider designating a towel for each task. For instance, a hand-drying towel, a dish-drying towel, a cleaning towel used to wipe down counters.
Solution: When you notice that your vacuum receptacle is full of dust and dirt, empty it! You don’t want to risk the particles blowing back into your home or onto your floors. You’ll also want to remember to change or clean the filter as suggested to ensure your vacuum can still pick up dirt like it should.
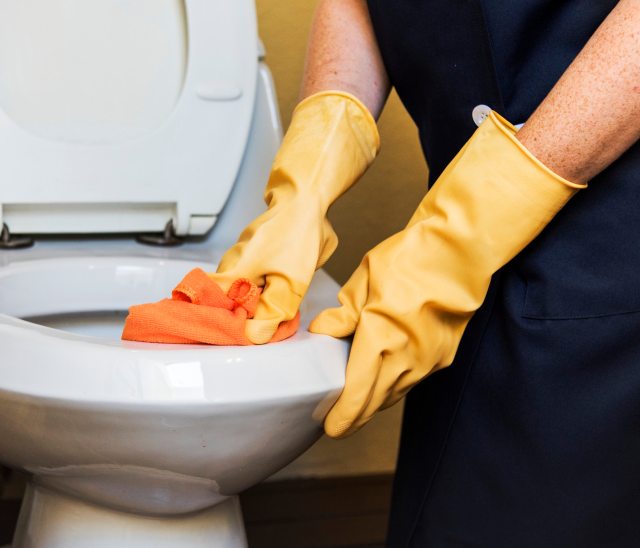
Cleaning Mistake: Putting your wet toilet brush back into its holder
Solution: Many of us are guilty of this bathroom cleaning faux pas! You scrub the toilet and then place the brush back into its holder while it’s still wet. Oops! Without letting the brush dry completely before storing it, you allow for germs to stick to the holder and brush where they can then multiply.
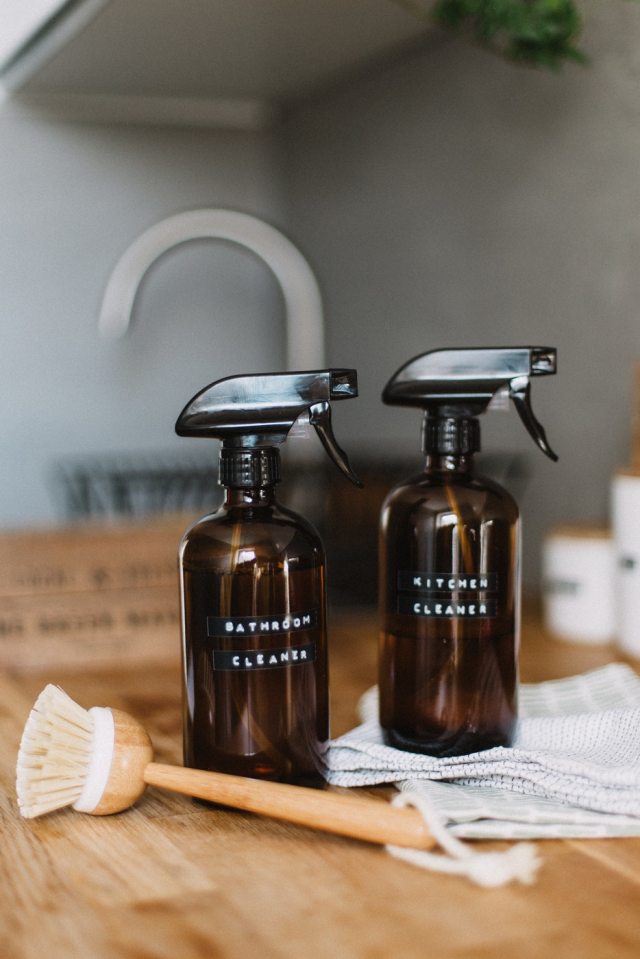
Cleaning Mistake: Spraying cleaner directly onto a surface
Solution: Spray onto a cleaning cloth before wiping down surfaces. Not only will your cleaner last longer this way, but you will avoid leaving any residue behind that comes with a build-up of cleaning product.
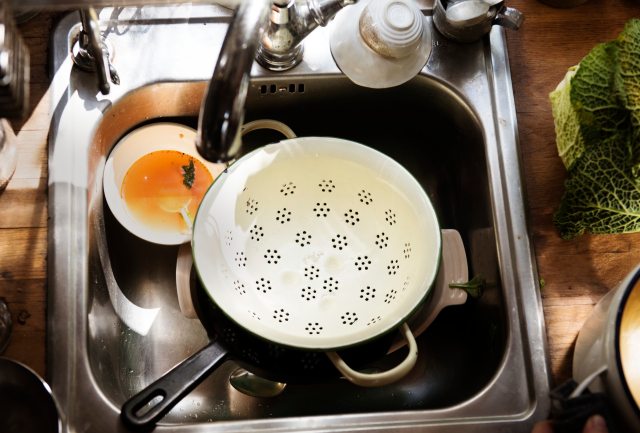
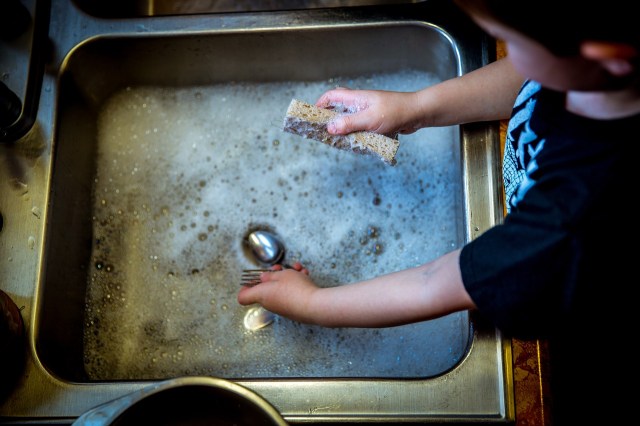
Solution: Think about it—you wash food particles off your dishes in the sink, but not every last bit makes it down the drain. Your sink is a moisture haven where food particles can easily stick, leading to germ and bacteria growth. So don’t call it a day yet, just remember to wipe out the sink after you’re finished!
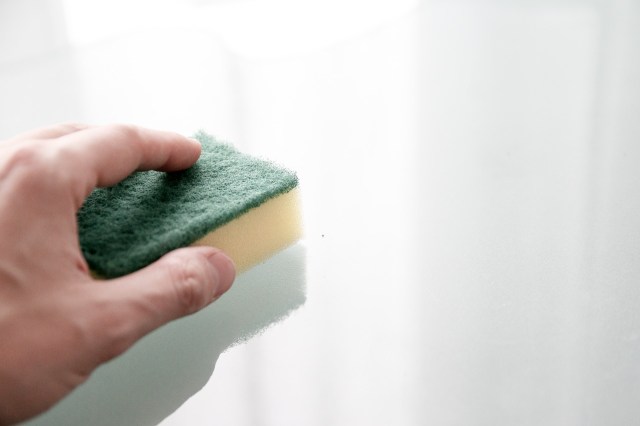
Cleaning Mistake: Thinking rinsed sponges are clean
Solution: Sponges can hold oodles of germs and bacteria and rinsing them is simply not enough. Even cleaning a dirty sponge can give bacteria a boost, according to a recent study! It is recommended that you use a new sponge every week, but since that isn't always practical, consider running your sponge through the washing machine and then transferring it to another place in the house. Or instead of a using a sponge at all, switch to a dishcloth that can be washed.
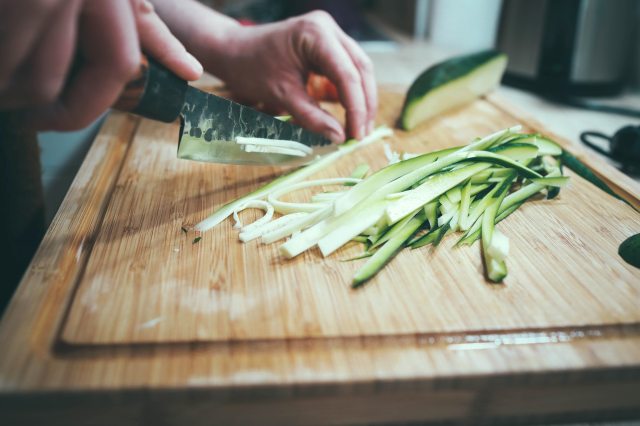
Cleaning Mistake: Washing cutting boards with dish soap
Solution: Did you know that the cuts and grooves made in cutting boards can hold food particles? If not cleaned properly, they can become a cozy home for bacteria! Instead of using dish soap, which will only clean superficial residue from the board, soak them in hydrogen peroxide before rinsing and drying.
Cleaning Mistake: Vacuuming pet fur without a wand
Solution: If your vacuum has a pet hair attachment, don’t be afraid to use it! Regular vacuuming will blow as much pet hair as it collects which will only make more work for you. If your vacuum has an attachment, this can be just as efficient to eliminate rogue hair and fur balls.
Solution: Get yourself into the habit of rinsing food out of pots and pans right after you use them—or at least after you’re finished eating. If you leave them to sit with food inside, it will only make it harder to remove the remnants later. Soak dishes in warm, soapy water for easier dish-doing!
Cleaning Mistake: Putting dryer sheets in your HVAC vent
Solution: It may seem like a fresh scent would happily disperse throughout your house when dryer sheets are in your HVAC vents, but instead of clean aromas, you'll end up spreading chemicals. You're better off lighting your favorite clean-smelling candle or diffusing an essential oil to give your home's scent a refresh.
Cleaning Mistake: Using wood polish on your furniture
Solution:Unless you're cleaning antique furniture without a finish, wood polish could actually make that coffee table more dull in appearance. There are dozens of non-polish formulas you can mix up right in your kitchen—with magic ingredients like vinegar and lemon oil—to clean effectively without ruining the finish.
Using colors inspired by your little ones favorite PAW Patrol character on Nickelodeon, and a few other materials, you can work together to craft a PAW Patrol inspired letter! Tune in Weekdays on Nickelodeon for more PAW Patrol.
Required Supplies
Wood Letter (We chose “T” for Tracker!)
Acrylic Paints and Paint Tray
Foam Sheets (various colors)
Paint or Foam Brush
Scissors
Pencil
Ruler
Hot Glue Gun
Steps
Gather the required supplies to have handy.
Start by using your pencil and ruler to divide the letter into three sections.
Choose three paint colors and paint each section one color.
While the paint is drying, cut out a PAW Patrol inspired badge from the foam.
Glue the badge pieces together and once the paint is dry, hot glue into place.
Last but not least, cut out a few puppy patterns from the foam and hot glue onto the letter.
Oh hello, free grocery delivery from Walmart! But you’ll need to act fast. This promo only lasts until the end of January. And we’ve got the scoop on how you can stay home, order online and get your groceries delivered without an added cost.
With winter in full-force, do you really want to snowsuit-up the kiddos, pack them into the car, drive through the ice and snow to the nearest grocery store, wrestle the snowsuit-clad kids out of the car, trudge through a slushy parking lot, spend 15 minutes meticulously drying off the card so that your toddler doesn’t freak when they accidentally touch one drop of water, spend an hour shopping, re-snowsuit the kids and drive back home? With Walmart’s delivery service you don’t have to worry about any of this.
So how can you get your foodie finds delivered for free? First, order your groceries. Just visit walmart.com/grocery or use the Walmart Grocery mobile app. Enter your zip and start shopping! After placing your order pick a time for delivery—you’ll need to choose a one-hour window. Next…well, sit back and wait for your food.
To get free delivery enter the code HOMEFREE at checkout. And that’s it! Walmart will waive the delivery fee on all orders through the end of January 2019.
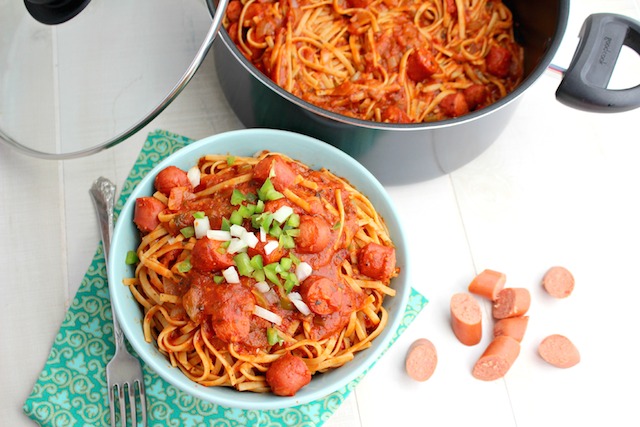
Get ready to be blow away. This recipe is the brainchild of Ramona at Kitchen Simmer, and it combines two of your kids’ favorite foods: spaghetti and hot dogs. Yes, really. Add in veggies like onions and bell peppers and the result is a delicious hearty meal that requires only one pot. Hooray for one-pot, easy clean-up meals!
Ingredients:
1 packet of hot dogs (I used good quality all beef hot dogs with no nitrates)
1 medium onion chopped (save some for garnish)
1 green bell pepper chopped (save some for garnish)
1 large jar of prepared spaghetti sauce
2 cloves garlic grated
1 tsp dried basil
1 tsp dried oregano
1 tsp sugar- if needed
red chili flakes to taste
salt and black pepper to taste
2Tbs canola oil
Garnish: Diced bell pepper, onions, Parmesan cheese
Method:
1. Cook pasta in well-salted water according to package directions. Drain and set aside in a colander. In the same pot, you cooked the spaghetti, heat 2 Tbs canola oil and saute onions and bell pepper with a little salt over medium heat.
2. When onions begin to soften add garlic, black pepper, dried oregano, dried basil and red chili flakes. Saute for another 2 minutes. Next, add the cut up hot dogs and saute for 2 minutes.
3. Next add jar pasta sauce, sugar (if needed) and adjust salt. Simmer with lid on for 15-20 minutes on medium-low heat. Finally, add cooked pasta and toss well in the sauce for 2-3 minutes. Garnish with onions and peppers. Enjoy.
Sure, you go there for the dried coconut snacks, organic wild arugula, rustic multi-grain bread and three-layer hummus. But now your fave grocery retailer has something that’s even better than their frozen orange chicken (but really, is anything better than that?). Yep, Trader Joe’s podcast is pure awesomeness. And here’s what you need to know about it.
The new podcast, Inside Trader Joe’s, takes listeners inside of the super-popular chain. With more than 41,000 crew members spread across 475 stores, Trader Joe’s is a well-loved part of the grocery community. Now we’re all getting a chance to pull back the curtain and get a peek inside what really goes on.
The five-episode podcast includes episodes that focus on the products, their values and their brand—all with info straight from the Captains (those are the store managers) and Crew. So what specifically will you hear in these fab little podcast episodes? Well, to start with answers to some of the questions that you’ve probably always had. Um, like those two bells ringing? If you’ve ever stood in line and thought, “What in the heck are those and do they mean that someone just won a TJ’s prize that I don’t know about?” The answer, according to episode one, is that someone has a question in need of answering. Hmm. Good to know.
Oh, and this isn’t a five-episode long commercial about just how crazy-cool TJ’s is. Nope. They even talk about their misses. Notably, their cream of venison soup and cottonseed butter (instead of peanut butter). Whoa!
For a meal that feels fancy without hours of prep work, you’ve got to try this genius recipe from Queen of My Kitchen. Mozzarella, tomato and basil is a winning combination, and with the help of your crock pot, it couldn’t be easier to get this dish on the table.
Ingredients 3 boneless, skinless chicken breasts, 2 lbs. total 1 8.5-ounce jar of olive oil packed sun-dried tomatoes (halves or julienne cut) 4 mozzarella sticks (also known as string cheese) 1 ounce fresh basil 1 14-ounce can of quartered artichoke hearts, drained 1 lemon, cut into wedges ½ cup shaved Parmesan or Asiago cheese
Method 1. Using a fillet knife carefully slice each chicken breast through the middle to make 6 thin cutlets. Place them in a shallow casserole dish and empty the entire jar of sun-dried tomatoes on top. Let the chicken marinate for at least 2-3 hours, preferably overnight.
2. Lay the cutlets flat (reserve the marinade) and place 2-3 basil leaves on top of each. Place a mozzarella stick (trim them to fit) in the middle of each cutlet and, starting at the thicker end, roll it up and secure with a toothpick.
3. Place the cutlets in a slow cooker and pour all of the sun-dried tomatoes, with the olive oil marinade, on top. Follow with the artichoke hearts.
4. Cook on high for 1½ to 2 hours or on low for 3 to 3½ hours.
5. Transfer to a serving dish and remove the toothpicks. Garnish with the remaining basil (chop if desired) and lemon wedges. Serve with Parmesan or Asiago cheese.
This recipe and photo come courtesy of Mona at Queen of My Kitchen. Be sure to visit her site, where you’ll find more family-friendly recipes that are as delicious as they are healthy.
What’s the key to flying with happy toddlers? Snacks. Lots and lots of snacks. The ideal treats not only fill up our kids’ bellies, they are easy to pack, don’t require refrigeration, aren’t super messy, and take some time to eat, so they double as an airplane activity. Read on for our favorite airplane snacks for toddlers, plus tips on how to pack, serve and even play with your food.
Snack tips: Show your toddler how to make shapes with the string cheese pieces. Put olives on their fingers and count them. Almond butter packets are a great partner for the pretzels they often serve on flights. Or, pack apple slices or a banana to eat with the almond butter for a filling snack.
Snack tips: Ask your toddler to find different letters in the alphabet cereal. Pack an assortment of sweet treats in a small tackle box and use the compartments to sort colors and shapes of different foods.
Snack tips: Freeze yogurt tubes at home so they’ll stay cool longer. Have your toddler eat that first so you don’t have to worry about refrigeration—they’re also likely to enjoy the ice creamy texture of a chilled tube. Lollipops at takeoff and landing are a fun tradition with a practical purpose: Swallowing will prevent any ear discomfort.
More Snack Tips
1. Concerned about liquids? TSA will allow you to bring food such as purees through the security checkpoint as long as they are for your child. They are considered “baby food” and are permitted as long as your take them out of your bag for screening.
2. Pack some sandwich baggies with paper towels. The towels can pick up spills, and the baggies make it easier to collect garbage to hand to the flight attendant.
3. Don’t forget to save snacks for the return trip home! Pack a separate resealable bag with snacks for the return trip so you make sure you’re stocked and ready to rock this traveling with toddlers thing.
What are your favorite airplane snacks for toddlers? Let us know in the comments.
There is nothing in the world like the smell of a newborn baby, especially when it’s your own (and your first!). Basking in the glory of your new bundle of love never gets old and as the days turn into weeks and those weeks turn into months before you know it, you have to get ready to go back to work.
As a breastfeeding mom who also works full time, I’ve needed to figure out how I can still give my little one my milk, all while still being able to maintain a successful career.
Since bottle feeding is my only choice when it comes to feeding my child while working, I didn’t want to use a bottle that would lead to nipple confusion. I still want my baby to latch and continue feeding at the breast when possible.
Finding bottles that wouldn’t result in nipple confusion is a trial and error experience. I’ve tried so many bottles from AVENT and Dr. Brown’s to Evenflo and Tommee Tippee.
Either my little one won’t take the bottle or she mimics bottle feeding on the breast, which is somewhat unpleasant. The nipples on the bottles I’ve tried are either too short, too thick, too thin or provides so much flow that my baby can overeat.
Enter nanobébé. Not only do these bottles mimic the breast, but are the first on the market to preserve the nutrients found in breastmilk, so you know your little one is still getting everything he or she needs. It’s nice to know that I can warm up stored breastmilk and not lose any of the antibodies and nutrients. (You can learn more about nanobébé here.)
Bottles Made for Pumping Moms Like Me
nanobébé
Like I said before, the shape of this bottle makes transitioning from breast to bottle and back super easy for my little one. There is little to no nipple confusion as the shape of the bottle mimics the breast.
What I also love about these bottles is that there is an attachment so you can pump directly into the bottle. Gone are the days of having to pump in separate bottles and then pour out the appropriate amount. It’s a one-stop-shop with these bottles.
Nanobébé also offers breastmilk storage bags and a little storage bin to go along with it, so keeping accurate amounts of breastmilk to then transfer to a bottle makes things easy when you’re working or on-the-go. This has been especially convenient when I’m having to have someone watch my little girl while I attend meetings or on a conference call.
Fast Warming
nanobébé
I’ve noticed the nanobébé bottles warm up so fast! It’s super convenient, especially when my baby is crying at night and I can’t feed her fast enough. With the way these bottles are shaped, overheating is prevented, making sure all the nutrients are maintained.
Before using these bottles, I had no idea that when you warm up breastmilk in other bottles it depletes it of its nutrients! New mom brain, for sure on that one.
Quick Cooling
nanobébé
According to nanobébé, “The FDA states that bacteria in fresh breastmilk doubles every 20 minutes that it does not reach storing temperature (fridge or freeze). nanobébé’s unique surface area is geometrically designed to spread the breastmilk into a thin layer allowing it to cool twice as fast as standard bottles on the market, which prevents bacterial growth.”
Easy-Peezy Cleaning
Leigh Weinberg
You’d think that with constantly going back and forth between bottles and breastfeeding that the cleaning and sterilizing of the bottles would be a pain. I have found that the nanobébé bottles are actually really easy to clean. They come apart smoothly (and not many parts to them, thank goodness!) and fit easily on any drying rack.
I do have to say that the nanobébé Slim Drying Rack makes things even ten times easier since the bottles fit the rack like a glove. Perk: you can store it anywhere when not in use as it’s so skinny! Keeps my kitchen organized, for sure. They can also easily stack in your refrigerator or, when not in use, in your cabinet.
My Husband Loves It, Too!
nanobébé
When my husband is home and I need to get some work done, all he has to do is take one of the breastmilk storage bags out and put it in a bottle, heat it up and voila! Our baby will have her meal.
If you’re like me and have already transitioned back into work after having a baby and are looking for bottles to make your life easier when you have to catch a meeting or a conference call, don’t overlook the nanobébé bottles.
Or, if you know a new mom that would greatly benefit from these bottles (and other products), nanobébé has a whole starter kit just for newborns. I know I'll be heading to Babies"R"Us or buybuy BABY to grab some more of these to keep a constant ready-to-go stash for my little nugget!
Head to nanobébé to purchase a Newborn Starter Set or a Starter Set and receive 20% off + free shipping when you use code RedTri20 at checkout!
Leigh is a first-time millennial mama to a beautiful baby girl. She is the founder and writer of Made To Mommy, a blog documenting her pregnancy and new mom finds that also provides tips and tricks to her followers, and an Advertising Manager.
Dig into some classic comfort food to warm up this winter. This meatloaf recipe from Amanda of Saporito Kitchen is sure to be an instant hit with your family, and it’s pretty easy to whip up with herbs and spices you already have in your pantry. Amanda recommends using a mix of ground pork and beef, but you can also use all beef if you prefer.
Method 1. Preheat oven to 350 degrees and line a baking sheet with parchment paper or foil.
2. Place the slice of bread in a small bowl and pour the milk over the top of it. Set aside.
3. In a large bowl, combine the remaining ingredients. Add in milk soaked bread and mix together with hands until ingredients are incorporated.
4. Turn mixture out onto prepared baking sheet and shape into loaf form.
5. Bake meatloaf at 350 degrees for 40 minutes.
6. Take meatloaf out of the oven and top with marinara. Bake for another 10 minutes or until the internal temperature reaches 155 degrees.
7. Remove meatloaf from the oven and let rest for 10 minutes before serving.
Share this recipe with your friends and then let us know your favorite winter comfort food recipe in the comments below!
Find more of Amanda’s awesome recipes on her website, Saporito Kitchen. As a graduate of the Le Cordon Bleu program at Scottsdale Culinary Institute, this foodie knows her stuff!