This easy, make-at-home playdough requires just four ingredients and no equipment or cooking, making it fun for kids of all ages, including toddlers. The salty dough deters eating and you can choose any kind of dye, or no dye at all. We like to use gel food coloring because a little goes a long way. Here’s how to make your own in just a few steps.This recipe makes roughly the equivalent of two standard size containers of commercial playdough. Because of the simple quantities it’s very easy to double or even triple the recipe. 

You will need:

1/2 cup of salt

1/2 cup of water

1 cup of flour (for mixing in the dough) plus 1/2 cup more for sprinkling/kneading

Food coloring (optional)
Measure your ingredients and add them all, except the food coloring, to a large mixing bowl. Mix them with a spoon or spatula until they start to stick together.
If you are making more than one color, divide the dough up into equal parts (depending on how many colors you wish to make). Add the food coloring to the dough. And mix it in a bit with a spoon, just enough to work give it a swirly appearance.

Sprinkle flour onto a dry surface and turn the dough out of the bowl. Knead. Push, pull, punch, knead! This is one of the funnest parts for kids and you can’t over knead it. The kneading is what ultimately distributes the color and you can use the color as an indication that it’s been kneaded enough.

The dough probably won’t have the exact consistency of the store-bought variety, but it gets pretty close. You want to keep adding flour in small pinches and working it in until the dough isn’t sticky but is still pliable. Your dough is ready for playing!Now, they will be super-occupied while you clean up the flour that’s all over the floor. Hand them a bread knife, a few cookie cutters and a garlic press and relax (or do the dishes). Store your playdough in sealable plastic bags. If it gets dried out, sprinkle a bit of water on it and knead it before playing. (And if it feels too sticky, add flour.)

Have you made your own playdough? Let us know if the comments below!

—photos and text by Amber Guetebier


A reliable standby for indoor fun just got a multi-million dollar makeover, just in time for winter. Bowlmor Lanes’ Times Square location on 44th Street is truly in the center of the tourist area’s action, and its brand spanking new interior takes visitors on a technicolor tour of NYC both past and present. We guarantee you’ve never bowled like this before!

photo: Bowlmor Times Square

Signs of the Times
Step into the newly-renovated Bowlmor in the heart of Times Square and you’re entering a fun zone that celebrates New York City. From the minute you check in, you’re reminded that the space used to house the New York Times (clocks set in different time zones hang above endless pairs off bowling shoes) and there’s a door marked ‘editor’ with the name of Bowlmor’s founder.

photo: Bowlmor Times Square

Welcome to New Yorks!
But those details are incredibly subtle compared to the rest of the place.  The renovation, completed earlier this month, transformed the 90,000-square-foot space into one that now offers seven themed lanes. Bowlers play in environments that  represent different parts of Gotham, including Central Park, Chinatown, Coney Island and Times Square.

(The multi-floored alley also features a cool, but obviously less kid-friendly NYC speakeasy lane, as well as one in an Art Deco style for those interested in some period bowling.) Whichever lane you end up in, expect to be surrounded by NYC icons and cool and colorful works of art, including murals by artist Jonas Never in the Coney Island section.

Altogether, the new Bowlmor offers 48 lanes enhanced by HD video walls and blacklights, as well as deluxe laneside seating.

photo: via Bowlmor Times Square Facebook page 

Game On!
Kids will also go gaga for the revamped arcade, filled with tons of video games and more active diversions like air hockey.

photo: Bowlmor Times Square

Party Hard at Bowlmor
Bowlmor is ready, willing and able to host your child’s birthday bash. (They’d love to host yours, too.)

Parties for kids’ birthdays start at $22.99 for the basic package, which includes 1.5 hours of unlimited bowling, shoe rental, juice and/or soda, plus a $5 arcade card for each child.

More deluxe packages include your choice of food options, ranging from a two-foot Coney Island hot dog covered in mustard, Coney sauce and diced onions, to gigantic soft-pretzels served with mustard and queso to Sprinkled Ice Cream Sandies — basically the best chipwich you’ve ever tasted — and something called a pizza cupcake, a big crowd-pleaser.

Still more add-ons include a bowling pin for kids to sign and chocolate chip cookie cake.

Bowlmor
222 West 44th St.
Times Square
212-680-0012
Online: Bowlmor.com

Have you visited the new Bowlmor yet? Let us know in the comments!

— Lambeth Hochwald

Our moms marked our first birthdays with supermarket sheet cakes loaded with frosting that made us bounce for days. Now you can bump it up a notch — but keep the sweet buzz — with smash cakes. These mini cakes are meant for tots to smash with their bare hands, caveman style, and eat until they’re good and messy. Click through our slideshow and get inspired.

Hot pink sprinkled cake
Our friend Kim from Lovin' From the Oven perfected the hot pink sprinkled mini-cake. We think the sprinkles add such a fun and festive flair to this creation. Kim's secret to making a flawless homemade cake is to place the baked cakes in the freezer before cutting, after cutting and after putting the first layer of frosting on. This helps the cake keep its shape and prevents crumbling. Plus, if you make a mistake simply lather that frosting on, which will cover up any blemishes.

“Like” this story if you created a smash cake for your kiddo’s first birthday and then tell us below which cake in our slideshow is your favorite. 

— Erin Lem

Click HERE for the latest in products, trends, and all things baby related.

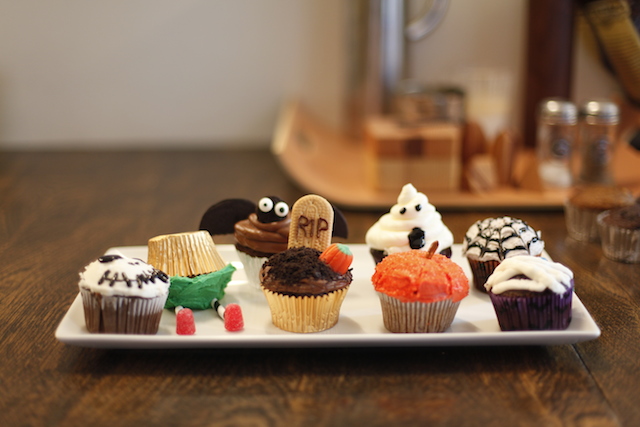
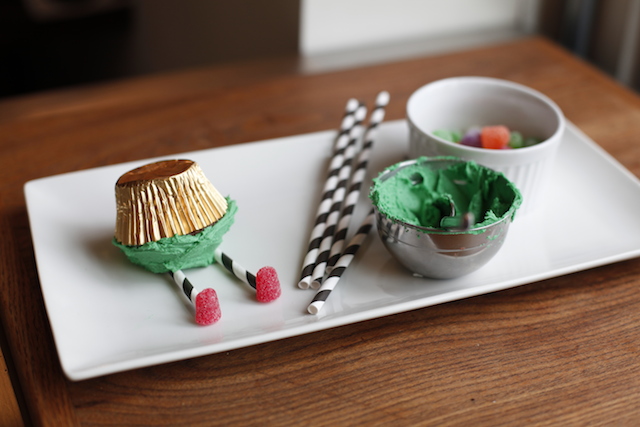
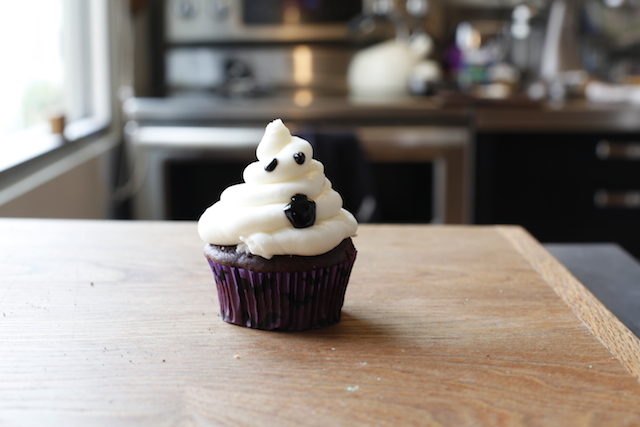
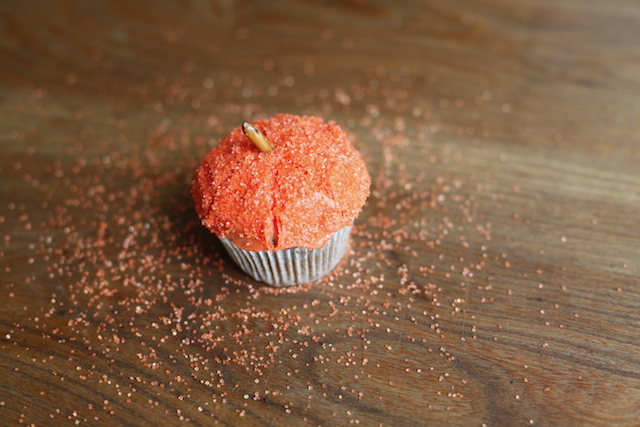
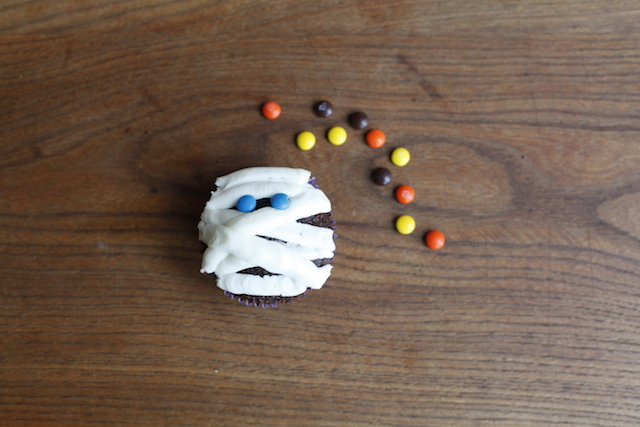
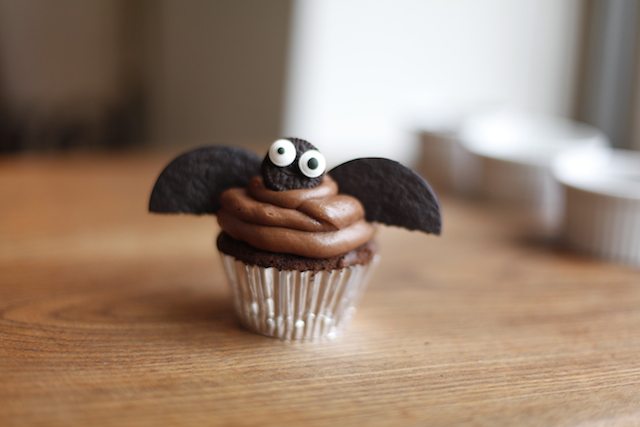
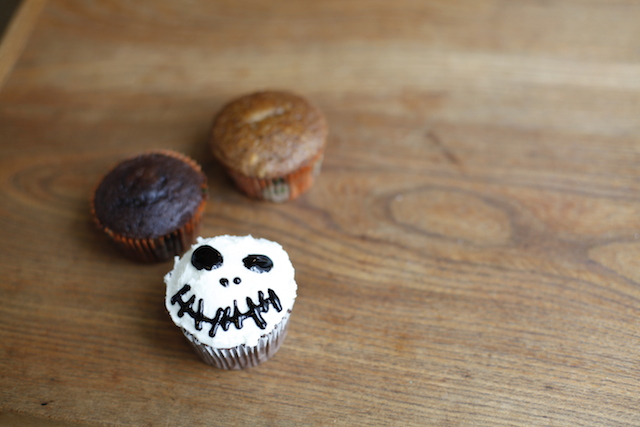
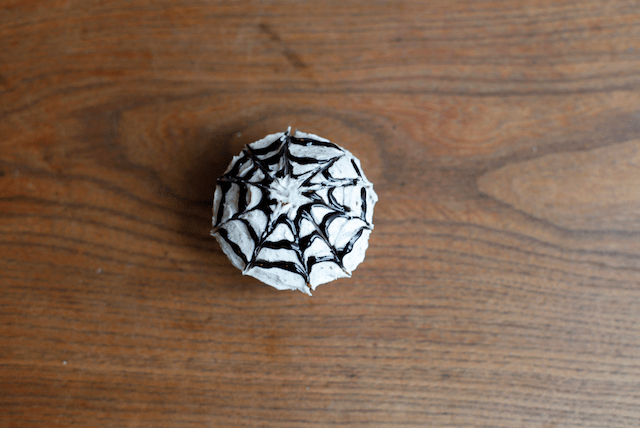
Witches and ghosts and things that go bump in the night? If you have a taste for all things Halloween, you’ll eat up these cupcake ideas. We put together some creative (and deceptively easy!) designs that are inspired by the spooky season.

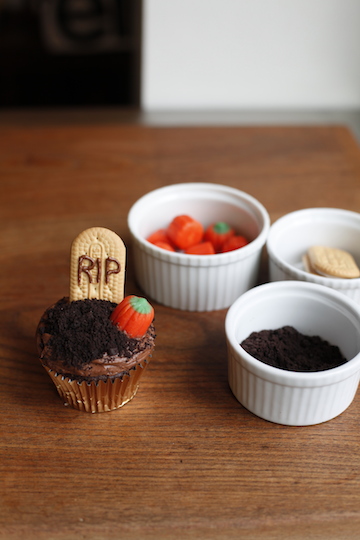
Ghoulish Graveyard

What you'll need: crumbled chocolate wafers, pumpkin shaped candy corn, vanilla wafers and chocolate frosting.

What to do: After covering her chocolate cupcake with chocolate frosting, Erin crushed chocolate wafers and sprinkled them over the frosting as "dirt." She set a pumpkin shaped candy corn on top and wrote "RIP" on the vanilla wafer before planting it in the "graveyard."

Which cupcake is your favorite? Let us know in the Comments!

— copy by Erin Lem; photos by Christal Yuen; cupcakes decorated by Erin Feher and Christal Yuen

After several long years of renovations, Clifton’s Cafeteria in downtown LA is finally open again and it’s easy to see why Walt Disney was once a regular patron; the entire place feels like it’s been sprinkled with a handful of Tinkerbell’s pixie dust. Kids love eating lunch inside what feels like a magical museum. Bring your appetites for exploration alongside the mac n’ cheese and be sure to check out the “Cabinet of Curiosities” (among many, many other amazing things).

Lions and Bears and Buffalo, Oh My!
For the uninitiated, Clifton’s is a cafeteria-style restaurant, but really it’s so much more. In addition to the cafeteria, the four-story building also features a bakery, two bars and a soon-to-open sit down restaurant. The real attraction is the place itself, which is decked out from floor to ceiling in a woodlands forest theme.

Your little explorers will feel very much like they’ve stepped into line for a Disneyland ride as you discover all the nooks and crannies, filled with everything from taxidermy buffaloes to dioramas hidden inside princess castles. Towering at the center of it all is a giant replica of a redwood tree that stretches to the top floor ceiling. Make a game of it as you explore, trying to see just how many different animals and hidden things you can find on each level. (Hint: When you’re waiting in line for the cafeteria, send your tots crawling into the tiny cave.)

Before you head up to the top floors, stop at the bottom of the stone waterfall and let your kiddos toss in a penny to make a wish. Speaking of pennies, don’t forget to look down when you step into the third floor restroom and check out the hundreds of copper pennies and Indian head nickels glued to the floor. Last, but certainly not least, no visit would be complete without a selfie next to the lion that watches over the dining room. Keep your eyes peeled, there are so many treasures to be discovered everywhere you look.

Good Eats
Between the hot dogs and mac n’ cheese, the cafeteria menu couldn’t possibly be more kid-friendly, but there’s plenty of delicious grown-up options too, from soups and salads to artisanal pizzas. The carvery station, serving up a daily Thanksgiving dinner of turkey with all the trimmings, is sure to please just about anyone, young and old. With your tray crammed don’t forget to save a spot for dessert. Your kids (and the kid in you) will giggle over the wiggly bowls of colorful jello, but the real winner is the rainbow sprinkled slices of birthday cake.

Carry your stacked trays up to the third floor dining area where there’s much more light and room to breathe for wiggly little ones. Plus you get to eat your meal next to a lion, that definitely doesn’t happen every day. Your little ones will be so busy pointing out new discoveries it may take them a while to finish their meals. Make the most of a lengthy lunch and order yourself a round of grown-up drinks at the Gothic bar across the hall. With a full top shelf bar, the talented mixologists will whip you up the tastiest midday cocktail you’ve ever had at a cafeteria.

The Low Down
We suggest visiting mid-week or waiting a week or two to pay a visit when the opening crowds die down. The current lunch-time line down the block moves pretty fast, but it can be a bit much for antsy little ones. Avoid bringing your stroller, as the place is filled with steep staircases and the elevator is hard to access.

There are two bathrooms, one in the basement that feels a little like a haunted mansion, complete with flickering lights. If your tots scare easily, avoid that one and head to the one on the third floor.

The closest parking lot is the St. Vincent Jewelry Center parking structure across the street at 639 S. Broadway. Prices vary, but weekends it’s a flat rate of $8 per day.

As long as you’re already downtown, make a day of it and visit another amazing newbie in the neighborhood: The Broad Museum.

Clifton’s
648 S. Broadway
Downtown
213-627-1673
Online: cliftonsla.com

Were you one of the first visitors at the new Clifton’s? Share your favorite thing about this enchanting place in the comments!

—written and photos by Shahrzad Warkentin

Sure, it’s Decorate a Cake Day, but if you’re looking to avoid that sugar-rush to the head use sprinkles to try decorating something else today. Scroll down for crafts, party decor and keepsakes you can make using cake’s favorite decoration, and then share your sprinkle-filled creations on Instagram or Facebook by tagging #RedTricycle.

1. Picture Perfect
Make your photos picture perfect with a sprinkle-covered frame. The tutorial by Kojo Designs is oh-so-easy. Click here for the full how-to.

photo: Kojo Designs

2. Party Hardy
Today is a perfect excuse to make a party hat. Jacks & Kate has the low down on the easiest sprinkled party hat–it’s totally tops. Click here for the tutorial.

photo: Jacks & Kate 

3. Sprinkle Silhouette
Instead of drawing your silhouette, fill it in with sprinkles. The blog, A Joyful Riot has the scoop on this fun activity that requires only four supplies!

photo: A Joyful Riot

4. Clip One On
Bling out their hair clip with sprinkles. Kojo Designs came up with this fun craft that’ll leave their ‘do looking fab. Find out the full how-to here.

photo: Kojo Designs

5. Light It Up
Give your votive candles a boost of color with this idea from Tikkido. Let your kids help place the sprinkles in the votive holder, but be sure to watch them around any open flames. Get the tutorial here.

photo: Tikkido

6. It’s Never Too Early for Ornaments
Whether you want to gear up for the holidays or just love to decorate, make these super easy sprinkle ornaments (we’ve actually done something similar ourselves and swear by it’s simplicity). For the full how-to from Gimme Some Oven click here.

photo: Gimme Some Oven

How will you decorate and play with sprinkles today? Share what you make by tagging #RedTricycle on Facebook and Instagram.

— Erin Lem

This year marks 150 big ones for the children’s classic, Alice’s Adventures in Wonderland, and The Morgan Library is celebrating with a beautiful exhibit worthy of the hoopla. See Lewis Carroll’s pocket watch and microscope, take a selfie with an Alice illustration, and then marvel at the original manuscript he presented to his muse Alice Liddell, the same manuscript that hasn’t left the shores of England for 30 years — and isn’t likely to do so again any time soon. If you’ve got an Alice addict, this is the show for you!

Big story, Small Space

This exhibit, while incredible in its scope, is diminutive: a single room painted canary yellow serves as the setting for celebrating how one story told in a boat one summer afternoon to a trio of rapt daughters ignited the collective imagination of children for a century and a half. There are a few seats sprinkled around the room alongside baskets of various versions of the tale; perfect for passing some time with the wee ones.

But for sure, you’re likely to be just as engaged as the kids, as the exhibit does give ample and appropriate attention to the creative tensions that beset the collaboration between author Charles Lutwidge Dodson, a.k.a. Lewis Carrolll, and his fine illustrator, Sir  John Tenniel. (It’s the latter’s images of Alice and friends that became iconic.)

Especially for Kids

More interesting to kids will be Carroll’s original pocket watch — just like the one his beloved rabbit used — or a beautiful golden microscope that stirred his imagination. Kids can also enjoy comparing the original hand-written manuscript, the very one Dodgson presented to the Alice, with the printed version, which is perched directly adjacent. The original Alice’s purse, with her name in needlepoint, is also in the show.

To make the most of your visit, stop by on Sunday afternoons, when a weekly Alice storytime appropriate for kids ages three to six will take place from 3-4 p.m.

If you or the kids want to do a deep dive before or after visiting the exhibit, check out the online version, which includes illustrations, photos and even a playlist of music inspired by the beloved (and trippy) tale. “White Rabbit” anyone?

Alice: 150 Years of Wonderland
The Morgan Library & Museum
Through October 11, 2015
Tickets: $18/adults; free/children 12 and under; $12/children 13-16; Free/Fridays, 7-9 p.m.
225 Madison Ave. at 36th St.
Midtown
212-685-0008
Online: themorgan.org

Will you heading to The Morgan to see the original “Alice”? Tell us in the comments below!

—Rachel Aydt


The below is a guest post from Yummy Supper written by Erin Scott.

Years ago, my French uncle, Jean Louis, turned us on to the delectable hanger steak, and we’ve been buying these beauties ever since. Hanger steak, sometimes called onglet, is a lesser known cut of beef, but butchers have long been hip to its great flavor and lovely marbling. It’s no surprise that you’ll sometimes find hanger steak referred to as “butcher’s steak.” A quick stint on the grill and a rub of brightly flavored gremolata make this steak an easy and flavorful weeknight dinner option.

Tip: If you can’t get hanger steak from your local butcher, a juicy rib eye is delicious grilled and topped with gremolata.

Serves 4

Ingredients
1-11/4 pounds hanger steak
Salt
1/4 cup chopped fresh flat-leaf parsley
1 tablespoon finely chopped lemon zest
2 cloves garlic, minced
Olive oil, as needed
Freshly ground black pepper

Method
1. Remove the steak from the fridge 45 minutes before cooking. Season the meat generously with salt and let it come to room temp.

2. In a small bowl, toss together the parsley, lemon zest, garlic, 1 teaspoon olive oil, and a pinch of salt. Give the ingredients a good stir, taste for seasoning, and you’ve got your gremolata ready to roll.

3. Prepare a grill for medium-high heat. Pat the steak dry and rub with olive oil. Grill for 5 to 7 minutes per side; you want hanger steak to be medium-rare, or it can get tough. Pull the steak off the grill and immediately season with another light sprinkling of salt and some freshly ground pepper.

4. Rub with the gremolata and let the steak rest for 10 to 15 minutes. Slice the steak thinly and against the grain.

“Like” this story if you’re loving this recipe as much as we are!

Reprinted from “Yummy Supper” by Erin Scott. Copyright (c) 2014 by Erin Scott. By permission of Rodale Books. Available wherever books are sold. Get the book for $15.80 at Amazon.com.

How many times have we heard our toddlers make insensible but sensible arguments like the kiddos in Tara Willmott’s video? Listen to these three-year-olds debate whether it’s raining or sprinkling with arguments like: “No your pretty and you’re not real … I’m real,” and “No, my mom said …” Stick to the end of the video to see how it all gets resolved. Psst — major points to the peace keeper in the middle!

video by Tara Willmott

What kind of infallible arguments have your budding debaters made? Share them in the Comments below!

— Christal Yuen