Walmart recently released its Top Rated by Kids toy list, and with 48 play-time picks, this list is packed with plenty of must-haves and mommy-I-want-its.

This year’s list features everything from famous friends (beloved characters) to gaming picks. Anne Marie Kehoe, vice president of toys at Walmart, said in a press statement, “Our customers count on us to have an unbelievable selection of top toys at incredible prices for every gifting occasion. And, that’s especially true during the holidays.” Kehoe added, “Our goal is to make it as easy as possible for parents to find the perfect toys for their children.”

So which toys made the list? The top toys in the “Famous Friends” category include:

  • 6V Plush Simba (Walmart exclusive)
  • Harry Potter Invisibility Cloak (Walmart exclusive gift box)
  • Paw Patrol Mighty Pups Super Paws Lookout Tower

When it comes to “Unboxing Toys,” the highest honors went to:

  • LOL Surprise 2-N-1 Glamper
  • Tic Tac Toy XOXO Friends Multipack
  • What’s In My Purse—Doll Purse (Walmart exclusive)

The “Outdoor Fun” category was dominated by:

  • 24V Real Tree UTV (Walmart exclusive)
  • Hover-1 Hoverboard and Kart Combo (Walmart exclusive)
  • Hover-1 Transport Scooter (Walmart exclusive)

The “Interactive Toy” winners were:

  • Build A Bear Workshop Stuffing Station Value Box (Walmart exclusive)
  • Juno The Baby Elephant
  • Nascar Crash Racers Track Set (Walmart exclusive)

Top toys in the “Aspirational Play” category include:

  • Barbie Dreamplane
  • Kindi Kids Doll
  • Scruff-A-Luv My Real Rescue (Walmart exclusive)

The “Gaming” category top toys include:

  • Cynosa Chroma Keyboard
  • HP Pavilion Gaming Laptop
  • Kraken Grn 2019

Click here for the full list of 48 toys!

—Erica Loop

Featured photo:


RELATED STORIES

The Disney Store Is Coming to Target

Icons Rosa Parks and Sally Ride Are Getting the Barbie Treatment

Panda Crate Is an Awesome New Subscription Service for Your Little Learner

Stuffing your face with delightful food is half the fun when you visit Walt Disney World, and now vegans and vegetarians won’t have to miss out on any of the magic. The Magic Kingdom has finally released a guide for plant-based cuisine in the park!

The pamphlet, called “Disney Plant-Based Cuisine,” is color coded and organized by each land in the park. Vegan options are noted with a leaf, so diners can find meals that are free of meat, eggs, honey and dairy.

In addition to identifying actual meals (which look pretty tasty even to a meat-eater), the guide also distinguishes which dining options offer breakfast, lunch and dinner, and whether it’s a quick service or table service restaurant. Get ready to enjoy the likes of cauliflower tacos, vegan brats and vegetarian bangers and mash!

Parkgoers can pick up the guide at any Guest Experience Team kiosk, Guest Relations locations at City Hall or the Liberty Square Ticket Office and at all table and quick service locations.

Here’s to hoping this guide arrives at every Disney Park soon!

––Karly Wood


RELATED STORIES

Everything We Know About Disney Parks’ Star Wars: Galaxy’s Edge & How to Get In

Disney’s New “Aladdin” Donut Will Take You to a Whole New World of Flavor

When Can You Make a Reservation for Disneyland’s Star Wars: Galaxy’s Edge?


Sometimes all a little one needs is something snuggly and soft, like an Abby Hatcher Fuzzly friend! Create your own Fuzzly inspired by Nickelodeon’s Bozzly. Tune in Weekdays on Nickelodeon for more Abby Hatcher.

Required Supplies

  • Colorful Sock
  • Stuffing
  • Hot Glue Gun
  • Mini Pom Poms
  • Felt Squares
  • Black Marker or Puff Paint

Steps

  1. Gather the required supplies to have handy.
  2. Fill the sock with stuffing and then fold back the ankle portion of the sock and attach with hot glue, enclosing the stuffing.
  3. Using felt and scissors, cut out ears, eyes, arms and legs. Hot glue into place.
  4. Choose pom poms to glue on for eyes and nose. Use a marker to draw on any other details!
  5. Use extra stuffing or felt to create a fun tail for your Fuzzly and attach with hot glue.
  6. Create any additional accessories out of felt for your Fuzzly and enjoy!

Image courtesy of Spin Master Entertainment

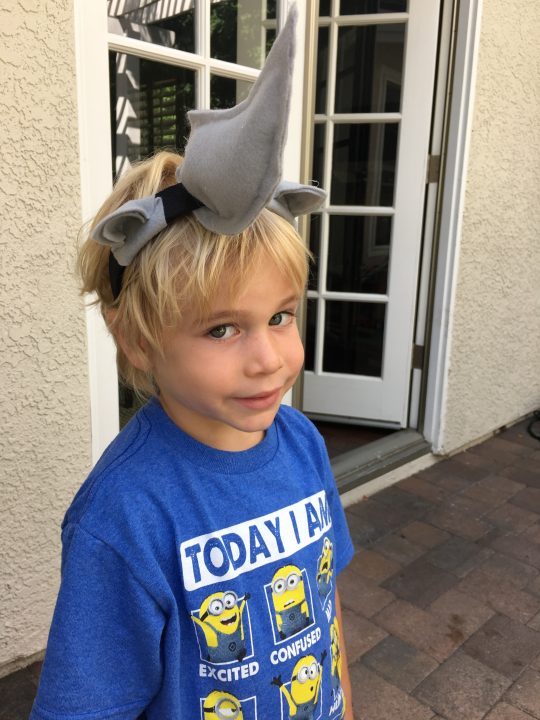
What’s a rhino without its horn? Considering the name itself stems from the Greek — “rhin,” meaning nose, and “ceros,” meaning horn, you can’t really impersonate a rhino properly without one. So get your little rhino-lover up and running with this DIY one-horned rhino headband.

rhino-horn-supplies

What you’ll need:

Grey felt (two sheets)

pen/pencil

headband

scissors

paper for tracing

glue gun

cotton balls (not pictured)

Step One:  Make stencils for the ears and horn
You can draw this freehand — or find some rh-inspiration here. Make sure the front and back of the ears are connected in the middle so you’ll be able to wrap them around your headband.

rhino-step2


Step Two: Cut out the pieces
Trace your stencils onto the felt and cut to create the shapes that will become your rhino horn and ears. (Note: Make two horn cut-outs; you’ll need to glue them together later.)

rhino-step3

Step Three: Glue and shape the ears
Wrap those adorable ears around your headband. Using (ideally) a hot glue gun, glue the front and back of the ears together (Note: It’s OK if the edges don’t line up perfectly.) Then, glue the outer bottom edges of the ears down so that the ears curl inward a bit.

rhino-step4
rhino-step5

Step Four: Now, for the horn
Using a hot glue gun, glue your two horn-shaped pieces of felt together, excluding the flat side. Be sure to apply the glue only to the inside edges; you’ll need to leave the middle empty so you’ll have space to stuff it. Once the glue is dry, cut a slit into the open side of the horn. This will be used to attach the horn to your headband.

rhino-step6

Step Five: Stuff it up
Use the top of a pen to push cotton balls into the horn until it’s filled up like a pillow (don’t worry about stuffing the bottom flap). Then, glue up the open side so that your “pillow” is sealed.

rhino-step7

Step Six: Attach your horn
Slide the headband into the slit of the horn, then use your hot glue gun to attach the bottom flap to both the underside of the headband and the upper part of the horn. If needed, dab glue all around the edges so the horn doesn’t slide around.

rhino-step9

You’re done! Put on your horn and do your best rhino-charge. Or, sit back and enjoy this thrilling video of the real thing.

rhino-kids

Got a better way to get in the rhino spirit? Share your ideas below! 

— all photos and copy by Melissa Heckscher


These 8-year-old twins are a few dollars richer after Angelina Jolie stopped to buy a giant teddy bear from them. Brothers Allen and Brandon were on the side of the road in Toluca Lake, CA trying to sell “Big Bear,” an 8 1/2 foot tall teddy bear originally from Costco. After an hour, they had no takers. Fortunately for them, Angelina Jolie and her daughter Shiloh just happened to be driving by. According to TMZ, Angelina doubled the twin’s asking price and handed each of the boys $50 before spending a hilarious few minutes stuffing the bear in the trunk of the car.

Allen and Brandon’s dad said the boys had no idea Angelina was a celebrity, until he filled them in later with a “Kung Fu Panda” reference.

All Photos:  TMZ

Have you ever had a celeb sighting? Tell us in the comments!

If you’re wanting a DIY costume for your little goblin this Halloween, but when it comes to using the sewing machine it feels like you have eight arms (none of which know how to use a said sewing machine) then we have the perfect, unbelievably easy costume for you. Turn your tike into a spectacular sea creature by following these simple instructions.

What You’ll Need

  1. A onsie. Long-sleeves, short sleeves—it doesn’t matter.
  2. 4 pairs of knee socks. We went to the dollar store and found these spotted beauties—it’s like they were made to be tentacles! (And the whole purchase set us back less than $4)
  3. 4 Safety pins.
  4. Extra fabric for stuffing. Light weight fabric is best. We used muslin swaddling blankets and a few scarves.

How to Do It

Stuff 4 of the socks with fabric or other stuffing. Use the safety pins to attach 4 tentacles to the onsie, 2 to the front, 2 to the back. Slip the remaining 4 socks over their arms and legs and, poof! Octopus! If you are handy with the needle and thread, feel free to sew the tentacles on for a more sturdy costume.

Do you have any ideas for super easy Halloween costumes? Tell us in the comments below! 

–Erin Feher

Thanksgiving kryptonite. Even if you don’t admit it you have it. Whether it’s the sweet potatoes that are never cooked through or the too-dry turkey, pulling together your Thanksgiving meal always poses its unique challenges. This year kick your problems to the curb. We scoured the Weelicious website, one of our favorite food blogs for parents, for sides, mains and desserts that you can make without a hitch (seriously). Read on for our recipe picks and then show off your Thanksgiving dishes by tagging #RedTricycle on Facebook and Instagram.

Get Your Dose of Sides & Veggies

Shredded Brussel Sprouts with Lemon and Poppy Seeds
Get ready for your kids to dig into a dish of brussel sprouts. Don’t believe us? Make this dish and then tell us about it in the comment section below!

Mascarpone Mashed Potatoes
A recipe with only 2 tablespoons of butter? Yes, it’s real, and tastes oh-so-good. For the full recipe that doesn’t sacrifice calories for taste click here.

Sweet Potato Biscuits
Before you go out and buy pre-made rolls, give this recipe a try. You won’t be disappointed and it will take less than 30 minutes to make (prep + baking time). For the scoop click here.

Cranberry Orange Sauce
If you’ve ever wanted to make your own cranberry sauce now is your chance! This recipe calls for agave nectar instead of sugar, which we love. Get the full how-to here.

Fill Up on These Mains

Green Bean Casserole
Once winter hits it’s casserole time. This easy green bean casserole is great for your Thanksgiving table, but also ideal for any chilly time of year. Get the recipe here.

Cornbread Cranberry Stuffing
Thanksgiving wouldn’t be complete without stuffing. Get the recipe perfected by Catherine McCord’s grandmother by clicking here.

Maple Brined Turkey
Don’t stress! Making the turkey is the marathon of Thanksgiving day. But, we’re here to help. Click here for a juicy and succulent turkey recipe you can’t go wrong with.

Desserts Your Sweet Tooth Will Love

Individual Pumpkin Cheesecakes
Sure, a pumpkin pie is great, but what about bite-sized pumpkin cheesecakes you can hand out to all of your guests? For a twist on the traditional pumpkin pie, click here.

Apple Pie Muffins
While the grown-ups may want to chow down on traditional apple pie, there’s no question the kids’ table will want these apple pie muffins. Get the recipe here.

Which recipe will you try this year? Leave a comment below!

— Erin Lem

photo: Inafrenzy via flickr


Ah, Thanksgiving. Some years you want to do the whole thing yourself, from the shopping to the peeling to the brining…and some years you just. don’t. Whether you want a little help getting the best ingredients and recipes guaranteed to work, or you really want to phone it in (i.e. let someone else do all the cooking and the clean up) this is a judgement free-zone, and we’ve got suggestions! Click through to see our ideas on how to make this turkey day a little easier — and enjoyable! — for the whole family.

For Locally-sourced Produce, Birds and Artisan Pie: Farmigo

Can't make it to the farmer's market and feel gouged by upscale grocery spots? Farmigo wants to be your go-to source for produce, meat and more from area farmers. (It's currently the largest online farmer's market, serving 15,000 families in the U.S.) They let you know where your birds are coming from, if they're free-range, and what they're fed. Produce is from small farms focused on sustainability, and pies such as Bittersweet Chocolate Bourbon Pecan are from the Brooklyn artisanal pastry chefs Pie Corp (you can also just get frozen crust). In addition, Farmigo is offering recipe bundles for stuffing starters, butternut squash soup, as well as prepared cranberry sauce from Beth's Farm Kitchen in Columbia County.

Farmigo is not membership or subscription-based, so you can try it out just for Thanksgiving, and there is no minimum order requirement. You do need to pick up your order, which is generally priced by weight (see site for specific costs); pickup locations both private and public are located all over the city, as well as in Long Island, New Jersey and Westchester.

Order by the first week of November to reserve your bird! (You'll put down a $30 deposit, which will be subtracted from the price of your bird, determined by weight, when it arrives.)

Farmigo: farmigo.com

photo: Farmigo

How are you getting help with Thanksgiving this year? Tell us in the comments below!

—Mimi O’Connor

Say hello to the healthy alternative to baked potatoes. This quinoa stuffed zucchini from the cookbook Secrets of Healthy Cooking by Barbara Seelig-Brown is everything you want in terms of texture (there’s crunch!), flavor (sweet onions and salty pancetta) and doing your body good. Your little ones will love how easy these are to eat as well – just pick ’em up and chomp on down! Get the full recipe below.

Serves: 6
Serving Size: 1/2 zucchini

Method:
1/2 cup uncooked quinoa, rinsed
3 zucchini, each weighing about 1/2 pound
1 teaspoon extra virgin olive oil
2 ounces chopped pancetta
3/4 cup chopped onion (about 1 medium)
1 large clove garlic, minced
3/4 cup halved cherry or grape tomatoes, quartered if large

Ingredients:
1. Preheat oven to 425°F convection or 450°F traditional oven.

2. Place quinoa in medium saucepan with 1 cup water. Bring to a boil, reduce heat to low, cover, and cook 15–20 minutes until tender.

3. Cut zucchini in half lengthwise. Using a paring knife, cut a V shape into each half and remove the center, creating a channel for the stuffing. Chop the zucchini that has been removed and save it for use in the stuffing.

4. In the meantime, place the olive oil in a large sauté pan. Add pancetta, onion, garlic, and chopped zucchini. Sauté until pancetta is
browned. Remove pan from heat and add tomatoes. Add cooked quinoa and mix well.

5. Stuff each zucchini half with 1/2 cup quinoa mixture and place on parchment-lined baking sheet.

6. Bake 20–25 minutes until zucchini are fork tender. Stuffing will be nicely browned.

Chef’s Secret: The quinoa mixture is also great when used as a side dish.

Zucchini are a great low-carb replacement! Make fries, pancakes, bread… what’s your favorite zucchini dish?

Copyright © 2015 by the American Diabetes Association. From Secrets of Healthy Cooking. To order this book call 1-800-232-6733 or order online at ShopDiabetes.org.

Master the  kitchen basics of healthy cooking with author and TV host Barbara Seelig-Brown’s new guide “Secrets to Healthy Cooking.” This cookbook simplifies the art of healthy cooking, especially for diabetics, with informational breakdowns of how much fat, sugar, carbs, protein and other nutritional facts at the end of each recipe. There’s even tips on how to pick the best vegetables, stick to your budget and more. “Secrets to Healthy Cooking” is available at ShopDiabetes.org; $17.95.


Your kids will love digging into these morsels packed with vegetables and protein. Get the little ones involved in mixing the filling, cutting the veggies, and topping the peppers with ketchup and cheese. Or prepare them ahead of time and wrap them to make for even easier prep when dinnertime rolls around.

Ingredients
6 bell peppers
2 tablespoons olive oil, plus more for greasing the dutch oven
1 large onion, chopped
2 cloves garlic, minced
10 ounces mushrooms, chopped
14 ounces ground beef or turkey
4 cups cooked rice
1-15 ounce can tomato sauce
salt and pepper, to taste
2 tablespoons ketchup
3/4 cup shredded extra sharp cheddar

Method
1. Grease your dutch oven. Prep your campfire so there is a flat bed of hot coals to place the dutch oven on.

2. Cut the tops off the peppers. Discard the seeds from the main part of the pepper, and set the hollow peppers aside. Trim the remaining pieces of pepper off of the pepper tops. Chop and reserve for stuffing.

3. Saute the onion in olive oil until translucent. Add garlic, mushrooms, and chopped peppers. Cook until vegetables are softened, about 5 minutes. Stir in the ground meat and cook through. Mix in the rice and half of the can of tomato sauce. Season with salt and pepper to taste.

4. Place the stuffing inside the peppers and put the peppers into the dutch oven. If you have any additional stuffing, you can put it around the peppers (just be sure to grease your dutch oven well).

5. Add the ketchup to the remaining tomato sauce and stir to combine. Spoon some of the tomato sauce mixture on top of the stuffed peppers. Sprinkle the peppers with cheese.

6. Place dutch oven on hot coals, making sure it is stable and level. Cook the peppers until they’re softened and the stuffing is heated through.

Recipe adapted from Dirty Gourmet.