Like a sponge, your baby is constantly soaking up information and learning new things about the world. These hands-on activities will engage one or more of the five senses, giving them lots of new things to touch, taste, smell, see and hear. Chances are, playtime is about to get a lot more exciting for you both. 

Sight: Glitter Sensory Bottles

Sharon McCutcheon via Unsplash

Shiny objects hold babies' attention, so these glitter-filled bottles from See Vanessa Craft are always a hit. They’re super easy to make, and your little one will be mesmerized as they move the bottle and watch the glitter sparkle.

Sensory Bags

NurtureStore

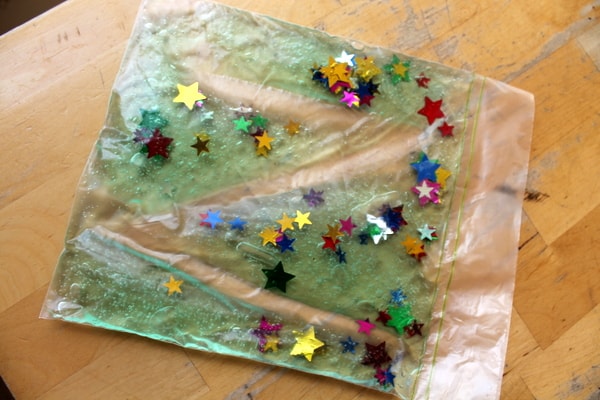
Engage your tot’s senses of both sight and touch with this simple sensory bag from NurtureStore. You can experiment with different add-ins, like pom poms, rice and pasta. Tape it to a table, floor or window for some mess-free, magical fun.

Sound: Exploring with Objects

Hands On As We Grow

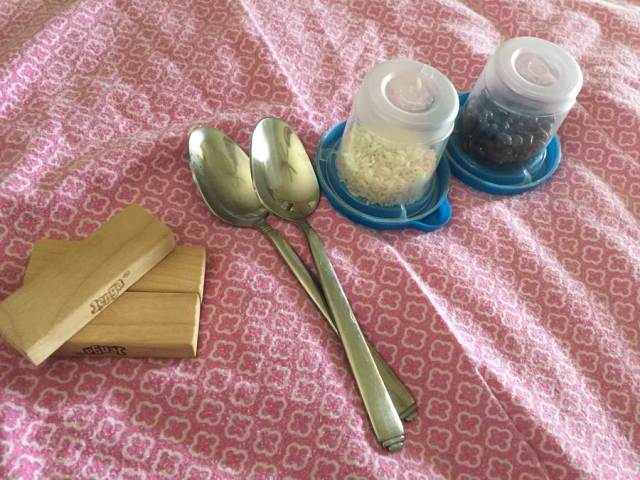
Keep things simple but fun with this easy activity from Hands On As We Grow. Gather some household objects, like blocks, spoons and rice or beans, in plastic containers. With younger babies, you can create different sounds and see how they react to them. Let older babies bang and shake to make their own sounds. Or, better yet, make music together! 

Homemade Instruments

Minieco

Babies naturally respond to music, and playing with musical instruments together helps baby bond with caregivers. Check out this list of homemade musical instruments you can make yourself, from jingly ankle bracelets to shoebox guitars. Playing instruments is also a great activity for babies to play with older siblings.

Smell: Scented Edible Finger Paint

Fun at Home with Kids

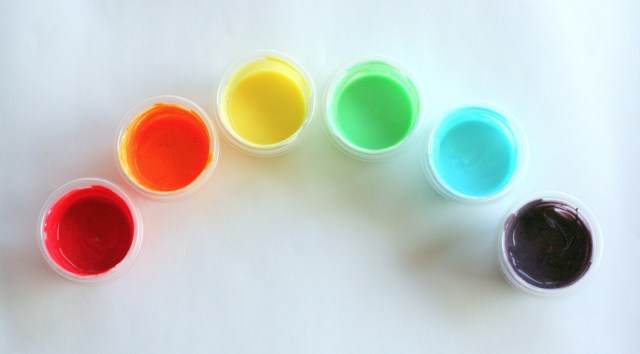
We love how vibrant these edible baby-safe paints are, and they contain only two common ingredients: yogurt and Kool-Aid drink powder! Nontoxic ingredients means it’s fine if your tot sneaks a taste. And yes, it works with nondairy yogurt (coconut, soy, etc) too. Head to Fun at Home with Kids for the instructions. For a non-scented variation, try this recipe, made with flour, water and food coloring.

Scented Playdough

The Typical Mom

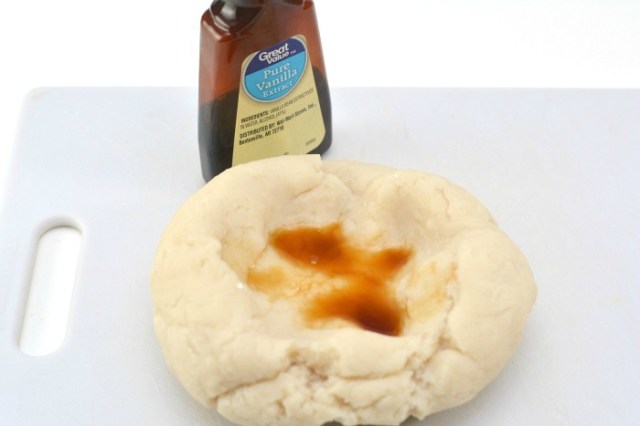
Take your homemade playdough to the next level with a yummy scent. This version from The Typical Mom uses vanilla extract and lavender essential oil for a calming vibe. Experiment with your favorite essential oils or vary scents by season: pumpkin spice for autumn, peppermint in winter, spring florals and bright lemon for summer.

Touch: Kinetic Sand

Surviving a Teacher’s Salary

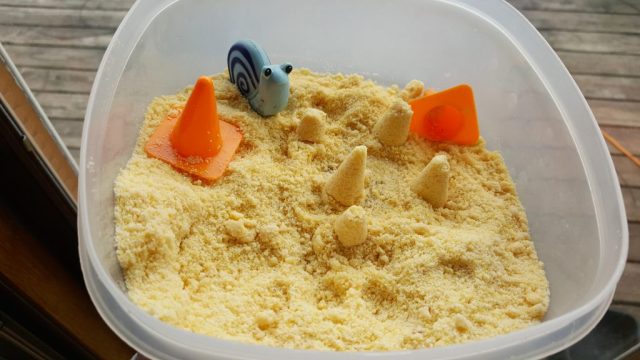
Check out this genius kinetic sand recipe from Surviving a Teacher’s Salary. It’s made with ingredients you probably have in your pantry, and it keeps well in an airtight container for multiple playtimes. Littles will love shaping the sand and letting it run through their fingers. Add your child's small cars, DUPLO blocks or small plastic animals to encourage imaginative play.

Touch and Feel Sensory Sticks

The Baby Bump Diaries

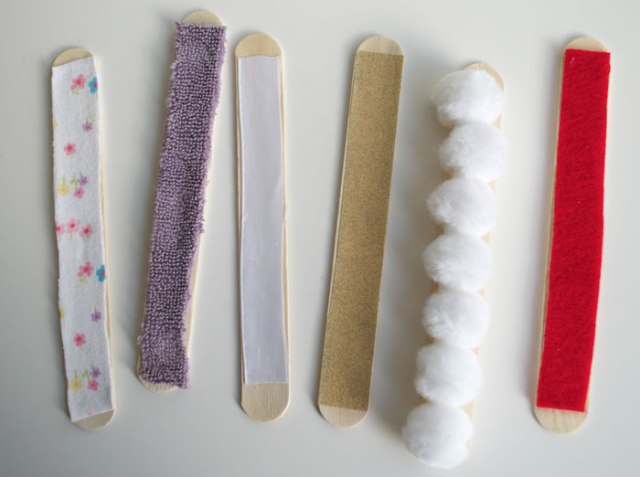
Teach your mini-me about different textures with this cool idea from The Baby Bump Diaries. Glue sandpaper, cotton balls and other items with varying textures onto popsicle sticks, and let your little one examine each one. This is a great activity to try during tummy time.

Taste: Fruit Exploration

Fun Littles

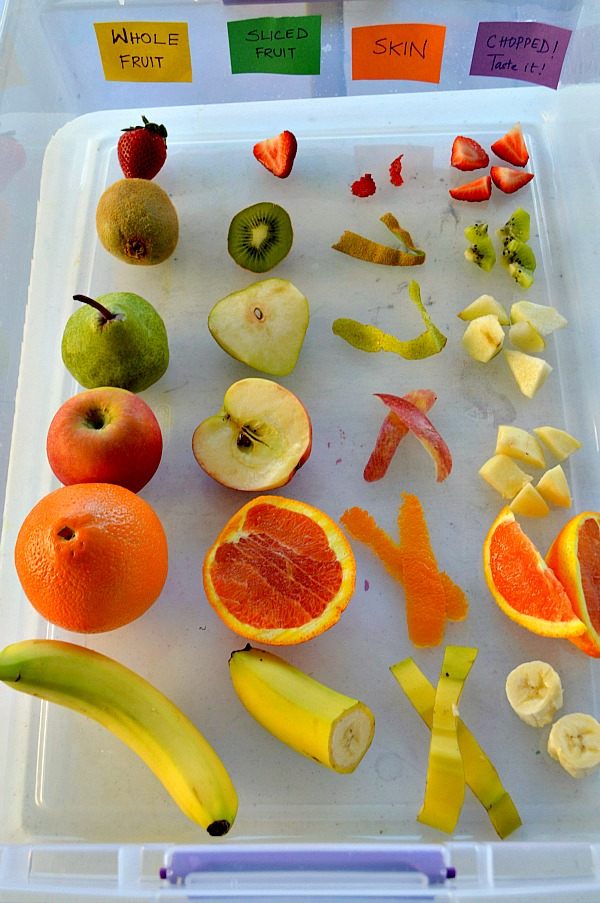
If your child has started eating solids, it's a great time to try this sensory exploration from Fun Littles. Set up a tray of fruit in varying forms and let baby examine and smell each one, and and even have a taste. As they do, you can point out the different colors, textures and scents of each fruit.

Applesauce Activity

Stacy Spensley via Flickr

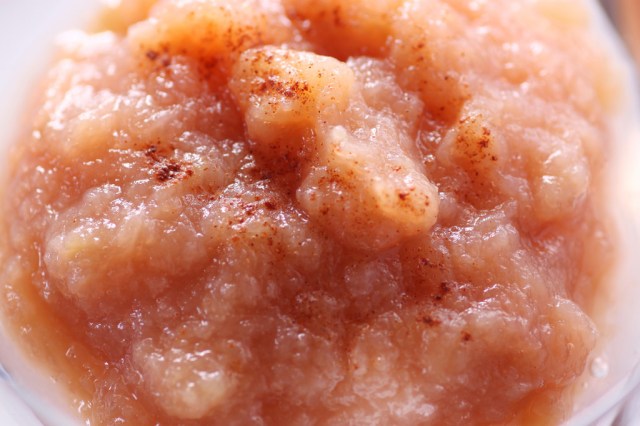
Cooking together is a great way to interact with your child at any age. Teaching 2 and 3 Year Olds shows you how to engage older kids in making applesauce. With younger babies, you do the prep work and talk to your baby about each step. Show your child a whole apple and let them touch or nibble it. Then cut it so they can hear the knife sound and see and lick the inside. Once the apples are cooked, show your baby how you mix it and then enjoy a healthy snack.

—Susie Foresman

RELATED STORIES:

Independent Play: Busy Boxes for Babies & Toddlers

The Best Age for Baby’s First Music Class, Flight & More

18 DIY Sensory Play Ideas for Baby

Did you know you can make ice cream in a resealable plastic bag without an ice cream maker, make your own candy geode, and bake hygroscopic cookies without any special equipment? Give curious minds at home a boost with these delicious science experiments for kids that’ll add a dash of excitement to your table and bring a whole new meaning to phrase “brain food.” Flip through the slideshow to see all the delicious science projects.

Save these tasty tests to Pinterest. Just click here!

Discover Density

Allison Sutcliffe

This colorful experiment found on CandyExperiments teaches your little scientist all about density using candy as the main ingredient. What’s not to love about this weighty rainbow!

Brain Boost Factor: The volume of sugar in each colored layer is the key to figuring out why the colors rise or sink.


S'more Solar Oven

Tierra Encantada

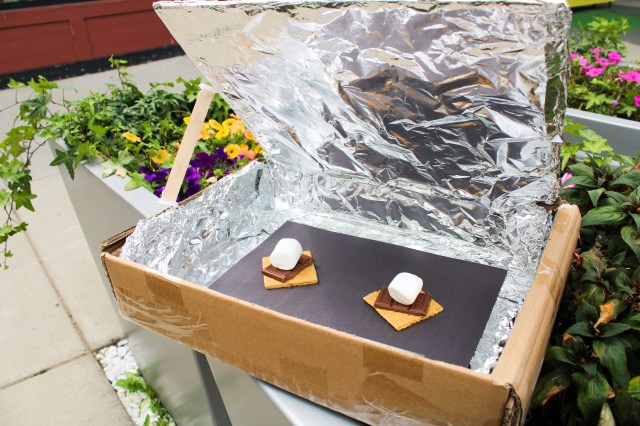
This awesome project from Tierra Encantada can be recreated any time of the year, as long as the sun is shining. 
You will need: 

  • -Cardboard box
  • - Aluminum foil
  • - Plastic wrap
  • - Black construction paper
  • - Tape
  • - Scissors
  • - Something to prop your oven’s lid open (ruler, stick, marker, etc.)
  • - S’more goodies - graham crackers, chocolate, marshmallows (you can also reheat cooked food!)

Cover the inside of the box with aluminum foil (use tape to seal tightly). Place black construction paper inside the box to absorb light. Stack your s’more ingredients. Cover opening of box with plastic wrap to conceal heat. Adjust lid to find the best angle to reflect sunlight. Use a stick to keep the lid in place.

Get cooking! Don’t forget to check on your food every few minutes. Depending on the temperature outside and reflection of the sun, it should take about 30 minutes to cook.

Check out the video tutorial here.


Pumpkin Seed Science

fall science experiments with pumpkin seeds
Erica Loop

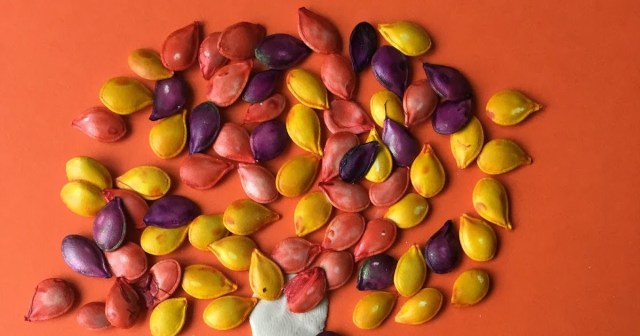
When it's pumpkin time again, do some sciencey fun while you carve your family's jack o'lantern by letting the kiddos explore the ooey gooey goop inside. This sensory activity is ideal for little scientists who are into making hands-on discoveries. Have them close their eyes and describe what the inside of the pumpkin feels like. When they're done, scoop out the seeds and let them dry. Your creative kid can add a few drips of red, orange or yellow food coloring into a bag, toss in the seeds and coat them. When they're dry, the seeds are perfect for making mini mosaics or other types if seasonal art. Not only is this sensory exploration an artsy adventure, but it's also a lesson in the plant life cycle. Discuss why pumpkins need seeds. Save a few seeds and plant them in indoor pots, creating a second fall science activity!

Insider tip: in the mood for Pumpkin recipes? We have pumpkin recipes for every taste bud. Just hop on over to our story for pumpkin recipes here. 

Candy Creations

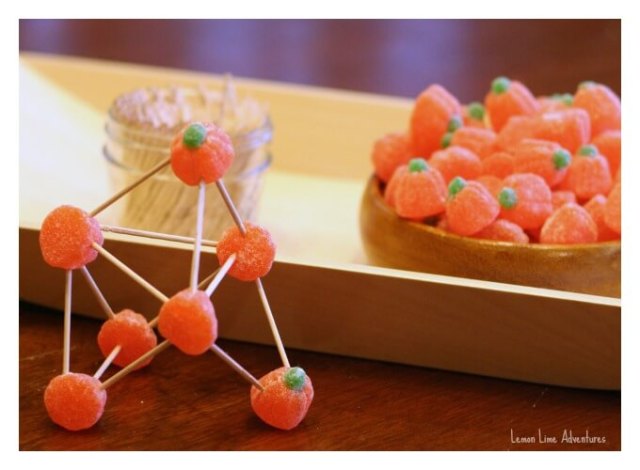
fall science experiments
Lemon Lime Adventures

This STEM idea from Lemon Lime Adventures takes autumn engineering to the next level. Your little learner can explore the art of building, getting hands-on with concepts such as form vs. function, balance and weight distribution. 

Insider tip: for ways to use up leftover Halloween candy, check out our ideas here. 

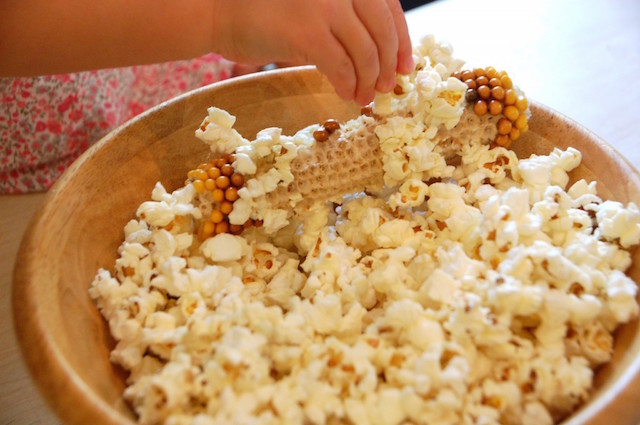
Pop Corn on the Cob

Tinkerlab

Break out your favorite family movie and grab the butter to go with homemade popcorn. Find out how to pop your own in this experiment outlined on Tinkerlab.

Brain Boost Factor: This is a simple heating up water experiment. The trick is that the water is inside the corn kernel. Who knew?


Rock Candy Geodes

a geode can be an edible science experiment if you do it right.
How to Cook That

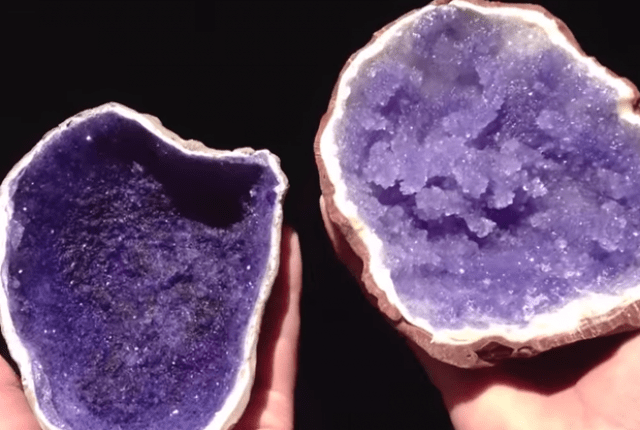
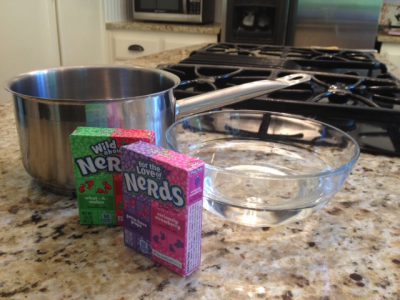
Take the traditional rock candy string experiment to the next level by making these tasty geodes. It’s all about crystallization achieved through total saturation with this experiment. Find out how to make these realistic looking candy creations at How to Cook That. Rock on!

Brain Boost Factor: They'll learn all about how crystals form and this one gives curious cuties the chance to see them life-size without using a microscope.

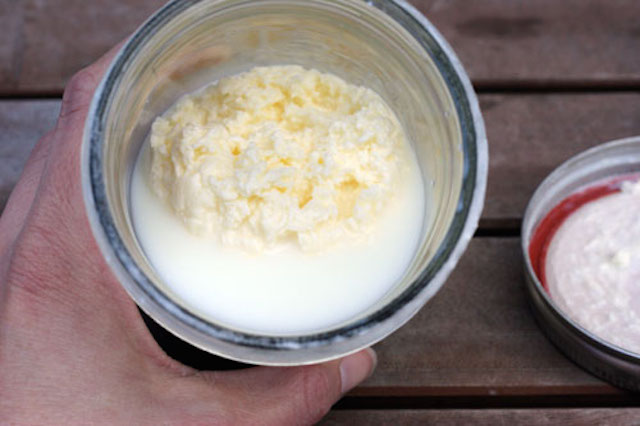
Churn Butter and Whip Cream

Make and Takes

Churn Butter and Whip Cream

When a trip to colonial Williamsburg isn’t on the menu, you and your little chef can make your own homestead-style whip cream or butter by simply shaking and shaking and shaking heavy cream. Make and Takes has everything you need to turn back the clock in your own kitchen.

Brain Boost Factor: Churning butter and whipping cream is all about agitating the fat molecules (those pesky buggers) and getting them to eventually clump together. The longer you shake ‘em up, the stickier they get.


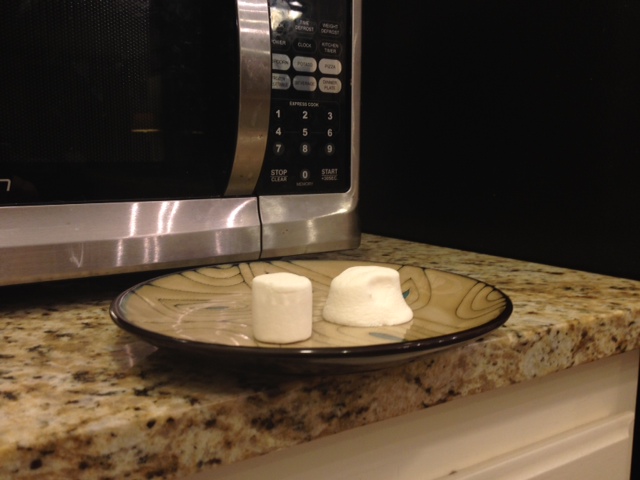
Microwave Marshmallows

Put marshmallows in the microwave and your little scientists will be amazed at the crazy antics that follow. They puff up. They shrink back down. And they still taste good. The Exploratorium spells out the necessary steps for this simple (tasty) experiment.

Brain Boost Factor: The thrilling combo of sugar, water and air do amazing things when heated up and cooled off quickly.


Bake Fresh Bread

Allison Sutcliffe

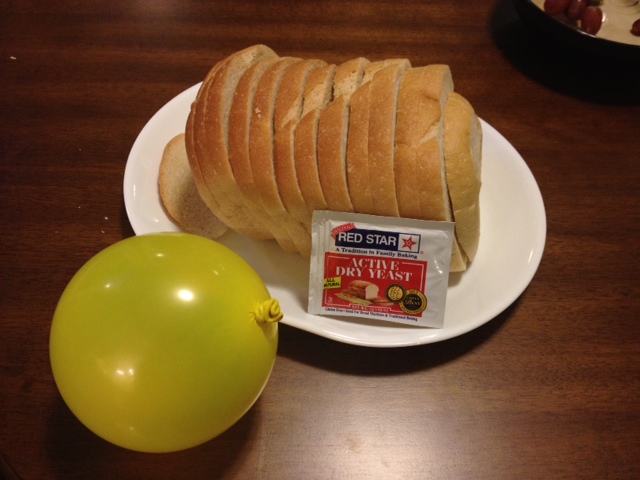
Break out your favorite bread recipe (and that bread machine that’s collecting dust in the cupboard) to cook up a loaf alongside this experiment, explained on Teach Beside Me. It’s an “inner working” visual that will certainly make an impact on your little cooker.
Brain Boost Factor: As yeast munches on the sugars in the bread, the gasses released perk it up, up, up!

Shake Up Ice Cream

no bake desserts
iStock

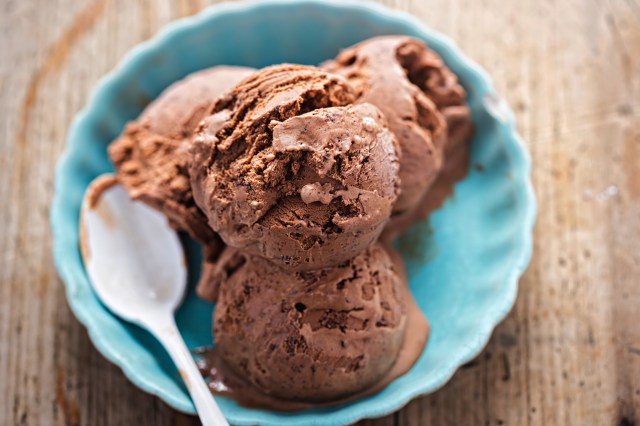
\You don’t need all 31 flavors to start in on this experiment with your kidlet. Get the step-by-step on shaking out single serve scoops in re-sealable plastic bags on Instructables. Be sure to have fresh fruit or other treats ready to mix in when the experiment is over. Yum!

Brain Boost Factor: The salt does most of the work in this frosty experiment. It lowers the freezing point of the outside ice enough so that the milk mixture inside becomes cold and creamy. Delish!

Squeeze an Egg

Science Sparks

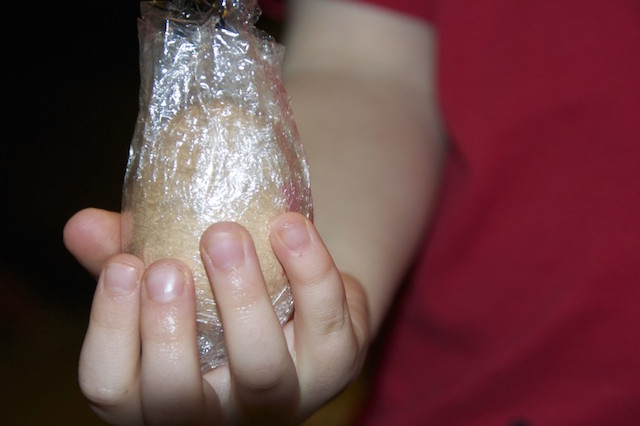
This egg-cellent experiment described on Science- Sparks will have everyone cringing when little hands put the big squeeze on a fragile egg. Try as you might, that baby won’t break. Until you crack it into a pan to make breakfast for dinner afterward.

Brain Boost Factor: The egg’s shape is clearly stronger than it looks.


Element Cookies

 Life at Cold Feathers Farm

Let your little chemists study the periodic table and make a tasty treat, all at once. Prep a batch of (extra big) sugar cookies, let the kids choose an element at the beginning of the periodic table, then set out frosting and M&Ms to re-create the atomic layout. Easy! Get the details over at Life at Cold Feathers Farm.

Brain Boost Factor: Giving your kids a visual (and tasty) version of nature’s building blocks is an easy intro to the physical sciences.


Test Grape Juice

Allison Sutcliffe

If you didn’t know grape juice was an indicator before, you will after walking your sidekick through this experiment found on education.com. Simply mix up some juice, add in a few extras and watch what happens. It’s a juicy revelation!

Brain Boost Factor: Recognizing acids and bases is the name of this color-changing game.

Regrow Leftovers

Karolina via Pexels

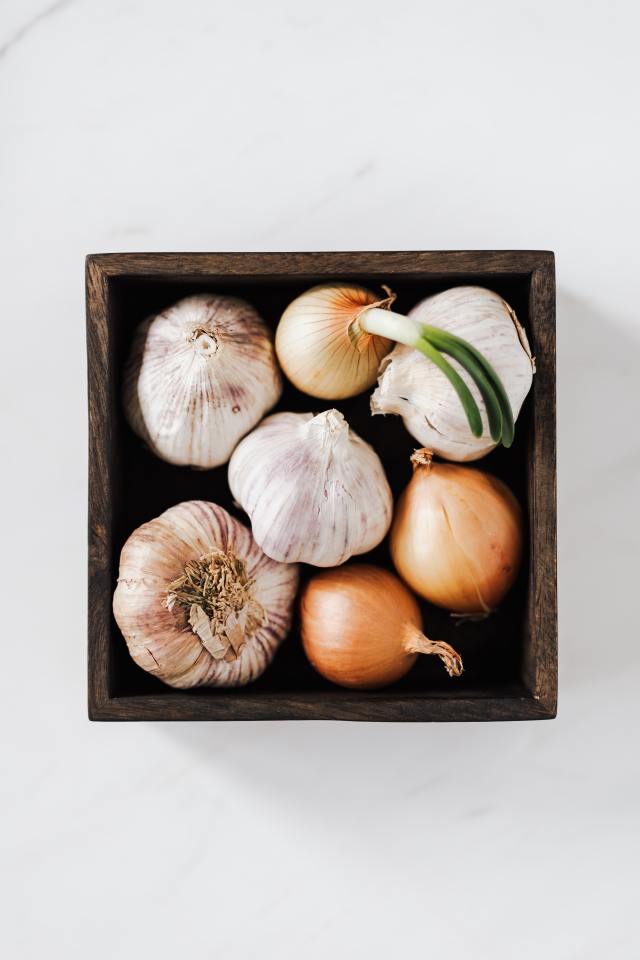
Insert a little plant science into the mix by re-growing food from scraps. Think onions, potatoes, and lettuces for this one (psst… green onions are a super easy, fast option). Get the low down on all that recycled goodness at Mrs. Happy Homemaker. Since plants need water and sunlight to grow, exposing scrap roots to that winning combo helps them recharge.

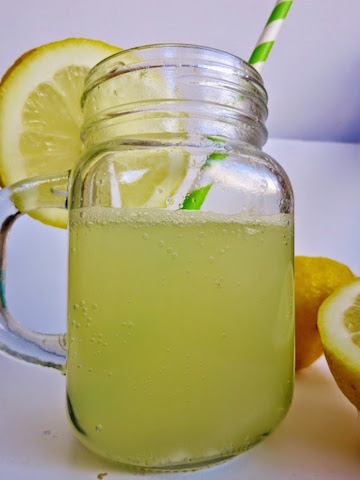
Make Fizzy Lemonade

Learn with Play at Home

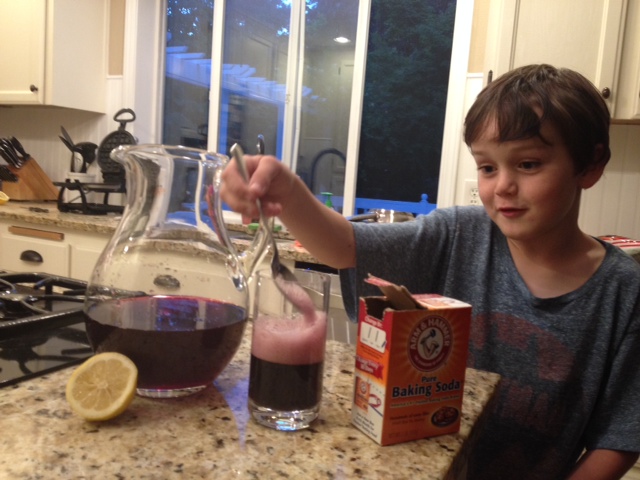
Plain old fresh-squeezed lemonade is so last year. Boost the fun quotient and learn a simple science concept simultaneously when you recreate this edible Fizzy Lemonade drink from Learn With Play at Home. It’s super easy to mix and little sippers report it’s pretty tickly too. A great alternative to the baking soda-vinegar volcano, it shows kids what happens when an acid and base are mixed together. 


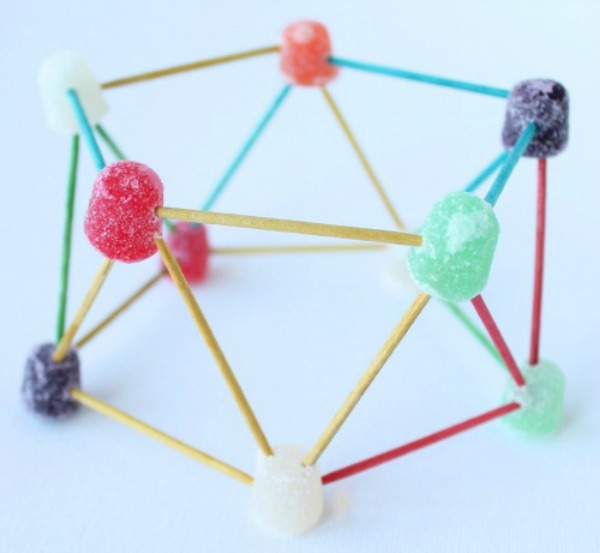
Gumdrop Structural Challenge

The Homeschool Scientist

'Tis the season for gumdrops and this classic structural engineering challenge uses just two ingredients: toothpicks and candy. We’re particularly fond of this one from The Homeschool Scientist because it helps you explain what the concepts (engineering, load distribution, physics, shape comparison) are to your kiddos while they are building it. doing it. Visit The Homeschool Scientist to get going. And click here for five more gumdrop-themed challenges. 


Bake Hygroscopic Cookies

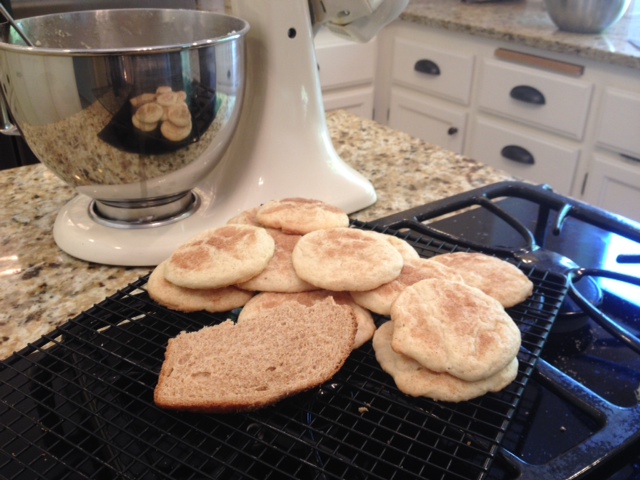
This simple science experiment is best when you check in on it the next morning. Bake up a batch of cookies, then place them in an airtight container with a piece of fresh bread. Watch as the cookies stay straight-from-the-oven soft thanks to the moisture of the bread (The sugar in the cookies is hygroscopic, which means it absorbs water molecules out of the bread). The best part? Getting to eat the cookies!


Dissolving Candy Hearts

Emily Ranquist via Pexels

Explore the science of your child's fave Valentine's Day candy and use up those leftovers STAT. Toss them into warm water and wait (and watch, of course) to see what happens. Repeat the science experiment with cool water, veggie oil, milk or any other liquid and record what caused the candy to dissolve the fastest, which took the longest. 

A Smell Challenge

Babble Dabble Do

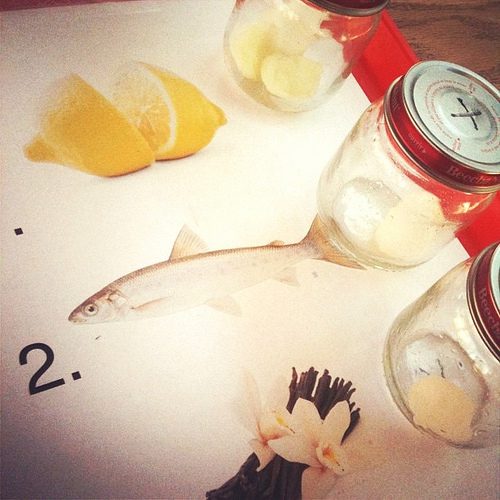
Teach kids the importance of smell with this activity that asks them to use only their noses to identify objects. Can they sniff out the fish oil over the garlic cloves? The lemon juice over the orange oil? Homeschooling blogger Ana has the instructions at Babble Dabble Do.


The Juice-Tasting Challenge

Susanne Jutzeler via Pexels

Tummy’s rumbling–it’s time to eat! Did you know that you “eat” with your nose and eyes as well as your mouth? It’s true. Put your family’s snifffers and peepers to the test with this juice-guessing game.

You’ll Need:
Masking tape
4 glasses
Pen and paper
4 flavors of juice
4 food colorings

How to:
1. Stack a piece of tape on the bottom of each glass and number them one to four, making sure your partner can’t see the numbers. Pour one type of juice into each glass.

2. Send your partner out of the room. Drip a different food coloring into each juice and stir so your partner can’t recognize the juice by its color alone. Record the number, juice type, and color in each glass on a piece of paper.

3. Call your partner back. Tell her to hold her nose, sip from each glass, and guess the juice If she’s like most people, she’ll be kind of confused–her eyes and tongue give her two conflicting flavor messages.

4. Ask her to unplug her nose, close her eyes, and sniff the juice before drinking it. Her guesses should be on target now. All hail the mighty schnoz!

Reprinted from Exploralab: 150+ Ways to Investigate the Amazing Science All Around You. Available online. $24.95.


Invisible Licorice

From Candy Experiments 2 by Loralee Leavitt/Andrews McMeel Publishing, LLC.

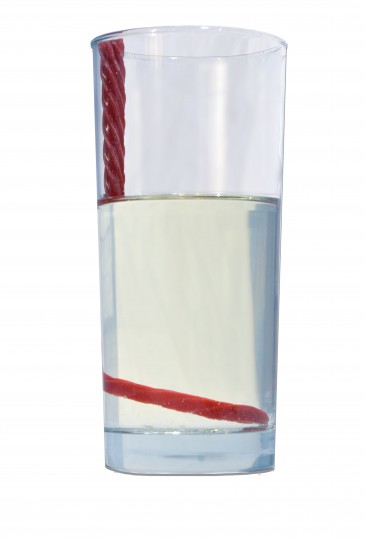
Did the candy melt or disappear? Your sweetums might think it’s magic, but it’s really all about how oil redirects light, causing half the candy to disappear! Click here for the instructions on how to recreate this mind-warping experiment.


Taste Test

Education.com

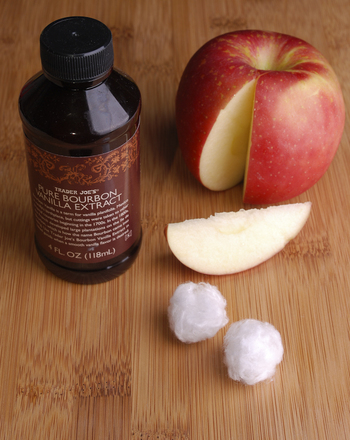
After figuring out this simple experiment your sidekick will want to play Houdini with all her friends. All it takes is an apple, vanilla extract, and a cotton ball to pull one over on her tastebuds. Abracadabra!


Rock Candy

Jessica B via Flickr

A Lesson in: Crystallization.

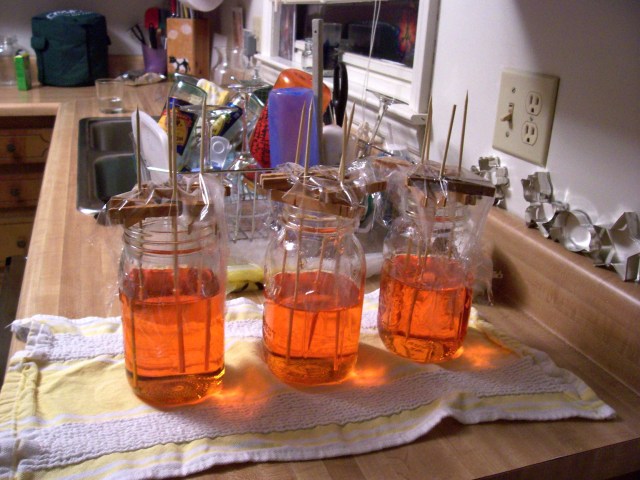
Be careful: The water only has the power to make the sugar crystals “invisible” when it’s piping hot. After the water cools down and evaporates, the sugar turns back into a solid. And with a little help of your sugar-soaked string, the crystals will find a home to grow upon and become rock candy. Learn how to make your smart sweets with these instructions from the Exploratorium. 

Messiness factor: Two sponges.

Magnetic Cereal

Rookie Parenting

A lesson in: Magnetism.

You’ve probably seen the label that says “fortified with iron” on your cereal box, but how much iron is actually in your cereal? Is there enough to cause a magnetic reaction? This super easy experiment doesn’t require too many fancy ingredients (cereal + magnet) which means you and the kiddos can try it right away. The results may surprise you! Get the how-to at Rookie Parenting and get started!

Messiness Factor: Two sponges.


People are stuck at home missing their favorite foods. Luckily some brands have been sharing their fan-favorite recipes. Now Ben & Jerry’s is stepping up to satisfy our sweet tooth. 

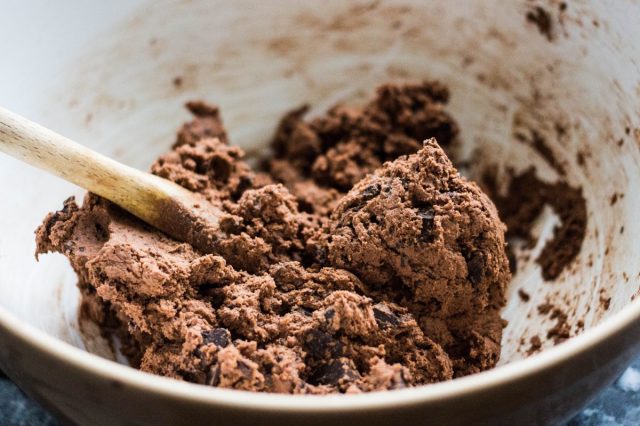
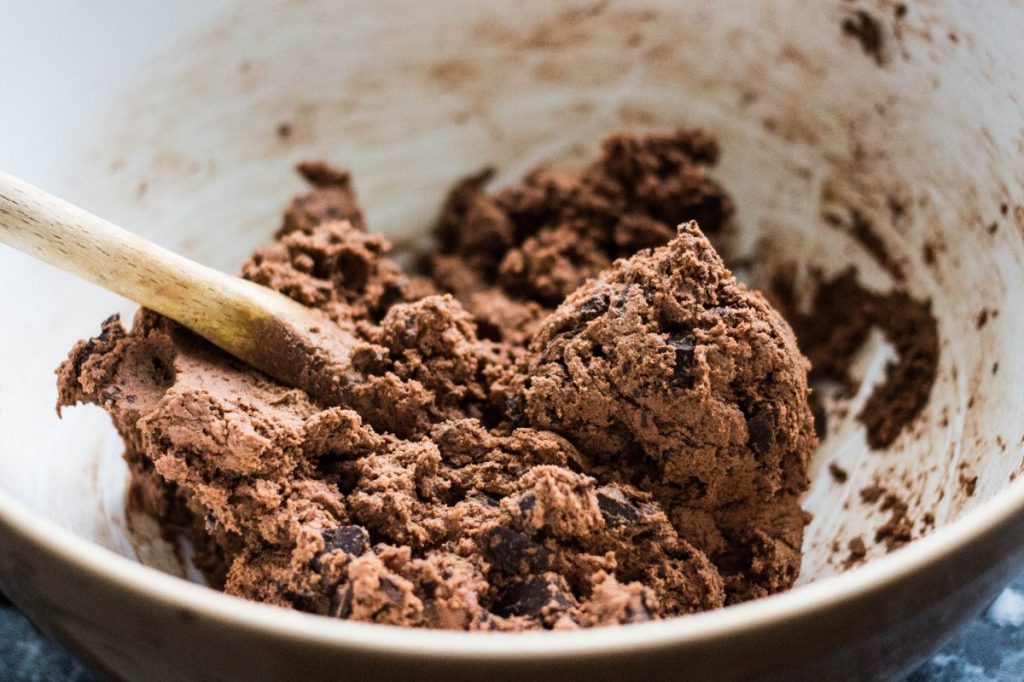
Ben & Jerry’s just shared their edible chocolate chip cookie dough recipe which is the same one used for the frozen balls found in their popular ice creams.

Cookie dough

INGREDIENTS

8 tbsp. unsalted butter (1 stick), room temperature

1 cup brown sugar, packed

2 tbsp. heavy cream

1 tsp. vanilla extract

½ tsp. kosher salt

1 cup flour

 ½ cup chocolate chips

Prep Time: 15 minutes

Total Time:  15 minutes 

Total Yield: About 2 cups


Step 1: Gather all your ingredients.

Step 2: First, heat treat the flour to ensure it is safe to eat. Do not skip this step, untreated flour can contain contaminants and is not safe to eat. Place the flour in a microwave safe bowl and microwave on high in 30-second intervals, stirring in between. Use an instant-read thermometer to ensure that the flour reaches 165°F throughout.

Step 3: In a stand mixer or using a hand mixer, beat together the butter and sugar until light and fluffy.

Step 4: Add the vanilla, cream, and salt. Mix to combine. Then add the heat treated flour and mix to incorporate.

Step 5: Fold in the chocolate chips.

Step 6: Serve and enjoy! 

Store your uneaten edible cookie dough in an airtight container in the refrigerator for up to one week, or in the freezer for up to six months.

—Jennifer Swartvagher

Featured photo: Charisse Kenion on Unsplash

RELATED STORIES

Disney Shares Recipe for Tasty Plant-Based Cookie Fries

Now You Can Make Disney’s Grilled Three-Cheese Sandwich at Home

Disney Releases an At-Home DIY Dole Whip Recipe

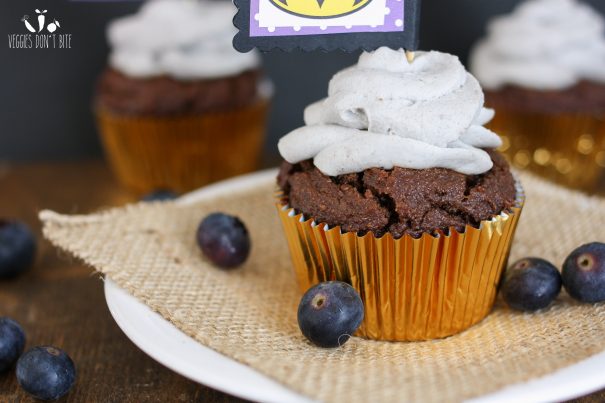
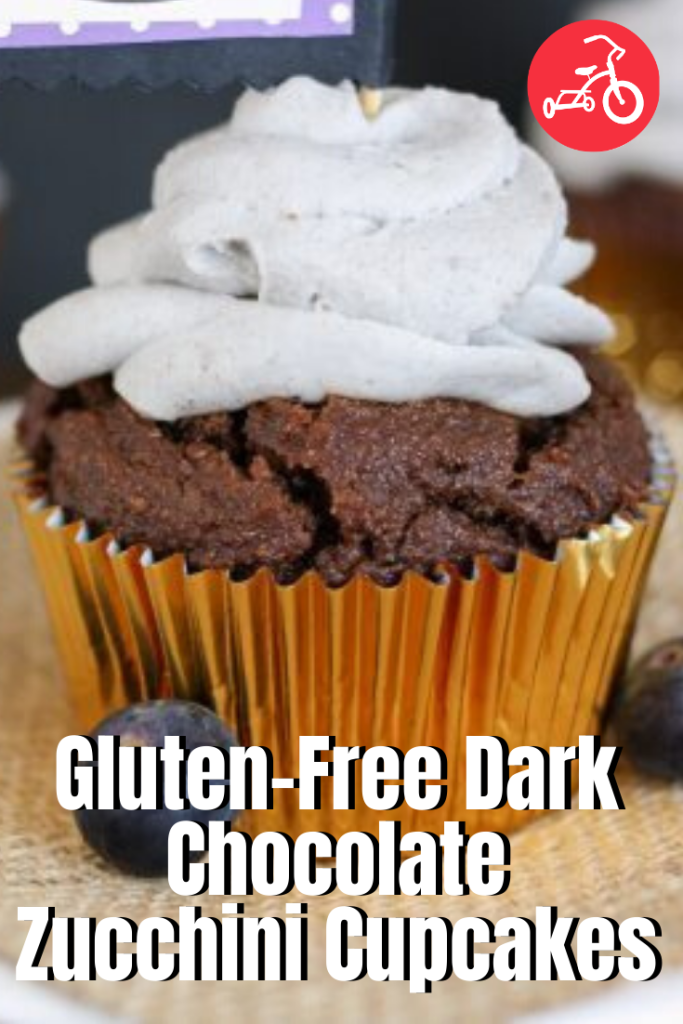
Dark Chocolate Zucchini Cupcakes (with All Natural Purple Whipped Frosting)

Tender, moist and delicious cupcakes with hidden veggies. Perfect for a morning birthday party or anytime you want to sneak in some extra veggies! They will never know…not to mention that ALL natural colored light and airy whipped frosting. What?!

Makes 12 cupcakes

Ingredients:

Cupcakes:
1 cup sorghum flour
¼ cup potato starch (not the same as potato flour)
¼ cup tapioca starch (same as tapioca flour)
1 ½ teaspoon baking soda
½ teaspoon Himalayan pink salt
3 ounces vegan dark chocolate (85% dark or more)
½ cup coconut butter (room temperature)
1 ½ cups date paste
½ cup full fat coconut milk mixed with 1 teaspoon apple cider vinegar (makes a vegan buttermilk)
½ cup finely grated zucchini
1 tablespoon vanilla extract

Purple Whipped Frosting:
2 tablespoons very cold date paste
top cream layer of 1 can full fat coconut milk (stored in refrigerator for 2-3 days or freezer for 2-3 hours)
1-2 tablespoons juice from frozen blueberries (depending on how dark you want it)

Note from the chef: I made many trials to get the consistency I wanted with these cupcakes, using a variety of flours that would make them nut free but still use a flour with some health benefits, along with being very soft, fluffy and moist. The measuring method I used was to spoon the flours into the measuring container then even it out with a knife. If you pack in the flour you may get a different result. Also, take note that the ingredients for the frosting, except the blueberry juice, are also in the cupcake recipe. Just measure out enough for both when measuring those ingredients. You can buy coconut butter or make it yourself by purely blending unsweetened, preferably not dehydrated, shredded or flaked coconut in a food processor or blender. It takes a while but will eventually turn into smooth coconut butter. There are many sources for directions online. The coconut milk I used was the Thai Kitchen brand. Although it has some guar gum in it, which isn’t my favorite, it is high in fat and creamier than most other brands out there. Make sure the coconut milk and date paste are very cold for the whipped frosting. The very cold date paste helps maintain the structure of the frosting.

Method:
1. Preheat oven to 350. Mix together coconut milk and vinegar to allow it to settle into a buttermilk and set aside. Make date paste if you haven’t, put 2 tablespoons in the freezer to get very cold for the frosting.

2. Combine flours, baking soda and salt in a bowl and set aside. Make sure you break up any clumps, using a whisk works well.
3. In a small bowl melt the dark chocolate with the coconut butter, making sure to melt slowly so you don’t burn it, and mix well. If using the microwave, melt for 30 seconds, then in 10 second increments until fully melted. It took me about 45 seconds. Once melted, add it with the date paste into a large bowl and using a stand or hand mixer, whip until mixed well. Add in “buttermilk,” zucchini and vanilla extract and whip again.

4. Using the paddle attachment on your stand mixer or a spoon, mix in dry ingredients putting in half first, then the rest. Make sure everything is combined well.

5. Place large spoonfuls of the batter into muffin tins lined with baking cups. Fill to just below the top of the cup. I use foil baking cups as they don’t stick like paper does. I also smoothed the batter down on the top by using a moistened finger, this helps them rise evenly as they bake.

6. Bake at 350 for 21 minutes. Depending on your oven, your baking time may vary by a minute or two. Start checking them at 17 minutes and take out when the tops begin to get firm and have a spring to the touch. Let cool in the muffin tins for about 10 minutes. Once cool to the touch, remove and continue cooling on racks until completely cool, about an hour.

7. While cupcakes are baking, take about ½ cup frozen blueberries and defrost enough to be able to squeeze the juice out of them. You still want them cold, if they are warm it will affect the structure of the frosting. If you accidentally get them too warm, just put the juice in the freezer to get cold before putting it in the frosting. Make frosting by placing all ingredients into a large bowl and whipping well using stand or hand mixer. Keep whipping until light and fluffy. The frosting will come out best if both the coconut cream and date paste are very cold. A few hours in the freezer works best. You want it just before it freezes.

8. After cupcakes are cooled, put frosting in a plastic bag, cut off a bit of the corner and squeeze out to frost each cupcake. Enjoy! It’s best to frost right before you eat them because the frosting will soften if it’s too warm outside. If storing, store in the fridge to maintain the frosting.

Sophia-Veggies-Don't-Bite
Sophia DeSantis is the author of Veggies Don’t Bite, a vegan, gluten free and refined sugar free food blog targeted to all types of eaters. She is the mom of two beautiful boys and wife to an amazing husband. Her and her family live a vegan, gluten free and refined sugar free life 90% of the time because she believes that the stress of having to be perfect shouldn’t overpower the benefits that their healthy lifestyle brings. Through her website, she hopes to reach anybody interested in making a positive health change in their life.

RELATED STORIES 

16 Healthy Birthday Cakes That Taste Great 

Easy Cake Decorating Ideas That Look Fancy 

30 Birthday Desserts That Aren’t Cake

15 Vintage Birthday Cakes Like Grandma Used to Make

Where we live in Michigan, the Governor has closed schools through the end of the school year. Since being in quarantine, we have definitely done more baking.  A few weeks ago, my daughter Lauren made homemade biscuits and Dominic and I have made my mother-in-law’s Sour Cream Kuchen numerous times (we actually have it on the schedule to make today)! This past Sunday, it was the traditional “Bunny Cake.”
Besides our baked goods tasting super duper yummy, I have used the baking “sessions” with Dominic to reinforce life skills, like having him read the recipe and getting all the ingredients out, following directions and measuring out the flour, sugar, etc. Since we had a teeny bit of vanilla frosting leftover from the “Bunny Cake,” I thought making some homemade brownies were in order!

After looking through a few cookbooks, I found the perfect recipe (meaning we had all the ingredients)! Dominic and I made it before dinner, so it could cool while we were eating dinner. We even made it a bit more fancy by adding some green sprinkles! I have made brownies in all different shaped pans, but never in a pie pan. The hubby, Dominic and I ate ours quickly, but I set Lauren’s piece on a plate on the dining room table. When she came looking for it, I told her where it was.

Much to our surprise, there were a couple of bites taken out of it. The culprit was Dominic!!! He had helped himself to her piece when I wasn’t looking, LOL. Guess he wanted a second piece! This morning, we discovered he had eaten two chocolate bunnies out of Lauren’s Easter basket. He’s a sneaky little thing.

Ingredients:

1 cup white sugar
1/2 cup unsalted butter (melted)
2 large eggs
1/2 cup white flour
1/3 cup baking cocoa
1/4 teaspoon salt
1 teaspoon vanilla extract

Directions: Preheat oven to 350 degrees. Spray a 9-inch pie pan with non-stick cooking spray and set aside. In a large bowl, put the sugar and butter and beat until smooth with an electric mixer or by hand. Add the remaining ingredients in the order given and combine them well. Pour into prepared pan and bake for 25-30 minutes or until a toothpick inserted into the middle of the pie comes out clean. Remove from the oven and let cool thoroughly. Sprinkle with powdered sugar, frost or enjoy as is!! Serves eight.

I am a stepmom to one and a mom to two. I have been a stay-at-home mom for almost 24 years. Grew up in Maryland and have lived in Michigan since 2001 when my husband got a job here. My 15-year old son has special needs.

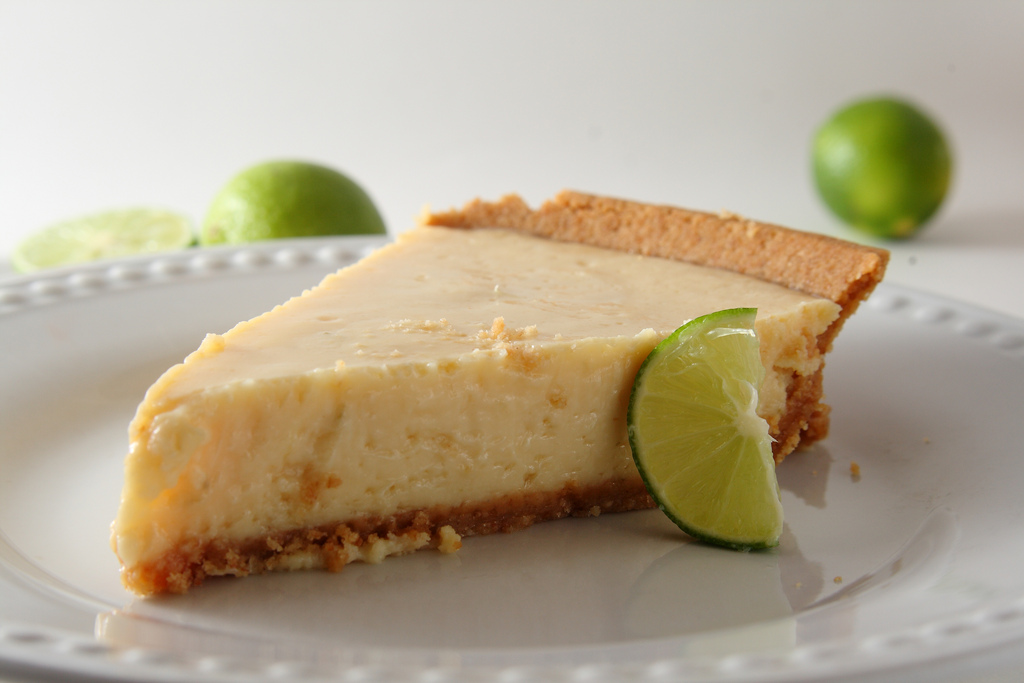
“No thanks, I don’t really like pie,” said no one, ever. The good news is, you don’t have to dedicated an entire afternoon to making one from scratch: this easy KLP recipe takes only a little longer to make than it does to eat. Scroll down for the recipe.

photo: arsheffield via flickr 

For the crust:

1 stick of butter (melted)

1 tsp. Vanilla extract

12 graham crackers (full length rectangles, not just the half-squares)

¼ cup sugar

1 tsp. Sea salt

Step 1. Melt the butter in a pan. Add the vanilla to the butter as it is melting and stir. Inhale this glorious scent.

Step 2. Crumble the graham crackers into a medium-fine (but not pulverized crumb). You can do it in a food processor or fill up a bag and let the kids whack it with a hammer or rubber mallet. We suggest double bagging it so the crumbs don’t spill out if the bag splits.  Once they are fairly even in size, add to a medium sized mixing bowl and stir in sugar and sea salt.

Step 3. Pour in heavenly vanilla butter to graham cracker mix. Stir until well combined.

Step 4. Press into a 9-inch pie pan. This is your crust, so get it as high up on the sides and as even as you (and your helpers) can.

Step 5. Bake for 10-15 minutes at 350 degrees, just to lightly brown the crust. Set aside and allow to cool completely while you make the key lime filling.

For the filling:


Key limes!! Probably a pound.
Eggs, three (just the yolks)
1 can of sweetened condensed milk
¾-1 cup of lime juice (from key limes)
2 tablespoons of zest from key limes
(Don’t forget to stash a lime or two aside for garnish, or get a regular lime just for this purpose.)

Step 6. Whip together the eggs and lime zest either by hand or in a stand mixer for about 2 minutes at medium.

Step 7. Add in condensed milk and mix for 3 more minutes. Mixture should be somewhat thick now. 

Step 8. Add in lime juice and mix well, until combined, about 1 minute.

Step 9. Pour or spoon tart delicious mixture into previously cooled crust. 

Step 10. Refrigerate for at least 2 hours and serve cold with whipped cream and a lime wedge garnish. Some people like to put their pie in the freezer and serve frozen, which is awesome on a hot day. There is no wrong way to eat this pie!

—Amber Guetebier, adapted from a verbal recipe from Alix Benedict

RELATED STORIES 

All the Pie Recipes. All of Them.

Everything I Know About Raising Kids I Learned from Baking

Baking Hacks You Should Memorize 

25 Easy Baking Recipes Even a Kid Can Make


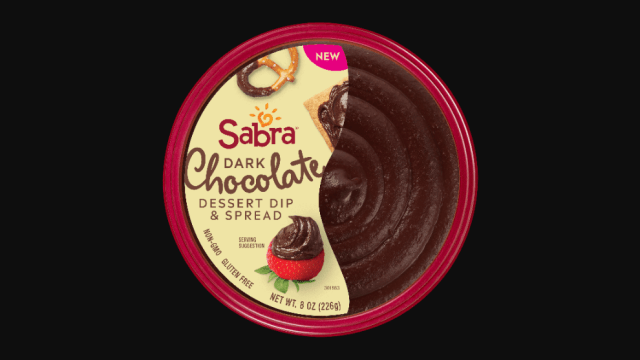
Chocolate hummus? Yes, please! One hummus giant has stayed out of the sweet realm, until now. During their Super Bowl ad Sabra teased their new chocolate hummus variety. 

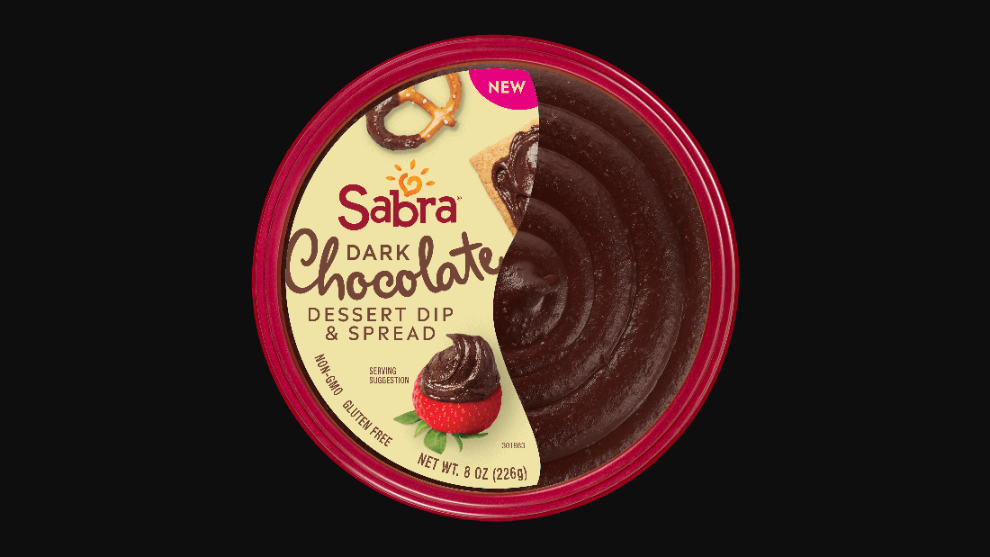
According to their website, Sabra’s new Dark Chocolate Dessert Dip & Spread will be released just in time for Valentine’s Day. It features a rich, chocolate taste that’s made with cooked chickpeas, soybean oil, cocoa, sea salt, and vanilla extract, among others. Unlike their other varieties, this new chocolate dip does not contain tahini (ground sesame).


Dessert hummus pairs perfectly with both sweet and savory snacks, ranging from strawberries to pretzels.

—Jennifer Swartvagher  

Photos courtesy of Sabra

RELATED STORIES

These Mystery-Flavored Fun Dip Pouches Are Perfect for Valentine’s Day

These New Dark Chocolate OREOs Are Not Thin on Flavor

Dunkaroos Are Making a Comeback & ’90s Kids Are Thrilled!


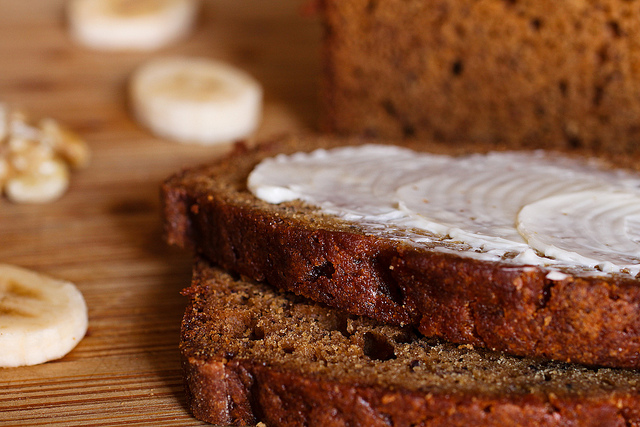
If you’re stuck with a handful of brown, mushy bananas, read on for a super easy banana bread recipe that your kids will love. Red Tricycle’s Editorial Director makes this bread quite often because it’s moist, flavorful and simple. In fact, she’s tried about a dozen recipes and this is by far the best. Read on to find out the only banana bread recipe you’ll ever need.

banana-bread

Ingredients:
2 cups unbleached all-purpose flour
¾ cup sugar
¾ teaspoon baking soda
½ teaspoon table salt
4 very ripe bananas, mashed (about 1½ cups)
¼ cup plain yogurt
2 large eggs
6 tablespoons unsalted butter, melted and cooled
1 teaspoon pure vanilla extract
1¼ cup walnuts, toasted and chopped coarse (optional)

Method:
1. Adjust a rack to the lower-middle position of the oven and heat the oven to 350 degrees. Grease and flour a 9-by-5-inch loaf pan; set aside.

2. Whisk together the flour, sugar, baking soda and salt together in a large bowl; set aside.

3. Mix the mashed bananas, yogurt, eggs (whip eggs together in a separate bowl beforehand), butter, and vanilla together with a wooden spoon in a medium bowl. Using a spatula, lightly fold the banana mixture into the dry ingredients until just combined and the batter looks thick and chunky. Fold in the walnuts if desired. Scrape the batter into the prepared loaf pan and smooth the surface with the spatula.

4. Bake until the loaf is golden brown and a toothpick inserted in the center comes out clean, about 55 minutes. Cool in the pan for 5 minutes, then transfer to a wire rack. Serve warm or at room temperature.

The recipe was originally spotted at America’s Test Kitchen.

Recipe adapted by Erin Lem, Red Tricycle’s Editorial Director who only wishes she had better photo skills to document all the fun dishes she makes when she’s not editing, writing, and uncovering family fun. 

photo: Sajia Hall via flickr