Sara’s tall and much smarter than she thinks is normal and terribly concerned with rules and social norms. She’s athletic and musical and so dogged in her determination to practice a skill until she masters it that we’ve turned her name into a verb meaning just that. My teenage stepdaughter is at once exactly who I was at her age and a total mystery to me. At thirteen, she wants to be both part of the younger children’s activities and totally separate from our tribe. I get that. She rages against rules and structure and craves routine at the same time. She is exactly who and where she needs to be at this point in her life.
I am the mother in this house, and that comes with all the trappings of motherhood. The glorious stuff of “drink your milk, be kind to your sister, is this closet for real?” belongs to me, but because I am not her mother, I can’t deliver that love in the same way. Her father is the primary parent to her in our house, and I am the assistant. The assistant is a tough role. Because I love her deeply, my instinct is to deliver that love in the same way I do to the three kids in this house that I brought to life. Mothering is an all-encompassing job, and my efforts aren’t made based on how you got into this house. However, it bears repeating, I am not her mother. My challenge is unique to a stepparent role: love differently.
I don’t bemoan this role. There is a certain beauty to watching a teen melt down and knowing that you have no part in bringing that train back on track. That last minute, forgotten requirement for school isn’t mine to track down, and I don’t have to be in the stands at every sporting event. But the thing is, this role still comes with the weight of delivering a whole human to the world. I see it as my job, along with her parents and her stepfather and all the other adults in her orbit, to instill her with the values and ability to make this world a better place for all of us. And so, the challenge becomes delivering that shaping and love from a different vantage point.
I have chosen the role of ally and coach. I am Sara’s champion and cheerleader. That isn’t regardless of what’s happening – I have no interest in alliances with assholes, teen or otherwise. For the most part, though, I choose to participate in conversations and activities where she and I can be on the same team.
If we can’t be on the same team (for example, if she’s mouthing off to her dear daddy), I leave the room. That allows him to handle it and me to stay in the ally role. I don’t intervene in her discipline, but am often unaware of the negative episodes in her teenage life. As her ally and coach, it’s my job to look for opportunities to shape that behavior differently the next time.
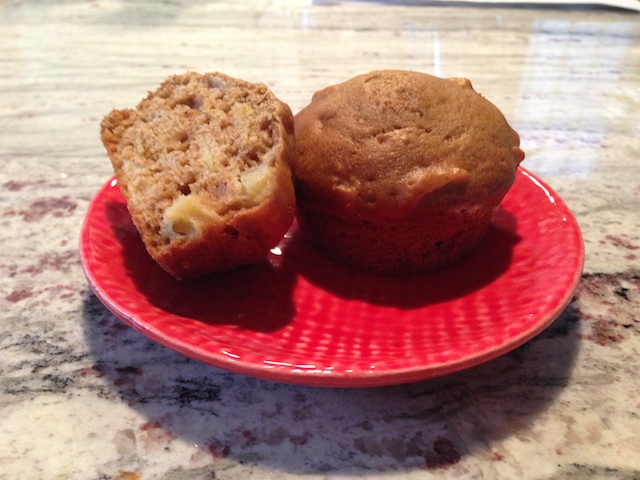
She and I bake often together – long, complicated vintage recipes involving intricate buttercreams and endless amounts of vanilla extract (seriously, why is vanilla extract so expensive?). She likes to bake on her own, too, but like most teenagers, focuses on the glory of it and is oblivious to the clean-up. The gets her in some hot water with her dad, who comes home to a messy kitchen and shockingly, expects her to clean it up.
This was the situation recently, made worse by Sara’s sassy response to her dad’s clean up request. She promptly lost her baking privileges. This stung – she’d been working her way through a book of cupcake designs and was really focused on her next attempt. She was mad. She took that out on her dad, and lost her phone and got stuck on dinner clean up duty for the week. A bad outcome for a bad choice. As you can imagine, I was far away from all of this – folding laundry in the bedroom as I listened to the drama unfold.
The next weekend, Sara was talking to me about a particularly hard recipe she wanted to try. She was thinking about trying it that afternoon. Sara had time to bake but certainly not to clean up that afternoon – we had a full evening agenda, as families often do. I asked her what she thought about that, and predictably, she was sure she could fit it all in.
I pressed a bit harder – was she sure? Would she be totally done with clean up? She needed to show dad she was mature enough to handle all the aspects of cooking alone. She was sure, and asked Gabe. Predictably, Gabe said no, not this afternoon but maybe tomorrow. Our girl was frustrated – she was facing some cupcake urgency. She took a deep breath and…walked away!
After a bit, I followed her and found her, very disappointed sitting in her room. I told her how happy I was to see her take dad’s rule and abide by it, and what maturity she showed accepting the constraint. “Yeah, “she sighs, “I thought about getting mad, but I figured then he wouldn’t let me bake tomorrow. It was hard, but I thought about that thing you said about being mature.” Ding, ding, ding!
Small victories. There are no Oscar speeches where the winner thanks their step-mother, no Olympic commercials dedicated to that kind of mom. Often, our girl doesn’t choose the path we’ve talked about, doesn’t make the mature decision. She’s thirteen – that’s her job right now. But sometimes, when I think she’s forgotten our conversations, I’ll hear my words come out of her mouth. That’s a win.
Do you have a story to share with our readers? We want to hear it! Sign up for our Spoke Contributor Network and start submitting your writing today.

Kate Chapman
Tinybeans Voices ContributorKate Chapman is a mom and stepmom to six. She writes about her modern-day Brady Bunch adventures at This Life in Progress. Drawing on her experience and background in psychology and sociology, Kate addresses the tricky topics of divorce, coparenting and blended families. She enjoys eating leftovers and hiding in the bathroom.


