Did you know the first-ever brownie recipe came from right here in Chicago? Yep, it did! This iconic dessert was created at the Palmer House in Chicago. In celebration of Palmer House’s 150th, we’re sharing the recipe so you can celebrate this milestone at home. As a bonus, we’re throwing in Hilton Chicago’s guest-favorite Signature Carrot Cake Pop recipe. Read on for the recipes and a little Chicago brownie history lesson to share with the kids.

photo: Palmer House Hilton

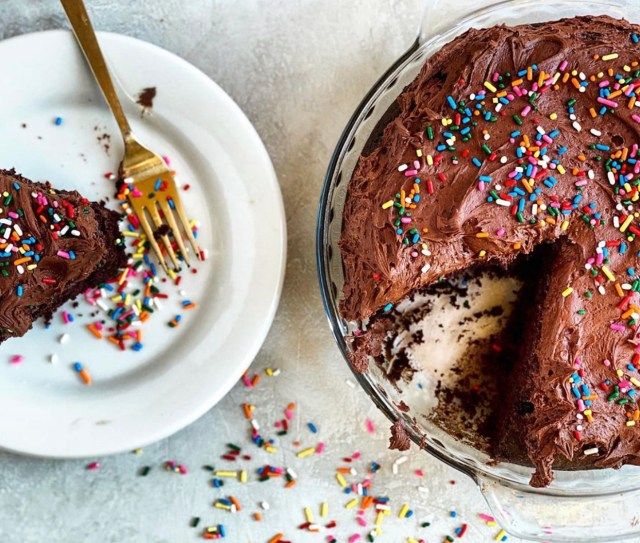
Palmer House Hilton Brownie
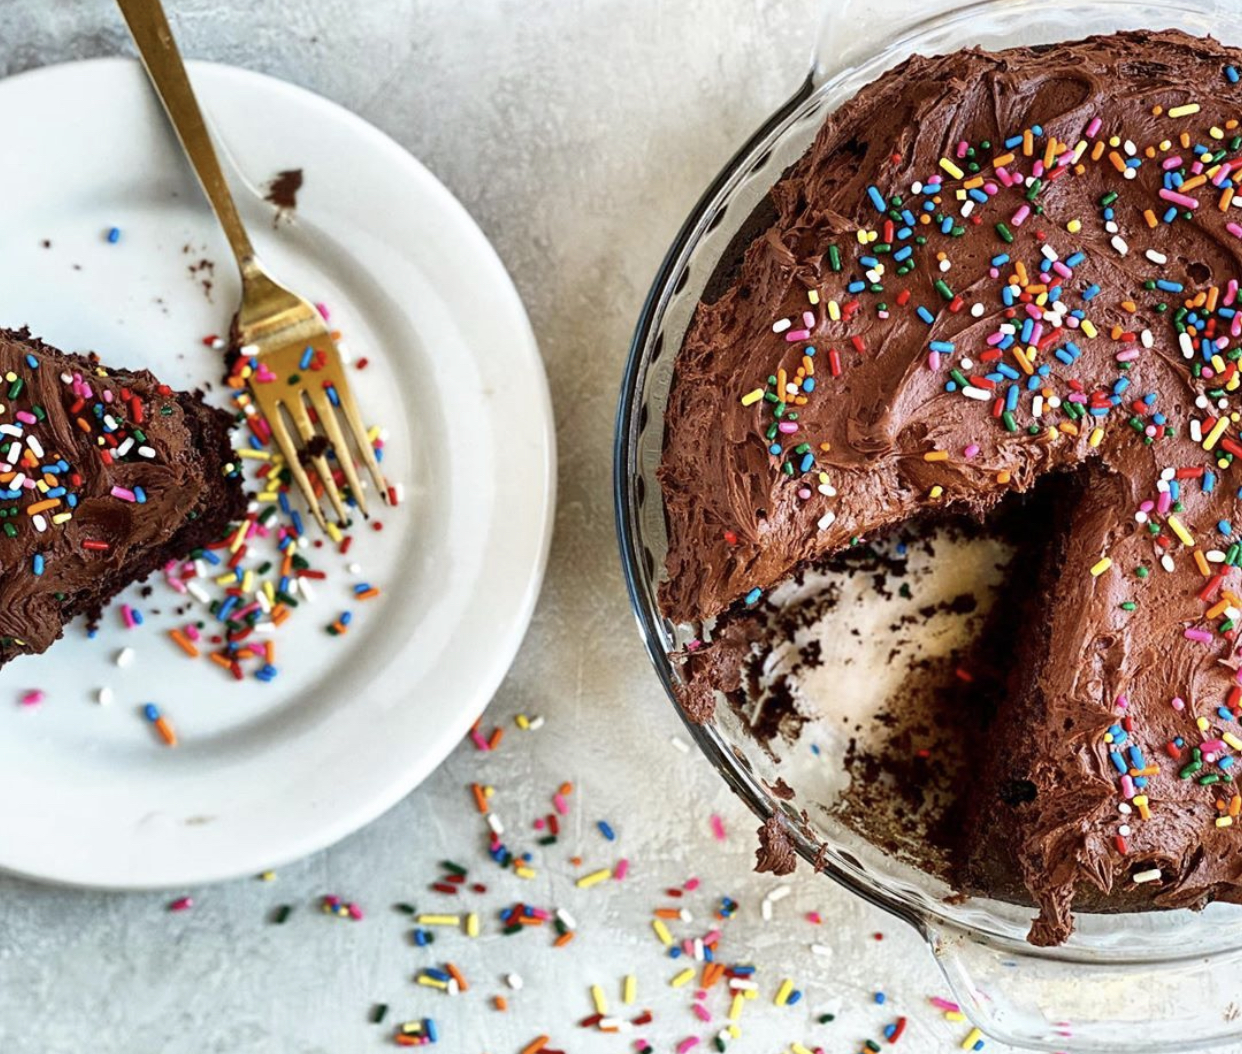
The first reference to the “brownie” in America appears in the Sears Roebuck Catalog published in Chicago in 1898. Specifically at the direction of Bertha Palmer to be served at the Columbian Exposition World’s Fair in 1893, the brownie was created in the Palmer House Kitchen in the late 19th century. The recipe below is well over a century old, and is the exact same one used for the brownie served in the Palmer House Hilton today! It remains one of the hotel’s most popular confections.

Ingredients: 
14 oz semi-sweet chocolate
1 lb butter
12 oz granulated sugar
4 oz flour
8 eggs
12 oz crushed walnuts
1 tbsp vanilla extract

Directions: 
1. Preheat oven to 300 degrees.

2. Melt chocolate and butter in a double boiler. Mix the sugar and flour together in a bowl. Combine chocolate and flour mixtures. Stir 4 to 5 minutes. Add eggs and vanilla and continue mixing. ​

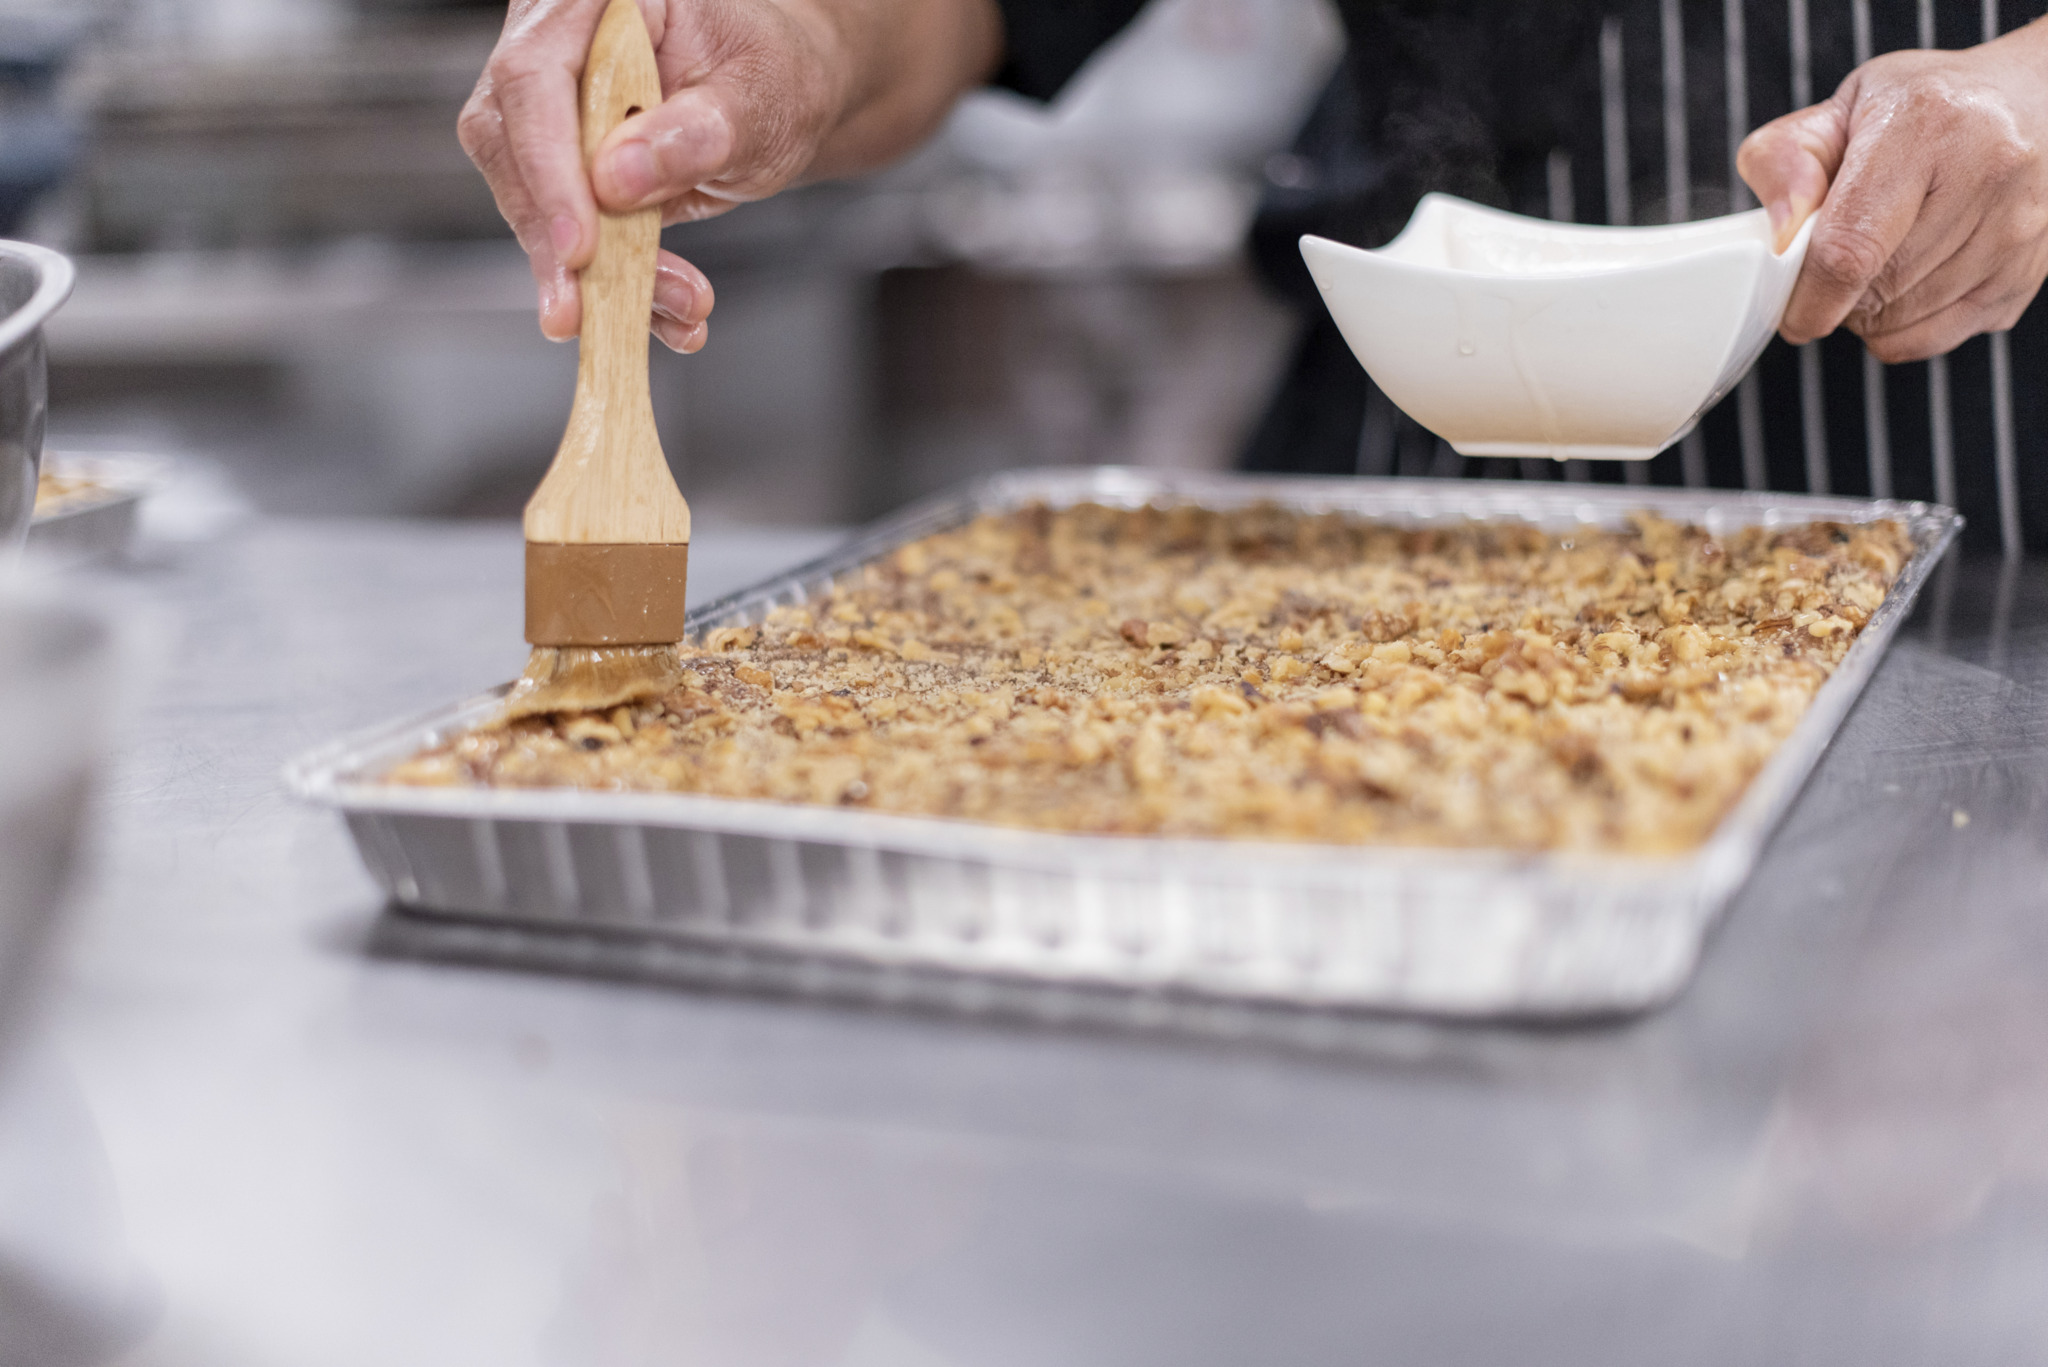
3. Pour mixture into a 9×12 baking sheet. Sprinkle walnuts on top, pressing down slightly into the mixture with your hand. Bake 30-40 minutes. ​

4. Brownies are done when the edges begin to crisp and has risen about 1/4 of an inch. ​

Note: When the brownie is properly baked, it will remain “gooey” with a toothpick in the middle due to the richness of the mixture.

Glaze: Mix together 1 c. water, 1 c. apricot preserves, and 1 tsp. unflavored gelatin in saucepan. Mix thoroughly and bring to a boil for two minutes. Brush hot glaze on brownies while still warm.

photo: Hilton Chicago

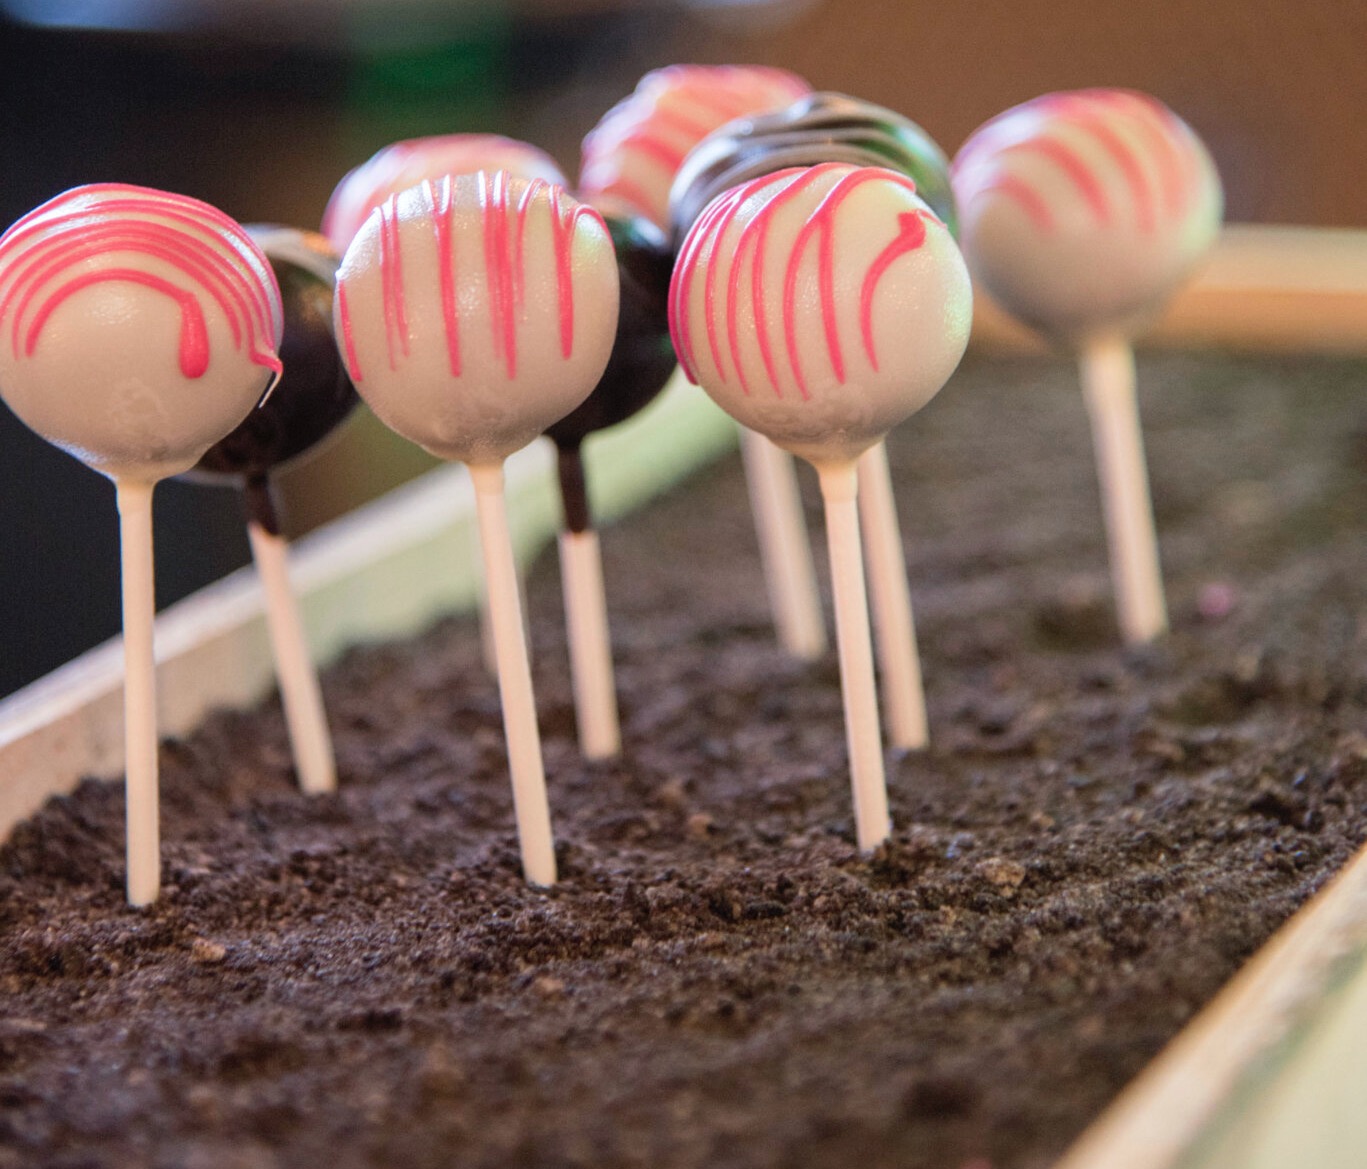
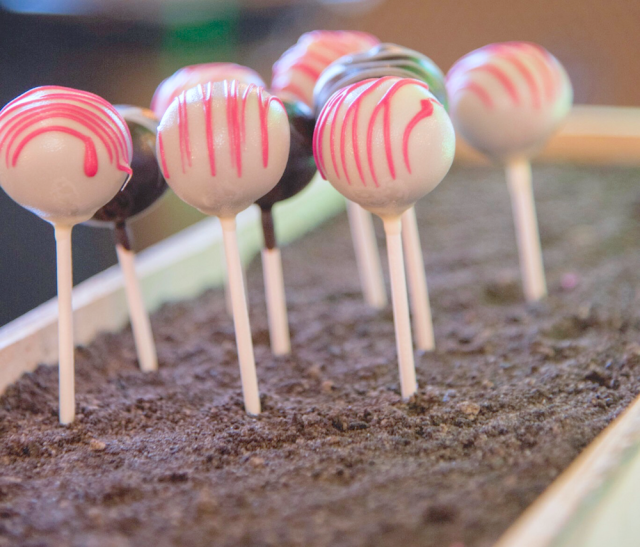
Hilton Chicago’s Signature Carrot Cake Pop Recipe

Ingredients:
3 eggs
2 cups sugar
3/4 cup buttermilk
1/4 cup vegetable oil
2 tsp vanilla extract
2 cups all-purpose flour
2 tsp cinnamon powder
2 tsp baking soda
1/2 tsp salt
2 cups shredded carrots
1 cup chopped pecans
3.5 oz. coconut flakes
8 oz crushed pineapple

Directions: 

Baking Process:
1. Spray and paper a 10” cake pan.

2. Combine all of the dry ingredients (flour, cinnamon, baking soda, salt).

3. In a separate mixing bowl, combine the eggs, sugar, buttermilk, oil, and vanilla.

4. Add the dry ingredient mixture and mix until all of the ingredients are fully combined.

5. Next add the carrot, pecans, coconut, and pineapple mixing gently with a spatula.

6. Pour into the previously prepared cake pan.

7. Bake for 25 to 30 minutes at 350*F degrees.

8. Let it cool down.

Assembly Process:
1. Combine the soft butter in the mixing bowl until well combined and add the powder sugar and vanilla, and mix until you reach a creamy consistency.

2. You will need to melt your favorite type of chocolate.

3. Place the chilled carrot cake in a mixing bowl and break into little pieces. Add some of the cream cheese filling until you reach a scoop-able consistency. (Note: do not add too much filling because your dough can become too soupy to scoop).

4. Scoop the size that you desire to make your cake pop.  Add stick and freeze for at least an hour.

5. Melt some of your favorite chocolate. Add some food coloring to make some fun color cake pops, if desired.

6. Once the cake pops are of hard consistency, dip in the melted chocolate and let them set for a few minutes.

— Maria Chambers

RELATED STORIES:

The Best Online Baking & Cooking Resources for Families

Fun With Food: Imaginative Hot Dog Creations

25 Easy Baking Recipes Even a Kid Can Make

Cue up your favorite holiday movies and get ready to enjoy a sweet treat. If you are excited for Duncan Hines Holiday Mega Cookie, then you are going to love their new winter-inspired treat. Teaming up with Swiss Miss the popular baking brand is releasing a new hot cocoa baking mix and frosting. 

Hot Cocoa Baking Mix

Duncan Hines Swiss Miss Hot Cocoa Flavored Boxed Cake Mix: Rolling out to grocers and retailers nationwide in November, this holiday must-have cake mix is practically a baking hack and is made with rich cocoa simply requires 3 eggs, a cup of water and a ½ cup of vegetable oil.

Hot Cocoa Frosting

Duncan Hines Swiss Miss Creamy Hot Cocoa Frosting: Hitting shelves nationwide in November the indulgent collab is the perfect topping to any baked good this season.

Top your cake (or cupcakes) with mini marshmallows and a sprinkle of cocoa powder for the ultimate holiday dessert.

—Jennifer Swartvagher

All photos courtesy of Duncan Hines


RELATED STORIES

Amazon Is Selling a Duncan Hines Ultimate Baking Kit

Enjoy Treats in Seconds with Pillsbury’s Heat & Eat Fudge Filled Brownies & Cinnamon Rolls

Nestle Toll House Challenges Fans to “Remix the Original”

Auntie Anne’s Is Selling DIY At-Home Pretzel Kits & We Can’t Wait to Order

Calling all Sid the Science Kids and Miss Frizzle fans: It’s time for science fair projects! Whether this is your kiddo’s first time showing off her Bill Nye side or if he’s a seasoned pro, they’ll need a fresh crop of science experiment ideas for this year’s fair. So nab a tri-fold poster board from the craft store, stock your home with plenty of supplies, and help your creative kid start hypothesizing as you check out these easy science fair projects that are easy for kids of all ages to explore.

Make a Volcano Explode

iStock

The quintessential science fair project, you might want to check with classmates to make sure there won't be five volcanos on the big day. Even so, there's a reason why this one is so popular. Not only is it fun to make the volcano, but the overflow of baking soda and vinegar is exciting for everyone. Get a great step-by-step tutorial from The Dad’s Book of Awesome Science Experiments. by clicking here

Make Ice Glow

indoor activities for kids
Mini Monets and Mommies

How can your child make ice glow? Hint: It involves tonic water. If a chemistry exploration is on your child’s to-do list, check out this light-based learning idea. For more fun, check out our glow-in-the-dark science experiments

Grow Sugar Crystals

Little Bins for Little Hands

Explore the science behind how rock candy is made. Grow your own sugar crystals with this super-science activity from Little Bins for Little Hands.

Rainbow Melting Ice

Mini Monets and Mommies

What happens when you gradually add food coloring to water as it freezes? The answer is in this kids’ science experiment. If you’re looking for science fair projects that are easy, this one is a simple STEAM activity for kids in pre-k and up.


Insider tip: create even more rainbows and harness your kids interest in science with these great rainbow science experiments for kids. 

Learn about Light

Hands On As We Grow

Light is more than just something that comes from kiddo’s star-shaped IKEA wall lamp. This science exploration from Hands On As We Grow helps your child to explore and experiment with the sun’s rays (or at least, the artificial version).


Insider tips: take your science experiments with light up a notch with these light-filled science experiments you can do at home. 

Discover and Dissolve

Mam.Papa.Bubba.

Your curious kid constantly asks why the colorful candy shell on their favorite sweets melts away in their sweaty little palms. With this experiment from Mama.Papa.Bubba. your child can explore the science dissolving Gobstoppers.

Cool a Can of Soda

Gepharts3d via Pixabay

Sometimes there’s nothing better on a hot day than a cold drink—but what happens if it hasn’t been chilling in the refrigerator? This experiment helps kids test the quickest way to cool a can. 

Apple Exploration

Pezibear via Pixabay

Most kids love apples, but so many of them won’t touch the fruit once it’s turned brown. So how about an experiment that keeps apples from turning brown? This easy, and fantastically fun, idea from Teach Beside Me has all the answers your child is looking for.


Insider tip: encourage her to play with her food in the name of science and creativity. Check out these fun and creative ways to play with apples. 

Liquids and Evaporation Rate

Conger Design via Pixabay

How does evaporation happen? Explore the way liquid turns into a gas with this awesome evaporation experiment. Get the full details, including materials and how-to steps, here.

Celery Science

Tinker Lab

How can your little learner create brightly-hued celery stalks? Check out this science experiment from Tinker Lab for a how to! Not only will your child dazzle with their new ability to turn the otherwise green veggie into pink, blue or purple pieces, but they’ll also learn about plant science.

Create a Jar of Fireworks

My Big Fat Happy Life

Find out what happens when you combine water, food coloring and vegetable oil! This science project from My Big Fat Happy Life gives your child the chance to explore, experiment and make some completely colorful discoveries. What’s great about this experiment is it’s easy to do with supplies you likely have at home.

Clean a Penny

Olichel via Pixabay

Grab a handful of pennies (or other coins if you have them) sitting around and see which cleaning solution make them shine the best. Kids can use liquids such as baking soda with water, orange juice, toothpaste, lemon juice and dish soap. Use a toothbrush (not yours!) to clean each penny with a different solution, and then little scientists can write down what each coin looked like before and after the cleaning.


Insider tip: feeling crafty? Put those pennies to good use with our lucky penny craft ideas. 

Grow a Gummy Bear

Alexas_Fotos via Pixabay

How, oh how, do gummy bears grow? Simply add a gummy bear to water and wait. This sweet experiment from Tinker Labs gives kids the chance to make comparisons and explore what happens to their favorite tasty treat when it takes a bath.

Common Color M&M's

Fz via Pixabay

Are yellows the dominant color in the M&M bag? Why does it seem like there are so few green pieces? This project is an easy experiment for even the youngest of kids. Buy a few packages of M&Ms, and then have kids sort the colors and count them. Then they can create a chart to track each color.

Force and Motion with Race Cars

Librarianism Chronicles

If your kiddo has Hot Wheel cars sitting around, this experiment is an easy way to test force and motion. With a few books and your child’s fave Hot Wheels, your pint-sized physicist can determine if the slope of the tracks affect the speed of the cars with this experiment from Librarianism Chronicles.

Microwave Popcorn Test

Must Have Mom!

This project is a great experiment if your family is a fan of microwave popcorn. Head to the store and buy three to five boxes of microwave popcorn from different brands, and then find out which one pops the best. Add variety to the experiment by testing butter vs. plain, or organic vs. regular. Get the full how to from Must Have Mom! here.


Insider tip: in the mood for popcorn after this experiment? Try out these unique and unusual popcorn flavors you haven't tried yet. 


Tummy time is an essential component for babies to promote sensory, visual, and motor development. You can begin doing tummy time with your baby as soon as you leave the hospital. For a newborn, start small with a few minutes of tummy time a day. By three months, try having your baby doing tummy time for a total of one hour. Don’t worry, that hour can be broken up into small sessions throughout the day.

For some babies, tummy time is not their favorite activity. Your baby may cry while on his/her tummy—it’s completely normal. Your baby just feels uncomfortable trying something new. If your baby seems distressed try tummy time at another time during the day. Preferably after a good nap and a full belly!

The Benefits Of Tummy Time

Your baby should continue tummy time until he/she begins to crawl sometime between 7 to 9 months of age. By placing your baby on his/her stomach, it will build the necessary muscles to begin crawling.

Tummy time benefits your baby in the following ways:

  • Helps build neck, back, and core muscles

  • Builds muscles to help a baby reach milestones like rolling, sitting, crawling, and eventually walking

  • Baby develops his/her tactile sense (sense of touch) during tummy time

  • Increases body awareness as baby shifts and adjusts his/her position during tummy time

  • Helps develop baby’s sense of balance and movement when he/she is placed into different positions

  • Develops hand and eye coordination

5 Tummy Time Activities To Try

1. Face-to-Face: This activity thrives on closeness with your baby. Start by laying down on a couch with your upper body slightly inclined, then place the baby on his/her tummy against your chest. Baby will lift and turn his/her head to see you. You can encourage your baby to lift his/her head by making kissing sounds or singing a song.

At first, your baby will only be able to lift his/her head for a couple of seconds. But over time, the length of time will increase as muscles are being built. Remember, practice makes perfect! This tummy time activity can be modified in difficulty when you see your baby doing well at a slight incline.

Simply, lay yourself flat on the floor and place your baby on your chest tummy down. This is a much difficult position for your baby. Always remember to keep a hand on your baby to prevent him/her from rolling!

2. Water Play: Place your baby’s upper body tummy side down on a nursing pillow or boppy. Take a baking or sheet pan (with edges) and put lukewarm water in it. Don’t worry you don’t need it too deep. Just add enough water to keep your baby entertained. Then add ball pit balls or small rubber duckies. I’ve found ball pit balls work the best for this activity because they are extremely light and will float. This activity will help keep the baby calm during tummy time, plus increase your baby’s sense of touch and vision.

3. Sensory Bags: Sensory bags are amazing for tummy time because they lay flat. To make a sensory bag for tummy time, take a gallon size Ziplock bag, and try some of the following combinations:

  • Clear hair gel with large buttons

  • A piece of white craft paper with 5 to 6 drops of paint. This allows your baby to mix colors without the mess!

  • Vegetable oil, water, and food coloring

Since baby’s don’t see an array of colors until between 4 to 6 months of age, try using contrasting colors.

4. Reading Time: Tummy time is the perfect time to read to your baby. Instead of reading to your baby sitting up, place your baby tummy down on a nursing pillow, and lay in front of your baby. This will help your baby turn and leave his/her head to see what story you are reading.

5. Black and White Books: Because babies do not fully see an array of colors until 4 to 6 months, contrasting colors like black and white are attention-grabbing for a baby during tummy time. You can make your own black and white images or purchase a baby book made up of black and white images. These are simple images of everyday objects like apples and boats. Many contrasting color books are designed to be folded out so every page is visible to your baby. You can either place the black and white images on the floor face up or place the images or book standing up. This will help your baby strengthen his/her neck and back by lifting the neck to focus on the images.

Don’t forget to have fun with tummy time! When babies first start tummy time, it can be uncomfortable for them because they lack the neck and back strength to keep their heads up. But with more practice, a baby will gain the strength to keep their head up longer to meet essential milestones. Thankfully, tummy time doesn’t have to be a struggle for your baby. It can be fun when adding in these entertaining tummy time activities into your baby’s everyday life!

Liz Talton is writing for the Speech Blubs blog. Her son received an autism evaluation, so she decided to start advocating. She is a creator of Pitter Patter of Baby Feet, a website dedicated to anything related to motherhood. She received a master’s degree in forensic psychology and mental health.

Social distancing with my two teenage boys, my husband and my dog for the last month, has been both a blessing and a curse, as they say. Have I loved binge-watching “Dexter” on a nightly basis while eating popcorn and leftover Easter candy or slices of cake or a bowl of ice cream (yes, the “no-eating in the TV room” rule was discarded weeks ago), all of us snuggled together on the couch (okay, that’s a lie—there’s no snuggling happening, as the three over 6-feet giants with whom I cohabit are not really all that snuggly)? Of course! Doing so is literally the highlight of every day. And have I loved how my husband (enthusiastically) and my children (reluctantly) help with dinner each night? Yes! So fun. The best. And is it a treat to see my kids a bit less stressed by school, extracurricular activities, their social lives, etc? 100%. I’m kind of the anti-helicopter mom, and so seeing them slow down and feel less pressure is indeed a blessing in my world.

But you know what is very much not a blessing (that’s right, you guessed it—the curse) of all of this? Cooking and preparing food 24/7 for two boys with voracious appetites and a husband who is big on snacking. I mean, of course, I love feeding my family, but every meal, every day, for weeks on end? No thanks. Not to mention the fact that we are trying to go to the grocery store infrequently, and when we do go, we cannot find the majority of items for which we are looking (GoGo Squeeze and toilet paper, I’m looking at you). And, to make matters worse, I make and write about sweets professionally, and items like flour, sugar, and butter are—as many of you can attest to—in short supply. Enter the chocolate “wacky” cake, a blessing, indeed, and a cake that I have always loved to make and eat, but one that is now on permanent rotation in my (cursed) “always-open for business” kitchen.

A “wacky” cake or a “depression” cake, as it is sometimes called, is a cake that is made without butter or eggs or dairy—wacky, I know. Many believe that such cakes, requiring none of the ingredients one usually thinks of when cake-making, rose to popularity when said ingredients were scarce (ie: during the Great Depression). Thus, I think we can all agree that it is not such a huge leap to think about baking up such a cake (or many) right around now, and that is exactly what I have been doing and am hoping you will, too.

My chocolate wacky cake recipe does call for flour, cocoa powder and sugar (you can use granulated or brown—light or dark), so if you cannot find one of those, sadly—for you and your littles—you will not be baking up a wacky cake any time soon. But if you have those items on hand (or can find them in the grocery store), as well as some leavening, vanilla, salt, vegetable oil, and vinegar, well, then you, my friend, are in luck (you also need water, but am hoping (praying?) that it is a given that you’ve got that.

The cake comes together simply in a bowl with a whisk, as I like to think of myself as the “queen” of easy-peasy sweets, and this is the easiest of the peasiest. My recipe also includes ingredients and instructions for a simple chocolate frosting, but it does require butter and heavy cream, and if those prove challenging to find, then skip the frosting altogether—the cake is so moist and deeply chocolatey, that I swear you’ll hardly miss it, and this, coming from a mom who loves frosting as much as her own children. Moreover, without the frosting, the cake is vegan, so there’s that, too.

Vegan or not, however, the cake is delicious—perfect for adults and kids, alike. Moreover, although I am not crazy about baking with my teenagers, and prefer to do it in solitude, actually, if baking with your children is something that brings you joy—or gets them off of their screens, albeit briefly—this cake is for you, as it is one of those baking “projects” that couldn’t be easier or faster to accomplish. The recipe can be found here. Happy baking and Netflix binging to all, and above all else (and in all seriousness) please be safe and well.

Jessie Sheehan is a food writer, recipe developer, and the author of The Vintage Baker. After abandoning an unfulfilling legal career and becoming a mom to her two sons, Jessie found her baking philosophy. Unfussy, old-school American desserts with a modern twist!

photo: Slow Sundays

Fried rice is our favorite way to use up leftover rice and veggies, and this kid-approved version from Slow Sundays is definitely a winner. You can switch up the ingredients based on what you have on hand, making it the perfect “clean-out-the-fridge” dinner.

Ingredients
Vegetable oil
2 tbsp ginger, minced
2 cloves garlic, minced
4 spring onions, finely sliced, plus extra to scatter on top
1 zucchini, finely diced
1 bunch bok choy or Chinese greens, finely chopped
1 corn cob, kernels cut off
A generous handful of broccoli (florets and stalk), finely chopped
3 cups leftover white rice
2 tbsp fish sauce
2.5 tbsp oyster sauce
Sesame oil
4 eggs, fried
Sriracha (chili sauce), sesame seeds and soy sauce to serve

Method
1. Heat vegetable oil in a wok over medium – high heat and add the ginger, garlic and spring onions. Fry gently until soft and golden.

2. Add your vegetables and continue to stir-fry over medium heat until cooked through. I turn the heat up high towards the end of the cooking time so some of the vegetables have nice crispy edges.

3. Add the rice to the wok and mix through the vegetables well, breaking it up as you go.

4. When rice is warmed through, add the fish sauce and oyster sauce and continue to heat until rice is nice and hot. Drizzle over some sesame oil.

5. To serve, top each bowl of rice with a fried egg, sesame seeds, fresh spring onions, soy sauce and chili sauce (optional).

What do you think of this meal idea from Slow Sundays

Our thanks go to Jo of Slow Sundays for sharing this recipe with us. Be sure to visit her blog to find more easy-to-make meals that even picky kids will love.

It sticks, it stays and even when you manage to peel off it off, a sticker can leave behind unwanted textures. While we can’t prevent our little ninjas from sticking stickers on walls, windows, glass or tables, we can help you erase any trace so that your surfaces look brand new. Read on for tips on removing sticker residue.

photo: romana klee via flickr

Getting stickers off metal. Peeling off the sticker should be no problem, but the residue is often a surprising task. Use oil to rub away the sticky parts and then wipe away the oil with vinegar.

Getting stickers off glass. Try heating the sticker with a hair dryer (or soaking it in hot water) to get the glue to melt. If it doesn’t come right off, then believe it or not, peanut butter is a tried and true method with saying goodbye to the leftover sticky bits.

Getting stickers off wood. Tackle the sticker with the hairdryer to get as much of the sticker off as possible. Depending on the type of wood you have, use rubbing alcohol (hand sanitizer works too) or eucalyptus/vegetable oil.

Getting stickers off painted walls or wallpaper. Since heat or water might ruin the wall, use a knife or credit card to remove the sticker carefully. Then dab at the remaining residue with masking tape until it’s no longer sticky. Use a little hot water if you need to get the whole process going.

Getting stickers off your kids. A simple bath should work!

What are your tips and tricks for getting sticker residue off? Tell us in the Comments below!

thaibasilpork_Lara Ferroni

This dish is quick and easy to make, yet full of the flavors that Thai cuisine is beloved for. Don’t worry if you don’t have all three sauces in your pantry. Soy sauce alone is fine, just taste and adjust the seasonings as desired. Ground chicken or turkey also works well in this dish, as well as fresh seafood: shrimp, scallops, mussels, and firm-flesh fish like salmon or halibut. To make it an-all-in-one dish, add some frozen vegetables.

Time: 20 minutes
Makes: 4 to 6 servings as part of a multicourse family-style meal

Ingredients:
2 tablespoons vegetable oil
6 cloves garlic, minced (2 tablespoons)
5 Asian shallots or 1/2 small yellow onion, cut into thin slices (1⁄3 cup)
1-1/2 pounds ground pork
6 red Thai chilies, cut into rounds (optional)
2 tablespoons oyster sauce
2 tablespoons fish sauce
1 teaspoon soy sauce
1 teaspoon brown sugar
1-1/2 cups packed fresh Thai or Italian basil leaves
Pinch of freshly ground black pepper (optional)

Method
1. Preheat a large wok or skillet over high heat for 1 minute. Swirl in the oil and heat until it becomes runny and starts to shimmer. Reduce the heat to medium. Add the garlic and shallots and cook until the garlic is light golden and fragrant, 15 to 30 seconds. Raise the heat to high and stir in the pork, breaking up clumps with the edge of your spatula. Stir and cook until the meat has just lost its blush, 1 to 2 minutes.

2. Reduce the heat to medium and throw in the chilies. Add the oyster sauce, fish sauce, soy sauce, and sugar and stir to coat the meat evenly. Stir in the basil and cook until the basil is wilted and the pork is cooked through, another 30 seconds to 1 minute. Transfer to a serving dish and sprinkle with pepper. Serve hot with freshly steamed rice and a side of veggies.

Born in Indonesia and raised in Singapore, Patricia Tanumihardja writes about food, travel, and lifestyle through a multicultural lens and has been published in numerous national and regional publications. Pat’s debut cookbook, The Asian Grandmothers Cookbook—Home Cooking from Asian American Kitchens is now available in paperback. She is also the creator of the Asian Ingredients 101 app, a glossary on-the-go that’s the perfect companion on a trip to the Asian market, and blogs at theasiangrandmotherscookbook.wordpress.com. She currently lives with her family in Seattle.

Photo credit: Lara Ferroni

fried-rice

Simple, healthy and delicious fried rice. Is it possible? Our friend Leah Singer of Leah’s Thoughts (she’s also Red Tricycle’s San Diego Editor) shared with us her favorite kid-approved fried rice recipe, which is broken down into 5 easy steps. So the next time you want to order out greasy Chinese food, opt for Leah’s version instead.

Ingredients:
2 cups rice, cooked (both brown and white rice works equally well)
2 Tbsp. oil (peanut or vegetable oil)
2 tsp. minced garlic
2 tsp. minced ginger (I use pre-crushed jarred ginger — so much easier!)
1/4 tsp. red pepper flakes (more if you want it spicy)
1/2 tsp. sesame oil (dark)
2 Tbsp. soy sauce
1 egg
2 scallions, chopped
1 Tbsp. sesame seeds

OPTIONAL: Chopped cooked chicken, shrimp, bacon

Method
1.  Heat the oil in a wok or large saute pan. Turn the heat down and add the garlic and ginger, stirring quickly so they do not burn.

2.  Once the spices are browned, add the cooked rice and toss to coat. Add to the rice mixture: red pepper flakes, sesame oil and soy sauce. Stir together.

3.  At this point, make a hole in the middle of the rice and crack an egg into the hole. As the egg heats, scramble it together; and once it’s cooked, combine with the rice. Turn off the heat, and add the scallions and sesame seeds.

4.  If you want to add meat to this dish and make it a main course, add chopped cooked chicken, shrimp or bacon now.

5.  Taste the rice to see if it needs more soy sauce, salt or pepper. Do not add salt until after you’ve tasted because soy sauce can be quite salty.


Leah Singer is Red Tricycle San Diego Editor, a freelance writer and a practicing speechwriter. She shares many family-friendly recipes, as well as stories of motherhood, craft ideas, writing, and other such topics at Leah’s Thoughts. Read more about Leah at: www.leahsthoughts.com.