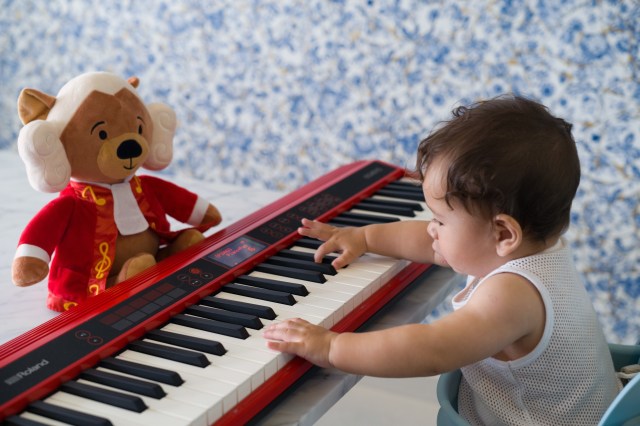
There’s no denying that pots, pans and wooden spoons are children’s go-to instruments. While the loud clinking and clanking may drive parents a little stir crazy, the process of making their own music is doing far more than putting a smile on their faces.

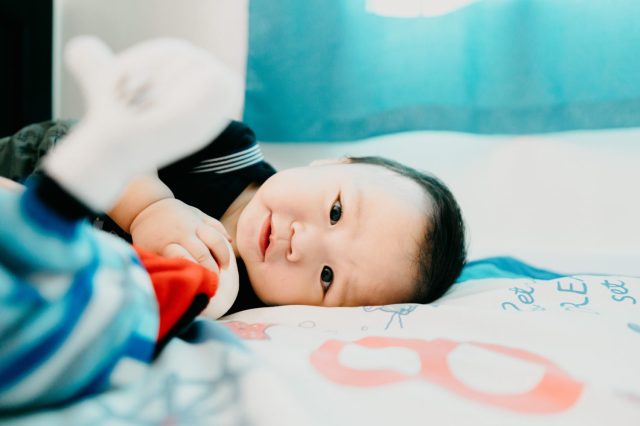
Music can be both stimulating and soothing for children, and you can help your child develop their inner music-maker just by creating music—yes, this means the clanging of your kitchen cookware, as well as the endless singing of those songs you can’t seem to get out of your head, is helping your baby. By sharing these moments together, parents are also enhancing bonding time and learning musical ways to help with transitions.

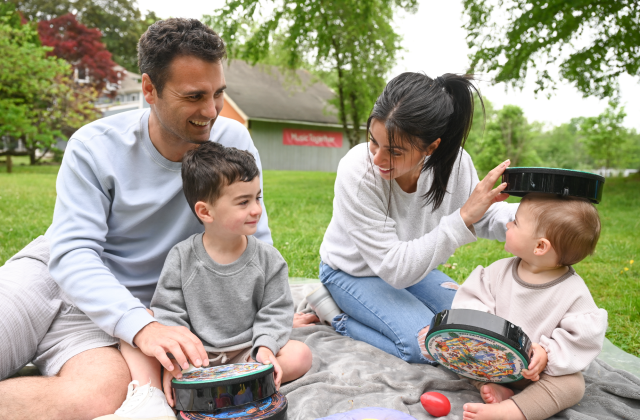
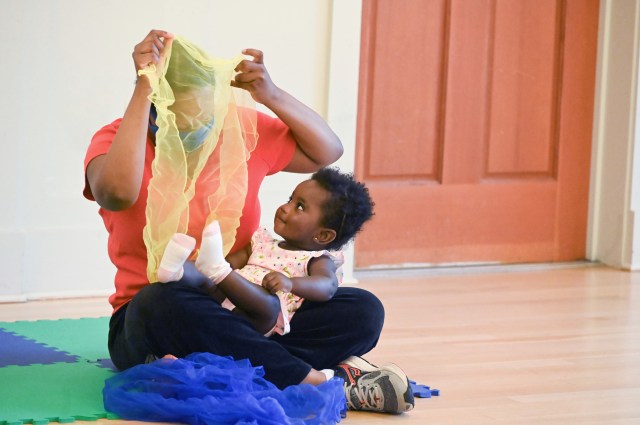
That’s what led Music Together, an early childhood music and movement program for babies and kids through age eight, to kickstart its classes in 1987. Through its 45-minute weekly classes, which are offered in thousands of communities around the world, Music Together is empowering households to make every day a musical adventure. It also turns out, creating tunes with your little one can further build unique connections in their brain, which support their language, social, emotional, cognitive, and physical development.

So, if you’re considering signing up for a parent-and-me music class, we’ve listed the top five benefits creating music as a family can have on your baby.

1. Helps Form Parent-Baby Bonding

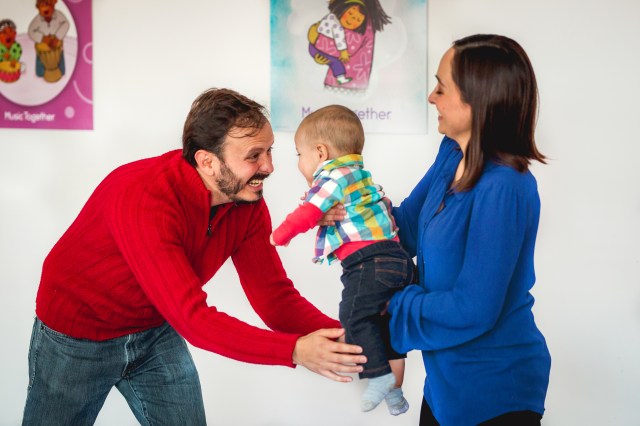
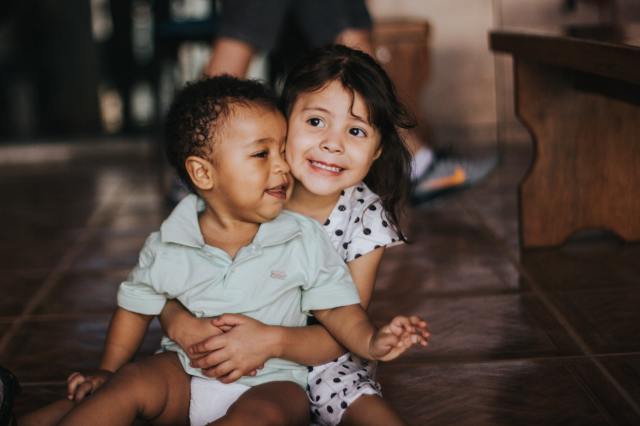
Carving out time free of distractions can be tough for parents. With work, household chores, daily errands and caretaking, it can sometimes feel like there are not enough hours in the day for play. With a dedicated music class each week, you can guarantee you’ll be focused on your kiddo, which, in turn, helps strengthen your overall emotional connection and bond.

Did we mention both baby and parents alike will also feel better by the end of class? Music is known to relieve stress and release “happy hormones” (dopamine and oxytocin). It’s a win-win for all!

2. Enhances How Infants Express Themselves

A 2012 study conducted by McMaster University found that infants who participated in interactive music classes alongside their parents smiled more often, had better communication and presented a more sophisticated brain response to music. Whether you incorporate singing and dancing as part of your daily household routine, or join a Music Together class at least once a week, you can aid your baby into doing the same.

Music also helps tots share how they’re feeling. “You might see your baby smile, giggle, or coo, in intensity when the music stops," explains Susan Darrow, CEO of Music Together. “This is a signal they may want you to sing some more.”

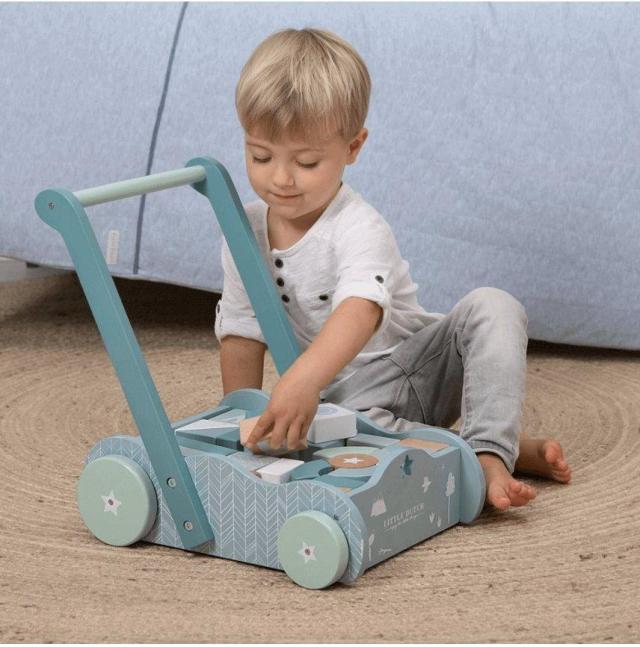
3. Boosts Motor Abilities

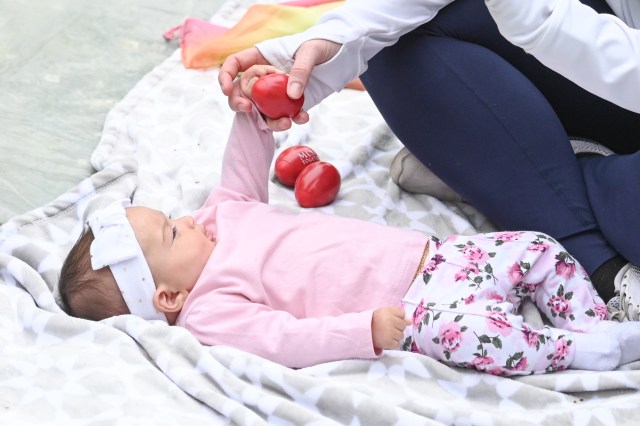
Darrow further adds the benefits of music on a baby’s motor skills. “When you hold your baby and walk, march, skip, or sway to the beat of a song or sing to them, you are teaching them about rhythm,” says Darrow. “They are building a ‘body memory’ of moving to the beat that they will be able to call upon once they are able to move to music on their own. And babies are capable of showing you that they really do feel and hear the music.”

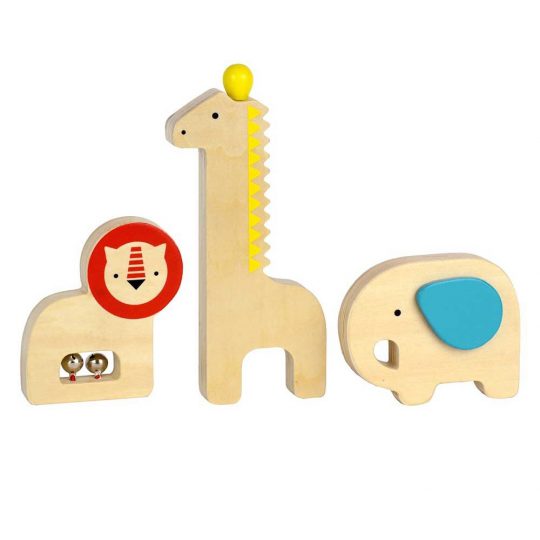
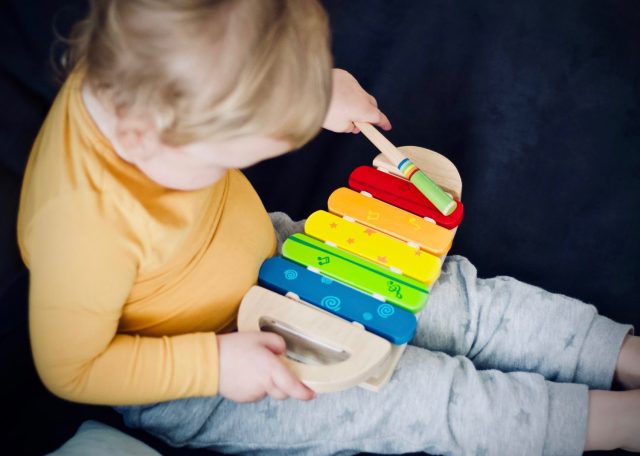
So, when your baby picks up an egg shaker or mini-maraca to play along with music, they’re helping improve their body awareness and hand-eye coordination. Plus: upbeat sounds will have them moving, jumping and bouncing—which are all important for their motor-skill development.

4. Builds Language and Literacy 

Through the words in a song, babies are exposed to new vocabulary that they can return and use to start practicing how to speak. Music also allows infants to begin experimenting with their voices with sounds, such as giggling and babbling.

Music Together has found that babies’ cooing sounds begin to match pitches in the music they’re hearing even before they’ve reached six months, particularly at the ends of songs. “In Music Together classes, we have heard infants as early as three weeks old shift their cooing to the same pitches as the songs we sing in class,” says Darrow.

5. Accelerates Cognitive Development

Babies are often compared to sponges: able to absorb whatever they’re immersed in. With music, little ones are exposed to new sounds and rhythmic patterns that they store to use at a later time. This helps not only increase their concentration levels and listening skills, but also builds their memory recall.

Research has also shown that singing, bouncing, dancing and playing music activates at least eight areas of an infant’s brain at the same time. Since music-making activities activate so much of the brain during this time of incredible plasticity, music experiences uniquely support growth across multiple domains.

Jumpstart your baby’s musical journey today with Music Together, which offers weekly 45-minute classes for both parents and children across the globe. To find a location near you, visit musictogether.com.

We’ve all heard the expression, “The days are long but the years are short.” And that has never felt truer than when you realize your snuggly newborn has suddenly transformed into a toddler who’s holding your hand for a walk around the block. (Sniff, sniff.). Throughout the first year, your little one will go from one movement milestone to the next. Here’s what to expect, along with tips to foster curiosity and safe exploration of their exciting world.

Like any milestone, babies follow their own timetables. If you have any concerns about their development, talk to your pediatrician.

Now that your Tinybean is exploring, it may be time for a furry adventure buddy. See how Hill’s science-backed nutrition can give your best friend their best life.

Tummy time!

Is tummy time always a favorite activity? Nope. Most newborns prefer to be held, rather than doing this hard work. Tummy time helps build head, arm, and neck muscles that pave the way for more mobility. Seven weeks is a good time to try placing your baby on their tummy a couple times a day. They may only be able to keep their bobble head up for a few seconds, but they’ll build up to longer lengths of time. Don’t give up, even if you’re seeing some fussing. Distraction with a favorite toy in front helps shift their focus.

Let’s roll

All of that upper body strength building sets the scene for rolling, starting around four months. Going from front to back is more common than rolling from back to front at first, but rolling progression isn’t an exact science. One thing’s for sure: once they start, they won’t want to stop. Moving from one end of the living room to the other is fun for budding explorers. Keep a constant eye on your traveling baby and make sure childproofing is in place.

Sitting on top of the world

Anywhere from four months to eight months, you may see signs of your tot trying to sit. Good head control is important for sitting to be successful. You can support the gradual process by seating them upright on your lap often. When they’ve built up the strength to sit on their own, make sure it’s on a soft activity mat (not unattended on a couch or bed) and that you’re very close by to catch them should they topple back. This exciting new posture gives their favorite toys a whole new vantage point!

Cute crawling

Sitting unsupported (with the ability to independently move into and out of a seated position), rocking on all fours, and rolling are the major clues that crawling comes next. This movement milestone usually occurs between 7-10 months. Place their favorite toys just out of reach so they eagerly crawl to get to them. Some babies create their own unique “scoot” and work their way straight to walking (skipping crawling altogether!). It’s especially important that secure baby gates block the stairs.

Cruising (cool shades, optional)

The next step towards walking is pulling up, followed by cruising. Usually between 8-12 months, your busy baby will start using furniture and crib bars to stand tall and see their world. (Dressers, TV stands, and bookshelves should be securely mounted to the wall in case they want to use them as “props.”) They’ll also use furniture to support them as they shuffle around. The more opportunities you give babies to move (even if they’re unsteady and you’re in a constant state of panic—welcome to parenthood!), the better. You can walk with your baby, by holding onto both of their hands as they take little steps.

We’ve got a walker!

Alas, all that muscle strengthening, coordination, balance, and confidence building has led to walking. Many babies’ take their first steps around their first birthday (but it can happen earlier or later). It’ll start with a few wobbly steps and lots of wobbly falls. But the more practice, the more confidence and control. You’ll see your baby become able to walk in different directions, and even squat to pick something up and continue on their way! Indoors, your little one doesn’t need shoes. Walking around barefoot or in socks greatly supports healthy foot development. But if you’re heading outside on a walk, closed-toe, flexible shoes provide excellent support and protection.

How you can encourage exploration.

  • Boost resilience. Falls happen. Stay close by and provide reassurance after a fall that it’s okay and they can try again!

  • Add a new toy into the rotation. Push toys can help little ones work on standing and moving from place to place with some extra “help.”

  • Let them roam. You may be used to putting them in the stroller, swing, and activity center throughout the day. Try to minimize the use of those contraptions and give them lots of time to move about and work on their new skills.

  • Create new ways to explore. Who knew Tupperware and spatulas were so exciting? Put together a baby-safe (low) cabinet full of kitchen objects like plastic bowls and wooden spoons. Let them sort, stack, and bang.

  • Help them “help” you. While it’s not the most efficient way to get things done, opportunities to be helpful are wonderful for giving babies a sense of independence. Whether that’s sorting socks or cleaning up toys, little tasks go a long way.

  • Add a pet to the mix! Even though they’re little, babies and toddlers can learn from their parents how to care for and be kind to animals. They can help with getting supplies ready, joining you for walks, adding water to the dog bowl when it’s low and providing plenty of snuggles to your furry family member.

Considering adding a pet to your family? See how Hill’s science-backed nutrition can give your best friend their best life.


Calling all taco lovers! If your mini me loves whipping up play creations, then they’ll love this absolutely adorable Fill & Fold Taco and Tortilla Set from Melissa and Doug.

The taco-tastic kit comes with everything kiddos need to host their own Taco Tuesday. Use the skillet, knife and wooden spoon to cook up chicken, shrimp, beef, tomato, onion, avocado, pepper, shredded cheese, pinto beans and crema before topping off with hot sauce!


photo: Courtesy of Melissa & Doug

The set comes with a foldable tortilla, hard-shelled taco and menu cards so your chef can craft fajitas, burritos or tacos to order. The set is for kids three and older and even comes with a hinged container for easy storage.

You can find the Melissa & Doug Fill & Fold Taco and Tortilla Set for $18.26 on Amazon.

––Karly Wood


RELATED STORIES

Bring On the Brie with Fisher Price’s Pretend Play Charcuterie Set

Melissa & Doug’s Roll, Wrap & Slice Sushi Counter Is Just What Your Little Foodie Needs

Fisher-Price’s Cake Pop Shop Is the Perfect Gift for Junior Bakers


kids cooking kitchen

As parents, we want our children to be happy and confident. We hope they will grow into the sort of adults we would like to know: able to look after themselves, social and successful in at least one role. Knowing how to prepare one’s own meals is a fundamental aspect of being an adult. Beyond just opening packets, the ability to select fresh food and combine it in a tasty and appealing way is a true life-skill.

It makes sense to introduce this skill to children early in their lives. The ability to prepare nutritious and sustaining food is an especially precious possession. And now, even more so, knowing that plant-based diets are thought to provide ‘primordial prevention’ against the serious chronic diseases of our time, puts the potential for good health firmly in the cook’s hands.

Even very young children can participate in the preparation of family meals. It’s a chance to connect with real food ingredients and to recognize qualities that will help children make healthy and compassionate choices, later. They will develop skills and talents to use throughout life. Everyone appreciates a good meal…and the cook who made it!

In fact, children usually love being in the kitchen. Cooking is creative and fun. Eating is social and delicious. It’s all good news!

Most of us parents have to ‘re-wire’ our attitudes and habits, though. Because cooking beside kids is a party! Yes, there are safety issues. Sure, a few hygiene practices need explaining. But when else in your life are you going to see your five-year-old kneading bread dough; your tweenie inventing sandwiches that include mashed potato; your teen using the wooden spoons to practice a drum riff on your mixing bowl—at the same time as whipping up a stunning lentil soup?

Kids in the kitchen offers a chance to put the joy back into meal making. Don that funny apron you were ‘too cool’ to wear a year ago. Serve the dessert first for an ‘upside-down’ dinner. Breakfast can be candle-lit; ambient music can be heavy metal.

If you are worried about safety, the mess, or a shortage of time, take a moment to consider the options: banning children from the kitchen will keep them in unskilled ignorance until young adulthood or beyond. Share meal prep with them now, and they are likely to gain skills, grow in confidence and probably delight you with wonderful conversation and photo opportunities.

If you say ‘Yes!’ to kids in the kitchen, here are simple tips to help you get started:

Safety: Give your child a qualification! The role of Safety Officer gives them the power to correct you if you break one of the Safety Rules. You’ll have to agree on the Rules; but the young officer learns to value and pay attention to details of safety, which they are then unlikely ever to forget.

Mess: Have plenty of floor cloths and hand towels at the ready and make sure everyone knows which is which. Offer aprons. Sweep up before you trip up. Do the washing up while you sing or play word games. Most of all, relax. This is a phase that won’t last forever.

Time: Yes, it does take more time; but it’s an investment in your child. You can schedule long sessions for the weekend; on other days, share simple tasks that suit their age. Try not to watch the clock; a non-pressured atmosphere is best.

3-6-year-olds: Water play comes into its own! Stand them at the sink and let them scrub vegetables, wash berries, or measure liquids. On dry land, let them try kneading and stirring.

7-10-year-olds: Children of this age are natural experimenters. Let them make a spice mixture, concoct a new spread, or design a smoothie. When they are ready, encourage them to write a recipe!

11-13-year-olds: The age of expertise. Theirs might be the difference between black, pink and white peppers, but it still denotes enthusiasm! Putting safety first, let them learn the same kitchen skills you have. Sharp knives, blenders, hotplates and open flame are facts of life and, with your unobtrusive guidance, these young people can deal with them very well.

14-16-year-olds: At this age, they can ‘take over’ or successfully deal with your phone call asking ‘Please, can you make dinner tonight?’ But, they still need to feel looked after, so don’t make that call too often!

16 plus: Going solo is just around the corner. Encourage them to develop a wide repertoire of dishes to set them up, for good!

You: Become assistant to your child: help only when necessary, preferably only when asked. Enjoy!

Peggy Brusseau has written or co-written some 24 books, many of them major bestsellers. Her recently published book, The Contented Vegan: recipes and philosophy from a family kitchen, is a guide to the fastest-growing lifest‌yle of the 21st century. Peggy lives in London with her husband and sons.

Traditional baby and toddler toys boost brain-building, hands-on exploration and are durable so younger siblings can play with them, too. Our favorite non-electronic baby and toddler toys come without batteries and ear-splitting beeps. Little ones learn through play, so a few carefully chosen toys in the toy bin will give your baby a chance to have fun as a tiny scientist, artist, and motor-skill champ. Here are a few of our favorite non-electronic toys for babies and toddlers.

Ronald Hechanova via Unsplash

1. Rattles
A good rattle is sized just right for babies working on tricky hand-eye coordination and learning how to pick things up. This classic toy doesn't look like much, but as babies grasp, shake and even slobber on it, they're learning about the world. Rattles reward curious little ones learning about cause and effect with a satisfying sound as it shakes. Choose a rattle you can easily clean, and make sure it's designed for babies to safely put it in their mouthsbecause it's sure to end up there!

2. Stacking Cups
Stack them in a tower, tip them over, put them inside one another, and then turn them into a home for a plastic cow. Stacking cups offer lots of interactive opportunities for fun and play. Most sets of stacking cups come in bright colors, giving little ones a chance to learn about colors. Balancing cups in a tower shape builds problem-solving skills, self-control and persistence. Another colorful stacking option is Grimms Rainbow, an all-wooden toy that's so beautiful you won't mind having it out on a shelf.

3. Sensory Bins
Toddlers learn about the world through hands-on activities and observation. Sensory bins or tables are a great way to give little ones a chance to explore. You can easily replicate this key preschool tool by filling a plastic bin with dry oats or water and adding measuring cups and scoops. If you're worried about the mess that scooping up water or dry oats can make, put a towel underneath your kiddo and the bin. If the weather is nice, put the bin outside to minimize clean-up, or purchase a water table or sandbox for more sensory fun. If you'd like to take your sensory-bin game to the next level, hide plastic animals or cars for kids to find, or dye rice or dry pasta for rainbow-colored play. Bonus: Sensory bins give curious kids a chance to learn about volume (how much water fits in a scoop?) and boosts imaginative play and language development.

Scandiborn

4. Push-Pull Toys
From Fisher Price's classic, affordable plastic corn popper to a wooden animal on a string, push-and-pull toys are beloved by budding walkers everywhere. These toys encourage balance and gross motor skill development, and they make perfect buddies for toddlers as they stumble and zoom through your home. We love this Little Dutch Walker & Block Trolley from Scandiborn ($59.95, pictured above), as it combines two beloved non-electronic toys in one.

5. Classic Blocks
Your kiddo will play with a set of durable wooden blocks for years and years. With blocks, little ones get a chance to work on problem solving as they figure out how to stack blocks on top of one another or organize them in a row. Eventually, blocks become a blank canvas for imaginative play, as kids turn their creations into castles, houses and zoos. Talking about block creations builds language and conversation skills, and, with a big set of blocks at the ready, older toddlers can work together and learn about cooperation.

6. Dolls & Stuffed Animals
Whether you're looking for a lovey for comfort or a toy your child can practice caring for and rocking to sleep, soft dolls and stuffed animals are a great addition to any baby's toy collection. Playing with dolls helps little ones learn about empathy and feelings. Pro tip: Choose those without plastic eyes that can be a choking hazard!

Jelleke Vanooteghem via Unsplash

7. Music Makers
One of the benefits of non-electronic toys for parents: fewer ear-splitting sounds. But sometimes a baby has just got to make music. Whether you break out your pots and pans and a wooden spoon or give your child a toy drum and a few egg shakers, toys that let kids make their own music are always a hit. Sturdy music-making options without batteries are more likely to last from kid to kid, and they give children the chance to be more creative. We like wooden xylophones like this one from Melissa & Doug because of their bright colors and the variety of sounds they make.

8. Balls
Roll it, throw it, catch it! Balls are awesome for boosting motor skills and hand-eye coordination. But they're also a great way to introduce little ones to the back-and-forth interaction and taking turns, which is one of the building blocks of conversation. Rolling a ball gives grown-ups the chance to connect and make eye contact with babies and toddlers, and it boosts language development. From soft balls with jingly bells inside to bumpy plastic balls just the right size for chubby little hands, toy stores are full of options perfect for babies and toddlers.

9. Bubbles
Bubbles mesmerize babies and toddlers (and many parents) as they float through the sky. Whether you make bubbles at home (we like this DIY option) and blow them outside to delight your kiddo, or pick up a bubble-making lawn mower, bubbles are a surefire hit with little ones. We like to keep a few jars of bubbles at the ready to distract cranky little ones.

10. Ride-On Toys
A good ride-on toy gives toddlers hours of indoor gross-motor fun. These toys develop balance and give little legs a workout. One of the best first-birthday gifts, our fave ride-on toys come with a basket or bin that little ones can use to give their favorite toy or stuffed animal a ride around the house, promoting imaginative play, too! We love the sturdy Little Red Rider Wooden Kid's Ride-on Bike from Hape. 

—Oz Spies

RELATED STORIES:

The Smart Moms’ Guide to Montessori Toys for Babies & Toddlers

New Indoor Playtime Toys & Activities for Toddlers

Let’s Play! Sensory Activities for All Five Senses

The great thing about babies is that they’re easily entertained, which is especially helpful when you’re trying to build a connection between your tot and their older sibling. Babes are obsessed with everything their siblings do, and bigs take great pleasure in making their babies laugh, or showing off their “reading” skills with their favorite nursery rhymes. So before your tot becomes a toddler and turns your big kid’s world upside down, your baby can start bonding with their older sibling by playing sweet and silly games together. These budding connections will only grow as your kiddos get bigger. From classics like peekaboo to anything-goes dance parties, here are our favorite sibling activities for big kids and babies.

1. Peekaboo

This old favorite is a classic for a reason! Peekaboo is an easy, surefire way for an older sibling to put a smile on baby’s face. To add an extra twist to the game, get out a lightweight blanket that your older kid can drape over their head, and then let your little one take off the blanket. Big kids can also play peekaboo with favorite stuffies, hiding them behind their backs before the big reveal. Ta-da!

2. Making the Band

Kids of all ages love to rock out. Gather up musical instrumentsxylophones, rattles, even ukuleles for the big kidsand encourage your kids to make beautiful music together. If you don’t have instruments, break out the pots and pans and wooden spoons. If your budding musicians want to make their own instruments, dig into the recycling bin: Make a drum out of an oatmeal canister or a shaker by putting beans in a toilet paper tube and taping over each end. You can find more baby Mozart-worthy DIY instrument ideas here.

3. To the Races

Encourage mobile kids to get out their wiggles and race each other across the living room. To even things out, big kids can do a crab walk or walk backwards while little ones crawl or scoot. Ready, set, go!

photo: Edward Cisneros via Unsplash

4. Mirror, Mirror on the Wall

Babies adore seeing facesespecially when they belong to beloved older siblings. Big kids can pretend to be mirrors and mimic their little siblings’ expressions, or make an exaggerated face and see if their baby sibling can do the same. The eye contact siblings make when they’re playing a mirror game helps to strengthen their bond as future besties.

5. Echo

The imitation game can also be played with sounds: Have the older sibling mimic the coos and noises their little sibling makes. For a twist, your big kid can even extend those oohs and aahs into words. This back-and-forth is how babies learn to talk and take turns in conversations, so by playing this game your older sibling is creating the building blocks for your baby’s future babbling!

6. Patty Cake

Rhymes, hand-clapping games, and finger-play classics are always a sibling playtime hit. Your older child can teach their little new tricks with patty cake, or throw other preschool favorites, like the Itsy Bitsy Spider or Five Little Monkeys, into the mix.

7. Story Time

Long before kids can read, they memorize their favorite picture books. Older siblings feel oh-so-grown-up when they “read” these books to baby siblings. Don’t worry if your child doesn’t know all the words yet; just reciting the beginning, middle, and end of the story will entertain their younger sibling. To make the story time a little extra special, add puppets, like these from the Etsy shop Frankly Fun Felt ($18).

8. Made You Laugh

Is there anything better than baby giggles? Challenge big brothers and sisters to make the baby laugh without touching them. They can try funny faces, silly dances, pretending to be an elephant, putting their shoes on their head…. Anything goes!

photo: Jens Johnsson via Unsplash

9. Keep It Rolling

Rolling a ball back and forth is an easy introduction to taking turns, and kids can play this game together almost as soon as little ones are sitting up on their own. Easy-to-grab balls like this one from Oball ($5) help baby play the game. Big and little siblings can also roll cars or trains back and forth. Pro tip: Rolling two similar toys back and forth at once makes taking turns a little easier because each kiddo will have a toy to hold onto at all times.

10. Dance Party

Put on your favorite tunes, pull out some gauzy scarves, and get a dance party started. To make it extra special, just add bubbles. Give your baby a rattle if they aren’t quite big enough for a full-body boogie. We guarantee it’ll give you a few minutes of peaceand you might be inspired to join in the fun.

Make sure to capture all those sweet bonding moments—and share them with your family and friends near and far—with the Tinybeans app. The secure platform puts parents in total control of who sees and interacts with photos and videos of their kids.

“It’s just four days,” my daughter said over the phone. “I know it’s a lot but we need to get away.” I couldn’t say no. My mother did the same for me, often, but with two kids not one. “Of course,” I replied trying to keep my voice calm.

Baby Ruby was just a few months short of two. Caring for her wouldn’t be a problem. After all, I have a Masters in Education and a Specialists Certificate in Early Childhood Education. Making friends with her might prove more difficult. I never got smiles or chuckles from my youngest grandchild. All I got was a furrowed brow and lots of frowns. The first thing she did when I answered the door was cry.

The plan was the parents would stay overnight at my house and then leave early in the morning. I took her for a walk to the park while they made their escape. “She loves the swings,” her mother said. She didn’t with me. She pointed to the stroller, shaking her head and called for her Mama. This might be worse than I thought.

Naptime was to begin with a story that she subsequently pulled from my hands and threw to the floor. She pointed to the TV and against all of my child-rearing practices I gave in. She fell asleep, while I followed the plot of Paw Patrol.

She looked around and called for her Mama most of the day, distracted by cherries, cookies and the squirrels in the yard. That night she cried heartily for her mother and my heart broke.

“Mama is in an airplane,” I said trying to explain her absence. That concept stopped her tears. She pointed to the sky and made the circular motion of flying. “That’s right,” I said, putting her in her cot. “Mama’s in an airplane. You lie down and she’ll be back tomorrow.” I knew a toddler’s sense of time wasn’t that well established for me to get caught in the lie.

She woke in the night crying. I reassured her, ‘Nana is here, Nana is here.”

“Mama,” she called out.

“Mama’s in an airplane,” I repeated.

She pointed to the sky, made the circling motion, lay her head down and went to sleep.

I turned to the single bed in her room instead of making my way back to my own. We woke together rejoiced at the excitement of breakfast, dressed and went to the swings.

Her vocabulary began to emerge, shaking her high chair to demand “din-din”. I cooked everything her mother said she would like. She didn’t. I dropped a wooden spoon and she smiled. I dropped it several times more. She ate a cracker and a slice of cheese.

I introduced her to the huge plastic container of toddler blocks and we build a tower. The words stacking, collecting, carrying and pushing floated to mind. Outside we collected pine cones in a basket, stones in a bucket, and she pushed her own stroller to the swings.

An airplane flew over. She looked up, pointed and frowned. Then she pouted and said Mama. “That’s right,” I said, “Mama’s in an airplane.”  I kicked the red ball on the grass and she went after it.

The nights became easier as she volunteered to lay her head on my chest as we rocked. I shook my head when she pointed to the TV and she got the message. Stories, the very love of my life were somehow verboten, as was singing her a lullaby. Perhaps that was such a special time with her Mamma, I wasn’t to intrude.

She learned where I kept the Tupperware and what kitchen drawers she was allowed to investigate. I handed her wet socks to put in the drier and she would put anything you wanted in the garbage, along with a few things of her own.

She spied my phone sticking out of my purse and held it to her ear as she walked around talking gibberish. When she saw my tablet on the coffee table, she brought it to me, puzzled that I didn’t welcome the gift. “You are my little computer,” I told her. “That’s all I need right now.”

While waiting for the magic moment of her parent’s arrival we were rolling on the floor laughing. It started out as Ring-Around-the-Rosie, but being two the “all fall down part” was the most fun. Having had a knee replacement, I couldn’t do this part until I stumbled and came down. She shrieked with glee and piled on top of me.

Her Dad came first. Her eyes opened wide and she put her arms out and said, “Dada.”

Her mother came behind. Ruby burst into tears. My daughter ran to her and picked her up. “I missed you so much,” she said. Ruby sobbed into her mother’s bosom.

She wouldn’t let go of her mother for the rest of the day, nor would she have anything to do with me, crying if I even came near. It broke my heart to end her stay on such an emotional note.

I tried to kiss her goodbye but she shot me a glare, turned away and buried her face once again. She refused to get in her car seat and held her arms out when the buckles closed. Just as I turned to go into the house I heard it.

“Nana!” a small voice called out.

This time the tears were mine.


This post originally appeared on The Globe and Mail.

Three boys and a girl call me Nanna. Nanna with 2 n's like Jennifer. I have no role to follow as my grandparents only lived in photographs. Having been a school principal I walk the line between rules and ridiculousness! I prefer being ridiculous and so do they. 

Packing school lunches is a task almost as relentless as cooking dinner, and sometimes as thankless for even the savviest of foodie moms—which is why shortcuts and hacks are an essential survival tool. We’ve got 22 school lunch ideas that’ll take the panic out of the morning pack. Keep reading to see them all.

photo: Clean Eats & Treats

1. Prep Lunches Ahead of Time

Whether it’s doubling up a Sunday roast or spending some time getting ahead by cooking up a big chili dish, prepping before the school week gets underway can save you time and trouble. Check out these lunch box ideas for big cook-ups.

2. Use a Thermos

Try to get the kids eating from a thermos at least once a week; it’ll give you the option to reheat leftover soups, stews and rice dishes for lunch.

3. Keep the Thermos Warm Until Lunch

That genius idea to get kids to eat leftovers won’t be so genius if the food is cold by the time lunch rolls around. Instead, pour boiling water into the container and let it sit while you make the rest of the lunch. Then, dump the water and fill the Thermos with warmed-up food.

photo: Kathleen Franklin via Flickr

4. Freeze Your Lunches

Prepped ahead portions of pasta, frozen veg, and leftover chicken can be pulled from the freezer on a weekday morning for an instant lunch. It’ll be freshly defrosted by midday and keeps everything else cool.

5. Pack Non-Perishables ASAP

You’ll only have to focus on the sandwich/main meal/dairy portion in the morning.

6. Keep Single Serve Condiments

Single serve condiments from take-outs and restaurants don’t need to be ditched. Pop a packet of ketchup in to liven up the cut veggies or bacon bits.

photo: Real Mom Nutrition

7. The Rubber Band Trick

Apples are more likely to be eaten if they are cut up, and this rubber band trick will keep them from going brown. Or, use the Real Mom Nutrition suggestion of rubbing a combo of lemon juice and OJ or pineapple juice on the slices.

8. Wooden Spoons

Forget sending the little ones to school with metal spoons. Use wooden ones for pudding or yogurt, it’s more environmentally friendly than plastic and you don’t have to worry about lost utensils.

photo: Emily Myers

9. Food with Natural Containers

Work with nature—hard boiled eggs, bananas, and clementines are lunchbox friendly foods that come in their own organic containers.

10. Pinwheel Sandwiches

Pinwheel sandwiches are one of the easiest lunch box ideas (and can be frozen ahead of time). You can bet the kids will unravel what you’ve carefully rolled, but the good news is it will probably end up being eaten!

photo: Clean Eats & Treats

11. Set Up a Snack Station

Plenty of moms, including Shannon Sargent at Clean Eats & Treats, swear by the idea of “snack stations” where kids can pick out what they want. Dedicate a space in the fridge or pantry using toy storage bins, and pack it with snacks or use this genius hack, which reuses a hanging shoe organizer with see-through pockets as a snack wall.

12. Easter Eggs

Pop six plastic Easter eggs in an egg box, each one stuffed with something different like popcorn, sunflower seeds, granola or crackers.

photo: Boulder Locavore

13. Banana Lunch Notes

No Post-It note nearby? Scribble on a banana instead.

14. Mini Kebabs

Create a totem of fruit, veg, cheese squares, cucumber, cherry tomatoes, mozzarella balls, folded salami, micro sandwiches and more. Snip off the end of the skewer if you’re worried about anyone at the lunch table getting poked.

photo: courtesy Jill Nystol via One Good Thing

15. Pizza Cutter

Meal prep is awesome, but if you need to whip up a quick sandwich, grab a pizza cutter to slice off those crusts in seconds.

16. Family Chalkboard

Put lunchtime options on a chalkboard or family whiteboard so the kids can see what will be in their lunchbox.

17. Put the Lunchbag and Snacks within Reach.

Time is everything when it comes to the morning rush. Hang their lunchbags in plain view, with a caddy below, and your kids will be able to easily toss in the snack for their lunch. Take a peek over at Hi, Sugarplum to see how to make it happen.

18. Pack Chicken Nuggets in a Thermos

If you’re looking for fun kids school lunch ideas try cooking chicken nuggets in the morning and throw them in a thermos to keep them nice and toasty.

photo: Melissa via Flickr 

19. Cupcake Liners As Dividers

Short on containers? Grab cupcake liners and use them to separate different items in larger plastic containers so you can have a sandwich, chips nuts and fruit in the same place.

20. Freeze Your PB & J

One of the easiest kids school lunch ideas is to make a week’s worth of frozen PB&J sandwiches. Use different jams, butters and even pieces of bread for variety.

photo: Miriam via Flickr 

21. Frozen Smoothies with Extra Veggies

If your kids need an extra dose of veggies, try frozen smoothies. You can sneak veggies like beets and spinach into them.

22. Print Lunch Notes Every Month

If you want to give your kiddos a little extra encouragement without having to remember to write a note every morning try printing a bunch of them at the beginning of the month so you’ll have them on hand.

— Natasha Davis & Emily Myers


RELATED STORIES:

The Real Reason I Always Pack a Little Extra in My Son’s Lunchbox

15 Lunchboxes That Get an A+

21 Lunch Ideas They Will Actually Eat

15 Lunch Ideas That Aren’t Sandwiches

Feature photo: Sarah Pflug via Burst

Lunchbox Hacks That'll Help You Survive the School Year

SaveSave

If you’re stuck with a handful of brown, mushy bananas, read on for a super easy banana bread recipe that your kids will love. Red Tricycle’s Editorial Director makes this bread quite often because it’s moist, flavorful and simple. In fact, she’s tried about a dozen recipes and this is by far the best. Read on to find out the only banana bread recipe you’ll ever need.

banana-bread

Ingredients:
2 cups unbleached all-purpose flour
¾ cup sugar
¾ teaspoon baking soda
½ teaspoon table salt
4 very ripe bananas, mashed (about 1½ cups)
¼ cup plain yogurt
2 large eggs
6 tablespoons unsalted butter, melted and cooled
1 teaspoon pure vanilla extract
1¼ cup walnuts, toasted and chopped coarse (optional)

Method:
1. Adjust a rack to the lower-middle position of the oven and heat the oven to 350 degrees. Grease and flour a 9-by-5-inch loaf pan; set aside.

2. Whisk together the flour, sugar, baking soda and salt together in a large bowl; set aside.

3. Mix the mashed bananas, yogurt, eggs (whip eggs together in a separate bowl beforehand), butter, and vanilla together with a wooden spoon in a medium bowl. Using a spatula, lightly fold the banana mixture into the dry ingredients until just combined and the batter looks thick and chunky. Fold in the walnuts if desired. Scrape the batter into the prepared loaf pan and smooth the surface with the spatula.

4. Bake until the loaf is golden brown and a toothpick inserted in the center comes out clean, about 55 minutes. Cool in the pan for 5 minutes, then transfer to a wire rack. Serve warm or at room temperature.

The recipe was originally spotted at America’s Test Kitchen.

Recipe adapted by Erin Lem, Red Tricycle’s Editorial Director who only wishes she had better photo skills to document all the fun dishes she makes when she’s not editing, writing, and uncovering family fun. 

photo: Sajia Hall via flickr