If you’ve only used your high chair for meals, get ready to knock your parenting game up a notch. With these easy ideas for high chair activities, your baby will be safely contained and entertained, giving you a chance to whip up dinner, make a quick call, do some cleaning, or finish your own meal.

Stirring the Senses

Bradley Gordon via Flickr

Sometimes, around-the-house items like a wooden spoon or spatula can serve as the best toys or distractions for baby. Hand one over while you're cooking and let baby chew, touch and bang to their heart's content.


Magnetic Magic

torbakhopper via Flickr

Place a small metal pan and a handful of magnetic letters, shapes or animals on your child's high chair to keep baby busy with sliding and touching the different shapes. Choose large items with securely affixed magnets to avoid a choking hazard. If the pan goes crashing down from the high chair, the magnets should keep the items from going flying. 

Flour Power

Amberlei Hellewell via Flickr

In the middle of baking? Let baby get involved by sprinkling a bit of flour on the high-chair tray for them to push around...and probably get all over themselves.

Banish Boredom with Beads

This classic wooden-bead maze toy, the Melissa & Doug First Bead Maze ($13.99), comes with attached suction cups that make it perfect for high chairs. (Bonus: You can tote it to restaurants to keep babe entertained before the food comes.)

Musical Chair

Dano via Flickr

Turn off the tunes and let your little one make the music instead. Tiny maracas, cymbals or a xylophone are all great ways for baby to shake or bang out a catchy beat from the comfort of the high chair.

Golden Globe

Hello Bee

Who isn't mesmerized by a snow globe or its DIY equivalent? Fill a water bottle with water or oil, glitter and small items such as shells, buttons or beads to create your own baby-safe snow globe or sensory bottle.

It's in the Bag

Can Do Kiddo

Unleash your baby's inner Picasso with mess-free painting. Slip a piece of construction paper into a resealable bag, squeeze in a few drops of paint, and seal it up. Tape it to the high chair's tray and watch the masterpiece come to life.

Turn on the Water Works

The Imagination Tree

If baby's high chair has a tray with a tall lip, you have the perfect spot for baby to splish and splash. Take a cue from Chasing Cheerios and add a drop of food coloring to up the fun factor. Note: This will get messy. Put on the right bib (check out our favorite bibs for every occasion) and maybe save this idea for a warm day when you can park the high chair outside. Or a day when you'd planned to clean your floor.

Pipe Play

elizabeth weislak via Flickr

To keep baby's brain and hands active, reach for a handful of pipe cleaners and an empty water bottle (for older babies) or a wide-mouthed plastic jar (for younger ones). First, twist pipe cleaners in half to soften pointy ends. Then, show baby how to fit the cleaners into the bottle or jar and watch those motor skills grow.

Stick With It

Chasing Cheerios

For the DIY-inclined, this Velcro board is a great way to keep baby's hands busy. To make this board, the Chasing Cheerios blog advises that you sand a wooden board, then affix strips of sticky-backed Velcro to it. Cut smaller pieces of Velcro to affix to blocks or other small toys. Your little one can attach the different items to the board and explore that satisfying telltale Velcro sound when they pull them off. Velcro will also help keep the toys on the high chair tray.

Do you have any tips for keeping babies entertained in their high chair? Share them in the comment section below. 

— Suzanna Logan

Nobody is more easily entertained (or has a better sense of humor) than kids. Who better to appreciate these hysterical spaghetti tools? Check out our 9 favorite spaghetti innovations below.

1. Crank it out. Solve your mini me’s noodle twirling dilemma with a crank operated fork that makes spinning noodles a cinch. They’ll reel-y get a kick out of this helpful gadget and you’ll be happy they get a mouthful each time. Little engineers and tinkerers won’t be able to resist meal time.

photo: Amazon.com

2. Perfect Portions. You’ll love this book that doubles as a measuring tool. It helps you find the perfect portion size to feed your fam. Simply feed the noodles through the mouth so you know just how big of a handful to drop in the pot to feed your crew. Did we mention it’s rinsable?
photo: Amazon.com 

photo: Amazon.com

3. Spin a Spoonful. If your kid is not quite ready for the above mentioned crank fork, we found something perfect for smaller tots. It’s motorized fork spinner that’s a no muss, no fuss tool that makes carbo-loading that much easier for your active eaters.

photo: Allison Sutcliffe

4. Serve up a rainbow. No matter what you top your spaghetti with, serving your little chef a bowl of dyed rainbow noodles guarantees he’ll gobble them up. Tablespoon has the dish on how to create this colorful, edible combo.

photo: Museumstore.org

5. Dish it up. Ditch your traditional spaghetti serving spork for this adorably different one your kids will love. And don’t forget to give it the old 1-2 roar when you serve up a plateful of steaming hot noodles to your dino-loving kid.

photo: Amazon.com

6. Be Magic. Amaze your friends and more importantly your kids when you pull this “magic” trick out of the pot. To keep water from boiling over, simply place a wooden spoon across the top of the pot. Voila!

7. Don’t Strain Yourself. This sweet strainer attaches to the bowl so your daughter can help drain her fave noodles without risking life and limb. Little hands are totally in the clear on this one and you don’t have to overhaul your entire sink to use it, either (we know you have dishes “soaking”).

photo: Amazon.com 

9. Store it Tight. Keep your noodle stash in sight of you little ones with a castle container like this one. Then when the craving hits, pop the top to boil a bowlful of pasta fit for royalty.

What’s your favorite spaghetti product or tip? Have you tried any of these? Tell us about them in a comment.

—Allison Sutcliffe

Did you know that babies learn faster during their first year of life than at almost any other time? Helping your baby make the most of this wonderful learning period gives them a good foundation for their later development.

So here are 10 important things you can do with your baby before they can walk or talk, to help set them up positively for later learning.

1. Make eye contact

Even the very youngest baby instinctively responds to eye contact – when a baby is seven hours old he’s already interested in his mother’s face and may even mimic facial expressions! Looking into your baby’s eyes is a beautiful way to develop a strong emotional bond between you both.

As your baby gets older, you can begin to play games such as ‘Peep-Bo’, which helps him begin to understand the concept of hiding things, and will also produce a storm of delighted giggles.

2. Rock your baby

Rocking your baby is an instinctive way to love and soothe her when she’s upset. This regular motion mimics the mother’s movement when baby was in the womb. Research has shown that rocking your baby helps to calm their heart rate, helping her to become calmer.

If your baby needs frequent rocking, try using a baby sling. Babies in rural Africa are tied to their mothers’ back (no buggies!), and rarely cry unless they’re wet or hungry.

3. Singing and music

We sing to babies instinctively, both to comfort them when they’re being rocked and also to entertain them. Don’t worry if you think you can’t sing! Babies respond well to all voices and they don’t make judgements about the quality of your voice!

Nursery rhymes are a great way to start, and there are lots of children’s songs you can use too. These can be a fantastic way to introduce other kinds of learning. For example, counting songs help develop maths skills, and as your baby learns to join in, his language skills will be improving too.

But don’t limit yourself to ‘children’s music’. My kids were brought up on a diet of genres which included classical, rock and pop, gospel, and much more. Variety is the spice of life!

4. Baby talk

Talking to your baby is absolutely critical from the moment she’s born. She will already be familiar with mum’s voice, and possibly dad’s too, so hearing a familiar tone will help soothe her and attract her attention. The sing-song nature of this baby talk actually helps babies begin to distinguish the different sounds in our language.

Of course, talking to your baby is invaluable in helping her language development. The more she hears you talking, the better her own language development will be.

5. Let them move

Your baby also needs lots of opportunity to develop physically. You can encourage this by giving your baby opportunities to explore movement. For example, let him squirm without his nappy for a few minutes at changing time. As he gets older, give him time laying on the ground, to encourage strong muscle development and his sense of his own body.

Put plenty of brightly colored toys within reach so he can practice reaching and grasping. And don’t forget to model physical actions such as stacking blocks or hitting a pan with a wooden spoon, so he learns to experiment physically.

Activities like swimming will also help your baby to develop physically, as well as giving him a sense of freedom he can’t get when he’s ‘earthbound’.

6. Share a massage

Our sense of touch is a wonderful way to communicate wordlessly and build a close bond. Unhurriedly rubbing baby lotion or gentle massage oil into your baby’s skin is superbly soothing for both you and your baby.

Touching and stroking release ‘feel-good’ oxytocin into the bloodstream, which slows the heart rate and is deeply relaxing. So taking a little time after her daily bath will make a world of difference to your baby’s sense of wellbeing and your own.

The National Childbirth Trust has a helpful guide to getting started with baby massage, or look for local classes.

7. Read to your baby

Reading to your baby can begin before they are born. My daughter-in-law read to her unborn baby from the moment she knew she was pregnant. My granddaughter is now six years old and she’s a complete bookworm.

Reading to a small baby helps them get familiar with how books work – how to turn the pages, how to focus on the picture or text, and eventually they’ll realize that all those black squiggles actually mean something. Books can be used to explore the world around them, prepare them for events like starting kindergarten, and process feelings such as anger or grief.

And of course, learning to love books and stories is a great foundation for building their own reading and language skills too.

8. Model social skills

As your baby grows, it’s important to help them develop the social skills they need, such as sharing, interacting with others, and communicating. The best way to do this is through modeling that behavior yourself.

Spend lots of time playing with your baby, including things like giving and taking toys, working together to build a block tower, or games to encourage copying. This helps him understand that play can be a shared activity.

Learning to share takes time, but let your baby see you sharing with them, such as eating a bowl of fruit together, taking turns to throw a ball, or letting him have his own spoon at mealtimes.

9. Let them experience new textures

When babies are tiny, they need to experience a safe and soothing environment. But as they grow, they also need to learn about the different tactile experiences the world can offer. So let your baby explore different textures by giving her a chance to play with a wide variety of objects.

Let her touch an ice cube, wrap them in a warm towel, or seat her on a sandy beach. Scoop, splash or dribble water over her at bath time, and in time, let her play with containers and splash for herself.

Provide toys made with fabric, soft fleece, wood and plastic, and encourage her to feel. Let her hear different sounds – my baby son was once rendered helpless with laughter as I tore sheets of paper. Rub sandpaper together, bang pan lids, and shake rattles. Sensory play like this is crucial to babies’ physical development, as well as their vision and hearing.

10. Offer a variety of foods

Exploring different textures also extends to food. Once your baby is old enough to eat solid foods, give him as much variety as possible. There’s a world of difference between slurping smooth oatmeal and crunching apple slices. Crispy breadsticks, smooth fruit puree and buttery avocado all help your baby experience different sensations.

Just think of the wonderful variety of textures among the different fruits and vegetables. Within reason, try to give your baby as much variety of taste and textures as possible – you may be surprised at what they enjoy!

I'm a mother, stepmother, grandmother and retired educator. I now share my time between the UK and The Gambia. I've been published on Huffington Post, The Good Men Project and ReadersDigest.com, and I blog about family life at www.fabulousfamilies.co.uk. Why not come over and say hi?

Thanksgiving is right around the corner and, with it, time to get in the kitchen with your kids and cook up some mouth-watering treats. To help provide inspiration, we reached out to six chefs, restaurateurs and food experts and asked them to share their favorite seasonal dishes. Click through for some tasty inspiration for Turkey day — and beyond!

For a Turkey a Cut Above

Svitlana Flom
Food blogger, Art de Fete
ArtdeFete.com

Mom of Vivi, two, and a mom-to-be

Thanksgiving thoughts: “My daughter is always by my side in the kitchen, helping stirring, measuring or making some mess in the kitchen. This upcoming Thanksgiving will not be an exception. I am hosting a real feast for our family. When I cook a dish, it’s important to me that I talk through the recipe step-by-step with Vivian, and she loves it. She always wants to be picked up and help me out with her tiny little hands. So next on the agenda: we’ll pick the prettiest 15-pound turkey together and my husband will massage the bird to make her really tender. We call it ‘a real shiatsu massage experience Flom-style.'”

Recipe

Herb-Roasted Turkey with Mushroom Gravy and Cranberry Sauce with Pear & Cointreau

Serves 8-10

For the turkey:

12-14 pound organic or kosher turkey

1 tablespoon rosemary, finely chopped

2 tablespoons flat-leaf parsley, finely chopped

2 tablespoons thyme, finely chopped

1 tablespoon lemon zest

2 tablespoons kosher salt

1 tablespoon black pepper

6 tablespoons butter, room temperature

Dry Brine William and Sonoma (A classic medley of fragrant herbs, spices with a hint of citrus)

For the stuffing

2-3 lemons, quartered

2 purple onions, quartered

1 carrot, cut into 2-inch pieces

1 celery rib, cut into 2-inch pieces

3 garlic cloves unpeeled, crushed

For the gravy

2 lb. button mushrooms, thinly sliced

3 cups low-sodium chicken stock

1/2 cup white wine

2 shallots, chopped

3 tablespoons butter

2 tablespoons all-purpose flour

1 thyme sprig

Salt and freshly ground black pepper

Unwrap the turkey and remove neck and giblets. Rinse the turkey under cold water and pat dry. Following instructions, rub dry brine all over turkey and inside the cavity, refrigerate covered in a plastic wrap for 1 or 2 days. (I like to use dry brine from William and Sonoma but a blend of your favorite spices will work just as fine.) Rinse off dry brine and pat the turkey dry with paper towels. Let it stand at room temperature for 2 hours before cooking. Season cavity with salt and pepper liberally and stuff it with lemons, onions, carrot, celery and garlic cloves.

Preheat the oven to 450 F with the rack in the lowest part of the oven. Set a V-shaped rack in the roasting pan. Place turkey breast side-up onto the rack. Tie the legs loosely with the kitchen twine, the bird will retains its shape and moisture during cooking and tuck the wings under the breast (you might have to break them to do it). Fold neck flap under, and secure with toothpicks. Add 2 cups of water to the pan.

Combine butter, herbs, lemon zest, salt and pepper and massage the herb butter all over turkey. Using your fingers, carefully loosen skin of breast and around thighs and rub herb mixture under the skin of both. Season generously with salt and pepper on all sides to ensure great flavors.

Roast for 30-40 minutes, rotating half way through. Reduce heat to 375 F and continue cooking for 1½-2 hours, basting with pan drippings occasionally (about every 20 minutes), until an instant-read thermometer inserted in the thickest part of the breast registers 165 F and 175 F in the inner thigh. Cover the turkey loosely will foil and let rest for 1 hour before cutting. (If breast gets too browned, cover it with the foil and continue cooking.)

To make the gravy: Strain the pan juices into a heatproof bowl and skim off the fat. Pour the pan juices into a large glass measuring cup; let stand until grease rises to the surface, about 10 minutes, then skim with a large spoon. Or use a gravy separator, this heatproof tool quickly separates juices from fat and filters solids.

Meanwhile, place roasting pan over medium heat. Add butter, shallots and cook them for 2 minutes, then add mushrooms and cook for 5 minutes. Add wine and bring to a boil; deglaze pan by scraping up any browned bits from bottom with a wooden spoon. Add stock; stir well, and return to a boil. Add thyme sprigs. Cook until reduced by half, about 5 minutes. Add the defatted pan juices, and cook 5 minutes more. In a small bowl mix 2 tablespoons of flour with 2 tablespoons of gravy liquid, mix well until it becomes a thick paste; slowly add a little more liquid until it gets thicker, resembling a heavy cream consistency. Whisk it into the pan drippings slowly; simmer the gravy for 2 more minutes.

Remove from heat, and season with the salt and pepper. Pour it into a warm gravy boat, and serve with turkey.

Share your favorite holiday recipe below!

— Lambeth Hochwald

Make this Halloween extra sweet by whipping up a batch of your very own caramels. Turn this cooking activity into a learning moment as you show your kids how to measure ingredients and read a thermometer. This recipe comes to us courtesy of FoodNetwork.com. Be sure to click over to FoodNetwork.com for more great recipe ideas.

Total Time: 1 hr 15 min
Makes: About 32 Pieces
Level: Intermediate

Ingredients:
Nonstick cooking spray
4 small ripe pears, such as Anjou or Forelle (about 2 pounds)
36 (6-inch) wooden skewers
1/2 cup granulated sugar
1/2 cup light brown sugar
3/4 cup dark corn syrup
4 tablespoons unsalted butter
1 cup heavy cream, divided
1/2 vanilla bean or 1 teaspoon pure vanilla extract
1/4 teaspoon freshly ground nutmeg
Pinch salt
Black sesame seeds for eyes
Pink or yellow candy buttons, for decoration nose

Method:
1. Line a sheet pan with parchment paper or foil. Spray with nonstick cooking spray.

2. Just before you make the caramel, core and cut pears into eight wedges, blunting the cut side so that it can lay on a flat surface peel side up. Place a skewer into each wedge, cover with paper towel, and set aside.

3. Combine sugars, corn syrup, butter, 1/2 cup heavy cream, vanilla and nutmeg in a heavy sauce pot. Bring to a boil over medium-high heat, stirring constantly with a wooden spoon. When the mixture has come to a brisk boil, slowly add in the remaining cream, keep the mixture boiling. Be sure to wipe any extra sugar from the side of the pot. Clip a candy thermometer to the side of the pot with the tip immersed. Boil the mixture briskly, stirring gently, until the mixture registers 240 degrees F on the candy thermometer, about 10 minutes. Immediately remove from the heat. Pour the caramel into a medium heat proof bowl using a rubber spatula so that you do not scrape the bottom of the pot. Let caramel rest until it thickens and cools slightly, about 3 minutes.

4. Blot excess moisture from the pears using the paper towels. Dip pears completely into caramel, swirling until it is fully coated, allow excess to drip off slightly. Place on prepared sheet pan. Decorate with black sesame seeds for eyes and candy button noses, while the caramel is still soft. Repeat until all the pears are dipped. Allow to cool until firm about 30 minutes. Serve.

Cook’s Note: As the caramel cools during dipping, it may stiffen and be too thick or slide off on the pear. Just reheat in microwave, checking at 20 second intervals until at the desired dipping consistency.

FOOD NETWORK (www.foodnetwork.com) is a unique lifestyle network, website and magazine that connects viewers to the power and joy of food. The network strives to be viewers’ best friend in food and is committed to leading by teaching, inspiring, empowering and entertaining through its talent and expertise. Food Network is distributed to more than 100 million U.S. households and up to 35 million unique web users monthly. Since launching in 2009, Food Network Magazine’s rate base has grown tenfold and is now the second largest monthly magazine on the newsstand, with over 11.6 million readers.  

This recipe for Pasta al Pastore courtesy of our friends at A Little Yumminess almost makes itself. Store bought, well-made Italian sausage (chicken, turkey or traditional pork) is the key to this easy dish. Well-seasoned sausage takes away the need to add your own seasonings and when possible we suggest using good ricotta.

Ingredients
4 hot (or mild for kids) Italian sausages
1 lb package rigatoni or pasta of choice
1/2 lb fresh ricotta
2 tablespoons olive oil
Grated pecorino/parmesan cheese (optional)

Method
1. Boil well salted water in a large pot. Add pasta and cook till al dente.

2. In a skillet, add oil, heat and then add sausage meat. You can crumble it with the back of the wooden spoon. Saute till cooked – 5-7 minutes.

3. Reserving 2-3 ladles of pasta water, remove pasta from water and add to sausage in skillet.

4. Add the reserved pasta water. Cook for a minute or so. Turn off heat.

5. Stir in ricotta and if using sprinkle with pecorino/parmesan.

For more easy, kid-friendly recipes click HERE

Tell us if you adapt this recipe at all to suit your kids’ taste buds. Fill us in below!

This is a guest post from our friends Simran and Stacie at a Little Yumminess. Be sure to visit their blog for more fab, kid-friendly recipes!

You’ve just gotten home from a busy day and your kids are begging for brownies. Or the grand-parents need new ideas for edible activities with your little ones, but they’re no Wolfgang Puck. Food Stirs to the rescue! This brainchild of an LA momtrepreneur takes the muss and fuss out of cooking and leaves in the fun and made-from-scratch results.

photo credit: Foodstirs via facebook

The Scoop on the Stir
Foodstirs are the very definition of convenient, but without the bad-for-you ingredients of convenience food. Instead of opening a box mix, filled with unrecognizable ingredients, and an expiration date 6 years in the future, you get everything you need for a recipe delivered to your door in a darling package, complete with a pretty recipe card with step-by-step photographed instructions. It’s an all-natural, non-GMO Martha Stewart in a box—a dream come true for those of us without a culinary bone in our bodies.

The food crafting kits are designed for budding chefs ages 5-12. Choose from themed kits, or become a chef in training with a 3 kit series, where kits get delivered to your door monthly, so you can count on a fun cooking experience regularly! Plus, every kid adores getting mail, and opening up the pretty box is half the fun. Everything is packaged in a super cute way, so it feels like something really special.

photo credit: Foodstirs via facebook

What’s in the Box?
You’ll get all the dry ingredients you need to bake the sweet treat. No flour in the house? No baking soda? No problem! Everything comes easily labeled and separately packaged. Unlike your typical Duncan Hines-type mix, Foodstirs keeps the learning and exploration alive. Kids get to measure out each ingredient (don’t worry, there’s extra in each ingredient pouch in case of spills). You can make a math game out of the project to make it extra educational (one half plus one half equals one whole lot of fun).

A colorful and easy step-by-step sweet recipe card comes with the dry ingredients, with pictures that are easy for kids to follow. Plus, you’ll get specialty cooking tools and craft supplies (from wooden spoons to cookie cutters) to start building up your at home kitchen tool drawer.

photo credit: Elena Wurlitzer

As a bonus, you’ll also get a healthy dinner recipe card, for you and the kiddos to make something scrumptious for your main meal. You’ll get a reminder e-mail in advance, letting you know what ingredients you’ll need for both the sweet and savory recipe. And with less than 8 steps in each and every recipe, you’re sure to keep your mini-chef’s attention the entire time.

The Birth of A Recipe
Recipe labor is a lot easier than baby labor!  But a lot of thought and energy goes into choosing the recipe that arrives at your door. Foodstirs works with a number of local LA chefs and nutritionists to create accessible and delicious recipes. But even before consulting these local food maestros, the first step is identifying a skill. The folks at Foodstirs want to make sure your kiddo is building a usable skill-set in the kitchen, from measuring to basting. A skill sheet is developed, and a recipe is perfected that incorporates that skill.

They even use Kid “Testirs” who make batch after batch of potential recipes until it’s perfect. Talk about an awesome after school gig. All that research means you’re sure to get an ideal recipe that your teeny taste-testers will have just as much fun making as they will eating.

photo credit: Elena Wurlitzer

Only in LA:
Foodstirs is the brainchild of Galit Laibow, a born-and-bred LA native.  There is so much creative energy in LA, but Galit was having trouble harnessing her own creative mojo in the kitchen with her two daughters. As a busy working mom, it was tough to have it all together at the same time: a great recipe, the right ingredients, the tools. Galit created Foodstirs for parents with a hectic schedule who want that unplugged time with their kids. As Galit says: “Cooking something is so much more than creating something to eat. It’s about pride, empowerment, sharing, creativity, and most importantly spending quality time together as a family.”

photo credit: Foodstirs via facebook

Order Up
With options like the “Brownie Popsicle” and “Heart Tart” kits (or seasonal treats for holiday fun), you’re sure to get your kid begging to throw on an apron and help you get cooking. And once you’re in chef mode, you’ll be whipping up that healthy dinner recipe to go along with the delightful dessert. The hardest part of the process is waiting for the brownies to cool.

Foodstirs delivers the ingredients, recipe and fun straight to your home, so you can focus on the more important things in life: like helping your kids lick the batter bowl clean.

Individual kits start at $24.99, and 3 kit series (with an apron) starts at $89.99.  You can find them online or at select local stores like Kidville.

Online: foodstirs.com

Are you and your family handy or hopeless in the kitchen?  We’d love to hear about your go-to recipes and kitchen adventures in the comments below.

—Elena Wurlitzer

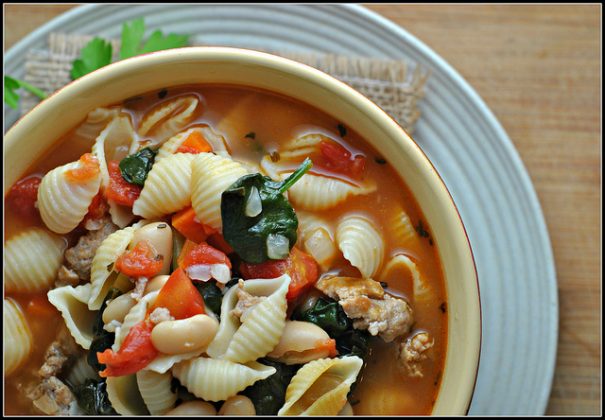
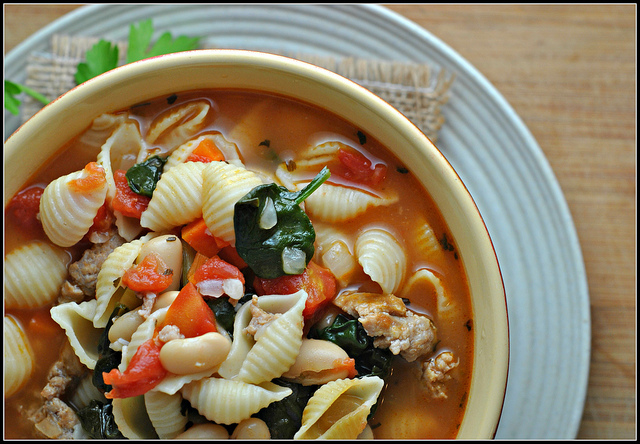
tuscan-sausage-soup

Nothing warms you up faster on a cold winter day than a bowl of hearty soup. This recipe for rustic Tuscan-style sausage soup, courtesy of Prevention RD, features ingredients you likely already have in your pantry. Plus, the addition of low-sodium chicken broth and whole wheat pasta make for a delicious soup with a healthy twist.

Ingredients: 
1 tsp olive oil
3 sweet Italian turkey sausage links, casings removed
2 carrots, peeled and finely chopped
½ onion, chopped
4 cloves garlic, minced
7 cups low-sodium chicken broth
1 (14.5 oz) can no salt added diced tomatoes (undrained)
1 (15 oz) can cannellini beans, drained and rinsed
½ Tbsp dried basil
8 oz dry whole wheat shell pasta
5 oz fresh spinach
¼ tsp black pepper, or to taste

Method:
1. Heat the olive oil in a large stock pot over medium heat. Once hot, add the sausage. Using a wooden spoon, break the sausage into pieces, cooking it until browned, about 5-6 minutes.

2. To the pot, add the carrots and onion and saute for 5-6 minutes or until softened and beginning to brown. Add the garlic and stir for 30 seconds.

3. Add the broth, tomatoes, beans, and basil; turn the heat up to high and bring to a gentle boil. Stir in the pasta and cook for 7-9 minutes or until al dente.

4. Stir in the spinach and black pepper; cook an additional 1-2 minutes. Serve hot.

Tell us how your rustic tuscan-style sausage soup comes out in the comment section below!

recipe and photo courtesy of Prevention RD.

For more delicious recipes like this one, click here!

Get a taste of Portugal with some Caldo verde (which means “hot green broth”) soup! This national dish (think Portuguese equivalent of American comfort food) is kale-based soup and will satisfy any veggie craving. Whether your kids want to dip some cornbread or slurp it down as an appetizer, the rich and hearty flavors are sure to make them feel right at home.

Serving size: 5 quarts (5 L), serves 10 to 12

Ingredients
¼ cup (60 ml) extra-virgin olive oil
½ pound (225 g) chorizo sausage, sliced or cut into smaller pieces
1 large onion, diced
3 quarts (3 L) Chicken Stock, simmering
2 pounds (907 g) potatoes, preferably gold such as Yukon Gold, quartered and sliced
3 cloves garlic, minced
Salt and fresh ground black pepper
1 large bunch kale, leaves shredded

Save for Stock: Onion trimmings, potato trimmings (don’t save kale stems as cole—cabbage family—vegetables lend a disagreeably strong flavor to stock)

Method
1. Place olive oil in a large soup pot—here a French-style rondeau—and heat. Add the sausage and brown while breaking up the sausage into small bits.
2. Add the onions and cook over medium heat or until softened but not browned.
3. Add the Chicken Stock and use a wooden spoon to release the tasty browned bits on the bottom of the pot.
4. Add the potatoes, the garlic, and the salt and pepper to taste. Bring to a boil, and then lower the heat and simmer until potatoes are half cooked, about 10 minutes.
5. Add the shredded kale to the soup and cook until tender, about 25 minutes.
6. Taste for seasoning and serve.

Soupmaker’s Tips
You may use Spanish-style dry-cured chorizo, Mexican style fresh chorizo, or authentic Portuguese chouriço here. All three are made from pork but Spanish chorizo is often smoked and dry-cured. It is seasoned with wine or garlic and with sweet and hot Spanish paprika. Mexican chorizo is a fresh sausage and must be cooked. Chouriço is a closely related Portuguese wood-smoked sausage seasoned with sweet paprika, garlic, salt, white or red wine, and Angolan piri-piri (hot pepper sauce).

Though Caldo Verde is often made with Vegetable Stock or simply water for the liquid, the richness and body of Chicken Stock make the soup more substantial and flavorful.

Have you tried making this delicious soup? Tell us in the comments below!

This recipe and photos comes from celebrated cookbook author and chef Aliza Green. Her cookbook “The Soupmaker’s Kitchen” dives into the art of making broths, stocks and soups with fresh ingredients for the most flavorful experience. To learn how to make all kinds of soups, from Vietnamese Pho to a Hungarian Woodlands Mushroom soup, get her book on Amazon.

Never mind that pesky Polar Vortex they’re predicting again this winter. Holiday mayhem comes first, and you’ve got enough on your mind between the parties to host, the mother-in-law to please, and the cards to send out. Take a deep breath. You’ll make it through the season, and we can help. We’ve listed common holiday woes and suggest quick fixes for them using local resources you’ll love.

photo: Eli Christman via flickr

Conundrum #1: It’s Time to Deck Your Halls

Do you want to release your inner Griswold but lack the luxury of time and know-how? Go pro when decorating your pad this year and hire B&B Holiday Decorating — the same company that blinged out the house featured on CBS’s “Mike and Molly.” After a free estimate, B&B will line your roof with lights; make your bushes, trees and windows pretty; and take care of everything from set-up to takedown and all the maintenance in between.

 photo: Eileen L via Yelp

Conundrum #2: The Line to See Santa is Crazy-Long

Do your kids want to whisper to Santa what’s on their wish list but you’re dreading the long lines? Take the insider’s track and scoot to Bass Pro Shop’s Santa’s Wonderland in Gurnee or Bolingbrook. Through December 24 you can get a free photo with Santa and, if there’s a long wait, you’ll get a Bass Pass with a designated time (first come, first serve) so that you can shop and return when Santa’s in the clear.

Or, for something truly unique to Chicago, visit Santa on the train — yep, The Metra and the CTA! From Addison to Chicago to Worth, Santa will be on the trains visiting children, handing out cookies and reading stories. For the full range of Santa’s whereabouts, visit santainchicago.com for schedules, pricing and specific activities as well as for special Santa sightings at Brookfield Zoo, Daley Plaza, 360 CHICAGO (The John Hancock Observatory), Lincoln Park Zoo ZooLights and Winter WonderFest at Navy Pier.

photo: Elena Roussakis via flickr

Conundrum #3: The Inevitable Cookie Exchange

C is for Cookie and W is for Wow-you-have-a-ton-to-bake. Whatever holiday you celebrate, cookies are on the menu. Dozens need to be made for neighbors, school parties, family and general jollification. Try something different this year: Attend a cookie baking class — you’ll get to sip drinks, meet new friends and cross something off your get-it-done list.

Sur La Table offers Holiday Cookie Exchange classes at their Naperville, Northbrook, Skokie and Chicago locations, which will enable you to walk away with recipes and a variety of treats: gingerbread snowflakes, stained glass sugar cookies, chocolate-espresso snowcaps, lemon-thyme cookie wreaths and more. The Chopping Block, located in Lincoln Square and the Merchandise Mart, has other classes on its menu: Festive Baking, to learn how to make delectable bars, cakes, sauces and crusts; Fun n’ Fancy Holiday Cookies, which will allow you to bring treats home; and Kids’ Cooking Class: Holiday Cookies, for when you have the littles in tow and need simple recipes.

The Wooden Spoon in Andersonville is another great resource for all of your baking needs (or woes?). Should you decide to make all of those sweets at home, it sells affordable baking essentials, from food coloring to rolling pins to sifters to baking pans and trays to holiday cookie cutters.

photo: Scott Leslie via flickr

Conundrum #4: You Have to Cook For Umpteen Relatives

You’re hosting the holiday festivities this year and you want to make sure that everything is just right. Enlist the help of experts and wow everyone at your dinner table — it doesn’t necessarily have to cost you a fortune.

Kitchensurfing is a new service in Chicago that sends a professional chef to your home to cook and serve your guests (gluten-free, vegetarian and other dietary concerns will be accommodated). They do all of the cleanup, allowing you to relax and enjoy quality time with family and friends.

If comfort food is your thing, try Johnny Casserole for local, fresh delivery and carryout options. Specialty casseroles like the Tamale Lee Jones (a Mexican-inspired dish), The Beth Ann (a chicken and veggie pot pie) and The Big Grabowski (featuring kielbasa and sauerkraut) are popular pillars; and salads, breakfast items and mac ‘n’ cheese are also available. Tip: Call in your order at least a day early to make sure what you want will be made and ready because only a limited number of casseroles are prepared daily.

photo: The Pinchuk Family by TK Photography

Conundrum #5: Oh Snap, You Still Have to Get Holiday Photos

You need to get your holiday cards stuffed and mailed but you forgot to do the most important thing — get that family photo! There are studios that can help in a pinch, like Maypole Studios Photography. Bethany Fritz offers holiday mini portrait sessions to capture your family’s holiday cheer. Sessions are 30-45 minutes for $100, which includes two high-resolution digital files from your sitting and complimentary online proofs.

TK Photography offers 15-minute sessions for $99 with Santa for holiday photos, which includes 5-10 images with and without Santa. Images are delivered fast — within 72 hours — so kids can meet Santa and you can get in and out with great photos for your holiday card. Another bright option is Studio on Webster, where photographers Elaine Melko and Emily Cummings will snap your clan in a 30-minute mini session and then let you pick your favorite five snaps from a gallery of 10-15 photos (prices start at $300 and upgrades are available).

photo: Chicago Trolley & Double Decker

Conundrum #6: You Want to See City Lights, Without Hustle & Hassle

You don’t have to schlep a toddler down Michigan Avenue in the winter air to see holiday lights at their finest. The Chicago Trolley & Double Decker Company offers a 2-½ hour Chicago Trolley Holiday Lights Tour, allowing you and your brood to sit back and enjoy the ride. Hop on at the John Hancock Observatory and see the John Hancock Tree and then cruise along to marvel at The Magnificent Mile, State Street, the Daley Plaza Tree and, of course, Macy’s famous Holiday Windows. You’ll have 30 minutes to explore the Christkindlmarket and also ZooLights at Lincoln Park Zoo. When your adventure is over, you’ll receive a free cup of cocoa and a cookie from the Hershey Store. Tours operate Fridays, Saturdays and Sundays through December 21 and everyday from December 26-January 4. For tickets and more information, visit chicagotrolley.com.

What is your secret to holiday success? Let us know in the Comments!

— Wendy Altschuler