Photo: Anna Moore

When you’re a single mom, it feels like you can never catch a break. You don’t have a partner to help even out the responsibilities. You are Mom. You are also Dad. Some days you’re superwoman and you are absolutely killing it. You’ve cleaned the bathrooms, done laundry, had sufficient amounts of caffeine, managed to get yourself out of bed on time that morning and even made pancakes for breakfast. Other days, you’re dragging. You woke up late, the house is a mess, you don’t know where to start and things are piling up.

You sometimes wonder if you’re doing the whole parenting thing wrong. Maybe it’s your fault that it’s just you. Maybe you’re what’s wrong.

I’m here to tell you that couldn’t be farther from the truth.

So much is packed into being a parent. Making sure you’re financially stable, making sure your child is taken care of while you’re at work, fixing dinner, laundry, cleaning bathrooms and changing bed sheets…the list goes on.

Don’t even get me started about all the parenting “advice” that is given so freely on the internet. You will always get the extreme opinions of any topic you research, finding that no matter how you phrase your question, you will always get a biased and very strongly worded answer thrown at you. People are quick to give you their thoughts and opinions on a situation without evaluating how they are coming across. This creates even more confusion and negative thoughts within the individual looking for guidance.

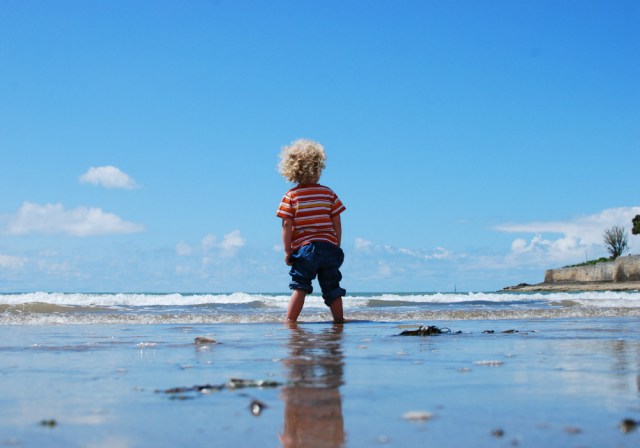
I asked my daughter one time if she’d be happy if it were just the two of us for the rest of her life. I didn’t get answers about cleaning or doing laundry. I got a very excited response about how we could have movie night every night and have our favorite snacks and have hot tea together. Of course, those are all things we could still do if I were married. The point I’m trying to make is that children’s minds work very differently from ours. An advantage of the mind of a child is that they see the positive in every situation, leaving adults longing for a mind like a child.

Not only am I a single mom, but I was a teen mom as well. Talk about a double whammy. Being fifteen and pregnant, nobody thinks you can make anything of yourself after that. You’re told that your life is over. Everything you’ve hoped and dreamed for yourself is now impossible. Which is why I went on to finish high school—half a semester early. I went to community college for two years and graduated Cum Laude. I finished my bachelors in Psychology from my University and had above a 3.2 GPA.

Being a single mom, being a young mom, doesn’t mean that your life is over. It just means you get to share it with someone who idolizes you, who thinks the world of you, who is always cheering for you. No matter what. Sharing experiences with the person you gave life to. Your built-in best friend.

I was able to cross the stage at my graduation seven months ago and look up at my seven-year-old daughter with tears in my eyes. She was beaming from ear to ear, waving and blowing kisses. In that moment, she didn’t care that I had laundry piled up at home. In that moment, she didn’t care that I’d forgotten to give her a drink with her breakfast last week. In that moment, she didn’t care that it was just the two of us.

In that moment, I was enough, and you are, too.


Hey, y'all! I'm a single mom to my seven year old daughter. I've loved writing all of my life, and love to share stories...most of which relate to parenting. Also sometimes our cat...Sir Gibson Severus Darcy. Yeah...it's a thing. Enjoy!

Photo: Shutterstock

Ever lived in the Bermuda Triangle? I have.

…At least that’s what my wife affectionately called our home. Things got in, but they had a habit of disappearing whenever you went looking for them. It didn’t matter what they were—shoes, books, keys, clothes—all went missing at one time. She even joked that the sofa would’ve gotten lost in the chaos that was our home if it wasn’t so big.

I blame myself for how disorganized our house had become. I had always struggled with organization, preferring to amass jumbled piles of magazines, socks, clothes and other assorted household items rather than placing them neatly away.

Drowning in Clutter

What was the point of putting them away when I was going to need them again? I thought I was saving time by leaving them where I last used them. That way I could find them easily.

Except that’s not what happened. Our house just got messier, until it started taking a toll on other aspects of my life. Being a work-from-home dad, having an untidy house seriously put a dent on my schedule. We were almost always running late in the morning because our kids either couldn’t remember where they’d placed their books the evening before or couldn’t locate their shoes or clothes. When it came to my own work, I wasted precious time trying to find paperwork or files and would lose contact information.

It was no way to live. The house felt drab and the clutter was driving everyone nuts. Even worse, my kids were starting to emulate my messy habits. I was disappointed in myself. I wanted them to grow to become responsible adults equipped with basic life survival skills and here I was teaching them that it was okay to live a disordered life.

So, finally, as the new year rolled around, I made the decision to kick my disorganization in favor of living a more proactive, organized life.

Creating Order from the Chaos

I proposed to add a bit more order to my family’s life and increase harmony at home by finally getting my act together. Here’s how I did it.

1. Go slow and keep it simple.

I couldn’t hope to tame years of chaos and clutter in one day, so I decided to make small gradual changes. One week, I tackled the jumble in the entryway, the next I started implementing a weekly meal plan.

It took commitment to get things underway, especially when my boys realized that they’d have to put in a little more time and effort to put things in their place. As a family, we also discussed and decided on a plan to declutter and organize at a pace that was manageable and comfortable for everyone.

2. Plan the purge.

Before organizing the house, I first had to figure out what to keep. Sorting through our stuff and purging what we didn’t need was brutal. It was tough having to let go of some items that held sentimental value, so I saved a few representative pieces.

Part of killing the clutter involved sorting items into three piles—those I wanted to keep, those that would be thrown away and those that would be donated. My family set aside two hours each Saturday morning of the month for us all to tackle a living area that needed purging. It was a tiring process, but we all felt relieved afterward.

3. Establish a household routine.

To keep on top of the organization, I incorporated regular household maintenance into my weekly routine and got the family involved. I set aside different days for different duties depending on everyone’s schedule.

For instance, Thursday was the non-negotiable laundry day, so if my kids wanted clean clothes, it was up to them to ensure their dirty ones made it to the laundry pile. With my older teens, I took the time to teach them how to handle their own laundry. When it came to mealtimes, no one was excused from the kitchen until dirty dishes were rinsed and placed in the dishwasher and place settings wiped clean.

4. Recruit my kids into the program.

In order for my new cleaning and organizing routine to work, I had to recruit my kids. They had to learn to put their dirty clothes into hampers instead of their bedroom floors, to put their books back into their backpacks before bed, stow away their shoes correctly, hang up their coats and keep their rooms clean.

We added daily room checks to our bedtime routine each night and would offer personalized incentives to those that put forth the effort to keep things tidy. Additionally, I decided to teach them responsibility by assigning age-appropriate chores. That way, all of us got to contribute to keeping the house neat.

Eventually, after weeks of cleaning and employing clever storage solutions, I managed to tame the clutter in our house. What was once a messy space transformed into a comfortable (and livable) living area and through teamwork, my family and I have managed to maintain our newly developed organizational habits.

Tyler Jacobson is a happy husband, father of three, writer and outreach specialist with experience with organizations that help troubled teens and parents. His areas of focus include: parenting, social media, addiction, mental illness, and issues facing teenagers today.


Keeping your house clean: it’s the perennial parenting struggle, especially for houses with working parents. And though I don’t place a lot of pressure on myself to get this one right (I don’t think it’s worth all the worry), I do have one big pet peeve: clutter.

Clutter on the countertops, clutter at the door, clutter on just about every available surface where clutter could gather. And yet, no matter how many times we clean a surface and tell ourselves that this surface isn’t going to get like that again, it doesn’t take long for it to get buried.

Which brings me to New Year’s Day this year. My husband and I had been home for a few weeks for a family surgery and the holidays and we were finally trying to get back on track with things around the house.

On that one wintry night, my husband had an epiphany. We wanted to keep these surfaces clean but our prior methods hadn’t worked. We also felt like everyone was a bit to blame for the clutter and so everyone should carry a bit of the responsibility. So he came up with a “micro-step” that has been a game-changer for our house.

In case you’re wondering, a micro-step (in this sense) is basically a goal that is readily achievable because it is broken down into something simple—something that is “too small to fail.” Thrive Global has a number of outstanding examples of New Year’s resolutions in the form of micro-steps that you can actually stick to.

Our “Too Small to Fail” Surface De-Cluttering Plan was simple:

  1. Choose the most cluttered surfaces in the house—that ones that most frequently get piled up and need attention.
  2. Assign each person in the family to one of those surfaces. Match the surface with the skill or frequent use of the person, i.e. give the four-year-old the living room table where toys often gather and give mom the hall lowboy where bills and batteries often come to rest.
  3. Each night (or at least five nights out of the week) take a five-minute “clutter” check to have each person pay attention to their surface and get it back in the clear.

It sounded simple and maybe overly optimistic, but I told him we’d try it. After giving everyone a few days leeway to get their surface back to visibility, we started our quest to keep those spaces in the house clutter-free. And by golly, it has worked!

We did discover a few necessary ground rules along the way:

Taking something off of our surface and putting it on someone else’s does not count as de-cluttering your space—UNLESS it belongs to the person who owns that space. So, if my husband finds that I’ve left my glasses or a book on the kitchen counter, he can put it on the low boy for me and I’ll take care of it.

If the whole family messes up a surface at once, the whole family should participate in recovering it. So, just because my husband has the kitchen counter assignment doesn’t mean he cleans up from dinner every night—it just means he checks the surface at the end of the night and tries to get everything back to its rightful place. Same goes for a family game on the living room table.

But guess what else has happened? We’ve gotten used to seeing those clean surfaces that our Surface De-Clutter plan has inspired us to spread the de-cluttering mojo to other parts of the house.

We’ve grown more conscious of where we put something down when we’re in a rush and have started making more of an effort to actually put it away rather than just put it in a “temporary” spot where it will get stuck. Doing it together has also helped us to feel committed as a family to this new ritual and has freed us up to be more present with each other on a daily basis.

At this point its only been two weeks since we started this plan, but I can tell you in all honesty that some of these surfaces haven’t stayed clear for more than a day in the past three years, so two weeks of keeping them relatively clean and open is a huge accomplishment. Because we are all sharing in the duty and because each person’s little piece is not too much to handle, we are finding success that we believe will last.

And you know what? All these open surfaces are bringing me a ton of joy!


RELATED STORIES

Marie Kondo Your Life with These 10 Genius Storage Solutions on Amazon

“Tidying Up with Marie Kondo” Is Your New Netflix Binge Watch

How Marie Kondo Almost Ruined My Marriage

Carrie Williams Howe
Tinybeans Voices Contributor

Carrie Williams Howe is the Executive Director of an educational non-profit by day, and parent, writer, and aspiring homesteader by night and weekend. She lives in Williston, VT with her husband, two young children, and a rambunctious border collie. Carrie writes about family, food, parenting, and homesteading.

Just because school is out doesn’t mean that learning needs to end. But, since it’s summer vacation time, learning should be strictly fun in our book! We rounded up the coolest science experiments for kids that can be done on while enjoying sun, sand and surf. From the science of sand castles to studying the tides, here are a bunch of ideas to make your next beach day one to remember.

Before You Go

Derek Thomson via Unsplash

Look over the experiments below and pack along the needed items. Some will require assembly ahead of time, and most are easy to pull off, but if you’re like us, you might want to try them out by yourself before showing your kids in order to keep the eye-rolling to a minimum.

The Science of Sand Castles

Benjamin Carlson via Unsplash

Things to Pack:
Sandcastle tools (pails, shovels, cups of different sizes, etc.)

Things to Do:
Scoop up the driest sand you can find on the beach and have your kid pack it in a cup as tight as they can. Turn it upside down and see what happens. When the sand comes pouring out, have your kid try it again with sand that has a bit more moisture and repeat. Continue doing so (perhaps adding a little water to the mix) until you get a nice solid cylinder of sand.

Things to Discuss:
Kids will clue in pretty quickly that wet sand holds together better than dry sand, but help them understand that water actually creates a thin “bridge” or “glue” that helps to hold the sand together. This is due to the surface tension of the water. Too much water and the “bridge” or “glue” gets broken down. Continue making observations throughout your masterpiece making. Make a moat. Does the water stay in place or does it get absorbed in the sand?

Filtering Water

Max Goncharov via Unsplash

Things to Pack:
Two empty bottles or canning jars
A funnel
A few paper towels
A few paper coffee filters

Things to Do:
In one bottle, place the funnel at the top and line with a paper towel. Fill the second bottle with dirty water (We suggest filling water from the lake or ocean and adding in sand granules, specks of seaweed, a teaspoon or two of dirt, etc. However, you don’t want really muddy water.). Pour the dirty water into the other bottle through the funnel. Next, replace the paper towel with a coffee filter and repeat the process. Then, do the experiment one more time with two coffee filters.

Things to Discuss:
At each stage, ask your kiddos what they see. Did the paper towel capture some of the dirt particles while others ran through? Does the water get cleaner the more filters that are used? Explain that we use filters all the time at home, and a water filter keeps the dirt out and makes the water safe to drink.

The Big Rocks in Life

Things to Pack:
Two large wide-mouthed jars
One smaller jar

Things to Do:
Collect two piles of large rocks or driftwood of about the same size. Then gather two piles of smaller rocks and shells, two piles of sand and a jar of water. Have your kid fill one jar with the sand, then the smaller rocks, and finally the larger rocks. There shouldn't be room to hold all of the big rocks. Then repeat the process with the other jar placing the big rocks in first, then the smaller rocks and then the sand and everything should fit. For the grand finale, pour the water into the jar.

Things to Discuss:
Were your kids surprised you could fit everything in the jar if they did it in reverse order? Did they think there would be a difference? This is an exercise that is often meant to symbolize life’s priorities, but it can also serve as a way to show spatial awareness too.

Become a Sand Inspector

Things to Pack:
A few sheets of black  and white construction paper
A magnifying glass
A magnet
A clear “zippable” plastic bag
A few toothpicks

Things to Do:
Place the magnet in the plastic bag. While holding the magnet, push the bag into the sand. Slowly lift the bag up. If your beach contains sand made from granite, then little black specks should be attracted to the magnet. Sprinkle these granules on the white paper. Then, sprinkle some lighter sand particles on the black paper and look at them through the magnifying glass. Try to pile the grains of different sand with the toothpicks.

Things to Discuss:
At first, all sand looks alike, but by looking more closely, you’ll see different colors and textures meaning that each sand particle came from much larger rocks of different colors and textures. The black sand is made of magnetite which forms when iron is mixed with oxygen.

Wave Watching

Things to Pack:
A watch or stopwatch
A pencil
Notepaper

Things to Do:
Look for an item bobbing up and down in the water like a bird or throw in a small piece of driftwood. Use your watch to time how long it takes for the object to go from the top of the crest to the bottom and back up again. That’s one bob. Record how long it takes for ten bobs to happen and then divide that number by ten. That will give you an average time for each wave’s period.

Things to Discuss:
When the water is at its high point, it is called a crest. When it dips down to its lowest point, it is called a trough. The space between two crests is called a wavelength.

Explore a Tide Pool

Things to Pack:
Water shoes – careful where you step!

Things to Do:
Look for periwinkles – little snails that live on the top of rocks in the “splash zone.”
Look for barnacles – grayish/white bits that look like tiny volcanos.
Look for mussels – blueish/black shellfish.
Look for sea anemones – they look like flowers.
Look for starfish

Things to Discuss:
All of these creatures are alive and are animals. When the rocks are dry, periwinkles will seal themselves up, so they don’t dry out. Barnacles close up when out of the water, but they feed on smaller plants and animals while submerged in the water. Mussels attach themselves to rocks so that they aren’t pulled away with the waves. Sea anemones will close up when gently poked. They stretch out in the water and shrink down when they are dry. Starfish “play dead” when they are out of the water but will slowly move when in it.

Make a Magni-Bucket

Frank McKenna via Unsplash

Things to Pack:
Plastic ice cream bucket or something similar
Plastic wrap
Large rubber band

Things to Do:
Before you leave the house, cut a hole (large enough to fit your kid’s hand in) about an inch away from the bottom of the bucket. When at the beach, cover the top of the bucket with plastic wrap and secure with rubber band. Make sure that the plastic wrap has some give to it. Pour water on top of the plastic wrap so that it sags down a bit. Then, have your kid hold different objects in the hole and look at them from the top of the bucket.

Things to Discuss:
The water is deeper in the middle and shallower on the sides just like a swimming pool and also like a magnifying lens making those objects appear larger.

Become a (Wind) Speed Racer

Things to Pack:
Two strips of cardboard
Four paper cups
Straight pin or thumb tack
Pencil with an eraser
Stopwatch
Pen and paper

Things to Do:
You’ll want to do the first part of this experiment at home. Cut out two strips of cardboard so that they are about an inch wide and about 12 inches long. Staple a paper cup at each end of the strips—one going the opposite direction from the other. Mark one cup with a large “X.” When at the beach, cross the cardboard strips together so that the top of each cup is pointed at the bottom of the next cup all the way around. Use the straight pin or thumbtack to puncture a hole in the middle of the strips and then stick it into the pencil. Facing the wind, see how many times the marked cup spins in 15 seconds. Multiply this number by four to get the total number of spins per minute, and mark down your findings. Repeat the process a few times during your beach visit.

Things to Discuss:
You created an anemometer. How did the wind speeds vary from each time you recorded? Was it faster in the morning or faster in the evening? When the wind pushed the cups, the air molecules caused them to spin around the pin. The faster wind pushed harder than the slower wind.

Whirlpool in a Bottle

Things to Pack:
Two empty and clear 2-liter bottles
Metal washer
Duct tape

Things to Do:
Fill one bottle with about two-thirds of sea or lake water. You might want to toss in a few specs of seaweed or leaves too. Place the washer on the bottle and line up the empty bottle on top of the water-filled one. Wrap the duct tape around the middle securing the two bottles together. Then, turn the bottles upside down.

Things to Discuss:
Does the water go straight down or do you see a mini whirlpool (Swirl the top bottom a bit for a better effect.)? The spinning water is called a vortex, and all tornadoes, hurricanes and typhoons are examples of air vortexes. Since you’re using water, this is an example of a whirlpool. As the water spins faster, it pushes to the outside of the bottle creating a hole in the middle. The air from the bottom of the bottle comes up the middle and the water from the top flows back down through the hole.

Hunting for Crabs

Things to pack:
Small shovels

Things to Do:
Walk down the beach toward the water, and look down for little holes. Sometimes you’ll find a bubble or two coming up. With your shovel, dig in the sand a few inches under the hole and scoop up the sand. When you brush away the wet sand, you might find a small crab or other creature.

Things to Discuss:
Crabs protect themselves by burying themselves in the sand when waves or other threats come by. While your kids might be tempted to take the baby crabs home to live as a pet, you’ll want to discourage this idea as they won't stay alive for long. 


With the demise of one of America’s most-recognizable brick-and-mortar toy stores, the forthcoming closing of nearly 1,800 Toys”R”Us and Babies”R”Us stores throughout the United States has left plenty of toy-hunting parents in a bind. Thankfully, there’s some good news: you can trade in your Toys”R”Us gift cards at Bed Bath & Beyond stores. Here’s the 411 on everything you need to know about exchanging your Toys”R”Us gift card for a Bed Bath & Beyond gift card.

One of the biggest challenges for customers of the closing stores has been what they should do with gift registries and Toys”R”Us store gift cards. Some retailers have stepped in to fill the void left behind by Toys”R”Us and Babies”R”Us. buybuyBABY is “saving” now-stranded Babies”R”Us baby registries—and now Bed Bath & Beyond is stepping up in a big way for customers, too. But before you trade in your Toys”R”Us gift card for a BB&B card, here’s what you need to know.

How do you exchange a Toys”R”Us gift card for a Bed Bath & Beyond gift card?

According to a Facebook post by the home goods retailer, Bed Bath & Beyond has partnered with CardCash, one of the largest gift card exchange sites online. If you have a Babies”R”Us or Toys”R”Us gift card, you can exchange it for a Bed Bath & Beyond gift card through CardCash’s dedicated Toys”R”Us for Bed Bath & Beyond gift card exchange site.

Can I exchange my Toys”R”Us gift card at my local Bed Bath & Beyond?

The gift card exchanges can only be made online and not in Bed Bath & Beyond stores.

What will exchanging my Toys”R”Us gift card get me in return?

You’ll receive a Bed Bath & Beyond eGift Card via email within 1 business day of completing your Toys”R”Us gift card exchange online. eGift Cards can be used in Bed Bath & Beyond stores and on the store website.

In addition to trading in your Toys”R”Us gift cards, CardCash also exchanges gift cards from more than 200 other merchants for BB&B cards, according to its website.

How many gift cards can I exchange?

CardCash doesn’t list a specific upper limit on how many Toys”R”Us cards you can exchange for Bed Bath & Beyond eGift cards, but you do have the option to process more than one exchange.

Does it cost anything to exchange my Toys”R”Us gift card online?

Yes and no: if you’re expecting to a get a dollar-for-dollar match on your Toys”R”Us gift cards, you’re not going to. CardCash buys back cards at a discounted price using its own proprietary valuation method to determine how much your gift card is worth to them.

According to comments on BB&B’s Facebook post, one customer went to exchange her $25 Toys”R”Us gift card and only got a little over $16 for it—so just be aware that you will not get the full face value for your Toys”R”Us gift card. (A bummer, yes—but it’s better than nothing.)

For how long will Bed Bath & Beyond exchange Toys”R”Us gift cards?

You need to act, pronto. Customers have until Thursday, Apr. 5 at 11:59 p.m. Eastern to exchange any Toys”R”Us gift cards for Bed Bath & Beyond gift cards online. After that, you’re out of luck.

https://twitter.com/LouGraiff/status/975072091815972864

What else do I need to know about trading in my Toys”R”Us gift card?

Only Toys”R”Us gift cards with a balance of more than $20 can be exchanged online. If you have a Toys”R”Us gift card with anything less than $20, your best bet is to head to your local TRU and buy what you can with it.

Also, the exchange only applies to Toys”R”Us and Babies”R”Us gift cards and not to store merchandise credits. Again, in that situation, get thee to your local TRU or BRU store and use it towards something while you still can. Toys”R”Us will stop accepting all gift card benefits on Apr. 15, according to the Federal Trade Commission.

Do you have Toys”R”Us gift cards piled up that you’ll need to trade in? Share your gift card exchange stories in the comments.

—Keiko Zoll

Featured photo: Mike Mozart via Flickr 

RELATED STORIES

Is Amazon Buying Toys”R”Us? Actually, It’s a Very Real Possibility

The Best Baby Registry Alternatives Now That Babies”R”Us Is Closing

buybuy BABY Offers to “Save” Baby Registries Stranded by Babies”R”Us Closure

Ask any mom what her least favorite part of motherhood is and laundry usually tops the list. Never ending piles of dirty clothes, missing socks and a laundry room that’s usually at the bottom of the totem pole when it comes to decor, all make this household chore less than fun. Laundry is just a fact of life and if you’re struggling with getting it done in a cramped space, YouTuber Hey Tonya has it all figured out. In one of her most recent videos, vlogger Tonya shows us how she transformed her laundry closet (yep, it’s not even big enough to be called a room) into an organizational dream.

If you aren’t already a dollar store shopper, we bet you’ll be one now! Budget is no object when it comes to making your laundry space workable when you shop at a dollar store, and you don’t have to sacrifice style for function either. Whether you own your home, or are restricted from major improvements because you rent like Tonya, your laundry room can still look like a million bucks. We love Tonya’s style from top to bottom: from the crisp white basket choices, to that amazing wall decal and stain removal guide. You may be asking yourself, “How come I never come across stuff like this when I shop at the Dollar Tree?” If there’s one piece of advice we can offer, it’s shop often! You never know what kind of treasures may await.

Check out more of Tonya’s tips on her blog, Hey Tonya.

Are you inspired? Tell us what you plan on organizing next in the comments below! 

— Karly Wood

Steamy bowls of pho, chicken tikka masala burritos, gourmet gelato popsicles and burgers piled high with produce—food halls offer options like these and much, much more. They are the perfect spot for families because they provide a break from meal monotony, offer something for everyone, and just might push the kids to try something new. We’ve gathered 15 of our favorite foodie spots that are totally worth a visit (or two!). See them all below.

Anaheim Packing District – Anaheim, Ca

Originally distributing the citrus fruit for which Orange County was named, the Packing District was converted to a community gathering space a few years ago with two levels of restaurants. Try some made-to-order fish and chips from The Chippy followed by gelato or sorbetto on a stick at Popbar. The chicken sandwiches from Sweetbird never disappoints. You can grab your eats and choose a spot at any of the communal tables or even swing in one of the wooden bench swings on the bottom level. Visiting without the kids? Definitely plan a stop at the super secret speakeasy The Blind Rabbit (if you can find it!).

Must Try: Snowballs from I Am (corn puffs with liquid nitrogen)

Online: anaheimpackingdistrict.com

photo: Kate Loweth


Do you have a favorite food hall that didn’t make our list? Give us the deets below!

— Kate Loweth

The start of the school year may be right around the corner, but there’s still a chance to let your little party animals host a slumber party for their pals before the bell rings. Flip through the slideshow below and find our favorite ideas; from silly games to their own breakfast club, this is one sleepover that’ll close out summer with a bang (guaranteed zzzzs not included!).

Make a Sweet Sheet Fort

There’s something so exciting about overtaking the living room with piles of pillows and blankets. Use push pins and fishing line to hang blankets from the ceiling, cover sofas and chairs in sheets, string twinkly lights around the room and scatter throw pillows to make things feel cozy and fun. Find helpful fort-making advice on Handmade by Kelly.

Photo: Handmade by Kelly

What’s your favorite sleepover activity? Share with us in the comments below. 

— Natalie Broulette

Daily
Today Is Recycle Day
Everything old is new again.
1

Try this trick to transform an old jug into one of the cutest lunch boxes in town.

2

Piles of papers are commonplace so why not try one of these cute ways to reuse your scrap paper?

3
Before you toss it, read up on 12 ways to recycle old food into something super tasty.

{ Today’s ideas brought to you by The Earth }

Comic book fans, rejoice! While the NYC storefront comic book scene has lost some key outposts over the last few years, a new spot just set up shop in Brooklyn. Mama Says Comics Rock, a venture from two home grown comic book devotees opened in March, and it’s ready to serve the comic book needs of fans of the form both beginner and hard core.

Mama Says What?
Why the name? Co-owners Davey Kourtesis and Cade Schreger, both Brownstone Brooklyn natives (Kourtesis grew up in Cobble Hill, Schreger in Brooklyn Heights) see the name as a  fun shout out to L.L. Cool J. Both men are longtime comic book readers and hobbyists, and were serious enough about the the idea of opening a comic book store that they’d been keeping an eye out for appropriate retail spaces in the area of their old stomping grounds. A Carroll Gardens storefront opened up and Mama Says Comics Rock found its home.


Mama Has What
You’ll find brick walls painted a clean white, nice dark wood floors and a selection of comic books, graphic novels and merch displayed cleanly (i.e. it’s not your father’s — or your — comic book store, with volumes piled high to the ceiling and every inch of space stuffed to the max). In-demand comics are displayed in baskets mounted on the wall to the left; high-profile books and related products can be found on tables in the center of the store; a nice wooden bench provides a spot to peruse the merchandise.

Kourtesis and Schreger promise a little bit of everything when it comes to inventory. Customers will find the top 50 new and ongoing comics series in the store, as well as independent and local comics and publications. Of course, subscriptions/pull lists are available for readers who need to know the latest issue of their favorite series is reserved and waiting for them.

For the Kids
While not every comic book series is appropriate for the tiniest of readers, many are and have plenty of junior fans. Mama Says Comic Rock stocks many titles popular with younger readers, including Amulet, Bone, Lumberjanes and The Simpsons, as well as older titles that still entertain, such as Calvin & Hobbes and Tin Tin.

More Than Just Comics
In addition to selling comics of all kinds, the shop also plans to host events such as signings and readings, art openings (an artist friend’s colorful work adorns the back wall now), and even movie screenings. (Anticipate a Marvel film fest leading up to the release of Captain America: Civil War.) There’s also been some interest in drawing classes, so those may be offered soon. Keep an eye on the store’s events page and Facebook feed for the latest updates. (Psst! May 7 is National Free Comic Book Day, and the store is participating!)

Mama Says Comic Rock
306 Court St.
Carroll Gardens
718-797-3464
Online: mamasayscomics.com

Does your family love comic books? What series is a must-read in your household? Tell us in the comments!

—Mimi O’Connor