Photo: Tinkergarten

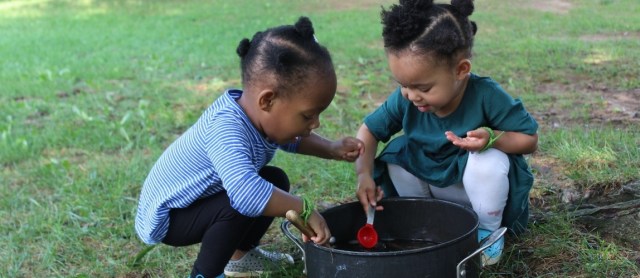
Play centers turn an ordinary corner of your home or yard into a unique space designed to inspire and make open-ended play possible. This gives kids a starting place and the ability to iterate. Plus, once the centers are set up, kids can play independently without any effort or even involvement on our parts!

PRO TIP: RELEASE NEW INGREDIENTS OVER TIME

Leave a few items out when you “launch” each play center. Hold back a few art supplies when you open up your art center. Or, keep a spice or a special kind of pie pan out of the mud kitchen for the first week. This gives you something to introduce to keep the centers dynamic and exciting. Plus, remember that objects from nature (sticks, tree fruits, bark, pebbles, etc) can become spoons to stir with, stamps to stamp with and ingredients for all kinds of play!

The Mud Kitchen 

Play with food and cooking is, quite possibly, the most universally appealing and accessible pretend play theme at any age. Toddlers can emulate us making meals, and older children can use mud kitchens to cook up grand feasts or to make concoctions and science experiments. Really, all you need is a set up that allows kids to play with water, house their bowls, scoops and other containers, and some surfaces on which to mix, mash, stir and “cook.” 

Mud kitchens can range from the simple (nesting bowls and some scoops) to the Pinterest-worthy. If you do not have green space attached to your home, grab a reusable shopping bag and fill it with bowls, scoops and a kitchen item or two that can take some muddy love and— voila—a portable mud kitchen!

PRO-TIP: MANAGE THE WATER SUPPLY

The key ingredient in any mud kitchen is actually water. Not everyone has a hose, and even if you do, you don’t want kids to let it run endlessly as they play (and hoses have a way of doing that once placed in kids’ hands). Plus, it’s never too early to teach kids to conserve and to manage a limited supply of resources. For each play session, give kids a 3-gallon bucket of water or a portable 2-gallon water carrier designed for camping. Let them know that’s all the water for this play session. Kids will quickly start to learn how to make that amount of water stretch—and you can get hours of play out of just a few gallons. 

Materials for the “no nails” Mud Kitchen:

  • Recycling bins (2)
  • around 6 foot lengths of 2’x4’ wood (2)
  • Milkcrate 
  • Small trash can 
  • Nesting bowls
  • Duct tape 
  • Garden stakes, twine and pipe cleaners
  • Various, non-precious kitchen items (old muffin tin, cookie sheet, measuring cups, mortar and pestle, etc.)

The Art Center

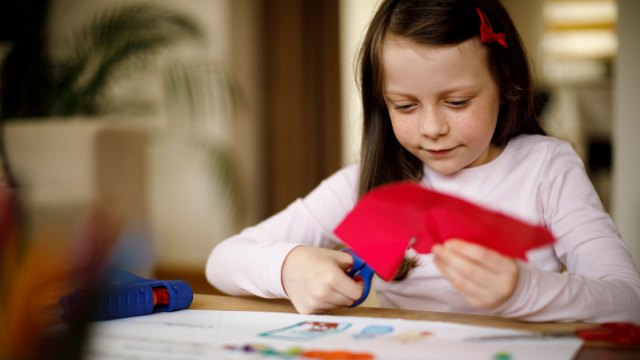
Making art supports so many aspects of learning—creativity, self-expression, sensory integration, motor skills—and creating art is joyful for humans of all ages. And, it can be really easy to set up an art center that makes materials readily available to kids and gives them even more opportunity and inspiration to create.

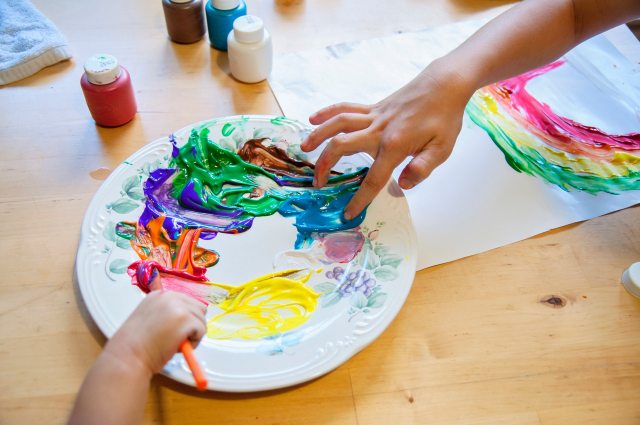
Pick a corner of your home where you can set out containers of art supplies and where there is space on the floor or on a table for kids to use the materials. If it helps, lay down a tablecloth or sheet so kids can create and make messes freely without risking damage to furniture or your peace of mind. You can also cover the table with a large piece of paper. Leave it there for a week and—voila—you have a piece of abstract art that documents your child’s creativity that week!  

If you want to make art outdoors, or you don’t have space to dedicate to an art “center,” fill a bin or wagon with art supplies for an art center on-the-go. 

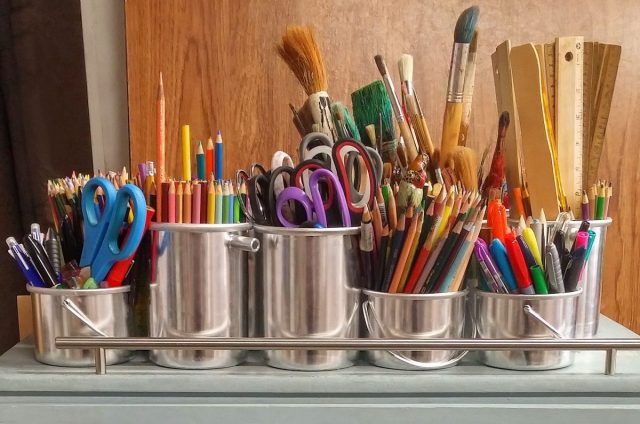
Whatever materials you include in your art center, make sure they are visible—merchandising can help inspire kids to use them. Put each kind of material in its own container so they are easy for kids to find and keep organized.

Materials for a simple art center:

  • Crayons
  • Markers
  • Colored pencils
  • Watercolors, water bottle, and bowl
  • Paintbrushes
  • School glue/glue sticks
  • Tape
  • Age-appropriate scissors
  • Colorful spices (e.g. turmeric)
  • Paper
  • Bits of fabric, ribbon, yarn, pipe cleaners, etc. 
  • Old magazines, holiday cards or papers of interesting colors or textures

The Water “Playground”

’Tis the season for soothing, stimulating WATER play—and you don’t need an in-ground pool or the beach to support hours of it. 

To a small human, a bowl of water and a measuring cup can qualify as a water playground, so make yours as simple or elaborate as you like. Each week you can offer a new “surprise” tool and wonder aloud: “I wonder how we could use this in our water playground?” Whether or not you already have a setup, here are some ideas to help make water play extra special this week:

Find a spot where kids can comfortably and easily play with water. If you have outdoor space, do you have a water source? If not, where, in the space, can you easily transport bins or buckets of water? What can contain the water for play? Kiddy pools, bins, and even large cooking pots work well. Feeling crafty? Wrap a tarp around a few pool noodles to form a pond.

Doing your water play indoors? Try the bathtub, the shower, or the sink. Or, lay towels on the floor and place a plastic bin or cooking pot in the middle.

Gather tools that can be used again and again to enhance water play. Some ideas:

  • Cups and containers of all shapes and sizes
  • Fun kitchen gear (funnels, basters, measuring scoops, etc.)
  • Washcloths, sponges, or other absorbent items
  • Rocks or household items that kids can “wash” and use to explore sinking and floating
  • Pool noodles, drain pipes, or other items that can be used as water channels
  • A smock (could be a raincoat or just a change of clothes) if your child prefers to stay dry during play
This post originally appeared on Tinkergarten.

After 18 years as an educator, curriculum developer and school leader, Meghan has her dream gig—an entrepreneur/educator/mom who helps families everywhere, including hers, learn outside. Today, Meghan serves as co-founder and Chief Learning Officer of Tinkergarten, the national leader in outdoor play-based learning. 

Your pool noodle is your trusty summer sidekick, but it has far more uses than taking a dip in the pool, river, lake or ocean. Did you know it also makes a great hobbyhorse or bubble blower? We’ve rounded up some uber fun ways you can transform this dollar store classic into your tot’s favorite new toy. Keep reading to get your noodle craft on.

Pool Noodle Monsters

Clumsy Crafters

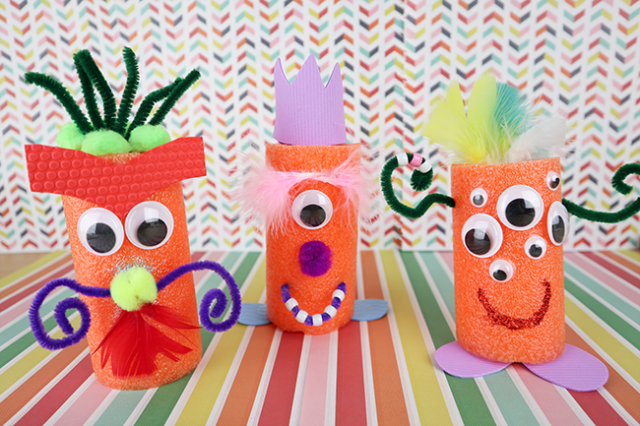
Boo! These anything-but-scary monsters are the perfect way to use up that old pool noodle. Cut into small pieces, then unleash your inner artist using googly eyes, pipe cleaners, feathers and whatever else you have stashed in your art kit. Get all the details over at Clumsy Crafter.

Abacus

Happy Hooligans

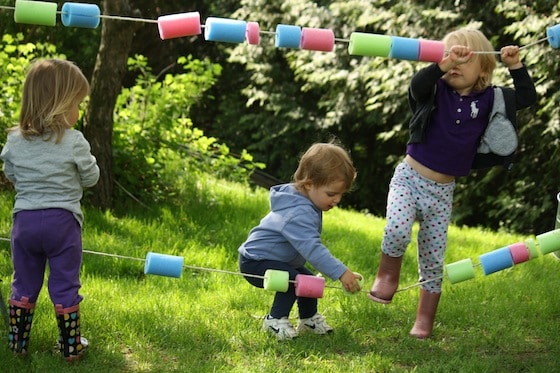
Get the littles outside and learning to count with this simple DIY pool noodle abacus. The simple to create project uses rope, pool noodles and a knife to cut, then is simply strung up in the backyard. You can find all the details over at Happy Hooligans.

Alphabet Knock Down

Toddler Approved

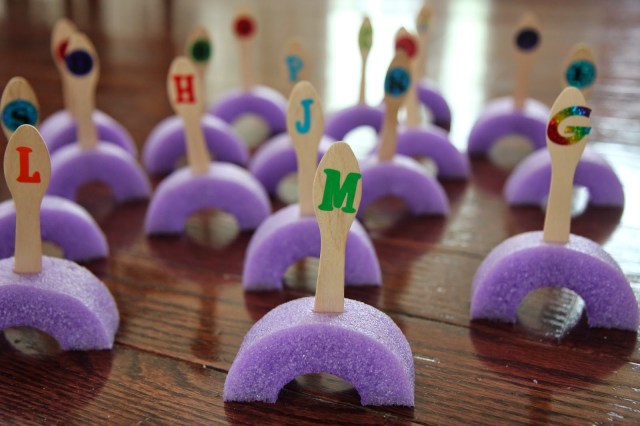
This activity is so fun, the littles won't even realizing their learning! Pool noodles are cut into C shapes, then a popsicle stick with a letter is added. Say the letter, roll a ball and see if you can knock it down! For all the details, be sure to head to Toddler Approved.

STEM Building Structures

Little Bins for Little Hands

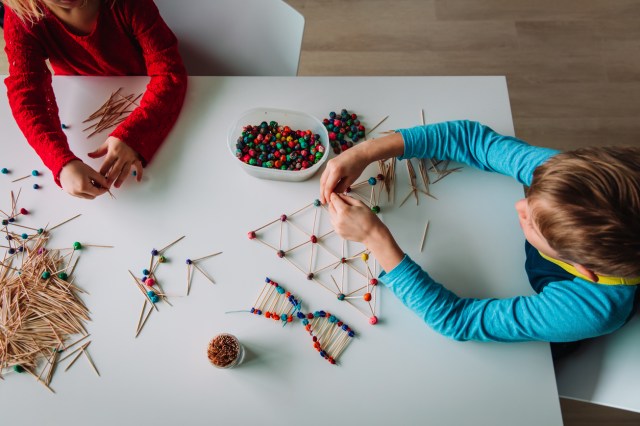
Summer STEM just got a whole lot more fun. This easy to pull off activity uses an inexpensive pool noodle and toothpicks––that's it! Let your little builder develop their building, design, math, fine motor and problem-solving skills with this simple activity from Little Bins for Little Hands.

Launch Pom-Poms

Frogs and Snails and Puppy Dog Tails

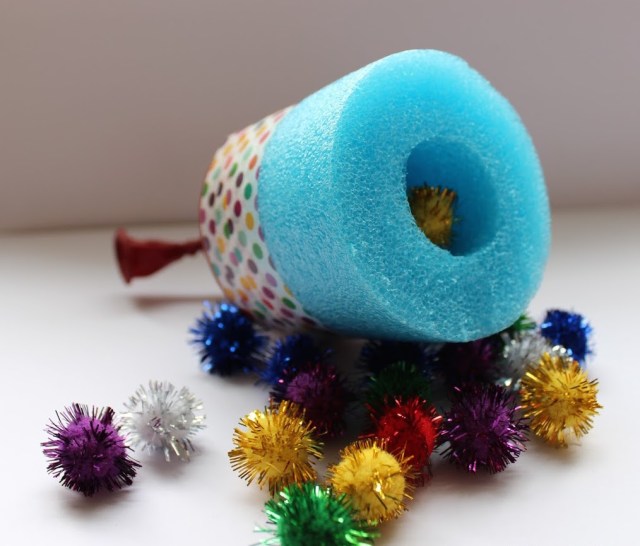
Go the distance with a pool noodle shooter. Get the need-to-know details to make your own from Jaime over at Frogs Snails and Puppy Dog Tails. Then, set up a target shooting range in the backyard for hours of outdoor play. Take aim!

Blow Bubbles

Skip to My Lou

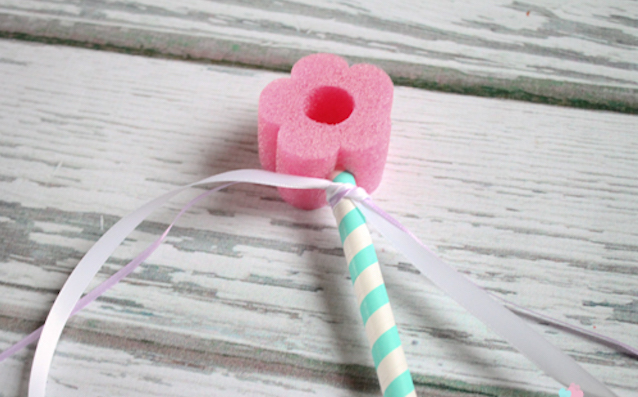
Whether you upcycle your own star or flower-shaped noodles or buy them pre-cut from the craft store, your kidlet will love blowing bubbles through them. And the best part? That you can make wands for the whole neighborhood. Skip to My Lou is where you’ll find out how to make this cute summer supply.

Make a Marble Run

mama papa bubba

The race is on down this simple marble run dreamed up by Jen over at Mama Papa Bubba. Set it up on a sunny day and kick back while your little ones play, play, play. Psst…cars race well on this track too.


Assemble a Water Wall

Casual Claire

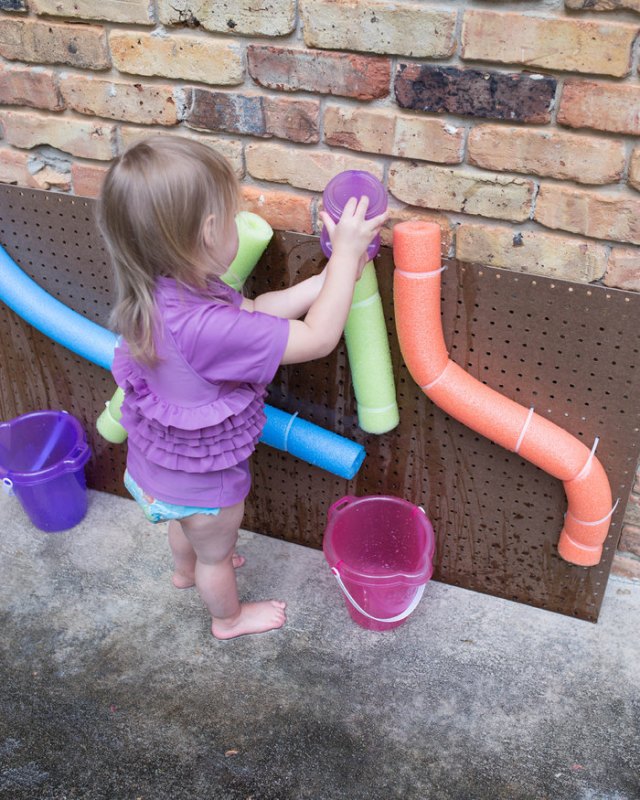
After sprinkler dashes and plenty of time wading in the kiddie pool, your mini-me can change it up but still keep cool on a sunny day playing at her pool noodle water wall. We love the idea of mounting one on a moveable pegboard like Claire from Casual Claire does. But, if you don’t have pegboard on hand a fence works just as well. Splash away, all!


Shoot Some Hoops

Ever Never Again

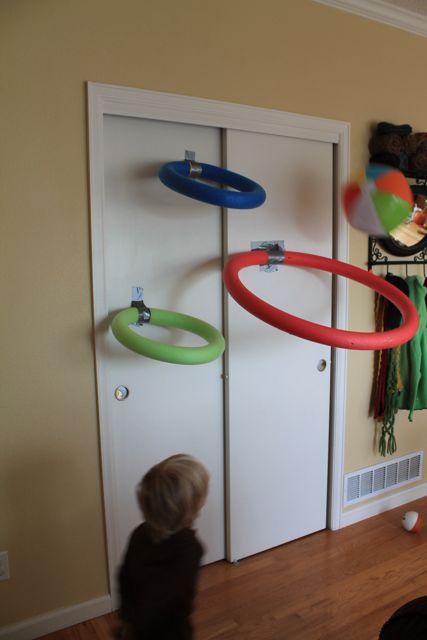
Indoors or out, these quick-to-assemble basketball hoops are just the right size for your sidekick to practice lay-ups and three-pointers, or to play a quick game of H-O-R-S-E with a sibling. Ever Never Again is where you’ll get the tips you need to set them up at your place. She shoots, she scores!
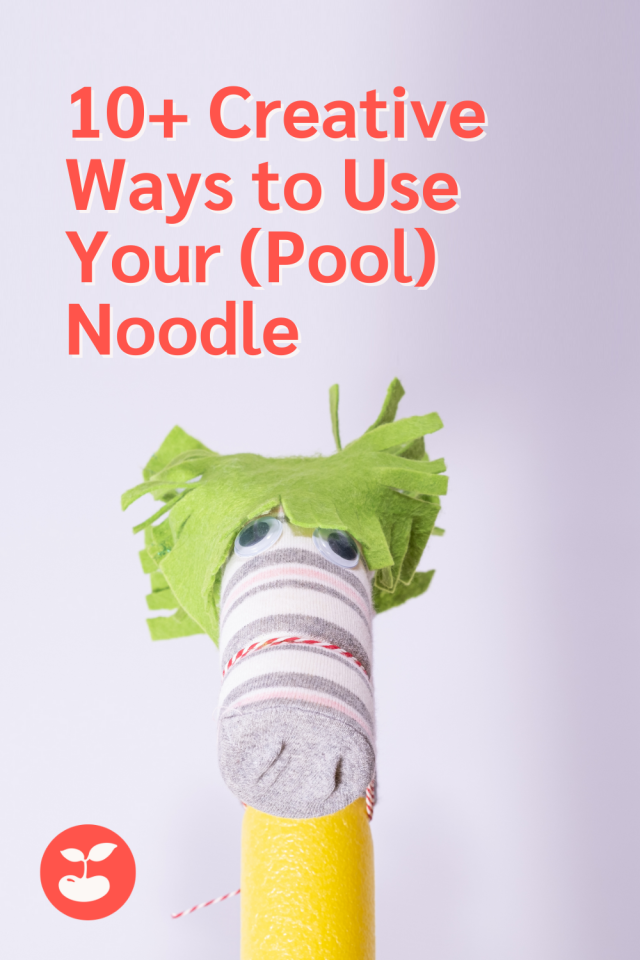
Ride a Hobbyhorse

Molly Moon Craft

Giddy-up, little pardner! Saddle up this cute hobbyhorse for hours of outdoor imaginative play. Find out how to make one yourself at Molly Moon Crafts. Trust us, it’s easier than you think! Hi ho, away!

Run Through the Sprinkler

pool party ideas
Mommy's Block Party

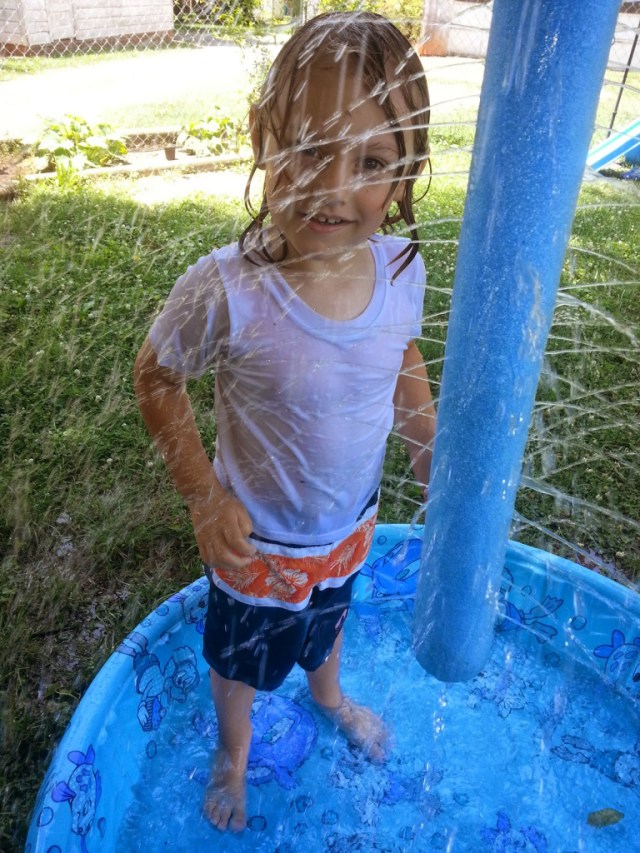
Turn your pool noodle into the best kiddie pool accessory in town, by converting it into an overhead sprinkler. Ondria at Mommy’s Block Party can walk you through the process. It’s like a trip to the splash pad, without leaving the house. Sounds like the perfect summer pace to us!

— Allison Sutcliffe


RELATED STORIES

15 Ways to Up Your Backyard Camping Game

37 Festive Crafts to Make This 4th of July

Here Are the 17 Best Bikes for Every Age & Stage

Mother’s Day will be here before you know it, so it’s the perfect time to help your kiddos make a craft to show Mom how much they love her. We’ve rounded up a list of easy paper crafts that kids can make themselves, from tissue paper flowers to patterned notebooks. Read on for some serious crafting inspiration.

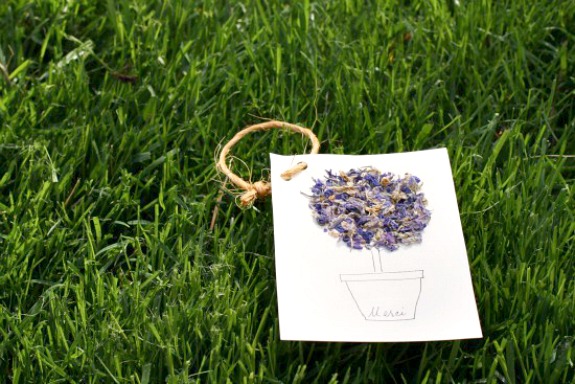
1. A Tasteful Topiary

Make and Takes

Grab some dried flowers and put together this sweet card from Make and Takes. Finish it off with white glue and a little drawing. To get all the details on this DIY, click here.

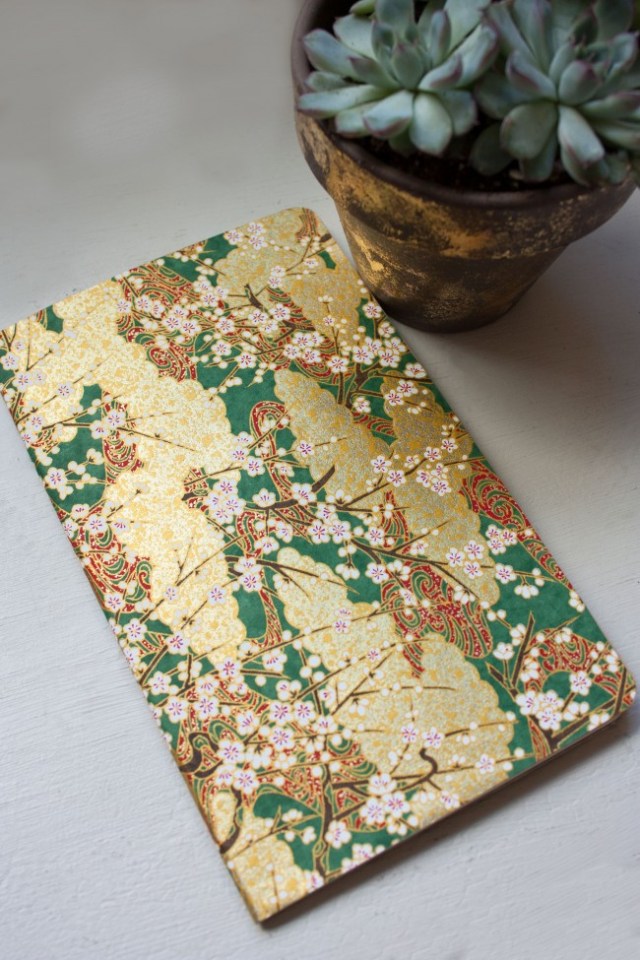
2. Patterned Notebook

Sisoo

How cool is this personalized notebook from Sisoo?! Grab a simple notebook and origami paper, and you’ll have the perfect gift ready in no time. Best of all, it’s something Mom will happily use. To get the details on how it’s done, click here.

3. Mother’s Day Questionnaire

Lil’ Luna

If you don’t have time to make an elaborate craft, this cute questionnaire from Lil’ Luna will fit the bill. Your little one can fill out facts about Mom, and then they can draw and color a one-of-a-kind picture of her. To get the printable, click here.

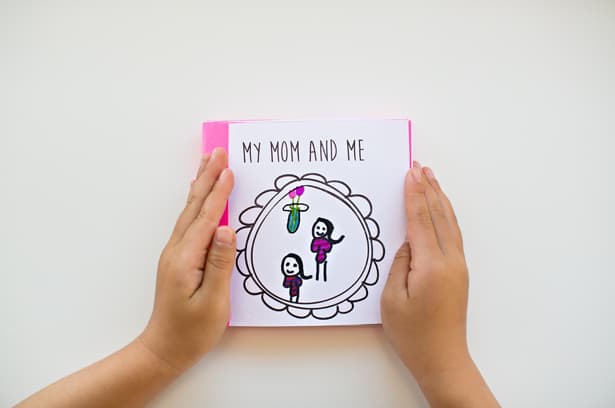
4. Mother’s Day Book

Hello, Wonderful

This kid-made book from Hello, Wonderful is guaranteed to melt Mom’s heart. The printable template includes prompts for them to write their favorite things about their mom. Get all the details by clicking here.

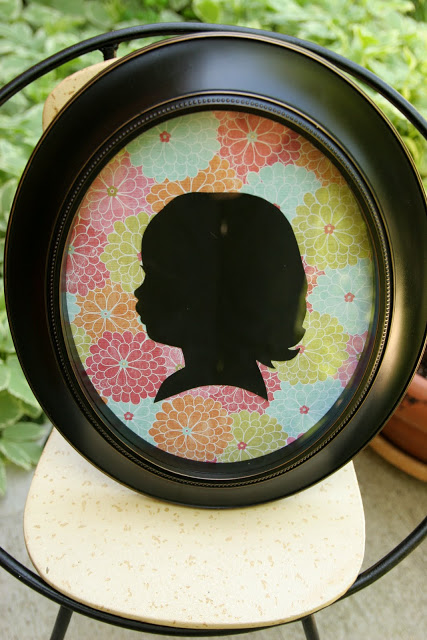
5. Easy Silhouette

Homemade Ginger

Professional silhouettes can be expensive, but you can actually DIY one that looks just as good, thanks to Homemade Ginger. You’ll be surprised by how easy it is—click here to get the step-by-step instructions.

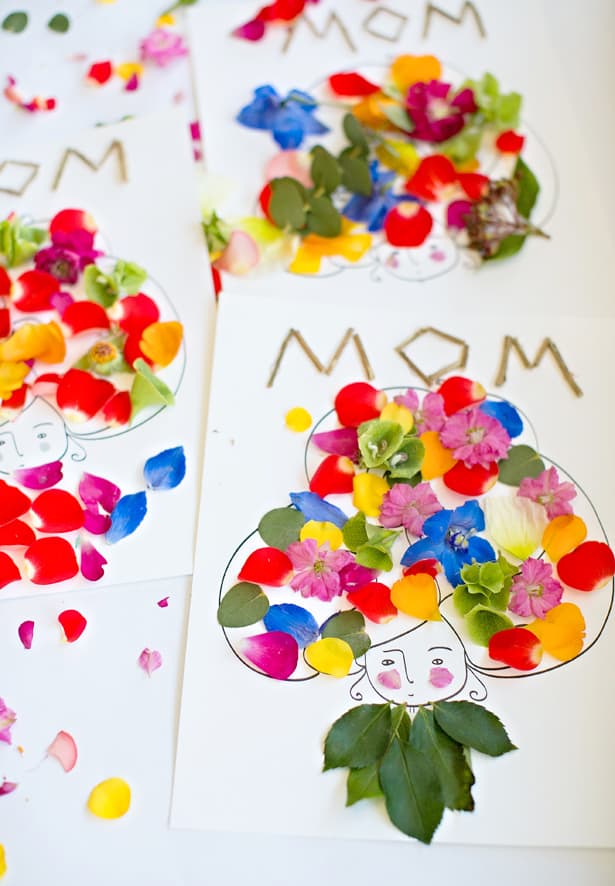
6. Flower Art

Hello, Wonderful

We’re obsessed with this colorful and creative idea from Hello, Wonderful. Just head outside and collect spring flowers and foliage, then use them to decorate a special portrait of Mom. To get the details, click here.

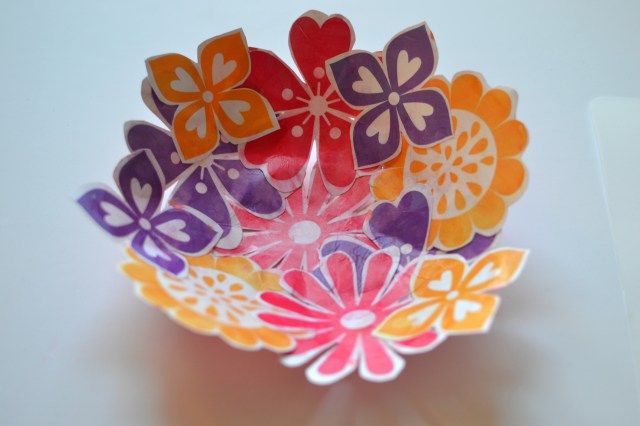
7. Paper Flower Bowl

B-Inspired Mama

We love this craft idea from B-Inspired Mama—it’s a gift that can be put to good use as a candy bowl or a trinket holder. Find out how it’s made and print out the colorful flowers by clicking here.

8. Printable Card

The Bird Feed NYC

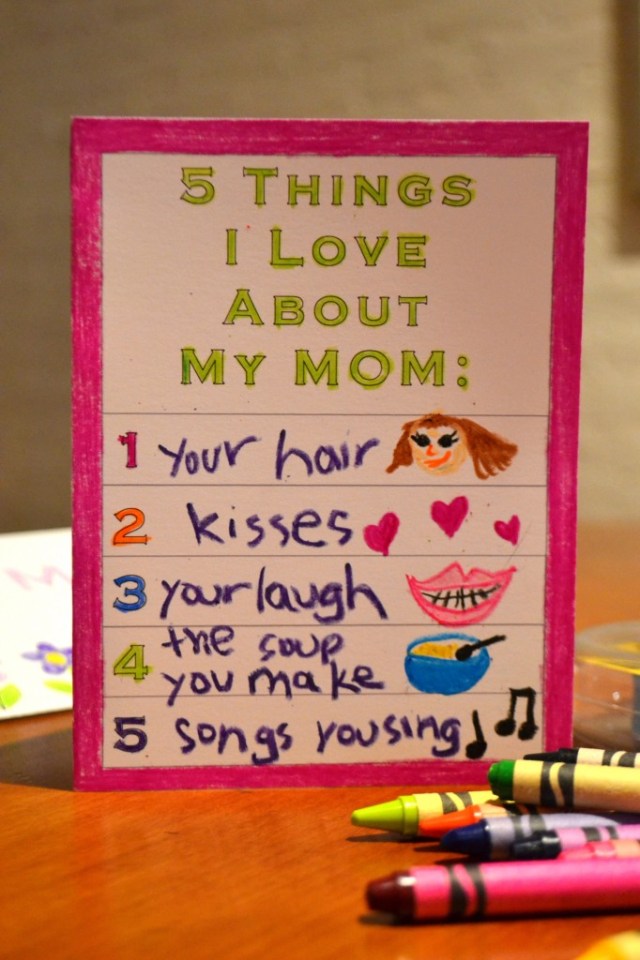
If you’re not the crafty type, that doesn’t mean you can’t still surprise Mom. Just print out The Bird Feed NYC’s cute card template, then let the tots fill it in with all the things they love about their mom. Grab the printable by clicking here.

9. Sequin Paper Plate Heart Suncatchers

Kids Craft Room

Break out the paper plates to make these cute suncatchers from Kids Craft Room. With a bit of paint and some sparkles, your little artists will make a keepsake that will melt Mom’s heart. Click here to get the instructions.

10. Butterfly Handprint Cards

The Best Ideas for Kids

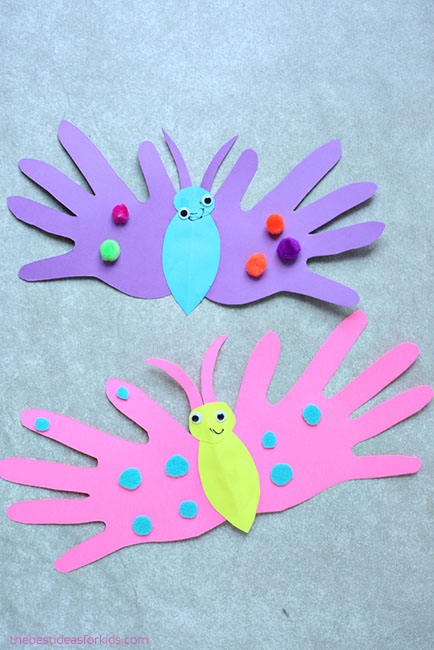
Take inspiration from The Best Ideas for Kids to transform your kiddo’s handprint into a pretty butterfly card. They’re super easy to make with construction paper and a little glue. To get the instructions (plus a cute poem to include with the card!), click here.

11. Best Mom Ever Medals

Chica Circle

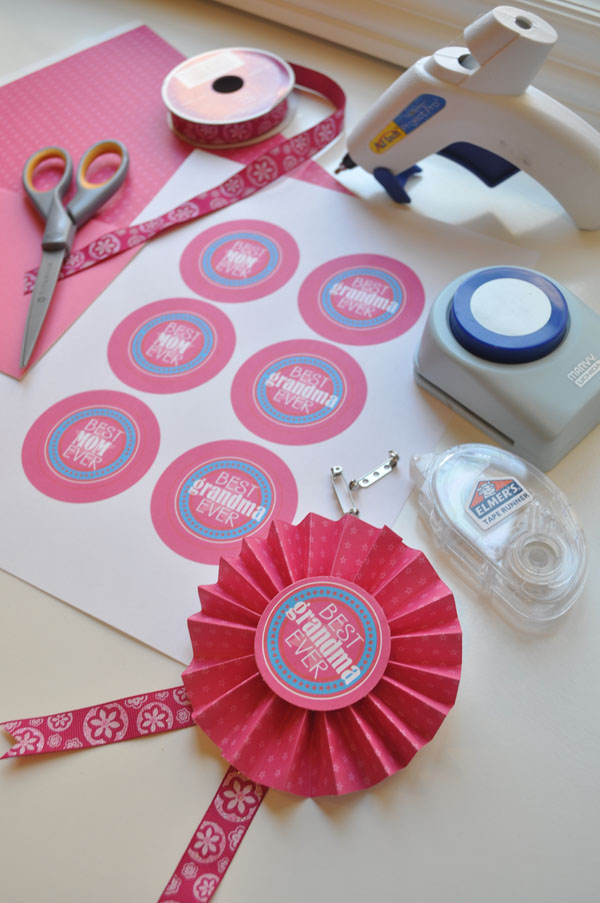
Remind Mom she’s the best with these adorable medals from Chica Circle. You’ll have these done in no time thanks to the handy printable. Click here to get the instructions and the templates (there’s a template for the Best Grandma Ever too).

12. Teacup Cards

In the Playroom

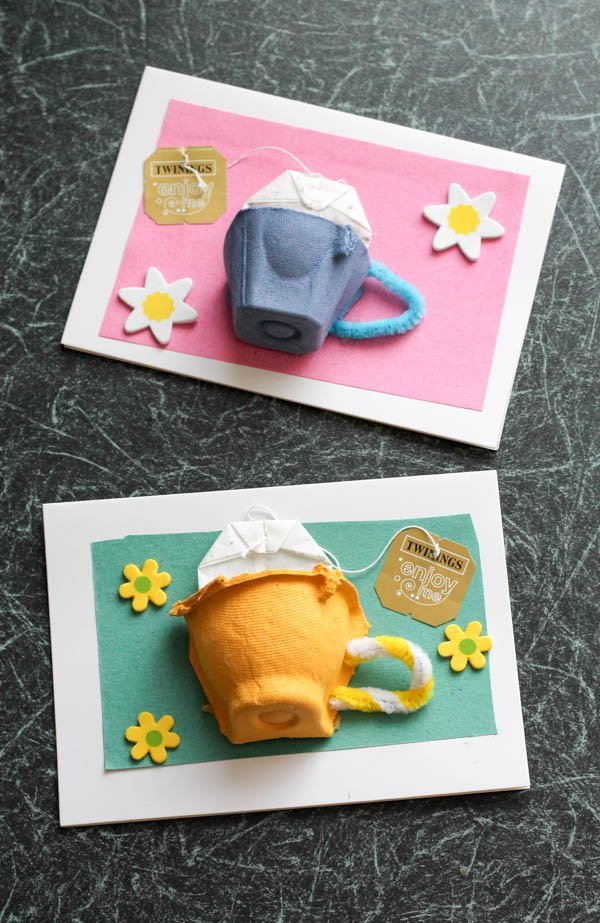
If Mom is a tea drinker, she’ll love getting a fun card inspired by In the Playroom. Made with egg cartons, pipe cleaners and her favorite tea bag, this card is sure to be a hit. Click here to get all the details.

13. Crepe Paper Flowers

The Art of Simple

Break out the crepe papers to make a bouquet of colorful flowers like this one from The Art of Simple. You can use pipe cleaners instead of floral wire to make it easy for the kids to take over. Click here to see the step-by-step instructions.

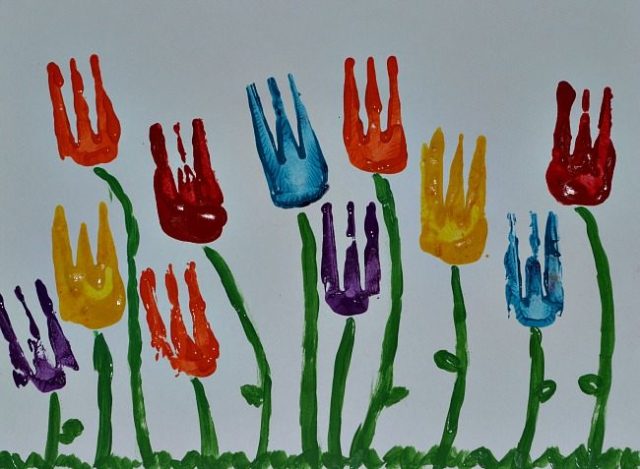
14. Tulip Painting

Fun Littles

Try out Fun Littles’ cool and colorful take on painting for Mom. Three-pronged forks become painting utensils, so you’ll have a pretty tulip garden in no time. Get the details by clicking here.

15. Woven Hearts

Maya*Made

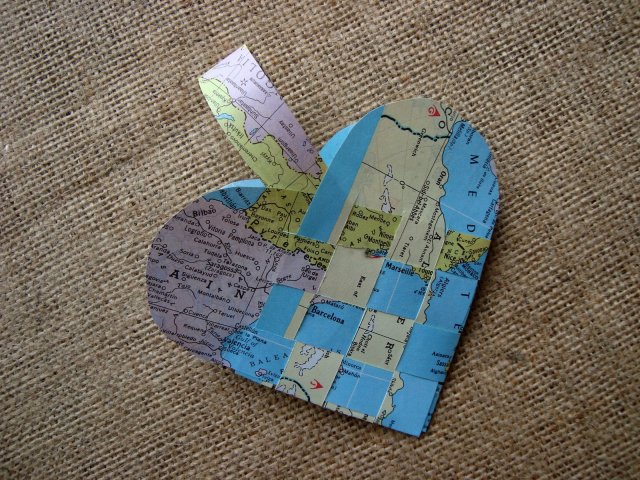
Little ones will love making woven paper hearts like this one from Maya*Made. You can experiment with different types of material, from vintage maps to newspapers to burlap. To get all the details, click here.

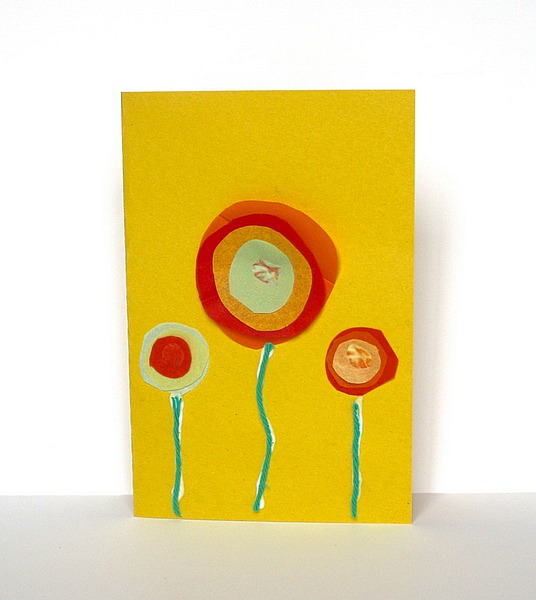
16. Tissue Paper Flower Card

Buggy and Buddy

For a last-minute gift, we love this easy idea from Buggy and Buddy. Kids can decorate a card with tissue paper flowers, then fill in the inside with drawings or notes for Mom. Click here to get the instructions and free printable.

—Susie Foresman

Feature photo: Pexels


RELATED STORIES:

20 Perfect Paper Crafts for Kids

Easter Paper Crafts for Kids

Origami Paper Crafts for Kids 

Carefree Crafting: Simple, Fun & Crazy Hat Ideas

10 Animal Masks You Can Easily Make in One Afternoon


If your kiddo is curious about her body, she’s probably asked you more than one semi-awkward question about anatomy. Today is National DNA Day, so it’s the perfect excuse to take the scientific discussion a little deeper by using hands-on building and fun ideas for teaching about the genetic code that makes your kiddo who she is Read on for our attempt you can totally (but not quite) copy.

photo: iStock

Who’s the Boss? Explaining DNA 

DNA stands for deoxyribonucleic acid and is one of the two types of nucleic acid in cells. We’re made up of many, many cells that we can’t see and each cell has a job. Some cluster of cells make up our muscles, some make up our bones—and all together they make our bodies! But how does each cell know what to do? That’s where DNA comes in. It tells the cells what to do.

DNA is like the boss of the company. It gives cells instructions that it passes down in the form of “codons,” which is a three-block code. These codes are made from a string of four different letters which have best friends they favor and prefer to hold hands with. A likes T and G likes C and when put together they become instructions for the cells.

photo: Michael Knowles via Flickr 

LEGO My Ego

Understanding DNA is kind of like understanding LEGOs. Imagine you have 80 LEGO bricks and only four colors to make a tower—the pattern you create will vary even though you only have four colors. Consider yourself the DNA and build, keeping two colors together at all times. You can create a short but wide tower or tall and thin one—all with the same blocks but just different combinations! The rules for those combinations come from mom and dad and the tower that comes out, the baby.

Need more tips on explaining DNA to kids? We love the way Owlcation explains it in this article.

photo: ElisaRiva via pixabay

Watch Me DNA-Nay

Kids love to build, so building a model of DNA is not only a fun activity to do together, it helps children understand the concept. Using a simple illustration like the one above, find your materials and get building. Ideas include:

LEGO bricks
K’NEX
Candy (check out this cute how-to from Thought.co)
Grapes and toothpicks
Marshmallows and toothpicks
Pipe cleaners
Clay (and sticks or toothpicks)
Beads

photo: Hiroshi Yoshida via flickr 

Observable Traits

Now that you’ve got a grasp on what DNA is, you can show the kiddos how these codes translate in real life by talking about a few common observable traits.

A Family Affair: Height
Totes an observable trait:  If two parents are tall, odds are their kids will be tall. And if both parents are short, they’ll be short. So you can blame (or thank) your parents for your stature.

Grab a tape measure and compare stats. If grandparents are around, measure them too, or call them up and have the kids ask their height. Get aunts and uncles in on the fun too. Of course kids won’t know their full height until they are all grown-up, but it’s still a great exercise in comparing the family’s DNA results.

Simply Irresistible: Dimples 
If both your parents have dimples odds are you will too, although it’s not a guarantee. Many people are born with dimples that fade over time. 

Pull out the photo albums and take a peek at baby pictures of mom, dad, grandparents and other family members. See any dimples? How about mom and dad at school age?

Tongue Rolling
Can you curl your tongue up into a tube? If so, you can thank your genes for that. However, nature loves to break the rules and this one can actually be influenced by your environment: that means you can learn to roll your tongue regardless of if you have the gene. (Unless, of course, you don’t want to).

Practice some tongue rolling skills, and take stock on who can do it and who cannot. Ask friends, teachers and family members and make a tally.

—Amber Guetebier with Christal Yuen

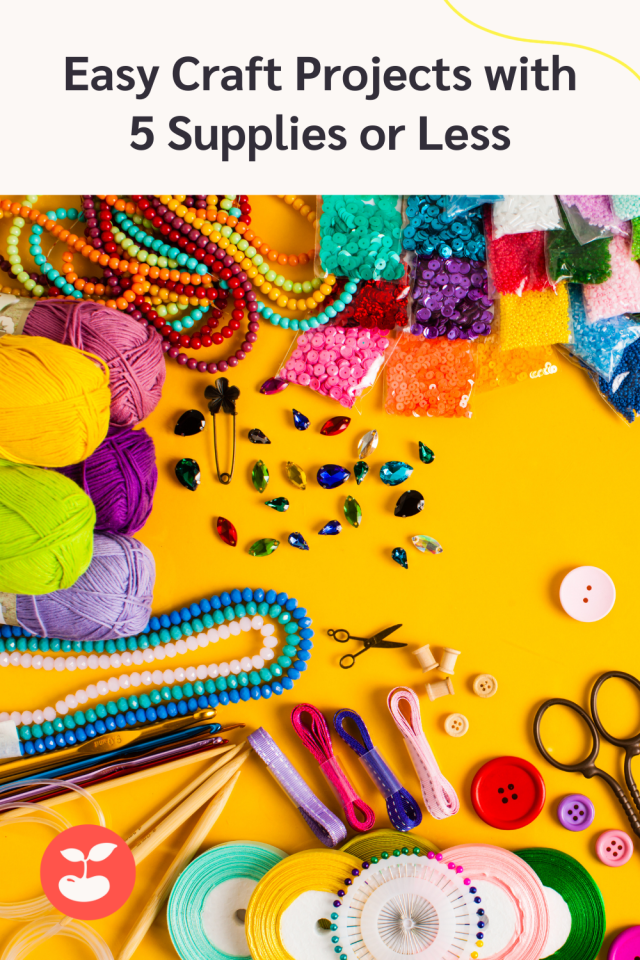
So you want to do a craft project with your kids but you don’t have the dozen or so things needed to make something amazing? Don’t be intimidated by a materials list! From edible necklaces to easy bird-feeders, here are our five-ingredient-or-fewer faves.

Cheerio Necklaces

Melissa Heckscher

Depending on how hungry she is, your little jewelry-maker will probably want to make a few of these necklaces that require only Cheerios (or any O-shaped cereal) and string to create. Just thread your string through the "O" until you're ready to tie it up and put it on. Hint: These are great projects to do at the table when kids are waiting for a meal.

Materials: "O"-shaped cereal, string.

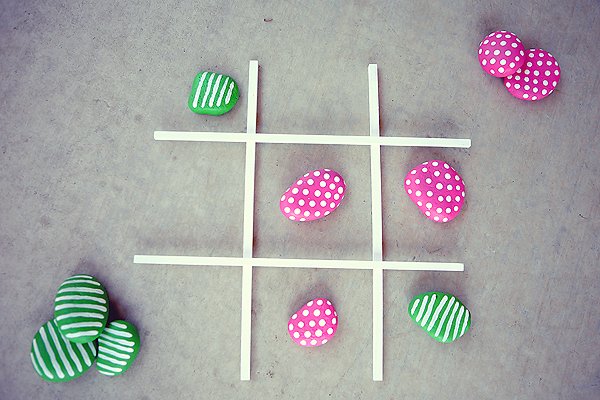
Tic Tac Toe Rocks

Eighteen25

Sticks and stones may break your bones—but they make great craft materials! A little paint and a bit of nature's own ingredients and your kids can make a tic tac toe board worthy of your coffee table. Crafty moms Jodie and Jen of Eighteen25 will tell you how.

Materials: Rocks, four wood square dowels (or plain old sticks, if you want a more rustic look), paint, paintbrush.

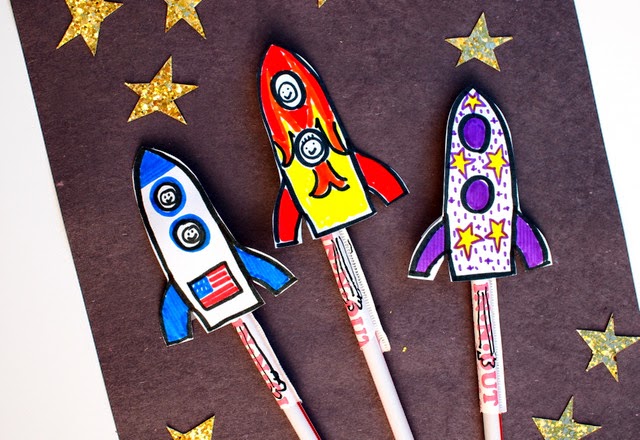
Straw Rockets

Pink Stripey Socks

Note to self: Keep a few of these super-cool straw rockets in your purse for the next restaurant outing with the kids. Better yet, tote the simple four ingredients in your bag and let your kids put together (and launch) this craft while they’re waiting for their meals. The other diners will thank you… until a paper rocket lands in their wine glass. Get the instructions from Mama Leslie at Pink Stripey Socks.

Materials: Paper, markers, straw, tape.

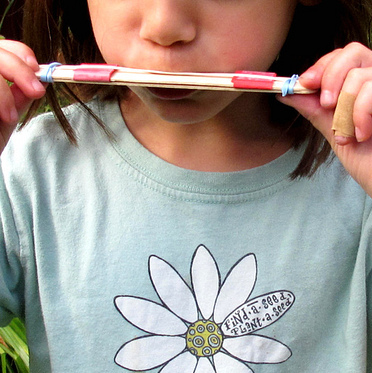
DIY Harmonica

mayamade.blogspot.com

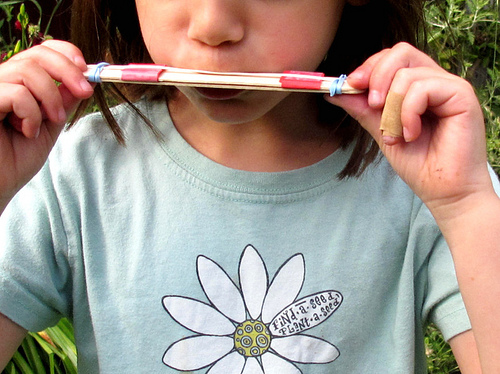
Why buy a cheap, plastic harmonica when your tiny tinkerers can make their own with a few easy steps and just four ingredients. Get the instructions from self-proclaimed "reinventor" Maya at mayamade.blogspot.com.

Materials: Rubber bands, popsicle sticks, paper, tape.

Paper Plate Frisbee

Melissa Heckscher

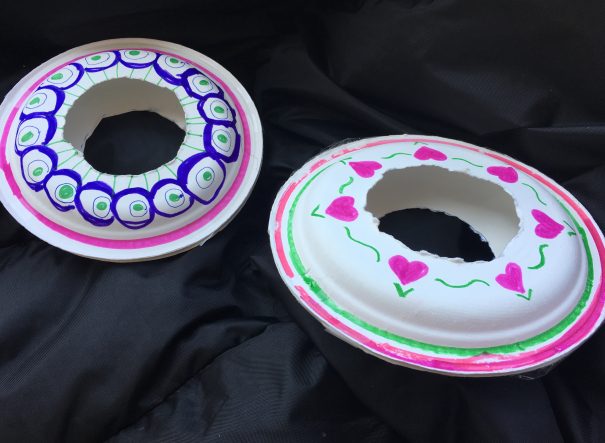
Would your kid rather play outside than do arts and crafts at the table? This easy paper craft will giver her a little of both. Get the simple instructions from blogging mother-of-four Amanda Formaro at Crafts By Amanda.
Materials: Paper plates, markers, tape, scissors.

Clothespin Dragonflies

Crafty Morning

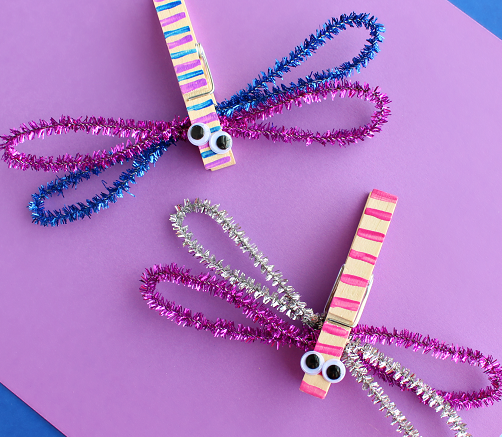
Pipe cleaners and clothespins are the main ingredients for these colorful clip-on dragonflies. A few easy steps and your kids will be clipping these adorable winged creatures all over your house. Mama Michelle has the details on her blog, Crafty Morning.

Materials: Clothespins, pipe cleaners, googley eyes, paint, glue.

Bowtie Bookmark

Mod Podge Rocks

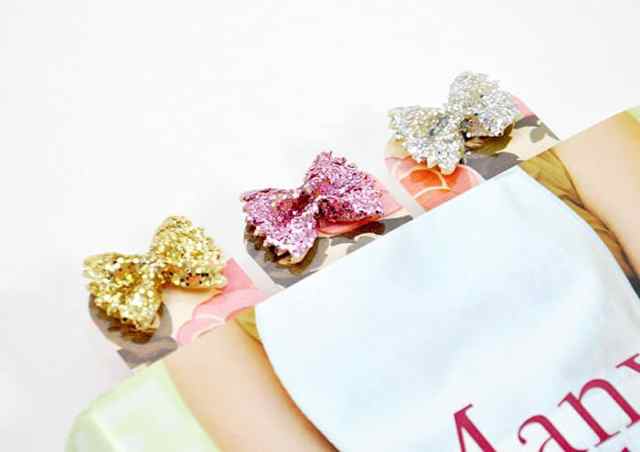
Want to make something that will inspire your child's reading and her creativity? Bowtie pasta has never looked cuter than in this easy DIY bookmark. Get the scoop from the Mod Podge gurus at Mod Podge Rocks.

Materials: Laminated cardstock, bowtie pasta, glitter, Mod Podge gloss, glue gun.

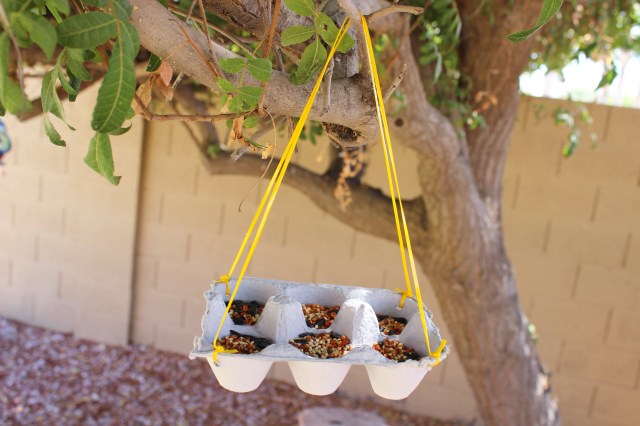
Egg Carton Bird Feeder

The Creative Cubby

Next time you're about to toss an empty egg carton into the trash or recycling bin, stop and read Creative Cubby's easy instructions on how to make an egg carton bird feeder. Your feathered friends will thank you and you'll teach your kids a good lesson on repurposing everyday items.

Want more bird-feeding ideas? Checkout our post on 12 Backyard Bird Feeders that Rock the Treetops.

Materials: Egg carton, string, glue, scissors, bird seed.

DIY Cork Boat

handmadecharlotte.com

Remember those mystifying ship-in-a-bottle creations? Handmade Charlotte gives our fascination a little twist with a cork sailboat project. Watch it become nifty house decor after you put the ship in a jar filled with water and pebbles, or let it travel the harsh waves of bathtime. Find out how to make your kids captain of this craft here.

Materials: Corks, thread, cardboard, toothpicks

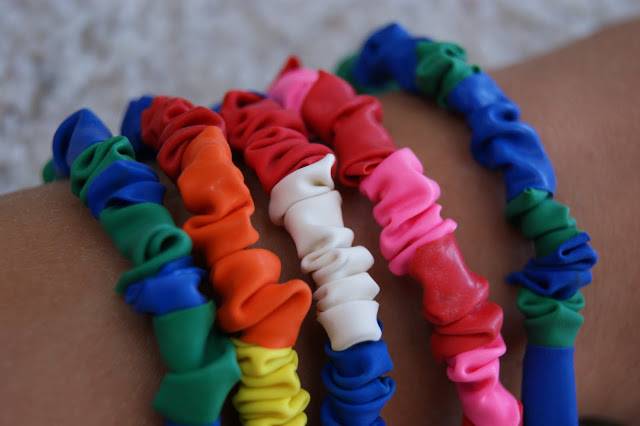
Balloon Bracelets

Michelle Paige

Don't throw those popped balloon remains away! Artsy and creative mom Michelle has the secret to turning those frowns upside down with a balloon bracelet. Get ready to string popped or new balloons into wearable happiness. Note: With completely shattered balloons, snip and save the stems and necks for a different style.

Materials: Balloons, tape, elastic bands

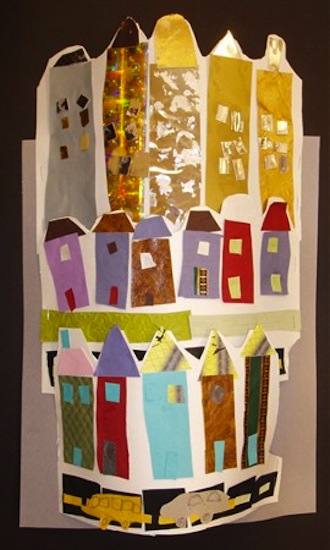
“3D” Paper Neighborhoods

Mrs. Picasso's Art Room

Handsy tots will love watching their imaginative efforts “pop” into the third dimension. Snip magazine scraps and colored papers into houses, streets and skyscrapers. To see how to make this city come to life, head over to Mrs. Picasso’s Art Room!

Materials: Scissors, paper (from plain to magazine scraps), glue, stapler (optional)

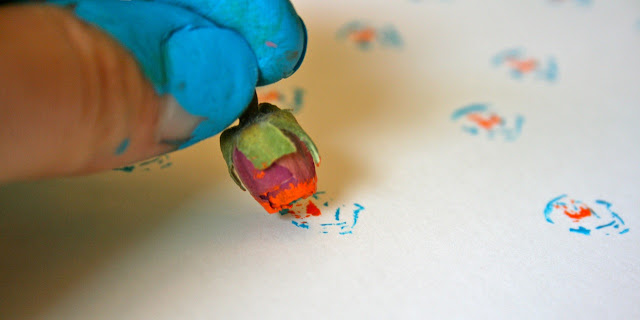
Nature Printing

Emily Neuburger

Reprint nature with stamps from Mother Earth herself! Scavenge your backyard for tiny pine cones, ferns, and flowers (last two need to be dried for stiffness) and experiment with ink. Emily Neuburger encouraged her kids to roll, press and smudge their creativity out. The final product? Lovely wrapping paper, framed art or even gift cards.

Materials: Craft paint, ink pads, dried rose buds, pine cones (almost anything can be used as a stamp)

Toilet Roll Characters

Matsutake

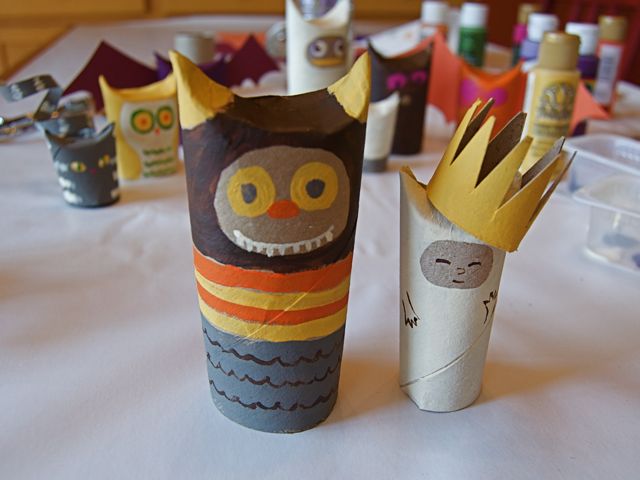
Fold in the edges of paper rolls and what form do you see? Do those points make an the ear of a cat? Or maybe there's a wild rumpus ready to start! That’s exactly what Katie from Matsutake and her little assistant saw, and with some paint, they brought a Wild Thing to life. Check out her blog to see what other creatures she was inspired to create.

Materials: Paper rolls (toilet, wrapping paper, paper towels, etc.) paint, markers

— Christal Yuen & Melissa Heckscher


RELATED STORIES:

Fun Arts & Crafts Online Tutorials for Your Little Artists

18 Creative Upcycled Crafts for Kids

Freeze Time with This DIY Time Capsule

Due to the growing COVID-19 pandemic, people are stuck in the house looking for fun ways to keep their kids entertained. The latest guidelines are calling for social distancing to stay in effect until the end of April and distance learning may continue past that. Michaels just released a list of 100 different projects that can be made using the same 10 items.

Craft supplies

You can find the 10 items, which includes standard supplies such as yarn, wiggle eyes, craft sticks, pipe cleaners and paint as well as the directions to create all of the projects on the Michaels website. All of the supplies can be purchased online for delivery or the craft retailer’s newly launched curbside pickup. To use the new curbside pickup, simply order online with Buy Online Pick Up in Store and Michaels will email you when the order is ready. Then, when you arrive at your local Michaels, just give the store a call and a team member will bring your items right to your trunk.

—Jennifer Swartvagher

Featured photo: Pixabay via Pexels

RELATED STORIES

Prime Video Offers Free Kids Content for All Amazon Customers

Audible Stories Now Streaming Free for Kids

Take Advantage of Free Online Courses from Ivy League Universities


Halloween isn’t the only day for dressing up. Tap into your creative side any time of year by making a hat. They make great additions to your costume box because they can serve as a full costume on their own—no snaps, zippers, buttons, tight leotards or confusing ties to figure out. With that in mind, we’ve dug up some simple, fun and totally crazy hat ideas that’ll make your day.

Cretaceous Crown

Cutting Tiny Bites

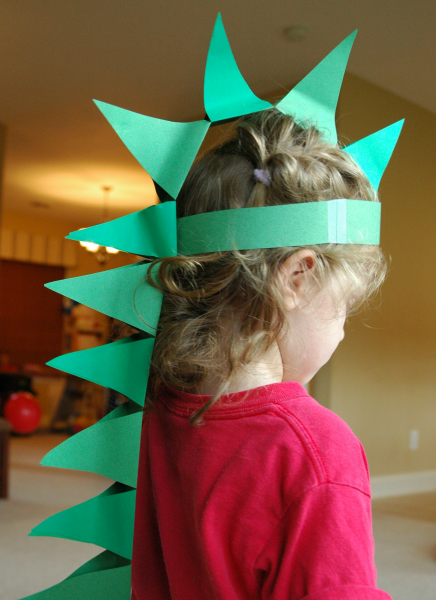
They're already obsessed with Jurassic World everything, so up your pretend play game with this adorable DIY paper dinosaur hat. It's easy to make, and you already have everything you need. Stomp over to Cutting Tiny Bites to learn how to cut, glue and assemble your way to your very own spiked dino hat.
Medieval Crown Craft

First Palette

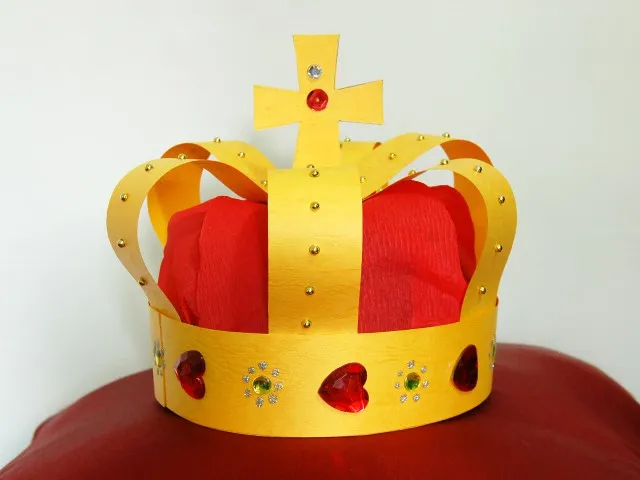
This craft from First Palette is fit for the pint-sized royalty in your life. With construction paper, crepe paper, and as much sequin bling as you can find, you'll have a new addition to the dress-up bin. Head here for the full instructions.

A cool cowboy hat

Gabby Cullen

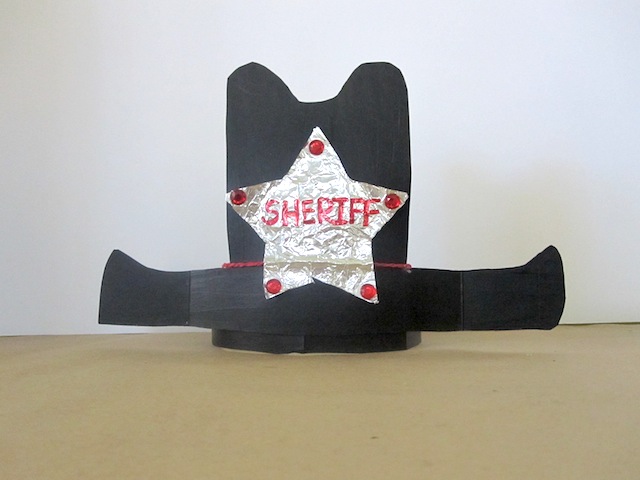
This cowboy hat is an easy craft you can make with your kids. Say giddy up and grab the tutorial by clicking here.

Bunny Hat

Alpha Mom

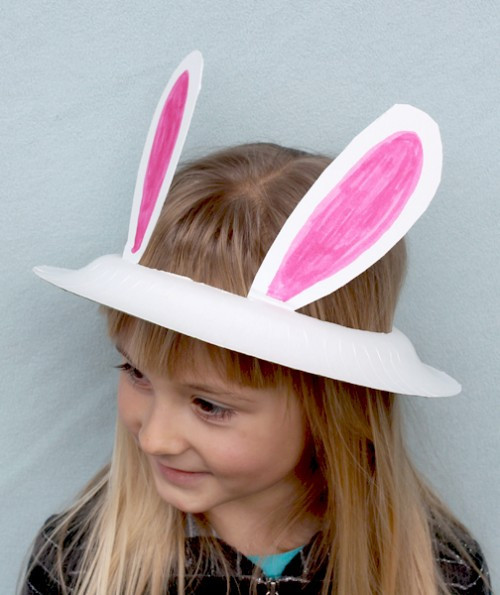
Your kids will be hoppin' around in no time with this super simple craft. Directions from our friend Alpha Mom call for scissors, one pink marker, and one paper plate. The site offers other great ideas for paper plate hats like decorative crowns and heart hats so check it out.

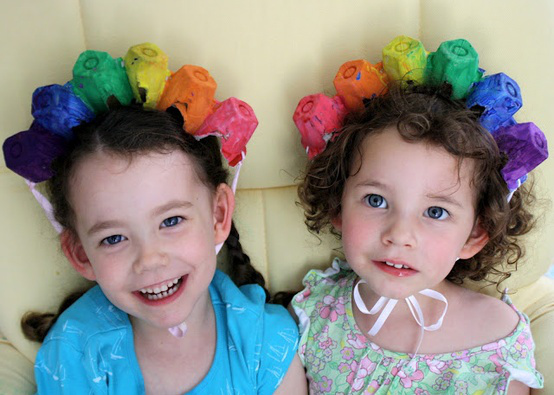
Rainbow Hat from Egg Carton

Having Fun at Home

Rainbow Queens? Rainbow Fishies? Flowers? Make these colorful egg carton crowns and see how they brighten up your kiddos' day. Having Fun at Home has the 411 on how to make this colorful hat—all you need is paint, an egg carton, and a ribbon for the tie.

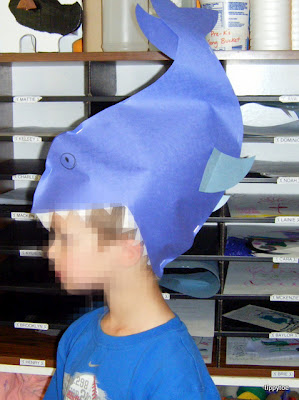
Shark Attack Hat

Tippytoe Crafts

For the shark and sea monster enthusiast that wishes he could breathe underwater, this hat's for you. There is a lot of scissor work involved so be prepared to help a bit if your kid isn't an expert cutter. All you need is blue construction paper, markers, glue, and a stapler. Head over to Tippytoe Crafts for the tutorial.

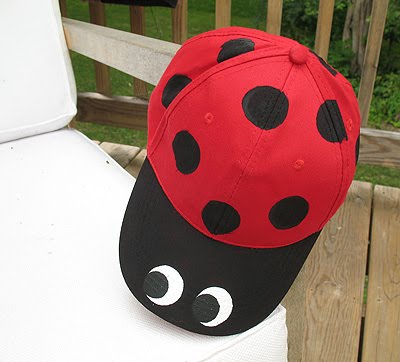
Ladybug Hat

Crafts by Amanda

You need black and white paint for this ... oh, and a red baseball cap but the good news is that you can get one on Amazon for just $3.99! And why not ... it's so cute and it's durable! See the tutorial over at Crafts by Amanda.

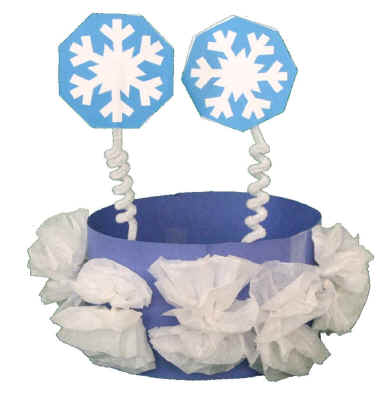
Snowflake Hat

DLTK

There are simple templates for this winter crown and all you need is blue construction paper, two white pipe cleaners, a pencil, scissors, tape, white tissue paper, and white thread. Optional craft supplies are stickers, markers, glitter or gel pens to decorate! See the how-to over at DLTK

Photo: igor kisselev/shutterstock.com

When learning how to form the letters of the alphabet, children respond differently whether they are kinesthetic, auditory, tactile, and visual learners. In addition to supporting a child’s preferred learning st‌yle, using various methods can also increase the “fun factor” when practicing how to write!

Kinesthetic Learners:

Kinesthetic activities provide children with opportunities to learn through movement. Children who prefer this learning st‌yle may find it more challenging to sit still when engaged in a learning activity. Their capacity for learning increases when both their brain and their body are engaged.

You may think a kinesthetic-based activity is a challenge for an activity that is traditionally done with paper and pencil, but movement can definitely be incorporated into writing activities. For example, have children hold scarves and use big arm movements to write the letters in the air. Or, have the children move around the room then freeze when you call out a letter. Their task is to form the letter with their bodies. They might create the letter “L” by having two friends lie on the floor in the correct formation. Or, they might decide they can make the letter “t” all by themselves by sticking their arms straight out on each side.

Auditory Learners:

Auditory activities appeal to children who learn best through actively listening. They may also find it helpful to talk about the material they are learning. Providing auditory learners with opportunities to both hear and recite information is ideal.

To incorporate the auditory learning style in writing practice, children can be taught rhymes or sayings that help them remember the pathways to use when forming letters. For example, children can use the rhyme, “Pull straight down for capital E. Then add some shelves. 1, 2, 3!” Hearing this rhyme, then remembering and reciting it themselves, can help children when they forget how to print a letter.

Tactile Learners:

Children who prefer tactile activities learn best by touching and manipulating objects. They generally prefer “doing” over simply hearing or seeing instructions. They are often referred to as “hands-on learners,” and prefer activities like building, using art materials, and using manipulatives.

There are many ways to incorporate tactile opportunities into learning how to write letters. Children can use their index finger to practise printing letters in trays filled with salt, sand, or shaving cream. Children can use paintbrushes and water to “paint” the letters on chalkboards or other surfaces like a brick wall. Tactile learners may enjoy using playdough to create the letters. Working with a partner, they can also take turns printing letters on each other’s back. To support tactile learners’ recall of letter formations, have them make the letters using art materials like stamps, pipe cleaners, or stickers.

Visual Learners:

Visual learners benefit from seeing the material they are learning. They may prefer to read and write versus listening and speaking. They can typically recall information better if it has been presented to them visually.

When learning how to write letters, children who are visual learners can benefit from seeing the letters and writing them. Provide these learners with a visual of what the letter they are learning looks like. Provide them with opportunities to trace the letter before moving on to independent practice where they write the letter themselves. Visual learners who are focusing on printing can benefit from the handwriting worksheets.

These tracing letters worksheets provide children with the steps to forming each letter, using the proper pathways. Tracing the letters allows children to rehearse the pathways before moving on to independently writing.

To support visual learners who are focusing on cursive writing, worksheets that follow the same pattern as the printing worksheets can be used: Provide a model of the letter, allow for opportunities to trace the letter, then move on to independent practice.

These cursive letters worksheets also provide students with practice linking cursive letters together to form words.

The worksheets noted above have been carefully crafted with appropriate lines to promote the correct sizing of letters. Young children who are experimenting with writing may print very large letters. As they become more experienced with writing, children need guidance around which letters are tall and which letters are short. They also need guidance to correctly write “tail” letters, which have parts that hang below the line, like “p” and “y.”

Providing children with multiple ways to practice writing letters can help them to be successful and also maintain their engagement in the learning process. Worksheets will help them achieve the end goal of being able to correctly form written letters on paper.

Alesia is a founder of PrimaryLearning.org, an educational website that helps elementary school teachers and homeschool parents with hands-on worksheets, activities and thoughtful articles.

With a little DIY magic, you can take an old kiddie pool from dumpster-ready to super fabulous. We’ve rounded up our favorite surprising and adorable ways to give the classic outdoor toy new life inside or outside of your house. Scroll down for fun tips and tricks to upcycle your kiddie pool.

DIY Ball Pit

Chelsea via Lovely Indeed

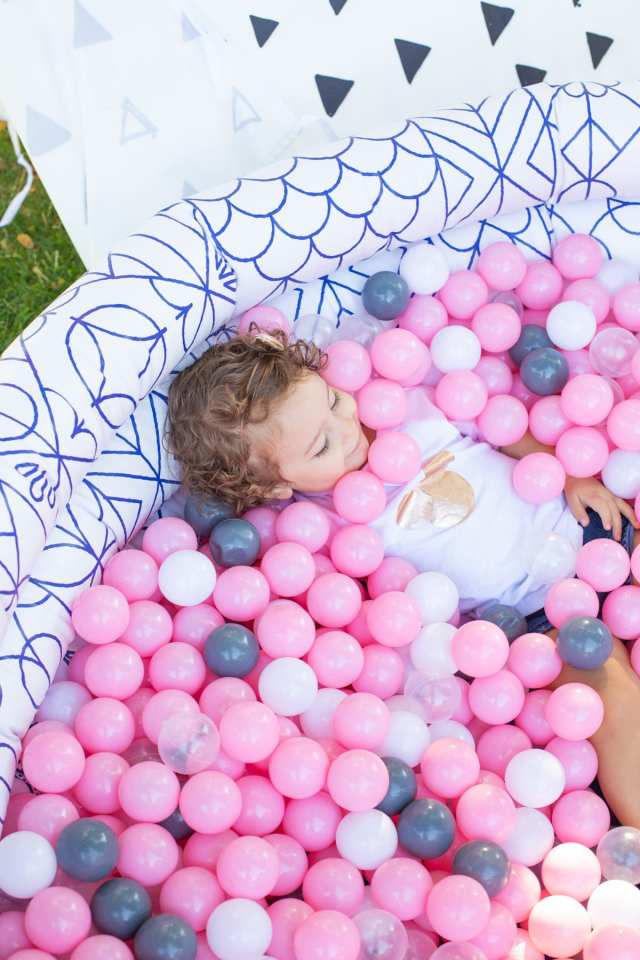
Kids a good ball pit, but sometimes we get a little icked out by the germ potential. That's where this clever DIY kiddie pool ball pit comes in—it's easy to make, and the only germs swimming around in it are your kid's own. Chelsea at Lovely Indeed did all the research and can show you how to create the best possible ball pit, guaranteed!


Gone Fishing

Anne Caminiti- Momee Friends of Long Island

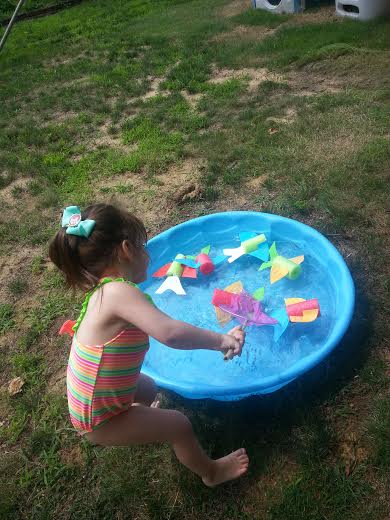
Here, fishy fishy. Set up an afternoon of backyard fishing fun by turning your kiddie pool into a pond. We love the double upcycle in this fishing game: old pool noodles get new life as fish and swim around in a baby pool. Swim over to Momee Friends of Long Island to learn how to make your own.

How does your garden grow?

Christy Jordan/Southern Plate

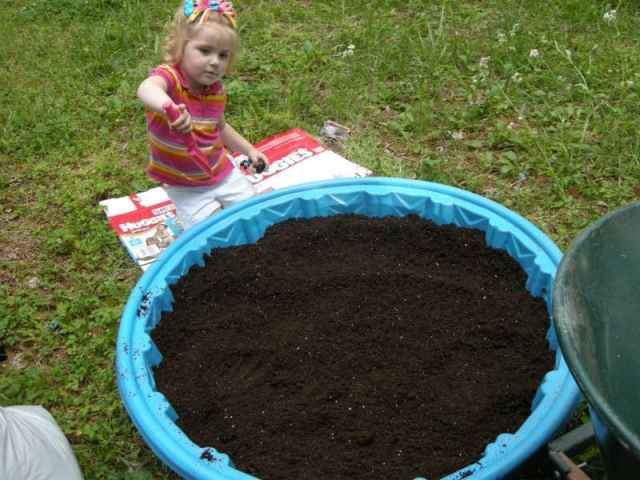
This creative DIY upcycle will help you grow a green thumb. With an old kiddie pool, you can make a new raised garden bed before naptime is through. Plus, these garden beds are just the right height for veggie loving kids to tend to their own plants. Find out how you can make your own from Christy at Southern Plate.

Ahoy Matey!

Sweeten Your Day Events

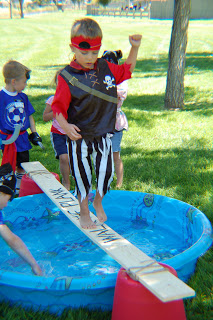
Even landlubbers will love walking this plank. Sweeten Your Day Events used a kiddie pool ocean as part of an epic pirate-themed party but we think you can surprise the kids with a pirate day any day! See how it's done at Sweet Your Day's site. 

Rainbow Magic

Agnes Hsu via Hello Wonderful

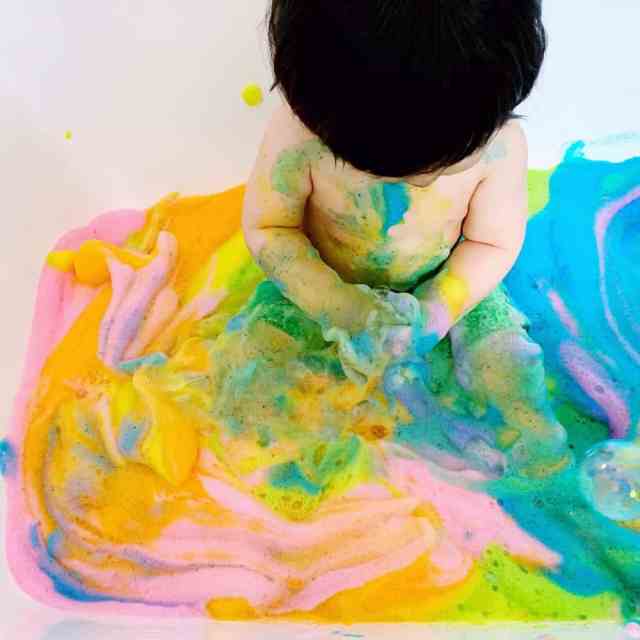
Fill a kiddie pool with rainbow soap foam for an afternoon of magical sudsy fun. We love that this easy sensory activity gives kids the chance to be inside of a rainbow. Slide over to Hello Wonderful to find out how to make your own rainbow bubbles.

To the Dogs

Take Lucy

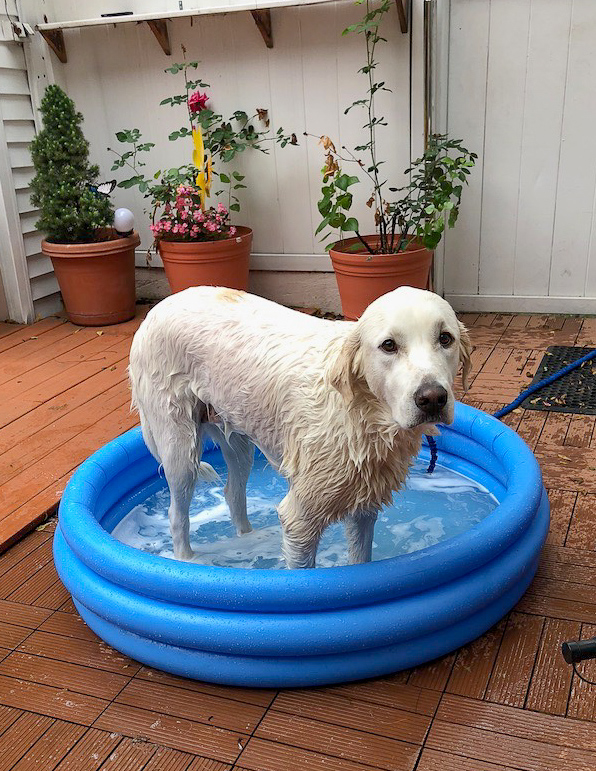
Give your best friend a bath in an old kiddie pool. Sweet Lucy here looks squeaky clean after her fun kiddie pool adventures. Pick up some tips and tricks on scrubbing your own furry companion at Take Lucy.


Water Balloon Blast

Sunny Day Family

Fill a kiddie pool with water balloons, and you'll be winning at water fights. You can take the water balloon fun up a notch with Sunny Day Family's creative water balloon stomp idea. While Laura used a big plastic tub for her water balloon stomp, we think it'd be fun in an old kiddie pool, too. Stomp over to Sunny Day Family to find out more—including the fun inspiration for this kid-pleasing activity.

Beachy Keen

Jillian Leslie via Catch My Party

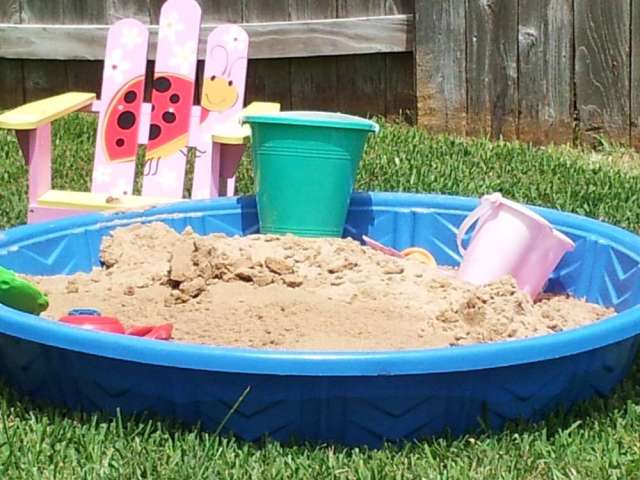
Bring the beach to your backyard with this clever kiddie pool trick. This version is the centerpiece of a beach birthday party, but we think this DIY sandbox would add fun to any yard. Learn more about this Birthday Beach Bash at Catch My Party.

Creative Combinations

Sam via Simple Everyday Mom

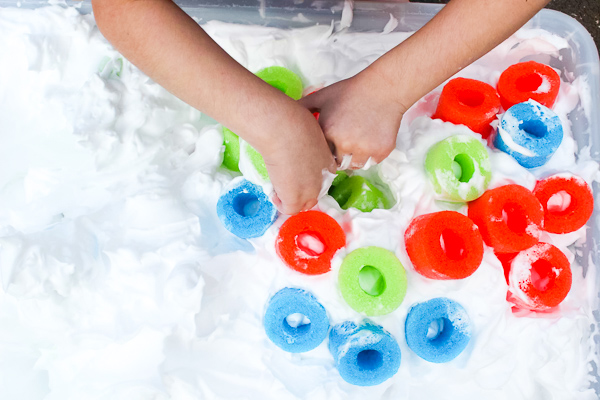
We wouldn't have thought to pair shaving cream and pool noodles for sensory play, but now that we've seen this awesome idea from Simple Everyday Mom, we can't wait to try it! Using a kiddie pool makes for interactive play and easy clean-up. Let Sam at Simple Everyday Mom show you how it's done—and how you can build a little learning into this playful activity.

Artistic Genius

One Crayola Short

Brilliant art teacher Mrs. Y created this interactive art project using a kiddie pool and tennis balls. We love that this one gets kids' creative juices flowing, and creates wall-worthy modern art. Check out how you can set this messy painting project up at One Crayola Short.

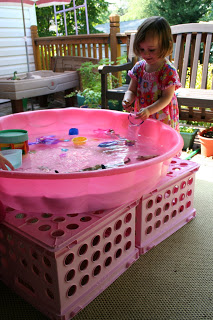
Water Table

Mary Lea/Pink and Green Mama

Looking for a water table on a budget? This DIY option is the most affordable water table out there. Check out how easy it is to make your own at Pink and Green Mama. You can add an extra-fun touch by floating homemade sailboats in the water.


Bubbles Bubbles Everywhere

Momma Society via Project Nursery

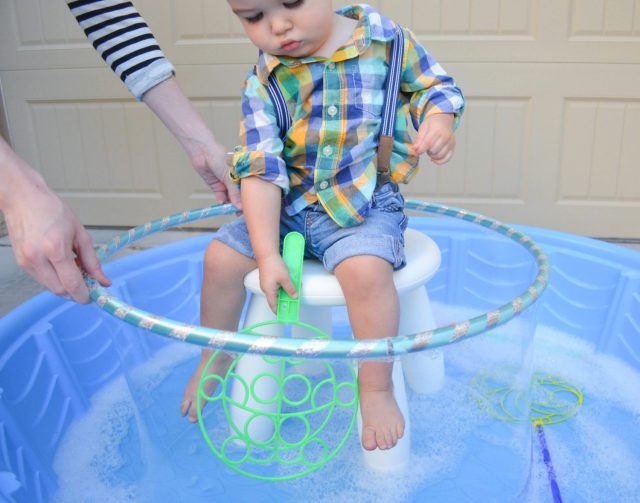
Turn that kiddie pool into the worlds' biggest bubble container. With a hula hoop, you can make bubbles so big you'll blow your kiddo's mind. You can also make DIY bubble wands out of pipe cleaners and extend the fun. Follow the recipe at Project Nursery, and you'll be blowing bubbles in no time.

DIY Water Park

backyard waterpark ideas
Little White House

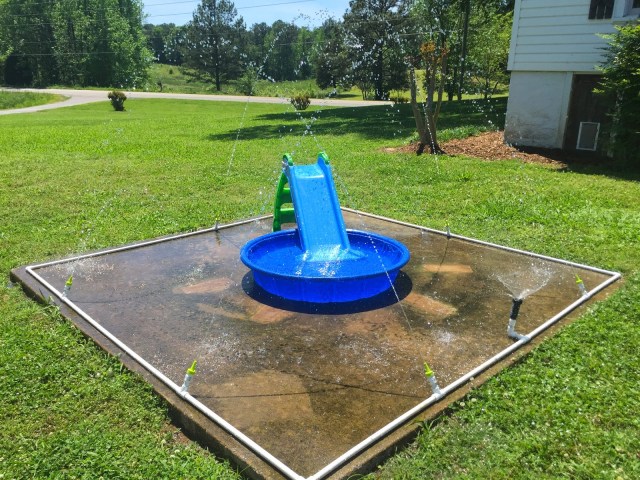
Combine a plastic slide and a kiddie pool, and you'll have your own pint-sized water park. Here are even more home water park ideas. We love the homemade slip n' slide!


RELATED STORIES:

11 Easy Ways to Set Up a Backyard Water Park

17 Awesome Pool Games to Play without Props

11 Easy Ways to Boost the Backyard Fun Factor