Looking for something more meaningful than a piece of chocolate to put behind those advent calendar doors? This simple, DIY advent calendar gives kids good deeds to do every day leading up to Christmas (or Hanukkah, which starts this year on Dec. 12). You can adapt it to any month, though, if you want to do one that is 30 or 31 days. Read on for the how-to.

materials-advent

What you’ll need: 

Paper

Twine, yarn, or string to hang advent bags

24 small muslin bags (30-31 if you’re going for a month)

24 clothespins (30-31 if you’re going for a month)

Number stickers (enough to label numbers) or fabric paint

Charms or other trinkets (optional)

Glue gun (not pictured)

img_7442

Step One: Brainstorm Acts of Kindness

Sit down with your kids and talk about what it means to be kind, and what they can do to practice kindness (Need ideas? Check out this story). Some ideas our young kindness crew came up with included:

– Call Nana

– Pick up trash

– Let someone in front of you in line at school

– Hug a friend

Then, have them write these simple acts on small squares of paper to go inside the muslin bags.

img_7438

Step Two: Number the Bags

Use number stickers or fabric paint to label all 24 muslin bags (we think gold glitter looks holiday-festive, but any color will do). Note: If using stickers, use a hot glue gun or other strong glue to secure the stickers to the bag; otherwise, they won’t stick for long.

img_7446

Step Three: Put Stuff Inside

Put the acts of kindness cards into each muslin bag. To up the excitement factor, you can also add trinkets or candy. Our best suggestion — Drop these heart-shaped charms into each bag (they’re about $8 for a box of 50) so your kids can make “kindness necklaces” to remember all those sweet, nice things they did.

img_7439

Step Four: Hang it Up!

Hang all the bags on a wall, across a mantle — wherever works! Start opening the bags on Dec. 1 and keep on cranking out those acts of kindness until Christmas Eve (and, hopefully, every day thereafter). If you’d rather keep your December decor secular, just add a few more days and call it a countdown to the new year.

acts-of-kindness-ideas

Keep the kindness coming…
Inspired? Check out these free lesson plans from RandomActsOfKindness.org that teach kids how to be fair, kind, and respectful all year long.


Hosting a crew of ghosts, witches, and goblins this October? Get ready for a spooky good time with these easy, affordable Halloween decorations. Many can be made with things you already have around the house, like glass jars and construction paper, and a few of the options are perfect for crafty kids ready to help deck your soon-to-be haunted halls. Happy haunting!

Halloween Terrarium

Today's Creative Life

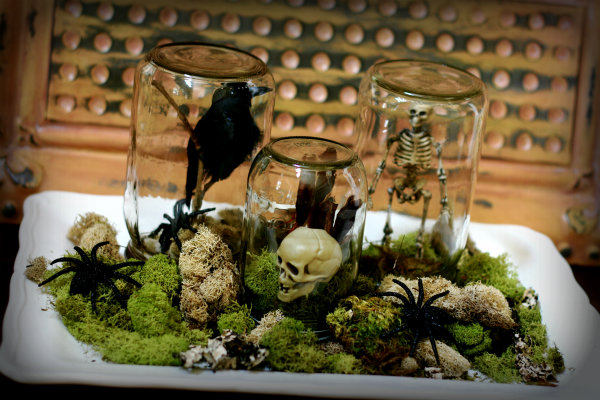
It's super easy to make an eerie centerpiece with twigs and rocks, glass jars and a few Halloween goodies from your fave craft store. You can use skulls and crows, or put a few mini pumpkins under the jars to turn down the scare factor. Using scrubbed-out jelly jars makes this decoration affordable, and you can put it together in less time than it takes to say hocus-pocus. Head on over to Today's Creative Life for the step-by-step instructions to make your Halloween terrarium.

Pine Cone Spiders

Fireflies Mudpies

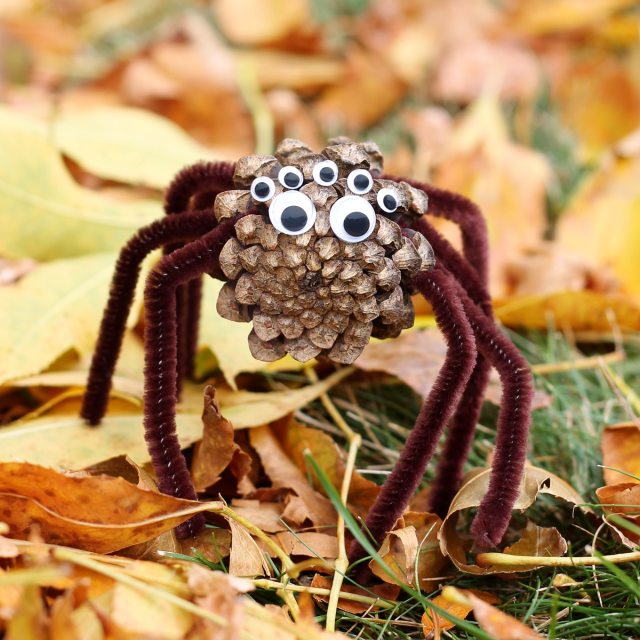
If you live near evergreen trees, this one is for you. First, send your kids outdoors to gather up the key supply: pine cones. Add brown pipe cleaners and googly eyes, and you'll be hanging up your own web spinners in no time. Plus, check out Fireflies + Mudpies blogger Melissa's affordable tip for making webs to go along with the eight-legged creations. Click here to learn how to make these pine cone spiders.

Crow Door

Idlewife

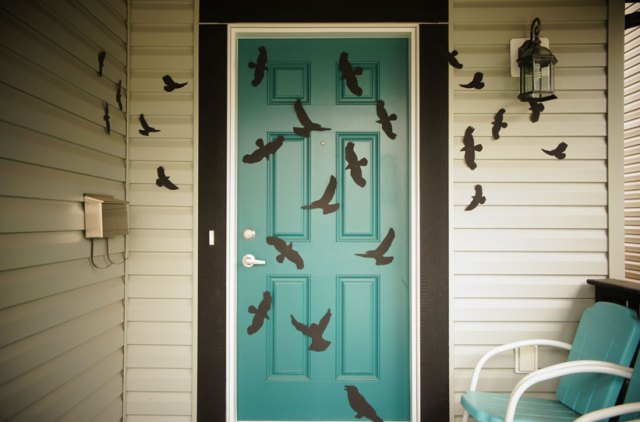
A flock of ominous birds will descend on your door with no more than a pack of black paper and a pair of scissors. This Halloween decoration costs less than a pumpkin spice latte and, as a bonus, it's easy to put up and take down. Peek at the detailed instructions on Idlewife to make your own nest of crows.

Spirit Jugs

Jen Sedillo via Eighteen 25

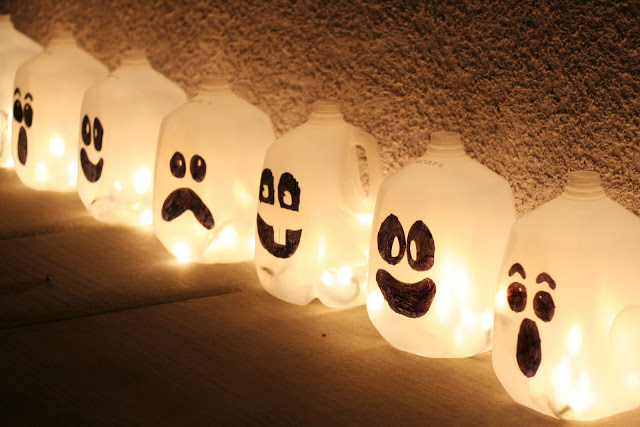
Create a ghostly trail leading party guests to your front door with spooky spirit jugs. This easy project makes use of milk jugs (starting saving now or ask friends!), meaning it can be made on the cheap. Crafty kids can help make these eerie, party-perfect outdoor Halloween decorations. Find out how at Eighteen 25

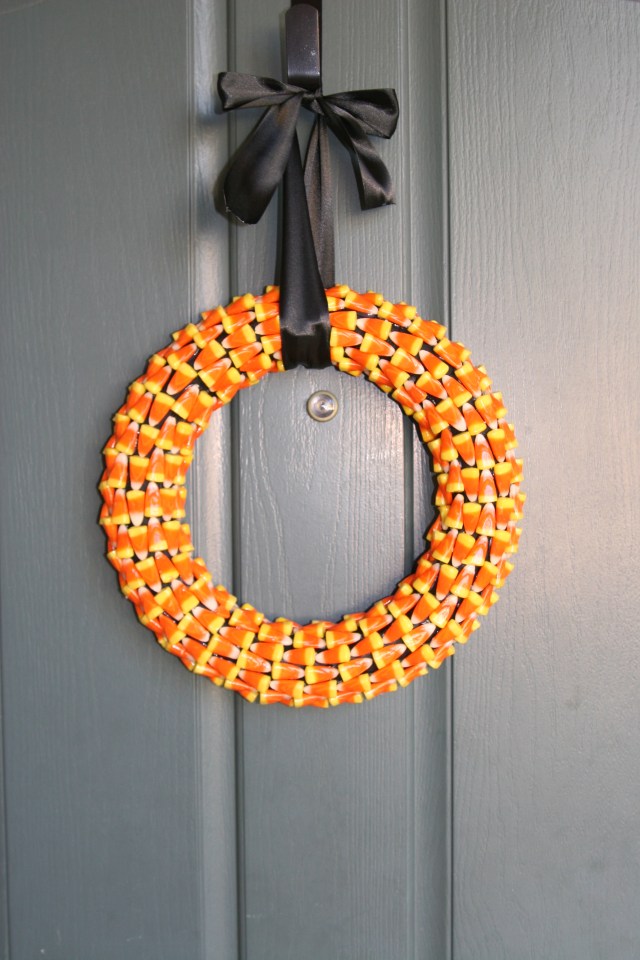
Candy Corn Wreath

Jellybean Junkyard

Pick up a bag of candy corn to make a wreath that's all treats, and no tricks. It's a simple DIY project that, when hanging from your front door, will announce that the party's inside. Jellybean Junkyard can show you how.

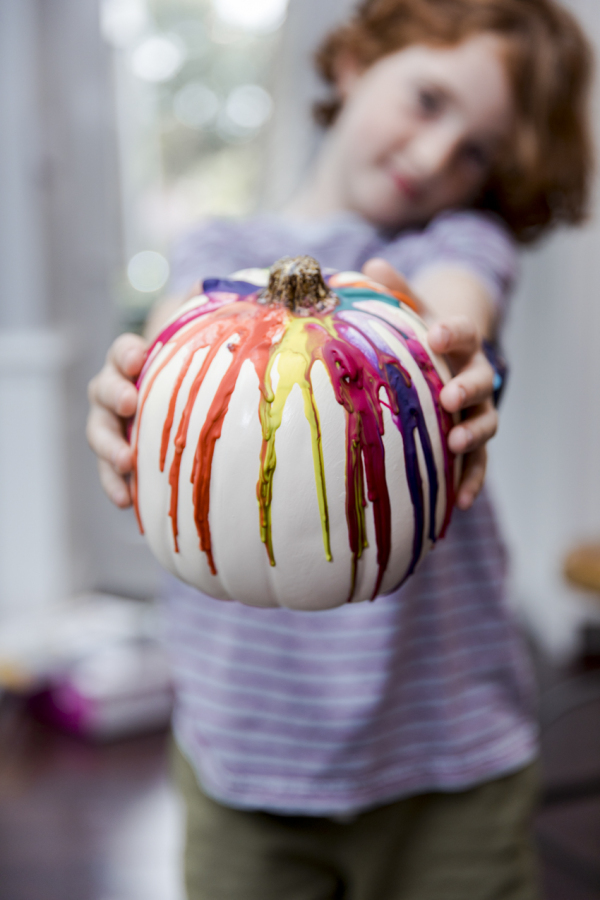
Melted Crayon Pumpkins

Katie Freedman

Wondering what to do with broken crayon bits? Gather them up to create bright, festive pumpkins perfect for any Halloween party. Use craft pumpkins if you'd like Halloween decorations that won't decay before it's time to trick-or-treat. Follow Katie Friedman's how-to here.

Halloween Window Monster Decorations

The Ledford Life

Save your Amazon boxes and use them to make creatures of all shapes and sizes to watch over your house from every window. Artsy kids can imagine and design monsters, and you can safely cut out the scary shape with an X-Acto knife. Creep over to The Ledford Life to learn how to create these affordable Halloween monsters. 

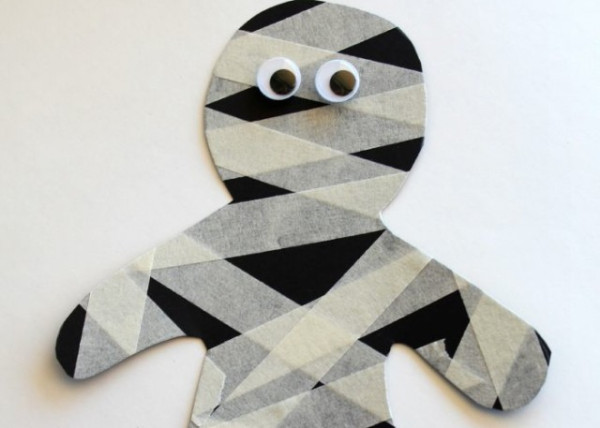
Masking Tape Mummy

Eighteen 25

Deck your walls with a crowd of mummies for extra Halloween fun. This simple tape-and-construction paper project doubles as a fun kid craft and an affordable Halloween decoration. Eighteen 25 has the easy-peasy how-to.

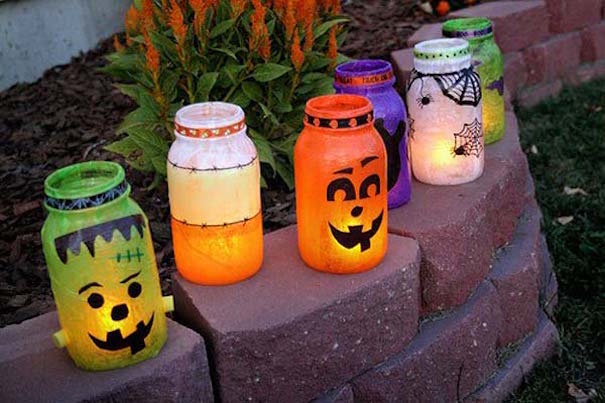
Ghoulish Lanterns

Nicole via Life's a Batch

Gather up a few mason jars to create an eerie glow with spooky lanterns. You can make a handful of different creepy creatures, from Frankenstein's monster to a purple-and-black ghost. These glowing ghouls can be pulled out for Halloween parties year after year. Life's a Batch shows you how to make your own.

Twine Pumpkin Luminary

http://alishagratehouse.com/twine-pumpkin-luminary/

A glowing pumpkin luminary will add a lovely, warm touch to your Halloween party decorations. Bonus: add a few gourds and keep this harvest decoration around all the way to Thanksgiving. Round up twine, glue and a strand of Christmas lights, then skip on over to Flourish to make your own.

Door Monster

Amber Guetebier

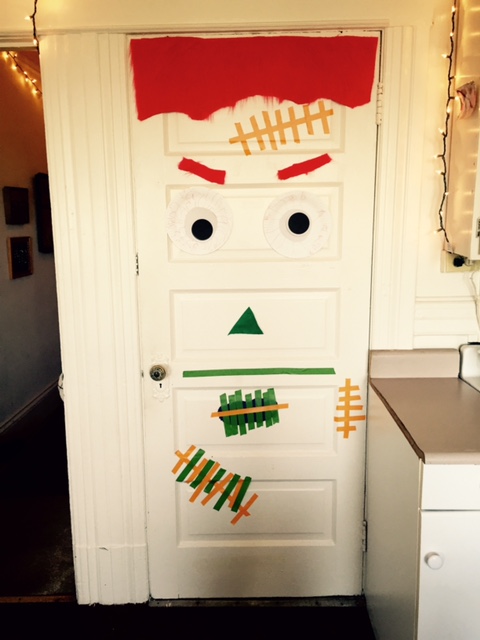
Create a boo-tiful door monster, either inside or outside of your house. This is one Halloween decoration that you can put together with goodies from craft supplies you probably have on hand already. Amber's post tells you how to make your own fiendishly fun monster.

Halloween Bunting Flags

We're Going to Make It

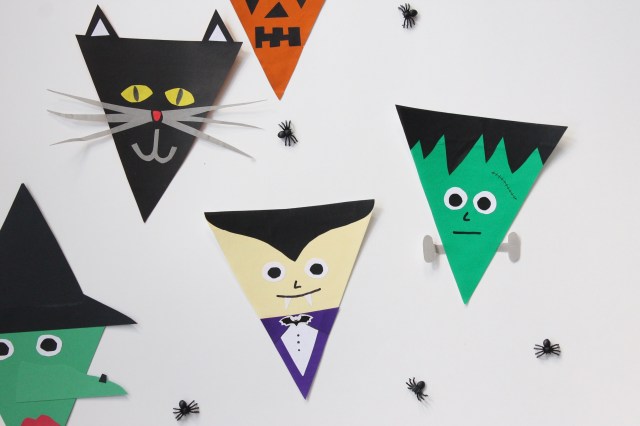
If your monster tastes run more cute and cuddly than bloodthirsty and bump-in-the-night, this wall hanging will be perfect. Make your own Halloween bunting with supplies you probably have at home (think construction paper and string). Find out how over at We're Going To Make It

DIY Light Up Haunted House

The Crafty Gentleman

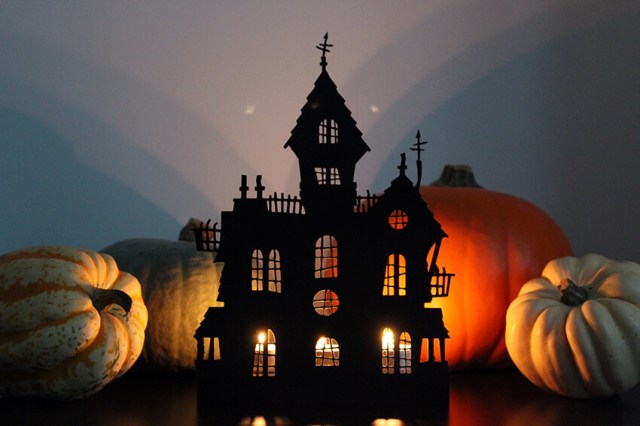
Shock your party guests with this awesome DIY haunted house party decoration. You'll need heavy black cardstock, battery-operated tea lights and cardboard or wood for the base. Note that this project is best for folks with Cricut machines, but it can also be created with a good pair of scissors, a craft knife and a little more time. For the step-by-step instructions to create a spooky manor of your own, visit The Crafty Gentleman.


RELATED STORIES
57 Halloween Decorations You Can Easily Make at Home\
14 Halloween Decor Ideas You Can Easily Pull Off
Target’s Spooky New Halloween Decor Is Getting Us Excited for Fall
Creepy-Cool Luminaries to Make This Halloween

Pumpkins, ghosts, vampires and cats: some classic Halloween costumes never go out of style. This season, disguise your trick-or-treater using one of these clever cat costume ideas. From DIY tutus and ears to realistic tails and Daniel Tiger–inspired hoodies, your cuddly kitten will stand out in a sea of princesses and superheroes.

photo: doityourselfdivas.com

When Your Cat Costume NEEDS a Tutu
We don’t care if the tutu has been overplayed, and neither will you when you see your chocolate-smeared child flouncing about in this furry outfit from Meg and Steph at doityourselfdivas.com. We won’t judge if you make yourself a matching one.

Why Hellooooo, Kitty
Grab a long-sleeved white shirt, some denim overalls, a pair of red shoes and a step-by-step guide by Gabriella at lil-miss.com to create a precious Hello Kitty “hat.” Prepare for a smitten kitten!

photo: alphamom.com

Easiest Cat Ears Ever for the Pro-cat-stinator
There’s no need to pull an all-nighter in the name of preserving your PTA prowess—these cat ears from Isabel Kallman over at alphamom.com (which can also be altered to turn into a variety of other animal ears!) and a little face paint (see below) will be your saving grace. Don’t be surprised if your little one curls up in your lap.


photo: instructables.com

How to Make the Most Meow-Worthy Faux Fur Tail
However you design the rest of your feline’s costume, this simple but oh-so-realistic tail from Jessy Ratfink at instructables.com will be the pièce de résistance. Humming purrs and plaintive mews not included.


Pint-Sized Cat in the Hat
Pay homage to Dr. Seuss in the cuddliest of ways. The costume set, created by Jennifer Hughes at Craft n Crazee on Etsy, includes overalls, a hat and a bow tie and is completely crocheted. Get ready to fill up your Instagram feed!


photo: Ryan Mcdonald via Flickr

Purr-fect DIY Kitty Cat Face Paint
Check out this not-too-intimidating example of kitty face paint from Ryan Mcdonald via Flickr, and get your paint palette ready. Use the photo as a template for dabbing on the sweetest, simplest feline nose and eyes.


The Cutest Crazy Cat Lady (or Guy)
Don a bathrobe and cover it in stuffed animals like Michelle at craftymorning.com—then top it off with some rollers or a shower cap and, ta-da! Every cat lover will agree that being smothered in kittens sounds like the most comfortable costume ever.  


photo: Pottery Barn Kids

The Softest White Kitty Costume
This super-soft white kitty costume, available in sizes three months through eight years from Pottery Barn Kids, accommodates tights or leggings to keep your child warm while he’s pawing at those trick-or-treat goodies.


Mine-craft Your Own Stampy Cat Costume
Sure, you STILL have no idea what Minecraft actually is—but you know your kid is obsessed with Stampy Cat. Follow boston.com correspondent Dr. Claire McCarthy and grab some yellow pajamas, a box and a few squares of colored paper and your progeny will be convinced you invented virtual reality video games.


photo: sippycupmom.com

Roar with Delight Over This Daniel Tiger–Inspired Costume
No need to count to four while making this adorable Daniel Tiger–inspired hoodie: you’ll need some sewing skills, but Melissa’s instructions at sippycupmom.com are detailed and the results are worth it. Don’t blame us if your toddler never takes it off.


The Cuddliest Lion Cub
For the pint-sized kitty cat who thinks he’s king of the jungle, forgo the domesticated house cat costume and unleash a last-minute (and no-sew!) lion from Kimberly at anightowlblog.com. Be prepared to feign fright at your tyke’s adorable roar(s).


photo: mimaandmoo.blogspot.com

A Mask with Cat-titude
No patience for face painting? Cut out a reusable cat mask (designed by Louise and Peggy from mimaandmoo.blogspot.com) instead. A little felt and some hot glue will get your kid purring in no time.


“It’s All Good” as Pete the Cat
Have we mentioned how much we love no-sew options that still manage to impress our kids? A Pete the Cat costume from Laura Clark at rediyfine.com fits the bill. Literary inspired? Check. Not your typical black kitty cat? Check. Eschews complicated sewing patterns and makes you happy you hung onto that old pair of shoes? Double check.


photo: 5minutesformom.com

A Black Kitty with All the Trimmings
We love the furry wrist and ankle cuffs on this relatively simple DIY costume from Janice and Susan at 5minutesformom.com. Check out the video tutorial to see how you can transform a black jacket and some jeggings into a costume contest contender.

What cat costume ideas do you have? Any to add to our list? 

— Katie Brown


Daily
Today Is National Paul Bunyan Day
He’s a lumberjack and he’s okay.
1

Start your day with a meal fit for a lumberjack.
Here are some ideas to fill your belly.

2

We’ve rounded up 3 Bunyan-inspired games
that are as easy as falling off a log.

3
Get your little logger looking the part with a simple DIY beard
and an old plaid shirt.

{ Today’s ideas brought to you by Axes }

Faster than a speeding bullet! Craftier than Martha Stewart! Blast into fun and creativity by taking a page from your kiddo’s favorite comic book, and everyone can be a superhero for the day. With a few extra items added to your next supply run, you can make a no-sew cape in as much time as it takes to save the world— at least, one they’ve created—a single afternoon. Scroll down for the easy how-to, and your littles will be flying high in no time.

You Will Need

1. 1 pillowcase

2. 1 sheet of Kuni sticky-back felt (any color) for superhero logo

3. 1 sheet of Kuni felt (any color) for superhero logo

4. Superhero Logo Template

5. Ribbon

6. Scissors

7. Hot glue gun (parental supervision required)

7. Glue sticks

9. Sharpie Marker

10. Jewels (optional)

Creating the Cape

1. Cut the pillowcase in half. We used a new jersey pillowcase because the fabric is so soft, but even an old one will do the trick. Look for the folded end, because, once cut, this will be a perfect place to insert ribbon. Tip: If you are going to use new material, iron out all the folds in the fabric before starting.

2. Roll out and measure the ribbon so there’s enough to thread through and hang from your superhero’s shoulders.

Design the Superhero Emblem

1. Print out a lightning bolt, or any other fun superhero template for tracing. (We love the simple ones from A Beautiful Mess and Vanilla Joy).

2. Trace the lightening bolt with your marker, then cut out the shape. Any yellow felt will do, but we used Kuni brand with sticky backing for extra thickness.

3. Cut out a circle from another sheet of felt (different color).

4. Hot glue the circle in the middle of the back of the cape. Pick a spot and stick with it, hot glue sets in a flash!

5. Place and secure the logo in the middle of the circle with hot glue.


3. Roll out and measure a length of ribbon for the seam along bottom of the cape and then hot glue the ribbon to the edge— this will help to keep the cape in action during play time.

6. Bonus Step: If your superhero loves a little sparkle, now is the time to add jewels!

Finish the Cape

1. Take the length of ribbon and thread it through the hole created in the folded top of the pillowcase. It should be long enough to drape around your little superhero’s shoulders.

2. Go outside and save the day!

Will you make one of these super simple superhero capes? Share with us in the comments below.

— Photos and copy by Gabby Cullen


Whether you’ve got a Millenium Falcon zipping through the halls, a USS Enterprise about to take flight or a Buzz Lightyear headed for Star Command one thing remains true: space-obsessed kids love to hang with the stars. Get ready to power up your space traveler’s phasers to STUN-NING—from a few in-your-wildest-dreams to simple DIY’s, we’ve got 11 spaces that will send your mini-astronaut into orbit.

Deep Space Bedroom

Travel faster than light every night in the Deepspace Defender Spaceship Bed – raise the outer door when it’s time for spacewalks, lower it when it’s time for suspended animation for that long trip to Betelgeuse. SPLURGE ALERT – at $13,900, you’ll need lots of galactic currency for this bed, designed and handcrafted by Doug Robinson for Fable Bedworks.

Psst. The super space age pod chair is from IKEA. The rug is from LA Rug on Amazon, and the robot is from Tin Toy Arcade (a great source for retro robots and more).

photo: Fable Bedworks

How would you create a room that’s outta this world? Tell us about it in a comment below.

— Helen Walker Green


We all harbor dreams of making our kids birthday parties look like our Pinterest boards but the idea of turning our dreams into a reality cause us to break out in a cold sweat. So instead of going the store bought route or even worse, throwing a full blown DIY party that turns into disaster 101, we’ve come up with three simple (yes, simple) DIY birthday party themes that are easily doable for the craft-challenged as well as healthy snack tips to keep your little partygoers active and energetic. Get inspired by these three ideas that look polished and professional, but were all done by DIY mamas on a budget.

At Zevia, we believe that every day is worth celebrating, but how do we do it a little smarter? Check out the ideas below and our Smarter Celebrations Pinterest Boards to help you throw the perfect party. Then kick back and pop open a can of Zevia Zero Calorie Soda with this high value coupon

Julia’s Fourth Birthday Pawty
With just a park, a dog-crazy kid, and a big imagination, you can throw a puppy pawty just like Julia’s mom did for her daughter’s fourth birthday. This DIY party took place at Julia’s local park, which party goers could reserve in advance for a nominal fee — we think if you’re planning a summer birthday it’s definitely worth checking out reserving a spot at your local park. The best part about the location? The lack of clean up before guests arrive and after they leave. The party was chock full of puppy themed activities and treats. Our favorite has to be the doggie kibble aka Coco Pufs and bones aka Scooby Doo graham crackers. Get inspired by this puppy pawty and see all the fabulous photos by reading more here.

Party Snack Tip: For more doggy-inspired snacks, try making your own homespun (and healthy) version of puppy chow made with a mixture of 1-2 tbsp peanut butter, 1-2 tbsp cocoa powder, and 1 cup rice chex. Or, make DIY Dog Bones with whole wheat mini pretzel sticks stuck into a mini marshmallow on either side and dipped in melted yogurt chips or white chocolate.


Outer Space Astronaut Party
Over the princess party theme? How about another bouncy house? No thanks! If you’re looking for a cool DIY birthday idea, check out this super sweet outer space birthday party for your astronauts in training. We love this theme because it’s gender neutral and most everything can be easily done yourself (or bought at your local craft store). To really ramp up the fun, convert your garage or spare bedroom into a glow-in-the-dark bonanza with black lights and hanging stars and planets that you and your kids can make in advance. Hand out glow sticks and you’ve got yourself an out of this world party. Click here to find out how you can throw an outer space party from the invites to the decor to party favors. 

Party Snack Tip: Keep your little space explorers fueled with flying saucer pizza bites made from english muffins topped with pasta sauce and shredded mozzarella cheese. For a sweeter treat, cut a melon in half, scoop out the seeds, and slice the melon into rings. Stack them from largest to smallest and fill with fruit salad or watermelon balls to make colorful melon planets. Finally, for an out-of-this-world (but healthy) root beer float mix in vanilla frozen yogurt and crushed up astronaut ice cream “sprinkles.”


Alana’s Second Birthday
Any of our kids’ birthdays are certainly huge milestones, but for Alana’s parents, their daughter’s second birthday was extra special. Alana was born two entire months early, weighing in at a little over three pounds. So when Alana turned two, her parents wanted to make the party extra memorable, while sticking to a budget. This DIY party took place in the family’s condo clubhouse and Alana’s mom set up stations (a pop up princess castle, snack bar, mini bowling and coloring zone) around the room to encourage the toddlers to explore. Alana’s crafty mama made most of the decorations herself and she even shared her shopping list and advice with us. Read more to discover how this party came together and then take a look at the awesome photos. 

Party Snack Tip: Celebrate strong and healthy kids with some high-protein good-for-you snacks that taste great too. Spread peanut butter and bananas drizzled with a little honey on a whole wheat tortilla and roll it up for a power-packed wrap. Grab a handful of carrots or cucumber slices and dip them in hummus for a vitamin- rich snack that’s great any time.


What was your most successful DIY party? How about your most disastrous?