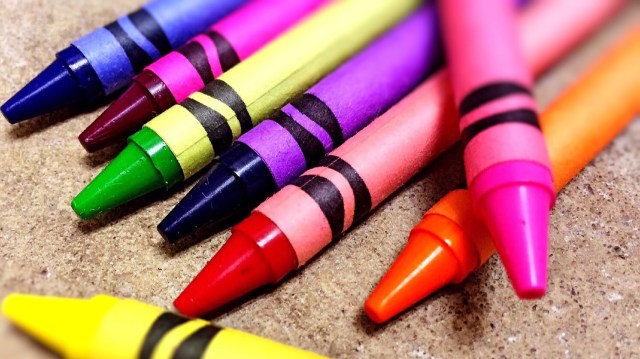
There’s nothing like a fresh box of new crayons, but sooner or later you’re left with tons of broken pieces––because kids. Before you toss those busted bits into the trash, keep reading to see how your kids can created gorgeous melted crayon art, candles and plenty of other unique ways to upcycle your old crayons.

Crayon Play Dough
iStock

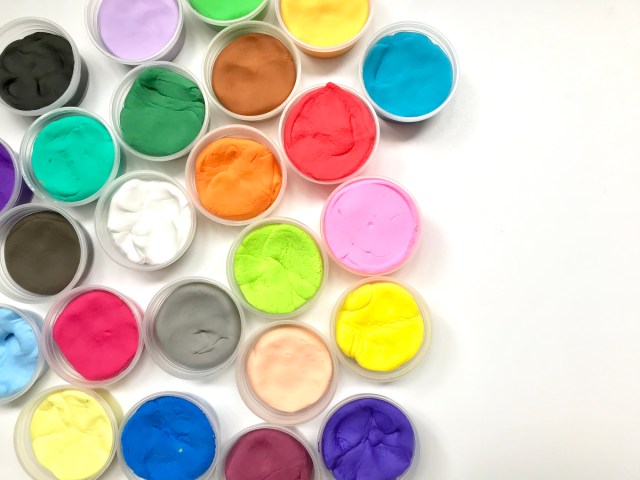
Sure, you can make play dough using Kool Aid, but did you know your old, broken crayons make great ingredients, too? Instead of tossing those small pieces, melt them down with your flour, salt and cream of tartar to make vibrant play dough, using this recipe from Sugar Aunts.

Hot Rock Crayon Art
Kids Activities Blog

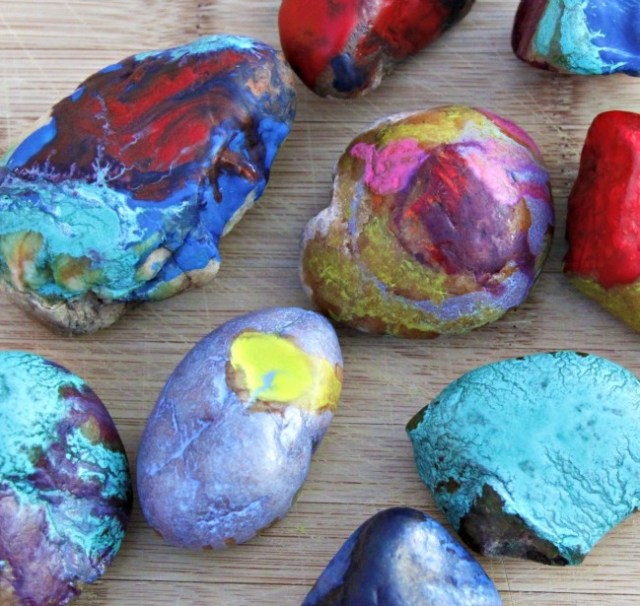
Perfect for hot summer days or those when you just need a craft, these hot rocks covered in melted crayons from Kids Activities Blog are so creative! Rocks baked in the oven (adult supervision, please!) are set on newspaper and then topped with broken pieces of crayon. Watch the colors melt and make one of a kind beauty!

One of a Kind Valentines
The Nerds Wife

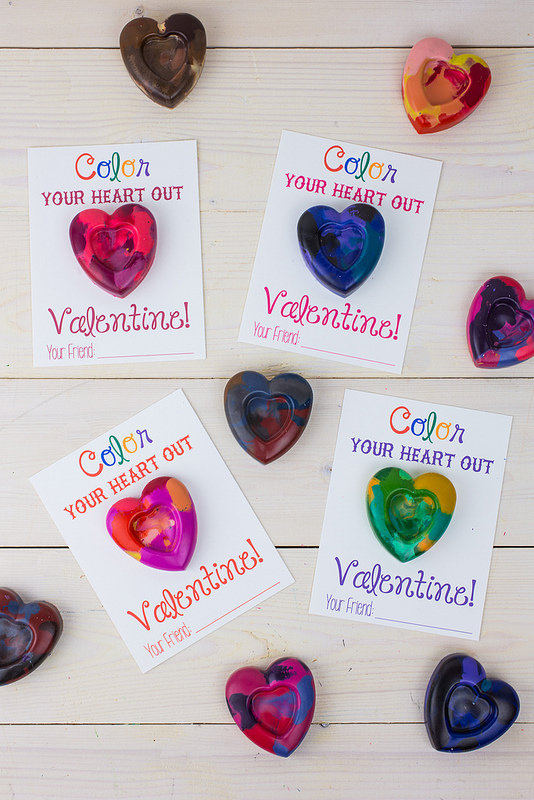
All you need is love, and broken crayons for this fun craft. This easy DIY Valentine from The Nerd's Wife is perfect for using those old broken crayons and sharing the love. Crayons are melted into a silicone heart-shaped baking pan and then attached to a sweet printable, perfect for your valentine.

Shaved Crayon Hearts
Skip to My Lou

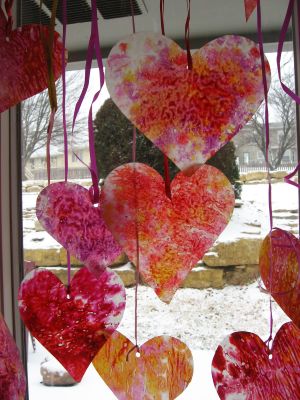
The next time you have teeny, tiny broken crayons, make them smaller! Shave the crayon remnants onto heart-shaped paper, then cover with wax paper and iron on low. The result? Beautiful Valentine-worthy hearts like these from Skip to my Lou!

Upcycle Your Crayons for the Greater Good!
Pexels via Pixabay

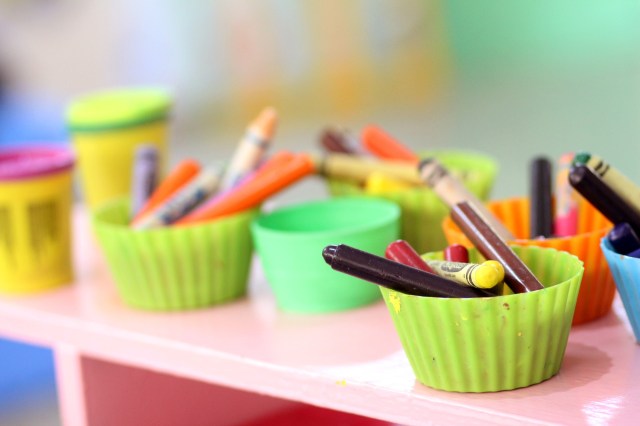
Did you know there are at least three different national organizations that take old crayons and turn them into something amazing, all for the good of the Earth and kids in need? Well, there are. Click here to learn more about these amazing programs.

Red, Yellow & Blue
Melissa Hecksher

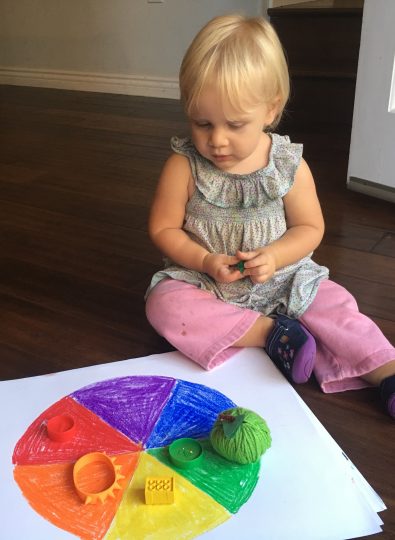
Teach the kiddos about the primary colors and how they rleate to by making an easy color wheel.

Melted Crayon Canvas
Shelly Massey

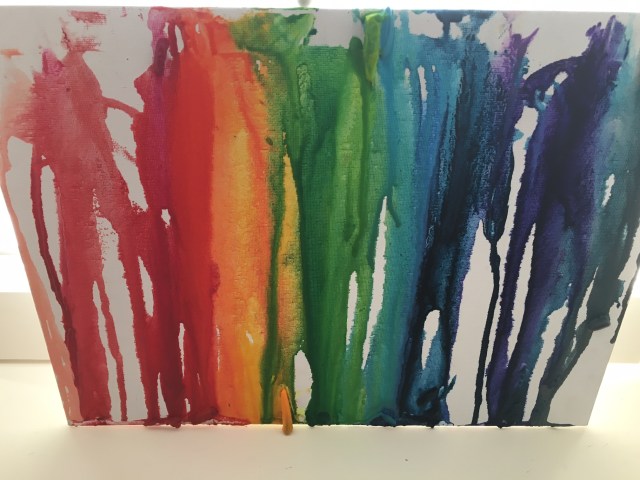
We’re so charmed by these melted crayon creations that our Atlanta editor whipped up with her kids. It’s easier than you think, plus you get to use all those broken crayons you know you have. All you need is a blow dryer, the crayons and something to let the wax drip on. While a canvas or paper is great, you can even try melting onto a large rock, bottle or even a tree branch.

Make Something New
19melissa68 via Flickr

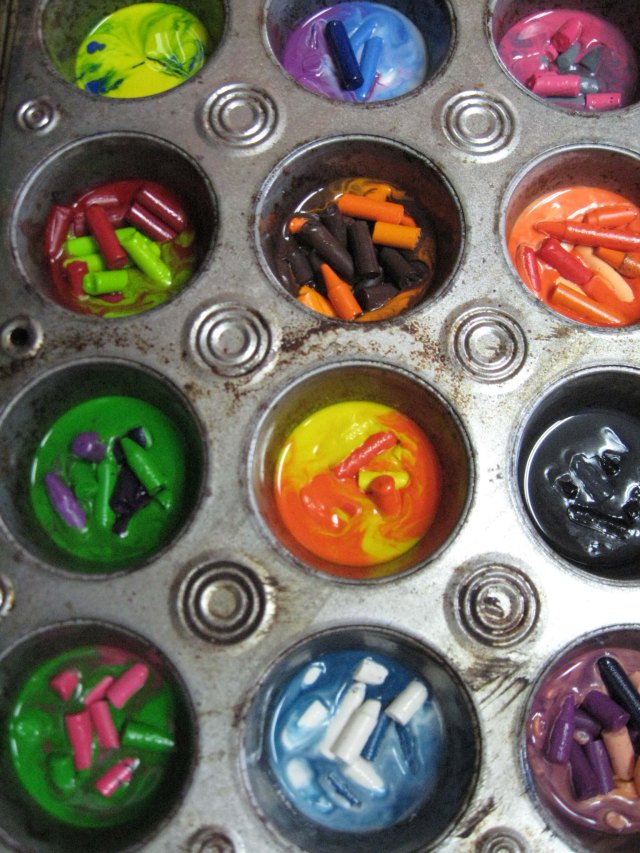
Gather up all those bits of broken crayon, peel away the paper and organize by color family. Then add the crayon parts to an old muffin tin and place in the oven at about 250 degrees until melted. Remove, let cool and you've got some creatively re-used crayons. You can also try microwaving crayons and pouring the wax into silicone molds to make heart shapes, LEGO bricks or whatever you have around!

Egg-cellent Wax Decorations
The Nerd's Wife

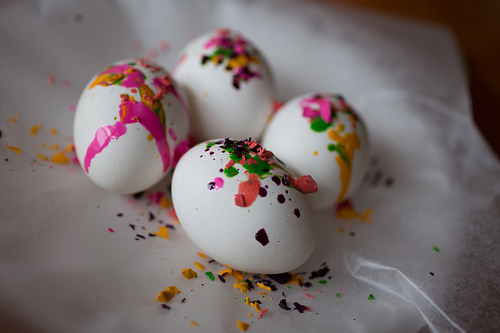
It doesn't have to be Easter to decorate eggs: try this cute trick the next time you want to pack hard-boiled eggs for a picnic. The wax stays on the shell, so the inside remains edible. Try the wax melting method with your old stubby bits of crayon by making these genius eggs from The Nerd's Wife. The heat from freshly boiled eggs melts the crayons into awesome abstract designs. Get the full instructions on how to make these fuss-free beauties by jumping over toThe Nerd's Wife.

Colorful Shells
Fun at Home with Kids

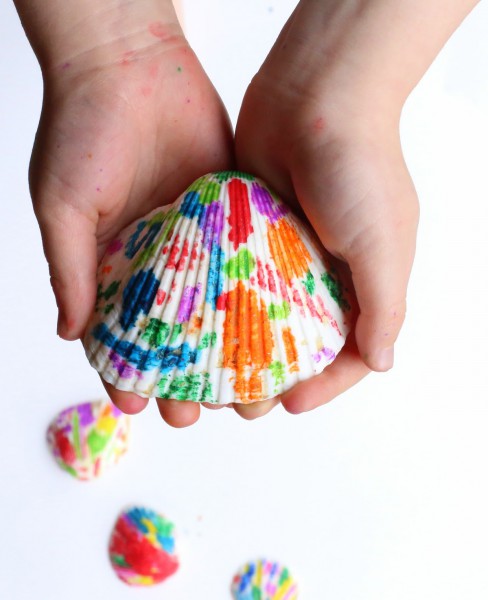
A set of crayons and assortment of shells is all you need to create your very own Crayola Experience at home. Recommended for older artists (oven use required), head over to Fun at Home with Kids for the full how-to.

Comic Strip Creation
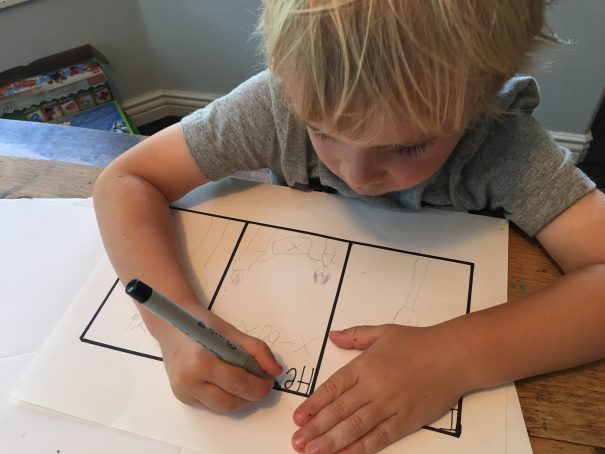
a boy draws and writes to create his own comic strip
Melissa Hecksher

Put your coloring skills to the test and help the kiddos create their very own comic book.

Coloring Books (but Not the Kind You Think)

Amber Guetebier

Crayons are a staple in your craft box, but what about on your bookshelf? For example, read: Red, A Crayon’s Story then do: an unexpected coloring experiment. Click here for more ideas on books that go with crayons!


Coloring for Grown-Ups
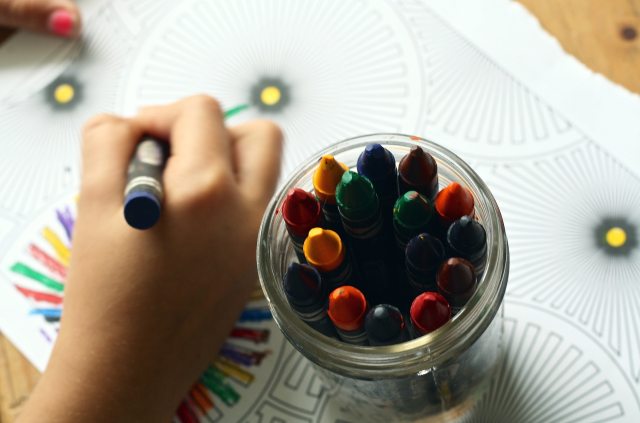
Ponce Photography via pixabay

Adults coloring is taking the world by storm, and we’re not just talking about sitting next to the kiddos while they do it. Read how coloring can actually help moms de-stress.

A Box of Crayons
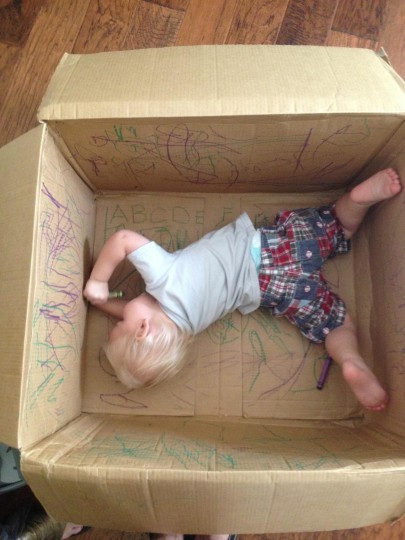
Berry Sweet Baby

Got a little guy or a big box? Pop them into the cardboard walls and let them go crazy, no cutting required. Now you have just enough time to go to the bathroom in peace.


—Amber Guetebier & Karly Wood

Feature photo: WorkAndaPix via Pixabay


RELATED STORIES

3 Ways to Recycle Crayons for a Good Cause

Coloring Book & Activity Pairings

Before You Toss Your Kids’ Old Markers in the Trash, Read This
 

You know how sometimes the pictures of what you did are way better than what you actually did? Like, you know, that time you went to the beach with your kids and spent 95 percent of the time in a state of anxiety but nevertheless took to your social media accounts later to post photos of your smiling brood enjoying a #familybeachday? That’s kind of the point at the Museum of Illusions, a pop-up exhibit on Hollywood Blvd. that puts visitors in front of various backdrops designed to take photos, solely to share. Scroll through to see what we thought and if you should go too.

Basically, the museum is a ticketed photo shoot that’ll make all your Facebook followers jealous. The “illusion” is really just that the backdrops are dimensional enough to make it look (kind of) like you’re doing whatever the scenery implies. The photos will show your kids scrambling up the side of a deep ravine…and tiptoeing on floating blocks high above the city.

Waving from inside giant bubbles…

And doing bizarrely wonderful stuff like this…

And this…

Kids will love role-playing their way through the museum, and grown-ups will love sending the finished photos to friends and family. Suffice it to say, the place needs no actual advertising to sustain its popularity (#genius). And it is popular: Expect to wait 30-60 minutes to get in if you visit on a weekend and about 15 minutes if you visit on a weekday. Museum organizers say you can avoid the wait if you pre-buy timed tickets online.

The Cost of Cool

So what’s the price for a destination that offers really cool pictures but no actual activity in which to partake (besides posing for all those really cool pictures)?

You can purchase tickets on the Museum of Illusion’s website for $25 (it’s $10 for kids 6-12 and free for kids under 6), or get $20 adult tickets at Goldstar.com. Sure, it’s a bit pricey for what you’re actually doing, but considering the dozens of seriously fun pictures you’ll have when all is said and done, we think it’s totally worth it. And just think of the super-weird holiday cards you could send this year!

If you don’t want to schlep to Hollywood for a single excursion, consider that the museum is nestled next to the Hollywood Wax Museum; across the street from the Ripley’s Believe it or Not!; and a block east of the bustling Hollywood and Highland Center. So make like a tourist and stay a while, especially when the grandparents are in town.

Note: Park at the Hollywood & Highland Center for only $2 for four hours if you dine or shop in the complex. 

Museum of Illusions
6751 Hollywood Blvd.
Los Angeles
747-274-9374
Online: bigfunny.net

Note: When we visited, there was no working elevator to take visitors to the second floor (museum organizers say this has yet to be fixed). Keep this in mind if you’re bringing strollers or if anyone in your party is unable to climb stairs. 

Have you been to The Museum of Illusions? Show us your cool photos in the comments below!

— Story and photos by Melissa Heckscher

RELATED STORIES:

Things To Do With Kids in LA

Tracking LA’s Most Instagrammable Walls

Now Open: Museum of Failure


From fairytales and storybooks to lunar modules and space exploration, our fascination with the moon begins as kids and continues well into adulthood. For National Moon Day, we’ve rounded up some scientific fun facts you can share with the kids and maybe your co-workers too! Scroll down to learn more.

Photo: Bruno Sanchez-Andrade via Flickr

1. The distance from the moon to Earth is 238,857 miles. If you drove from the moon to Earth at 65 mph it would take you 3,674 hours to get there, or 153 days if you never stopped for bathroom or snack breaks!

2. The moon was formed when a huge object hit Earth and blasted out rocks that all came together and started orbiting round Earth. They all melted together like in a big heated pot, cooled down and became the moon.

3. The moon goes round Earth every 27.3 days.

4. Our moon is the fifth largest moon in the Solar System.

Photo: jasbond007 via Flickr

5. Neil Armstrong was the very first person to walk on the moon. He stepped out of his spacecraft, the Eagle, on 21 July 1969 and said, “That’s one small step for man, one giant leap for mankind.” Weird Fact: There are NO pictures of Neil Armstrong on the moon (they are all of his partner, Buzz Aldrin) except this one above, where you can just make him out in the reflection in Buzz Aldrin’s helmet.

6. Mons Huygens is the tallest mountain on the moon, it is 15,420 feet tall, just over half the height of Mt Everest (29,029 feet). But because the moon’s gravitational pull is about 83% less than on Earth, you could pretty much just float to the top. Easy!

7. The moon is very hot during the day but very cold at night. The average surface temperature is 224 degrees Fahrenheit during the day and NEGATIVE 243 degrees at night. Brrr!

8. The phases of the moon are: New Moon, Crescent, First Quarter, Waxing Gibbous, Full Moon, Waning Gibbous, Last Quarter, Crescent…then it’s back to New Moon.

9. A lunar eclipse occurs when Earth is between the sun and the moon.

10. Earth’s tides are largely caused by the gravitational pull of the moon. You can thank the moon for boogie boarding!

Do you have any out-of-this world facts about the Moon that you can share? Tell us in the comments below! 

—Erin Feher


A family that crafts together stays together. For a darling date-night-in or a bonding crafternoon with your kids, check out our favorite crafts below. They’re known to make hearts swell.

Crepe Flowers
Create a bouquet of flowers with your little one. It requires three easy-to-find materials and takes less than 15 minutes. The best part is that these flowers last forever, meaning you and your kiddo never “forget” to water them. Click here to get Red Tricycle’s very own tutorial.

“Date Night” Jar
“Letting the popsicle sticks decide” is also a fantastic, stress-free and diplomatic way of choosing an activity. All you need is a clean jar, popsicle sticks, a black pen and decorating materials of your choice like ribbons, stickers, paint, etc. Write your activity ideas like “Watch a movie, go to the park,” or “Get ice cream” on the sticks. Keep the jar on the side and whenever you’re ready to spend time together, pull out a stick and go! If you have time, be extra creative and color the popsicle sticks thematically so that you can use the jar for date night ideas with your partner too.

photo: Personalcreations.com

Crayon Candles
What a great way to take all those colors your kids “don’t like” and turn it into a beautiful craft that’ll warm up any room. You will need to grab a bag of shredded wax, candle wicks and candle holders, which can be easily found at any Michael’s store, but the end result is worth it. Pst – Don’t forget to add fragrance to really spice up the experience! Get the full tutorial over at ramannoodles’ Instructable’s page.

photo: Jennifer Longaway via flickr

What kind of crafts do you like to show your love? Tell us in the Comments below!


Daily
Today Is Stamp Day
Lick it.
1

Not all stamps are lickable.
Create your own custom stamp to really leave your mark.

2

Move over geocaching: get your clues for a letterboxing adventure that requires little more than signature stamps and a yearning to explore.

3
Try your hand at these easy miniature envelopes perfect for correspondence or secret notes.

{ Today’s ideas brought to you by Sealing Wax }

When it comes to quick and easy, this simple little walnut shell boat will make a quiet afternoon come alive with tales of the high seas. All you need are a few basic ingredients and it’s smooth sailing indeed. Read on for the how-to.

You will need:

Walnuts: whole walnuts, shelled in half

Toothpicks or small twigs

Scotch tape (optional)

A candle

For the sail: Thin paper, leaves, fabric  (whatever floats your boat)

Step one: Crack that nut!
You’ll probably want at least half a dozen (which is only 2 whole nuts) or more depending on how many kiddos you have. Crack your nuts, eat or set aside the yummy innards.

Step two: Hoist that rag!
If you are using paper, have the kiddos decorate your sails. Or gather the just-right leaf, or fabric piece: it will need to be small, thin and relatively stiff. You can create triangle sails or rectangle, tall or wide. You’ll probably have to experiment a bit to get the right size sail, but roughly 2” x 1.5”  is a good size.

Step three: Drip it, drip it real good.
Light that candle and let the wax drip into the shells. You want just enough to be able to poke one end of the toothpick or small twig into the wax. Let the wax cool enough and stick the mast in. Attach the sail to the mast by poking it through. (You can use scotch tape to reinforce or even tape the sail directly onto the toothpick, just keep in mind added weight up top may cause a capsized boat). 

Step four: Sail away!
Use the sink or a small bowl and sail your little walnut shell boats. Have a breath-powered race to see who reaches the other side.

Tips & Tricks
No wax? Try a marshmallow, a small bit of silly puddy or even playdough: all you need is to hold the sail up without adding too much weight to sink. 

Poke the sail through the stick before you “raise” it in the wax.

If your boat sinks, try trimming the sail and keeping it closer to the hull.

Have you ever made a walnut shell ship? What other cute crafts can you make from a walnut shell? 

—Photos and copy by Amber Guetebier

There are a plethora of choices when it comes to dressing the kids, but let’s be honest; most are made fast and cheap somewhere far, far away. In the spirit of Small Business Saturday (Nov. 28), we nailed down some of our favorite local designers who create chic, timeless pieces for pint-sized fashion plates.

Creative Hands Corner
Sonja Gogic-Jones aims to make clothes that are unrestricted and free flowing allowing infants and toddlers to be the bundles of boundless energy they strive to be. Born and raised in Montenegro, she brings a European flare and sophistication to her handmade pieces. Creative Hands features vivid prints and soft, pliable fabrics. Each piece is lovingly made in Sonja’s home. You can find her collection on Etsy.

Online: etsy.com/shop/CreativeHandsCorner

The La La Circuit
For over a decade, Leann Trowbridge was a co-owner of the Adams Morgan vintage shop, Meeps. She brings her yesteryear sensibility to her love of textiles and design with a sweet collection of dresses made from vintage fabrics and updated with Trowbridge original patterns. Her designs are avail online on Etsy and in Front Royal, Va at Gathered.

Online: etsy.com/shop/lalaCircuit

Mirasa
Aashumi Shah, from India, traveled to Mumbai to study woven design before becoming a graduate of FIT. Mirasa reflects her niece and son’s penchant for bright colors and bold designs. Using soft, organic cottons, Aashumi mixes fun, bold colors like orange, teal, purple and blue in her whimsical patterns. Her collection includes onesies, hoodies, blankets and toys. She can often be spotted at Eastern Market. She is also on Etsy.

Online: etsy.com/shop/mirasadesign

Ankara Streets
Jessica Thomas makes modern silhouettes out of classic, African wax prints. She fuses the boldness of Ankara with hip, street-inspired styles and “urban American flare.” Her designs can be found on Etsy.

Online: etsy.com/ankarastreets

Yellow House Knits
Stefanie Doebler’s heirloom-quality cardigans and pullovers come in fun, vibrant hues. She aims to create pieces that will be treasured for years to come. Inspired by her regional landscape, each knit bears the name of a local D.C. street. Yellow House Knits can be found at Gala in Kensington, Maryland or online at Etsy.

Online: etsy.com/yellowhousesweaters

Do you have a favorite local kids designer? Tell us in the comments section below. 

–Meghan Meyers

Whether you collected shells by the shore or postcards on the road, it’s easy to transform treasures from your summer travels into fantastic keepsakes. Get creative with these easy ideas and you’ll have a blast preserving your memorabilia while creating new memories with your little collectors. Any of these 13 ideas are perfect for the “what I did this summer” edition of back-to-school show and tell.

Wax On!

A set of crayons and assortment of shells is all you need to create your very own Crayola Experience at home. Recommended for older artists (oven use required), head over to Fun at Home with Kids for this colorful how-to.

photo: Fun at Home with Kids


How do you preserve summer memories? Share with us in the comments below.

— Lauren Hill

What’s the difference between those $50 jarred candles and the hunk of beeswax you can pick up for less than $10? Not much, and making your own candles is a craft you can do with your little ones and the perfect way to check off that gift list for friends and family members. Here’s a simple tutorial on how bake up your very own custom candles.

What You’ll Need

1. A hunk of beeswax.

2. Some wicks.

3. Glass containers of your choice, such as apothecary jars with lids, glass votives or canning jars. We used 3 oz. Mason jars.

4. Sticks, such as popsicle sticks or chopsticks.

5. Disposable loaf pan or old pot.

Note: We used this lovely kit from Half Hitch Goods. It’s only $19 and includes everything but the glass jars and loaf pan. 

How to Do It

1. Use an old pot or disposable loaf pan to melt the wax, since it will be almost impossible to fully clean it afterwards. Set the loaf pan on a baking sheet and turn the oven on low. Place the beeswax in the loaf pan and place it in the oven, stirring occasionally as the wax melts. Depending on the size of your wax, it should take about 1 hour for the wax to melt completely.

2. Cut the wick a couple inches longer than your glass container.

3. Wrap one end of the wick around your stick, and lay the stick over the top of the container, so the wick hangs down the middle. Set the bottom end of the wick in the bottom center of the container, using a smudge of hot wax to set it.

4. Pour the melted beeswax into a handled container then pour it into the glass. Note: The beeswax will start to cool and harden quickly (especially during cooler weather!) so do this as quickly as possible while being extra CAREFUL. Wax is hot and sticky!

5. Let the poured candle dry at room temperature for 24 hours. Clip the excess wick to about 1/4 inch and remove the stick before lighting.

Pro tip: Once your candle burns down, you can remelt the wax, add a new wick and make a new one! 

Have you made your own candles? Do you have any tips for our readers? 

–Erin Feher