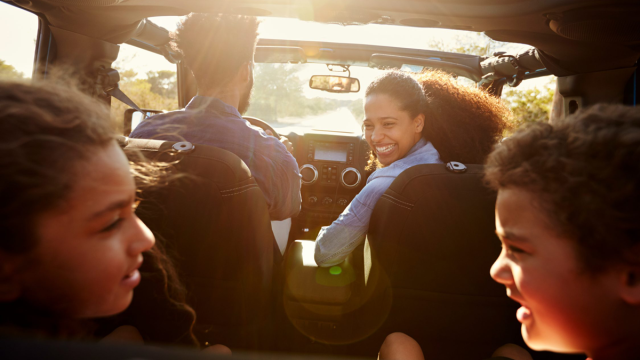
Embarking on a long road trip with little ones can make even the most seasoned parents nervous. But having fun and keeping everyone entertained (without plugging in) is easier than you think. Here are 22 boredom-busting road trip activities and car games for kids to ensure backseat moaning and groaning are kept at bay. Screen-free fun for the win!

iStock

1. Plan it out. Before hitting the road, catalog the kitschy, weird, and wonderful sights to see along the route. World’s largest ball of twine, anyone? Wall Drug pit stop? You bet! Then, make sure to stop and gawk a while so the kids can stretch their legs and you can grab a few family selfies to post. Find memorable roadside attractions that made our list or choose your own landmarks.

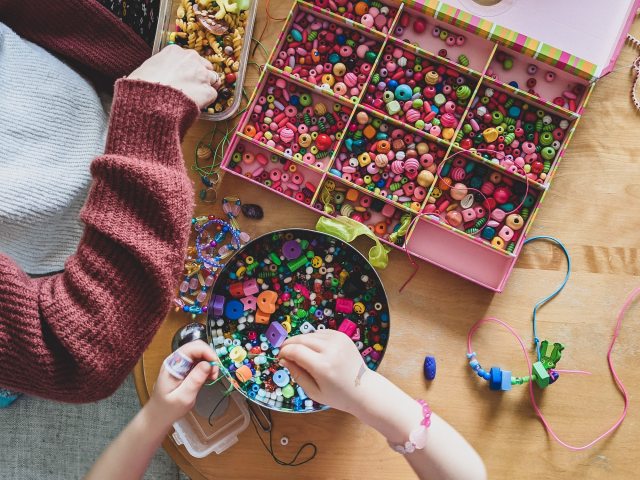
2. Keep little hands busy. A toddler's hands are best kept busy between those hypnotic highway naps. A large plastic yogurt container with a rectangle cut out of the top combined with a Tupperware full of colorful pom-poms—little hands love to stuff fuzzy balls into the container. Or, try threading oversized buttons onto a ribbon when the second wind hits.

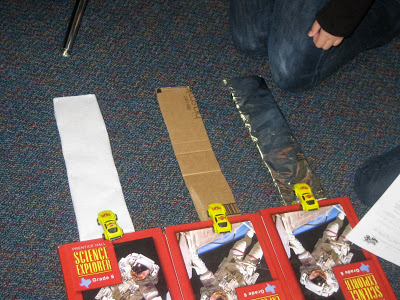
3. Map out your trip. Pick up a few of the classic, old-school paper maps (one for each kid) and let them mark it up, highlight routes, check off milestones—whatever they’re interested in—as you go along your trip. It’s a great way to get them involved in the journey, instead of just focusing on the destination.

4. Play 20 Questions.
This classic road trip activity is easy even for your tiniest passenger. Make sure the answers are only yes or no and keep the answer simple for toddlers (in fact, give them a hint ahead of time: family pet, relative, favorite toy, etc.).

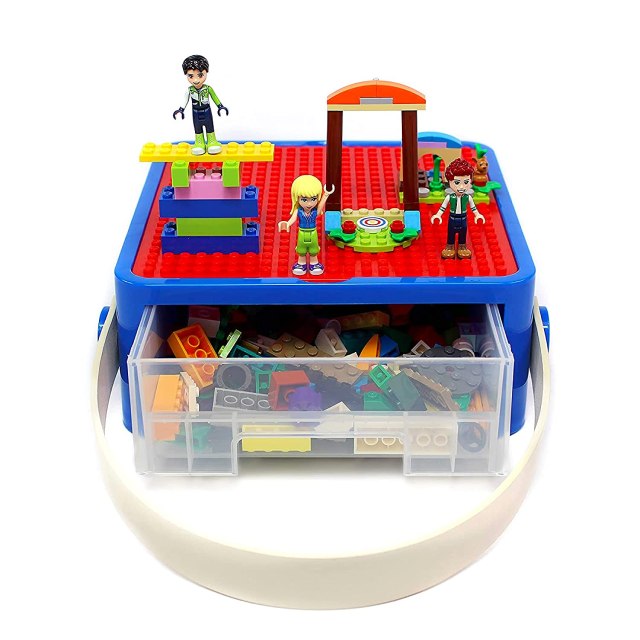
5. Pack a building kit. Building toys like LEGO are always an awesome and fun way to keep kids happily busy. But on road trips? That can be a challenge. This little container not only has a small drawer for important bricks, but it also has a handle and a building plate on top, which is ideal for car or plane travel. Buy it here.

6. Dress up dolls. Paper dolls sure have come a long way, baby. But what hasn’t changed is the way they engage the imagination over and over again. That’s why we love them for travel; you can check som out here

7. Fold paper. Hit the craft store before hitting the road to snatch a pack of origami paper for the six and up gang. Make sure you have a flat surface, and you’ll be swimming in Chinese stars, fortune tellers and pirate hats before you’re even out of town!

8. Bring travel games and toys.
When it comes to the toys you'll bring along for the journey, there are a ton of fun classic and new options to choose from, like marble runs, magnet learning letters and more. See our favorites by clicking here.

Asian kids looking out window of car on family road trip
iStock

9. Let them decide. Kids love having choices and getting involved in decisions. Give them an hour or so out of each day of your road trip and let them dictate where you stop and what you do (with certain limits, of course). It may mean taking a whole bunch of extra stops, but it’ll be worth it to keep the peace. Plus—sometimes it’s just fun to say yes a lot more than you say no.

10. Stick it up. When you see windows, think blank canvas for your littlest road trippers. Dollar Store gel clings and window markers work great when the only view around is farmland and open country. You can even break out a pack of removable stickers to kick it up a notch if you’re feeling brave.

11. Make them work. Okay, so maybe not work, but put the kids into action with a scavenger hunt—like this easy printable one from Schooling a Monkey. It’s a great road trip activity that keeps kids busy searching for water towers, purple cars, a flock of birds—you name it! Grab stickers to check off the squares as you go, then sit back and watch how excited your kids get when they spot things like farms and traffic signs.

12. Play the counting game.
From big rigs to farms or flags, there are things you can count on while driving. Let your kid decide, and you can even make this road trip activity more challenging by narrowing the category (red cars instead of any car).

iStock

13. Play classic road trip games. Three words: License Plate Game. Bring this vintage fave back into fashion with your mini crew. Find plates from all 50 states (C’mon Alaska and Hawaii!) or modify it into an alphabet game starting from A to Z, using the plates you pass along the interstate. See our other favorites here

14. Tell a tale. Spin a yarn to rival Homer’s Odyssey by creating an epic story-in-the-round with your little literati. One person begins the story (think once upon a time or in a galaxy far, far away…) and takes it to a cliffhanger moment (gasp!) before passing it to the next bard of the car. Keep it going as long as you can. Imaginations, engage!

15. Play with puzzles. These super cute magnetic wooden blocks from Tegu help pass the miles for the preschool bunch. Plus, they win the road trip trifecta. Easy to pack? Of course. Great for open-ended play? You bet. Tons of fun in a small space? Check!

family on a road trip will enjoy games you can play in the car
iStock

16. Listen up. There’s no better time to sit back and get comfy for some good old, mesmerizing story-telling than on a long road trip. Queue up a few great audiobooks beforehand. Or, check out these podcasts for curious kids before you head out on the highway. With a mix of something for everyone, the entire family can get in on the fun!

17. Go old school. A good retro road trip deserves good retro toys. Thank goodness so many are making a comeback. Etch-a-Sketch equals mess-free drawing (and a whole slew of questions about how it works) for the older bunch, and a View Finder takes the edge off for the kids who want to watch something.

18. Get crafty. Make your preschool teacher proud and pull out felt boards for your journey. These individual boards (look for them at your local craft store or indie toy shop) lend themselves well to car travel. Scenes can be continually recreated and the felt sticks to itself, but nothing else.

Kelly Sikkema via Unsplash

19. Start clicking. One fun road trip activity is to unearth an old Polaroid camera or get a few disposable ones before the trip. Have your kids snap pictures when the mood strikes. From the car, at a rest stop, when there are just 10 miles to go. Then, use these photographic masterpieces to create a journal of the trip when you return.

20. Hide trinkets. Set up your own Hidden Object game around the car before heading out. Place little trinkets (think leftover plastic spiders from Halloween, colorful paper clips, vintage buttons) in plain view around the car. Then when your road trippers are getting antsy, challenge them to see how many they can find.

21. Tell more stories. Get inspired to tell tales along the road by using story blocks. Make your own ahead of time or grab an adorable set, like these wooden story blocks from HABA. What you do from there is as open as the road. Pick them randomly from the tray they come in and let fate determine the direction of your story, or let the munchkins lay them out first and create a story from there.

22. Hand out rewards. Inject a little motivation into the trip with a prize box. Try playing the quiet game if things get too loud. Or offer a dip into the prize box if they can make it 10 more miles without a squabble. Prizes can be simple like getting to pick the next song or choosing the next activity, or you can stock up on a few dollar store items before heading out of town.

—Allison Sutcliffe & Heather Dixon


RELATED STORIES
20 Road Trip Hacks for Your Next Long Car Ride
11 Fun Ways to Keep Them from Asking (the Dreaded) “Are We There Yet?”
5 Cool Podcasts to Try on Your Next Road Trip


When it comes to upcycled crafts for kids, there’s no need to head to the craft store to stock up on supplies. You and your little tree hugger can get creative with upcycled crafts using items you already have! From toilet paper roll crafts to K-cup planters, we’ve found unbelievable projects that give your recyclables a second wind. Keep scrolling to see some of the most unique upcycled crafts that are perfect for an Earth Day 2022 activity.

Tin Can Planters

using tin cans for upcycled crafts
Julietta Watson via Unsplash

Not only will you give your used tin cans a new life, but you'll bring joy to a windowsill, back step or fire escape! The kids can paint each can the way they want, then plant and watch your herbs, flowers or succulents grow. Get a tutorial (you'll need to make sure there's enough drainage) from Home Edit by clicking here

Upcycled Under the Sea Charm Necklace

Handmade Charlotte

Using old strips of fabric and clear plastic containers, these upcycled Under the Sea Charm Necklaces from Handmade Charlotte make for perfect Earth Day attire. Kiddos can braid old T-shirt scraps and cut out and paint plastic shapes in this easy afternoon craft.

Mini Drums

using K-cups for upcycled crafts
Sunny Day Family

Don't toss those used K-Cups! These adorable mini drums from Sunny Day Family reuse those old coffee containers in a fun (and not too loud) way. 

Maracas

a picture of easter egg maracas
Made Everyday

This genius idea from Made Everyday is bound to be a hit with your budding musicians. They’ll have a blast filling and decorating old plastic Easter eggs, not to mention the hours of entertainment once they’re done. 

Window Mobile

Buzzmills

The ceiling's the limit with this ultra-pretty mobile from Buzzmills. This easy-breezy creation uses watercolors to create hanging flowers out of egg carton cups. The result is something worthy of a fancy window display—or maybe even a relaxing nursery. 

Creative Crayons

The Everyday Mom Life

Having children always means plenty of crayons on hand, many of which have seen better days. Instead of tossing the broken nubs, you and the kiddos can spend the afternoon melting them down into colorful new works of art that not only serve a purpose but cut down on waste––and look pretty, too! Get the full details over at The Everyday Mom Life.

Darling Dream Catchers

using CDs in upcycled crafts
Pink Stripey Socks

Music and movies have gone digital which is why that pile of CDs has probably been gathering dust in your closet. With a few supplies that include yarn and beads, your kiddos can turn those dinosaur compact discs into upcycled crafts. Get the full details on making your own dream catchers over at Pink Stripey Socks.

Play With Plastic

Tinkerlab

Turn empty water bottles into a dynamic water wall just in time for summer. Your little engineer can get hands-on, helping to mount the bottles at just the right angles to create drops and splashy turns for maximum water flow. Get the know-it-all deets from Rachelle at Tinkerlab.

Powerful Paper

Motherhood and More

In case you hadn’t heard, newspapers aren’t just for reading anymore. They also upcycle into structurally sound geodesic shapes perfect for indoor play on a rainy day. Find out how to make this dome from Annie over at Motherhood and More. Then unleash your little engineers for hours of imaginative play in their cozy new dome sweet dome!

Sweet T-Shirts

Hello Glow

Your kiddo grows like a weed. So it’s not surprising last year’s summer shirts don’t fit her anymore. Don’t hand all of them down…yet. Hold on to a few of the more colorful ones to make these adorable bracelets designed by Stephanie at Hello Glow.

Cereal City

Dinner: A Love Story

Learn how to turn this breakfast staple into a bright-light, big-city playscape with paint and a little imagination, thanks to Dinner: A Love Story. Add a few Mini Figs or other plastic people and the door to a whole new world of play just opened up.

Top Time

Lalymom

Finally! Something to do with all those squeeze pouch caps your sidekick leaves on the table, in the car and under…well, pretty much everywhere! Laura at Lalymom has a simply brilliant craft project to turn caps into wearable art for all.

Eye Spy TP

Lu Bird Baby

After hanging up the aluminum can birdfeeder, why not make binoculars so your sidekick can take in all the action? Who knows where this simple craft we found at Lu Bird Baby will lead. From the wilds of your backyard habitat to the jungles of the neighborhood park, your little explorer will see it all through these creatively colored glasses.

Bag Jumps

A Childhood List

Take those plentiful plastic bags piled up under the sink and put them to good use beyond picking up after Fido. Little hands can help cut and braid them into a colorful jump rope perfect for park play. Simply follow Katie’s easy tutorial at A Childhood List for a reuse project that tips the genius scale.

Coffee Containers

Surf & Sunshine

Whether you’re planning a new garden or adding to the old one, K-cups make for easy-peasy indoor seed sprouting. Add dirt, water, and of course, let your little green thumb bury those seeds deep before setting these dainty cups on a sunny windowsill. Between planting, growing and replanting, this cycle is sure to keep your little sprout entertained the whole season.

Egg-citing Art

Picklebums

Set your petite Picasso to task with paints and egg cartons, cut into bird-like masks by your skillful hand. Kate at Picklebums has all the tips and tricks you need to make this egg-cellent project.

—Taylor Clifton, Allison Sutcliffe & Karly Wood


RELATED STORIES:

28 Ways to Reduce Plastic Waste That Are Actually Doable for Families

Eco-Friendly & Sustainable Brands You’ll Feel Good Investing In

Raising a Global Citizen: Daily Habits to Start Young

10 Clever Ways to Upcycle Your Old Baby Gear


These baby shadow box ideas are simple to make

A newborn shadow box is a beautiful way to display baby treasures like the hospital ID bracelet, birth announcement, going-home outfit, and first teeny hat. A baby shadow box is quick to DIY (just three steps!) and makes a special addition to your nursery. You’ll never forget the details of the amazing day you met your babe.

Step 1: Gather Your Keepsakes

Taking Care of Monkey Business

First, decide what to display. You could include a sonogram, baby's first photo, hospital ID bracelet, hospital hat, first socks or booties, baby's going-home outfit, the first pacifier, birth announcement, tiny footprints, crib shoes, or a piece of a beloved swaddling blanket. We love what Alli from Taking Care of Monkey Business included in hers (see above).

Related: 7 Pro Tips for Taking Monthly Baby Photos You’ll Want to Share

Step 2: Buy the Supplies

Or So She Says

Head to your favorite craft store (or open Amazon) to pick up items for your keepsake shadow box. First, you'll need the shadow box itself. We like the Studio Decor 4-Way Adjustable Shadow Box because it's flexible in depth so it can accommodate larger items like crib shoes or lovies. It's also sized well for this project at 12 inches square. 

You may also want to include small wooden letters for your baby's initials. To add color or a pattern, use scrapbooking paper for your background.

And finally, you'll need something to hold your keepsakes in place inside the shadow box. Try a few pretty pearlized pins or mini clothespins so you don't have to cover your keepsakes in glue. Visit the Or So She Says blog to see how Aimee put her shadow boxes together.

Make sure to capture all the giggles—and share them with your family and friends near and far—with the Tinybeans app. The secure platform puts parents in total control of who sees and interacts with photos and videos of their kids.

We feel for your winter birthday babies: celebrating in the shadow of the holiday season is tough! We’ve rounded up eight party favor ideas for kids that promise to make their special day that much more special—and parents will appreciate that none of them include candy. Whether you’re looking for a magic wand or a DIY memory game to while away cozy winter days, we have the perfect party favor to wrap up your little one’s celebration. See them all below.

Bitty Bubble Jars

The Pretty Blog

These pint-sized glass jars from The Pretty Blog are the perfect size for bubbles—and the pipe cleaner bubble wands are genius! Adding a few drops of food coloring in winter shades of icy blues transforms an anytime-toy into an adorable seasonal favor.

Adorable Aprons

Lillian Hope Designs

For a group of budding chefs—or perhaps for a cookie decorating gathering—consider passing out aprons so that you don’t send home tiny bakers encrusted in frosting and sprinkles. While these aprons from Lillian Hope Designs are personalized with iron-on transfer paper, you could easily swap out guests’ names for a mixture of holiday symbols, snowflakes, snowmen ... you get the idea!

Wonderfully Easy Wands

Aesthetic Nest

For the Frozen fanatics who just can’t let it go, make their whimsical dreams come true by outfitting each and every guest with one of these Elsa wands from Aesthetic Nest. Using just a dowel rod, a few ribbons, and some snowflake ornaments, they’ll soon be turning everything into snow and ice.  

Party Pampering

Evermine

For older children who enjoy a little pampering, dole out these mini manicure kits from Evermine. The frosted bags are on-target for the season, and you can change up the packaging and nail polish colors for a more wintery look. You could even include tiny bottles of hand cream to protect little fingers in the dry cold!  

Make Your Own Memory

The Green Divas

Compact enough to slip into a backpack or purse, this pint-sized memory game from The Green Divas is perfect for airplane rides, doctor’s office waiting rooms, or restaurants. The options for images on each wooden coin are only limited by your local craft store’s stamp selection! Your special birthday kid will have a ton of fun making these games for his friends, too. 

Let It Snow

Minieco

Give your guests the double-whammy magic of a snow globe AND a LEGO miniature! These hand-held jars from Minieco will entrance little eyes for hours—both with their softly-falling glittery “snow” and the LEGO figurine inside. Let your child choose different figurines for her guests to choose from for themselves.

[rt_slide image=”1447962″ caption=”One%20Little%20Project” photo_url=”http://onelittleproject.com/birdseed-ornaments/” target=”_blank” rel=”noopener”>One Little Project are sweet to look at and simple to make, and can easily hang from a tree limb so kids can watch feathered friends stop by for a snack.

photo: — Taylor Clifton & Katie Brown


RELATED STORIES: 

18+ At-Home Birthday Party Ideas for Kids

29 of 2021’s Top Birthday Party Themes

Easy Birthday Cake Decorating Ideas That Look Fancy


Once shops start breaking out pumpkin spice everything you know it’s almost here—Halloween! Even if you’re not a kid going trick or treating, it’s still so fun to pretend to be someone (or something) else for the day and take in all the creative costumes around you. Not human? No problem! Halloween is an inclusive event and all of your furry friends are welcome to get in on the Halloween spirit. We’ve rounded up some of our favorite, easy (no sewing required) costume ideas that will have your pet fitting right in with your ghoulishly fun fam—happy haunting!

Caring for a family pet has its own set of tricks and treats! Hill’s Pet provides science-backed nutrition for every age, size and need and makes it easier to support your pet’s needs. Learn more about how Hill’s helps pet owners stay a step ahead.

Beanie Baby

Are you a 90’s baby? Then you should turn your pet into a Beanie Baby, baby! This one is great for cats or dogs. It’s minimal but so sweet and nostalgic. All you need is some felt to cut out the heart-shaped tag and a white marker or paint. Just attach the tag to their real-life collar and they are as cute as the coveted "it" collectibles of their day. Get ready for lots of smiles on your daily walk.

Coffee Cup

If your pet is on the smaller side, this one is perfection: Turn your furry friend into your favorite cuppa joe! All you need is some cardboard or poster board, some inspo for the cup logo from your favorite coffee joint, a lid to top it off and some fabric elastic to tie it all together. This costume idea is HOT!

“Hairy Pawter” aka “Harry Potter”

It’s everyone’s favorite young wizard (just furrier than you remember...) This one is a crowd-pleaser for sure and it doesn’t take any wizardry on your part, just a few bucks for supplies. You’ll need some felt, hot glue and pipe cleaners to make those iconic specs. You can find loads of pictures of Harry Potter online, simply pick a look and be inspired! Not into research? Just put together the glasses, that famous scarf with strips of felt and the lightning bolt "scar" and you are good to go!

Cereal Bowl or Martini Glass

The “cone of shame” can’t ruin your pet’s costume game! Truly make it work, by turning your pet into a bowl of fruit-colored cereal! Head to your local craft store and buy some multi-colored foam—then cut it into circles and “toss” into their cone. Cut out a spoon shape from cardboard and spray silver to complete the cutest bowl of cereal you’ve ever seen.

Cones are so cool, they can also turn your pet into a walking martini! Pick up some foam ovals at any craft store, spray green, and skewer with a plastic rod or stick—cheers!

Ballerina Tutu or Cheerleader

Because pets can be pretty light on their toes, not to mention flexible (hello, downward dog yoga pose), turn your friend into a ballerina with the perfect tutu! This one is good for pets that aren’t into the full costume vibe. All you need is some tulle, fabric elastic and velcro tape to hold it in place. Measure your pet’s “waist” so you know how large to make the band. Then cut strips of tulle and tie them onto the band however you please.

Want to rep your fav team? This look doubles as a cheerleader uniform—just use tulle in your team's colors and accessorize as little or as much as you want.


—Jamie Aderski

Covering your house with Halloween thrills and chills has never been easier. We found 14 homemade (or almost) Halloween decorations that range from super clever (dead & breakfast anyone?) to delightfully simple. Scroll down to get inspired. 

Add a Bubbling Cauldron to the Yard or Front Porch

courtesy of Grandin Road

Witches and wizards will appreciate a properly bubbling cauldron on Halloween night. We love this tutorial from Scattered Thoughts of a Crafty Mom. Get what you need in the link below! 

Get the look here

Go Overboard on Pumpkins

Andrei Lanovskii via Unsplash

We love the idea of going overboard on pumpkins lining your front porch. You can get various sizes and shapes and even use some luminaries! 

Get the look here

Halloween Yard Sign

Jen Theodore via Unsplash

Lead little ones to your front door with eerie signage. From Harry Potter to zombie warnings and more, there’s no end to the possibilities! We love this version from Birds and Soap.

Get the look here.  

Keep It Simple

Annie Spratt via Unsplash

If you aren't a huge fan of over-the-top Halloween decorations, keep it simple with gourds, pumpkins and straw. It's still got that festive feeling, and you aren't staring down skeletons for a month. 

Get the look here, or snag real pumpkins at your local pumpkin patch. 

Make a Cave-Like Entrance

The Crafting Chicks

It’s easy to make your porch a spooky cave where bats dwell like this cobweb banner we spotted over at The Crafting Chicks. We love how it’s sweet enough to not scare off tiny trick-or-treaters. 

Get the look here. 

Milk Carton Luminaries

Jen Sedillo via Eighteen 25

Better start saving your milk jugs (and ask your friends!) now to make your own Spirit Jugs like the ones from Eighteen 25.

Stacked Painted Pumpkins

courtesy Brit Co

These stackable pumpkins look amazing, add a funky vibe to your front porch, and are surprisingly easy to make—especially when you follow the tutorial we found over at Brit + Co. It’s also a decoration idea that’ll last for years and can be used both inside and out. 

Get the pumpkins here

Dead & Breakfast Sign

Christy James via Confessions of a Serial DIYer

How clever is this Dead & Breakfast sign from Confessions of a Serial DIYer? It's the perfect addition to your haunted home. 

Get the look here.


Easy Floating Ghosts

Practically Functional

These floating ghosts seem more sweet than spooky. The best part? This last-minute decor detail is a cinch to make. Jessi of Practically Functional has the details on a DIY anyone can tackle.


Giant Spider Web

Jacob Clayton at MyUntangledLife

Life can be a tangled web and MyUntangledLife makes one of the best! Drape this amazing spider’s home on your front porch for the holiday and see how many little ghouls and goblins dare enter!  

Get the look here

Mice Silhouettes

courtesy Sixty Fifth Avenue

If you’ve got steps up to your front door, this idea from Sixty-Fifth Avenue works perfectly. We love the silhouette mice: they add a spooky touch without being too creepy. Add in a few pumpkins and any Cinderellas out for a stroll will feel right at home. You can find the silhouettes at the local craft store or make your own if you’re feeling crafty. See the entire set up over at Sixty-Fifth Avenue.


Climbing Skeletons

Stefanie Schiada of Brooklyn Limestone

We are in awe of the skeletons caught crawling all over this amazing home in Brooklyn. Stephanie of Brooklyn Limestone shares her inspirations and stunning home decor here. And, even if you don't have a 100-year-old home to decorate, you can still get the look by following this tutorial from Instructables

Nancy Creative

These Jack O’ Lanterns are anything but “cookie cutter"! They’ll light a ghoulish path to your door as luminaries, or add a stylish pop to your porch. All you need are stainless steel cookie cutters and a rubber mallet. Nancy at Nancy Creative has the scoop.


— Natasha Davis & Gabby Cullen


RELATED STORIES
Amazon’s Best Halloween Decorations (Most Are Under $20!)
Boo! Lowe’s Is Getting Ready for Halloween with Spooky New Inflatables
11 Ways to Dress Up Your Front Porch & Door This Halloween

We always end up with extra marshmallow bunnies and chicks around Easter, so why not put them to good use? We’ve gathered up a bunch of ideas—everything from hot chocolate to a science experiment. Keep reading to find out the best ways to use up those PEEPS before they go stale.

1. Jimbo Pants PEEPS®

PEEPS®

Peeps dipped in chocolate and sprinkles? Yes, please! Give those extra bunnies a gourmet upgrade with this easy recipe from Master Chef JR judge, chef, author and founder of Milk Bar, Cristina Tosi

2. Swimming Peeps Jello Cups

The First Year

How cute are these swimming PEEPS from The First Year? Plus they’re super easy to make using Jell-O, Cool Whip and a dash of food coloring—your kids can help out throughout the process. 

3. PEEPS Milkshake

Shared Appetite

We love Shared Appetite’s idea of turning PEEPS into a pretty pastel-colored milkshake. Sure, it’ll give your kids a major sugar rush, but Easter only comes around once a year, after all! Click here to get the recipe.

4. PEEPS Pudding Cups

Chic ‘n Savvy

Send your PEEPS on a garden adventure with this clever dessert idea from Chic ‘n Savvy. Kids can even decorate the pudding cups themselves with Oreo “dirt” and candy “carrots.” To get all the details, click here.

5. PEEPS S’mores

Eclectic Recipes

You won’t need to restock the pantry with marshmallows after Easter. Making brightly colored s’mores with PEEPS is much easier than you might think and the sugary crunch adds a little something special. Click here to check out the quick how-to from Eclectic Recipes. 

6. Edible PEEPS Play Dough

Still Playing School

Now you can squish these PEEPS to your heart’s content without the sticky aftermath. Still Playing School’s fabulously fun recipe repurposes those PEEPS into safe edible play dough for mouthy tots. 

7. Graham Cracker Birdhouse

Kitchen Trials

If your little ones love crafting gingerbread houses during the holidays, then they’ll have a blast making a sweet birdhouse for your leftover PEEPS , too, like these from Kitchen Trials. Using coconut, melted chocolate and candies, the decoration options are endless. 

8. Science Experiment PEEPS

Lemon Lime Adventures

What happens when you microwave a PEEP? This experiment is perfect for inquisitive scientists who love to collect data down to the last decimal. Click here to check out the procedure over at Lemon Lime Adventures.

9. PEEPS Popcorn

Grain Changer

This delicious popcorn from Grain Changer is the ultimate springtime treat. Drizzled with white chocolate and melty PEEPS , chances are it’ll disappear in no time. 

10. PEEPS Wreath

Tried and True

You’ve been through every PEEPS project, and you still have more left over (that’s the nature of PEEPS). Use what you have left to make the most vibrant wreath anyone has ever seen. Head over to craft blog Tried and True for the instructions. 

11. PEEPS Diorama

We love this idea that's all over Instagram where you use leftover PEEPS to create fun dioramas. Use PEEPS to recreate a scene from a favorite movie or an important event in history! 

12. PEEPS Centerpiece

Two Sisters Crafting

Take some inspiration from Two Sisters Crafting to repurpose your PEEPS (and other leftover candy) into a unique seasonal centerpiece. Grab artificial blooms from your local craft store and get creative. 

13. Chocolate Peanut Butter PEEPS Fudge

Crafty Cooking Mama

We’re suckers for fudge, and this genius recipe from Crafty Cooking Mama is bound to be an instant favorite. It’s super simple—just melt a few ingredients together in the microwave and then refrigerate it for a few hours. You’ll be blown away by how delicious it turns out. 

14. Minute to Win It: PEEPS Version

Not Consumed

Create your own homemade minute to win it game! Inspired by family fun blog Not Consumed, see how high you can stack your PEEPS in an allotted amount of time. Winner takes all the PEEPS! 

15. PEEPS Hot Chocolate

Don't let the bright colors make you forget that PEEPS are really just cute marshmallows. What better way to enjoy the fluffy goodness than by adding them to a mug of hot chocolate

https://www.instagram.com/p/BwhkKtNgiIB/?hidecaption=true

16. PEEPS Rice Krispies

We love this oh-so-colorful way to use up PEEPS by making them into Rice Krispy treats. Just use them as you would marshmallows in your favorite recipe, separating colors to make a rainbow! 

—Christal Yuen & Susie Foresman


RELATED STORIES:

10 Ways to Eat Eggs After the Big Hunt Is Over

17 Ways to Upcycle Your Leftover Plastic Easter Eggs

21 Totally Cool Things You Can Make Out of Egg Cartons

The food coloring in your kitchen cabinet can do more than turn vanilla frosting into a magical unicorn-esque rainbow hue. While creating crazy colors of pancakes, baked goods and more is always welcome by your fam, you can also use food coloring in science experiments for kids. From how to tie dye with food coloring to dying eggs (and everything in between), check out these easy science experiments for kids!

Coffee Filter Crafty Science

Erica Loop

What happens when you drip a few drops of food coloring onto a coffee filter? Before you add the food coloring, ask your child to predict whether the drops will stay put or move. Drop one hue onto the edge of the filter and watch what happens (the color will magically move). Repeat with other colors, letting them mix and turn into new hues.

Milk Magic

Myriams Fotos via Pixabay

Fill a shallow dish with a thin layer of milk. Add a few drops of different colored food coloring. Make sure the colors don’t touch. Dip the end of a cotton swab into dish soap. Press the soapy swab into the milk and hold it there. Watch as the colors magically swirl through the milk; even though the colors look like they’re moving on their own, it’s really science at work! The soap reduces the surface tension of the milk and makes the fat molecules move. The addition of food coloring makes this process easy to see.

Ice Milk Science

Erica Loop

Your child explored what happens when you put food coloring into a shallow dish of milk. Now it’s time to add a liquid-to-solid experiment to the mix. Drip a drop of food coloring into each compartment of an ice cube tray. Use the primary colors or choose a rainbow of hues. Fill the tray with milk and mix the color in each compartment. Freeze the tray. Repeat with food coloring water. Compare the ice and ask your child to guess why the colors are different in the two trays. Hint: The white milk lightens each color! Drop the pastel milk cubes into a fresh glass of milk and observe the colors as they melt.

Get Glowing with Science

Erica Loop

How can your child make glowing paints? All you need is tonic water—and a black light! Add in food coloring to take this science experiment for kids to the next level. Pour the tonic water into a clear plastic cup or freeze it. Bring the liquid or ice into a completely dark room and turn on a black light. Watch as the bubbly water glows. After your child observes the glow, add a drop of food coloring into the cup or freeze a colorful tonic water cube to see what happens next.

Frozen Color Combinations

Erica Loop

Take color mixing science one step farther with this artsy idea! Make red, yellow and blue ice cubes with food coloring and help your child to hypothesize what will happen when they mix, blend, and splash each one in a cup of primary-colored water.

Oil, Water, and Food Coloring

Erica Loop

Your creative kid has already made food coloring ice cubes. But what happens if you replace the water with oil? Compare and contrast the two different liquids with colorful science exploration. Get the easy-to-follow how-to steps here.

Rainbow Ice Melt Race

Erica Loop

Check out this easy rainbow ice-making how-to. After your kiddo makes the colorful cubes, they can line up a rainbow (red, orange, yellow, green, blue, indigo and violet) and race each one. Even though the cubes can’t move on their own, your child can push them across a piece of white card stock paper. As the cubes move, they’ll leave behind a colorful pattern. Ask your child to explain where the colors come from. Add on to the science experiment and coat the bottom of the cubes in salt. Observe or time the cubes to see if they melt at the same rate as plain (unsalted) ice.

Egg-cellent Food Coloring Rainbow

Ksenia Chernaya via Pexels

Did your child use the primary colors to mix secondary ones? Now that you have six plastic cups filled with custom colors, it’s time to break out the hard-boiled eggs. Dying eggs with food coloring is an easy way to explore and experiment. Before you dunk or dip the eggs (with the shell on) in the colorful water, ask your child to predict what they think will happen. Dip one egg in each color, wait 10 seconds and pull the eggs out. Put the eggs to the side and repeat, dunking a new set of eggs for one minute this time. Repeat the experiment—but wait five minutes or more. Compare the eggs and ask your child to explain the differences they see.

Primary Color Mixing

Erica Loop

Yellow and blue make what? Help your little learner to explore the primary colors—red, yellow, and blue. Pour tap water into three clear plastic cups. Add three to four drops of each primary color into each cup. Now it’s time to mix the colors. Use additional clear plastic cups to blend the primaries into secondary hues (green, orange, and purple). Pour part of the yellow water into an empty cup, add blue, and watch what happens. Repeat with the other colors.

Magic Color Change Flowers

Gerhard Romero via Pixabay

How can your kiddo turn a white flower blue, pink or purple? This experiment allows your child to see how water moves through a flower. Fill a clear cup half-way with water. Add a few drops of your child’s favorite food coloring hue. Cut the end of a white carnation’s stem and place it into the water. Repeat with different colors in different cups. Watch and wait! Ask your child what they think will happen to the flower. As the flower sits in the water, the food coloring will make its way through the step and to the petals—changing the flower’s color.

Top Tie Dye Ideas

The Kitchen Table Classroom

Yes, tie typically means adding fabric-ready pigments from the craft store to plain white tee’s, tanks, socks, and more. But you can also use food coloring. Ramp up the experimental aspect of a seemingly simple tie dye craft and compare the differences between fabric pigments and food coloring from your kitchen’s pantry. Try each of these dye crafts with both color options, hypothesize what will happen and observe the similarities/differences.


RELATED STORIES:
59 Easy Science Experiments to Do at Home
100+ Indoor Activities to Do with the Kids
16 Easy Science Fair Projects for Kids

Calling all Sid the Science Kids and Miss Frizzle fans: It’s time for science fair projects! Whether this is your kiddo’s first time showing off her Bill Nye side or if he’s a seasoned pro, they’ll need a fresh crop of science experiment ideas for this year’s fair. So nab a tri-fold poster board from the craft store, stock your home with plenty of supplies, and help your creative kid start hypothesizing as you check out these easy science fair projects that are easy for kids of all ages to explore.

Make a Volcano Explode

iStock

The quintessential science fair project, you might want to check with classmates to make sure there won't be five volcanos on the big day. Even so, there's a reason why this one is so popular. Not only is it fun to make the volcano, but the overflow of baking soda and vinegar is exciting for everyone. Get a great step-by-step tutorial from The Dad’s Book of Awesome Science Experiments. by clicking here

Make Ice Glow

indoor activities for kids
Mini Monets and Mommies

How can your child make ice glow? Hint: It involves tonic water. If a chemistry exploration is on your child’s to-do list, check out this light-based learning idea. For more fun, check out our glow-in-the-dark science experiments

Grow Sugar Crystals

Little Bins for Little Hands

Explore the science behind how rock candy is made. Grow your own sugar crystals with this super-science activity from Little Bins for Little Hands.

Rainbow Melting Ice

Mini Monets and Mommies

What happens when you gradually add food coloring to water as it freezes? The answer is in this kids’ science experiment. If you’re looking for science fair projects that are easy, this one is a simple STEAM activity for kids in pre-k and up.


Insider tip: create even more rainbows and harness your kids interest in science with these great rainbow science experiments for kids. 

Learn about Light

Hands On As We Grow

Light is more than just something that comes from kiddo’s star-shaped IKEA wall lamp. This science exploration from Hands On As We Grow helps your child to explore and experiment with the sun’s rays (or at least, the artificial version).


Insider tips: take your science experiments with light up a notch with these light-filled science experiments you can do at home. 

Discover and Dissolve

Mam.Papa.Bubba.

Your curious kid constantly asks why the colorful candy shell on their favorite sweets melts away in their sweaty little palms. With this experiment from Mama.Papa.Bubba. your child can explore the science dissolving Gobstoppers.

Cool a Can of Soda

Gepharts3d via Pixabay

Sometimes there’s nothing better on a hot day than a cold drink—but what happens if it hasn’t been chilling in the refrigerator? This experiment helps kids test the quickest way to cool a can. 

Apple Exploration

Pezibear via Pixabay

Most kids love apples, but so many of them won’t touch the fruit once it’s turned brown. So how about an experiment that keeps apples from turning brown? This easy, and fantastically fun, idea from Teach Beside Me has all the answers your child is looking for.


Insider tip: encourage her to play with her food in the name of science and creativity. Check out these fun and creative ways to play with apples. 

Liquids and Evaporation Rate

Conger Design via Pixabay

How does evaporation happen? Explore the way liquid turns into a gas with this awesome evaporation experiment. Get the full details, including materials and how-to steps, here.

Celery Science

Tinker Lab

How can your little learner create brightly-hued celery stalks? Check out this science experiment from Tinker Lab for a how to! Not only will your child dazzle with their new ability to turn the otherwise green veggie into pink, blue or purple pieces, but they’ll also learn about plant science.

Create a Jar of Fireworks

My Big Fat Happy Life

Find out what happens when you combine water, food coloring and vegetable oil! This science project from My Big Fat Happy Life gives your child the chance to explore, experiment and make some completely colorful discoveries. What’s great about this experiment is it’s easy to do with supplies you likely have at home.

Clean a Penny

Olichel via Pixabay

Grab a handful of pennies (or other coins if you have them) sitting around and see which cleaning solution make them shine the best. Kids can use liquids such as baking soda with water, orange juice, toothpaste, lemon juice and dish soap. Use a toothbrush (not yours!) to clean each penny with a different solution, and then little scientists can write down what each coin looked like before and after the cleaning.


Insider tip: feeling crafty? Put those pennies to good use with our lucky penny craft ideas. 

Grow a Gummy Bear

Alexas_Fotos via Pixabay

How, oh how, do gummy bears grow? Simply add a gummy bear to water and wait. This sweet experiment from Tinker Labs gives kids the chance to make comparisons and explore what happens to their favorite tasty treat when it takes a bath.

Common Color M&M's

Fz via Pixabay

Are yellows the dominant color in the M&M bag? Why does it seem like there are so few green pieces? This project is an easy experiment for even the youngest of kids. Buy a few packages of M&Ms, and then have kids sort the colors and count them. Then they can create a chart to track each color.

Force and Motion with Race Cars

Librarianism Chronicles

If your kiddo has Hot Wheel cars sitting around, this experiment is an easy way to test force and motion. With a few books and your child’s fave Hot Wheels, your pint-sized physicist can determine if the slope of the tracks affect the speed of the cars with this experiment from Librarianism Chronicles.

Microwave Popcorn Test

Must Have Mom!

This project is a great experiment if your family is a fan of microwave popcorn. Head to the store and buy three to five boxes of microwave popcorn from different brands, and then find out which one pops the best. Add variety to the experiment by testing butter vs. plain, or organic vs. regular. Get the full how to from Must Have Mom! here.


Insider tip: in the mood for popcorn after this experiment? Try out these unique and unusual popcorn flavors you haven't tried yet.