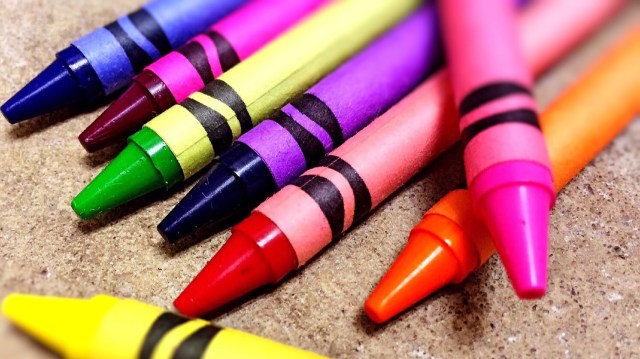
There’s nothing like a fresh box of new crayons, but sooner or later you’re left with tons of broken pieces––because kids. Before you toss those busted bits into the trash, keep reading to see how your kids can created gorgeous melted crayon art, candles and plenty of other unique ways to upcycle your old crayons.

Crayon Play Dough
iStock

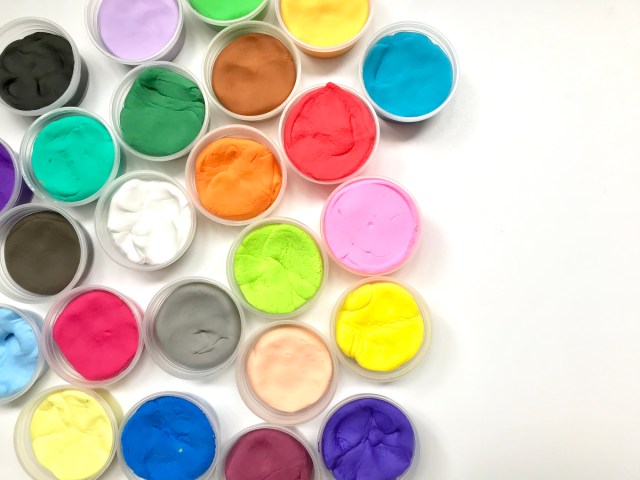
Sure, you can make play dough using Kool Aid, but did you know your old, broken crayons make great ingredients, too? Instead of tossing those small pieces, melt them down with your flour, salt and cream of tartar to make vibrant play dough, using this recipe from Sugar Aunts.

Hot Rock Crayon Art
Kids Activities Blog

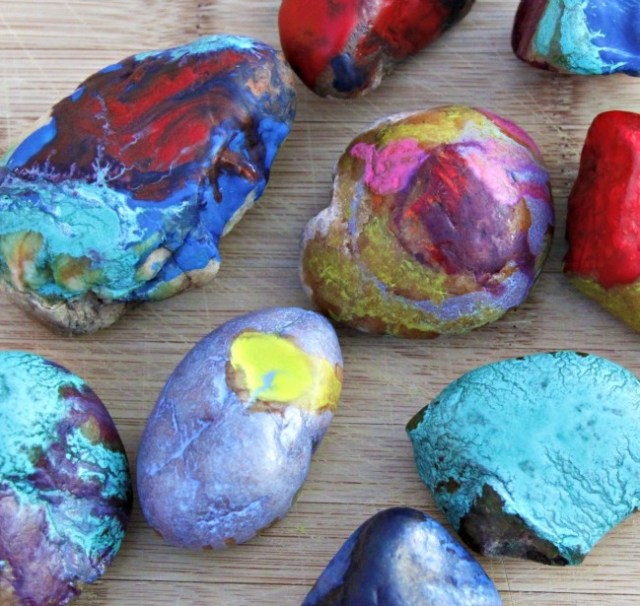
Perfect for hot summer days or those when you just need a craft, these hot rocks covered in melted crayons from Kids Activities Blog are so creative! Rocks baked in the oven (adult supervision, please!) are set on newspaper and then topped with broken pieces of crayon. Watch the colors melt and make one of a kind beauty!

One of a Kind Valentines
The Nerds Wife

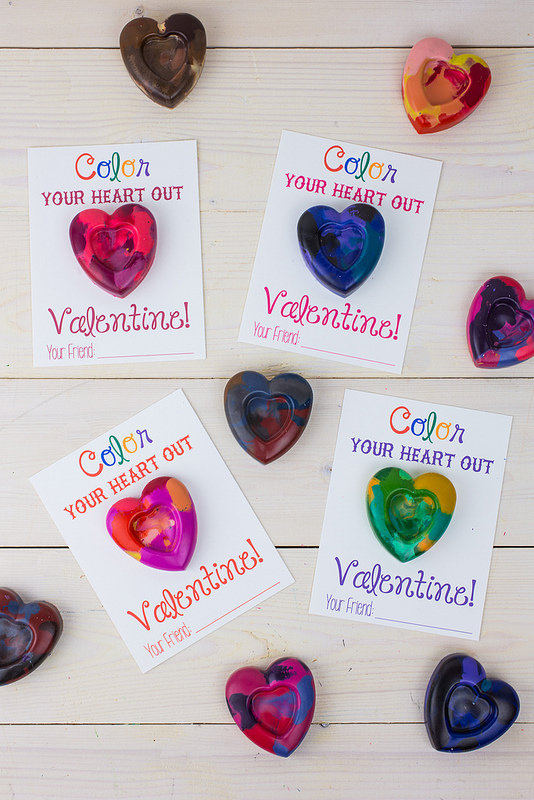
All you need is love, and broken crayons for this fun craft. This easy DIY Valentine from The Nerd's Wife is perfect for using those old broken crayons and sharing the love. Crayons are melted into a silicone heart-shaped baking pan and then attached to a sweet printable, perfect for your valentine.

Shaved Crayon Hearts
Skip to My Lou

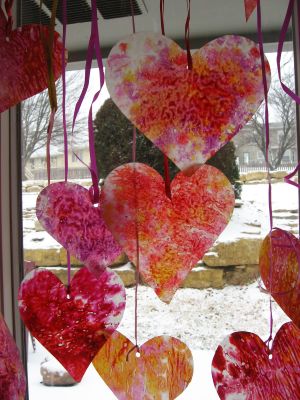
The next time you have teeny, tiny broken crayons, make them smaller! Shave the crayon remnants onto heart-shaped paper, then cover with wax paper and iron on low. The result? Beautiful Valentine-worthy hearts like these from Skip to my Lou!

Upcycle Your Crayons for the Greater Good!
Pexels via Pixabay

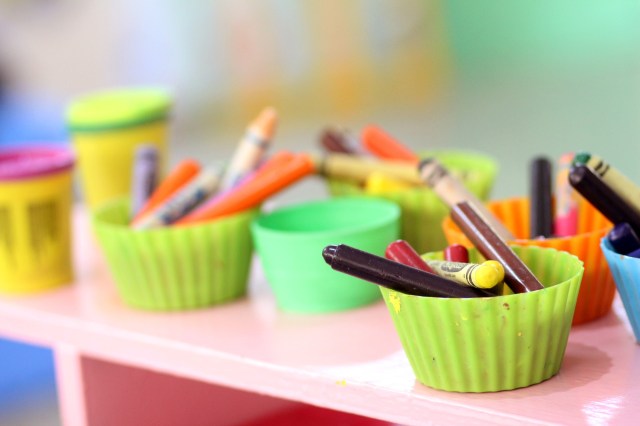
Did you know there are at least three different national organizations that take old crayons and turn them into something amazing, all for the good of the Earth and kids in need? Well, there are. Click here to learn more about these amazing programs.

Red, Yellow & Blue
Melissa Hecksher

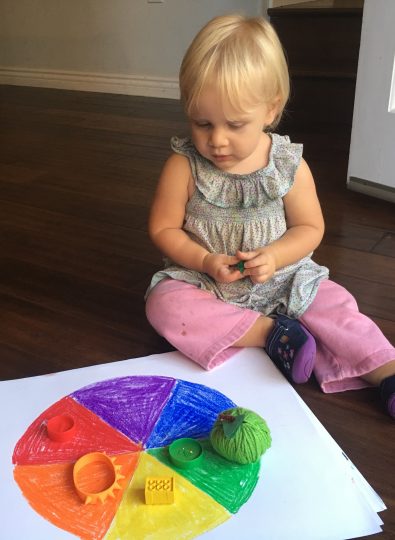
Teach the kiddos about the primary colors and how they rleate to by making an easy color wheel.

Melted Crayon Canvas
Shelly Massey

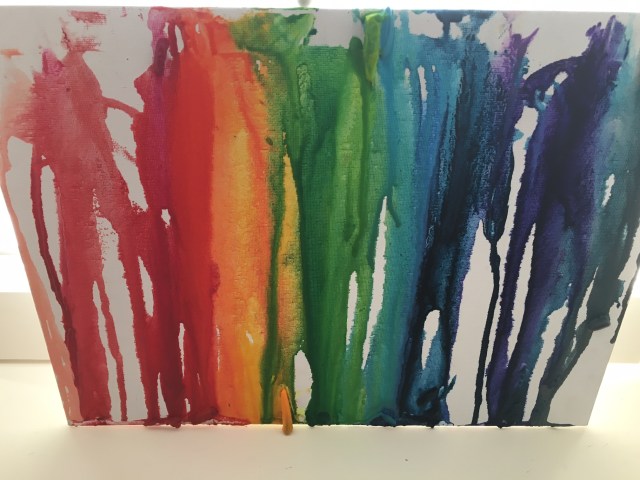
We’re so charmed by these melted crayon creations that our Atlanta editor whipped up with her kids. It’s easier than you think, plus you get to use all those broken crayons you know you have. All you need is a blow dryer, the crayons and something to let the wax drip on. While a canvas or paper is great, you can even try melting onto a large rock, bottle or even a tree branch.

Make Something New
19melissa68 via Flickr

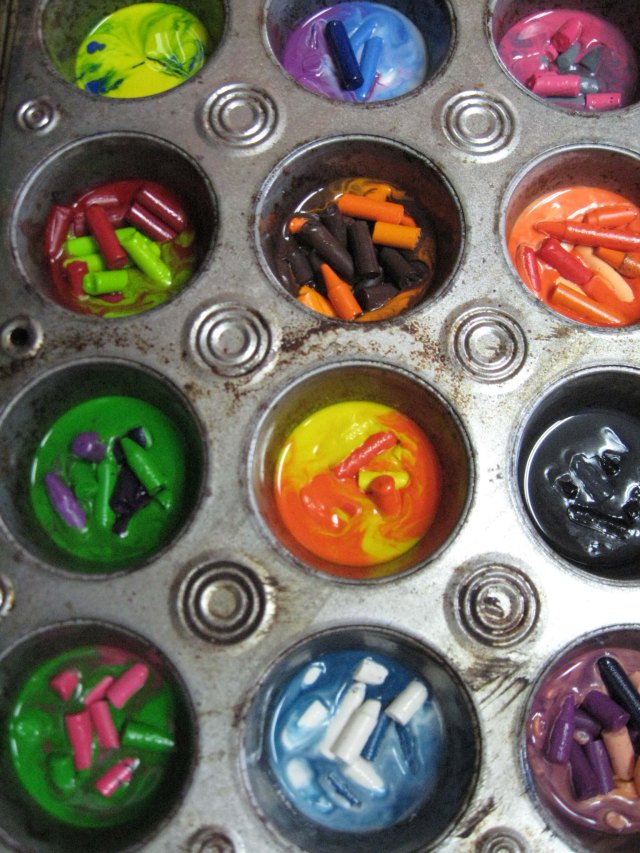
Gather up all those bits of broken crayon, peel away the paper and organize by color family. Then add the crayon parts to an old muffin tin and place in the oven at about 250 degrees until melted. Remove, let cool and you've got some creatively re-used crayons. You can also try microwaving crayons and pouring the wax into silicone molds to make heart shapes, LEGO bricks or whatever you have around!

Egg-cellent Wax Decorations
The Nerd's Wife

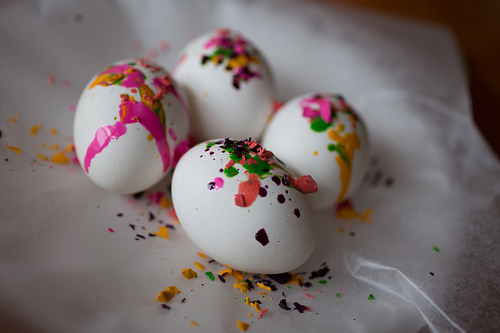
It doesn't have to be Easter to decorate eggs: try this cute trick the next time you want to pack hard-boiled eggs for a picnic. The wax stays on the shell, so the inside remains edible. Try the wax melting method with your old stubby bits of crayon by making these genius eggs from The Nerd's Wife. The heat from freshly boiled eggs melts the crayons into awesome abstract designs. Get the full instructions on how to make these fuss-free beauties by jumping over toThe Nerd's Wife.

Colorful Shells
Fun at Home with Kids

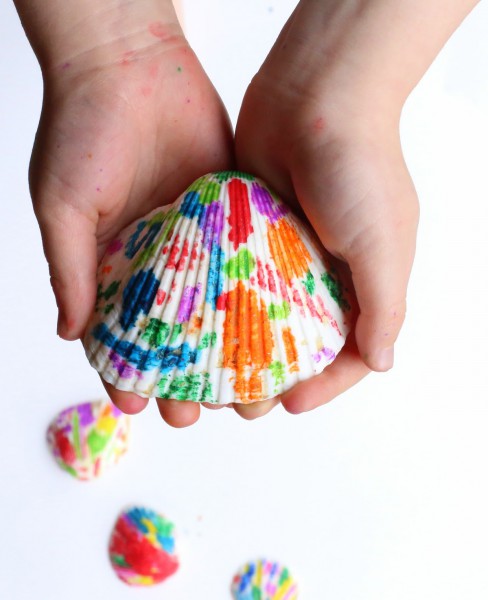
A set of crayons and assortment of shells is all you need to create your very own Crayola Experience at home. Recommended for older artists (oven use required), head over to Fun at Home with Kids for the full how-to.

Comic Strip Creation
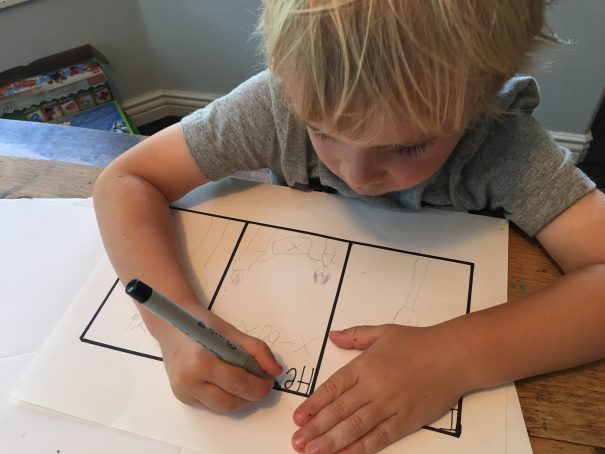
a boy draws and writes to create his own comic strip
Melissa Hecksher

Put your coloring skills to the test and help the kiddos create their very own comic book.

Coloring Books (but Not the Kind You Think)

Amber Guetebier

Crayons are a staple in your craft box, but what about on your bookshelf? For example, read: Red, A Crayon’s Story then do: an unexpected coloring experiment. Click here for more ideas on books that go with crayons!


Coloring for Grown-Ups
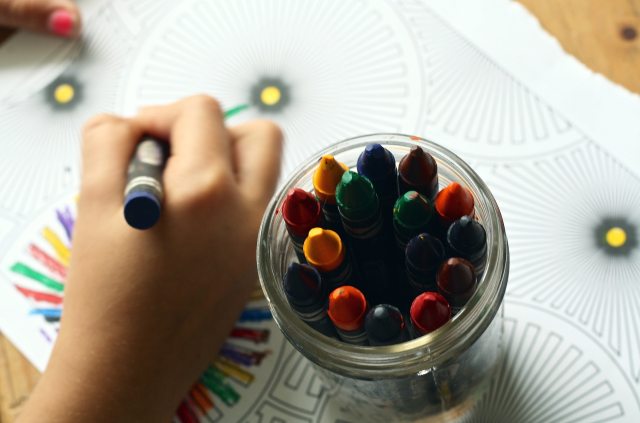
Ponce Photography via pixabay

Adults coloring is taking the world by storm, and we’re not just talking about sitting next to the kiddos while they do it. Read how coloring can actually help moms de-stress.

A Box of Crayons
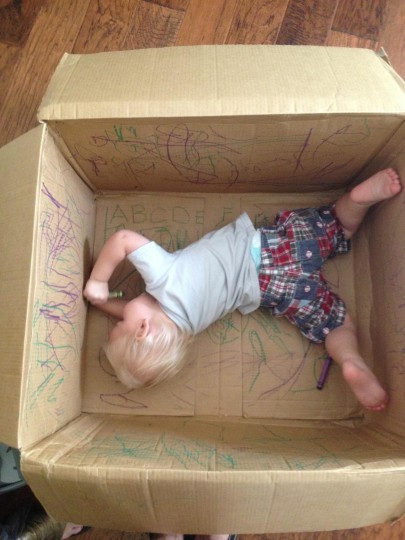
Berry Sweet Baby

Got a little guy or a big box? Pop them into the cardboard walls and let them go crazy, no cutting required. Now you have just enough time to go to the bathroom in peace.


—Amber Guetebier & Karly Wood

Feature photo: WorkAndaPix via Pixabay


RELATED STORIES

3 Ways to Recycle Crayons for a Good Cause

Coloring Book & Activity Pairings

Before You Toss Your Kids’ Old Markers in the Trash, Read This
 

Photo by Ryan McGuire via Gratisography; composite by Karly Wood for Red Tricycle

What’s better than funny parenting tweets? Hilarious holiday parenting tweets! Parents everywhere are getting ready for the big day and whether they’re bribing their kids to stay in line or just bemoaning the days leading up to Christmas, they are downright funny.


1. Totally winning it.

2. Oh totes.

3. Well played smoke alarm, well played.

4. Livin’ the dream.

5. Never. The answer is never.

6. They sound just alike, really.

7. Who needs The Club when you have kids?

8. Yes PLEASE!

9. Sweet dreams are made of these.

https://twitter.com/thecheekymommy/status/1073030425843503104

10. Out of the mouths of babes…

––Karly Wood


RELATED STORIES

Funniest Parenting Tweets of the Week: December 7, 2018

Funniest Parenting Tweets of the Week: November 30, 2018

Funniest Parenting Tweets of the Week: November 23, 2018


There’s a sort of beauty that comes with seeing things in hindsight, right? We notice tiny little things of importance and goodness and often tend to gloss over the not-so-great stuff. Recently, I’ve started approaching my role as a parent with such a perspective. I’m still very much in the thick of raising two toddlers under the age of four, but I’m already seeing how quickly time passes and if it makes any sense at all, I already miss these days, even while I’m living them.

I had such a realization this evening when I was picking up the house before the kids started their baths. I entered my bedroom and was immediately greeted by the tiny chair that my daughter had propped up against the door. She had been trying to reach the top of my dresser earlier, where I keep my necklaces. Then, I saw my son’s toy trucks strewn all over the floral carpet.

I thought the mess looked pretty manageable, all things considered, and then I noticed the baby food pouch that someone had stepped on. Pureed mangoes, peaches and (this is the fun part) beets were splashed all over the place, with one particularly purple stream hitting my stark white dust ruffle just so.

For a second, I just stood there and took it all in. Yes, it was a mess, and yes, I was more than a little irritated that they’d just left it and assumed I’d pick it all up like I always do. Still, it was golden hour, and the sun was pouring through the plantation shutters, and in that particularly beautiful light, I didn’t really even see the mess. I saw hours of play, joy and laughter.

I pictured my four-year-old daughter lugging that chair in from her tiny table in the kitchen, then stepping up on it to get a clandestine look at mama’s jewelry box. I pictured my son, sitting comfortably on the floor, playing quietly with his favorite toys. Then, I pictured my bedroom put back exactly the way it had been five years ago before babies were even a word on our breath.

I closed my eyes and saw my unruffled comforter, pulled tightly at the corners without a single wrinkle. My dresser always stayed dusted and wiped clean on the top and my necklaces were never tangled. I had my diffuser on the nightstand and every night I’d drip in some lavender essential oils and my husband and I would drift off into dreamland, not waking up in the middle of the night for anything, but actually indulging in eight hours of uninterrupted slumber. Yes, it was a sweet time back then, but right now is even sweeter.

Give me the messes and the memories. Give me the toy boxes crammed all the way to the top like a game of Tetris, with tops that won’t close and are about to fall off the hinges. Give me the sticky cupboard drawers with misplaced and mismatched kitchen tools  Give me baseboards with the paint nicked off from a plastic bike that really should be outdoors but is more fun inside.

Give me the chaos and the craziness, because these are hands-down the best years of my life and if I’m going to spend them in a tornado of toys, so be it.

It’s not in my nature to tolerate a mess. The younger version of me wouldn’t let the sunset on a sink full of dirty dishes, but here it is close to midnight and their cartoon plates and half-full milk cups are sitting waiting to be washed. I’ll get to them soon and one day this little house that we worked so hard to restore and decorate will look like a showroom again.

For now? It looks like a family actually lives here. And judging from the ten pictures of Crayon hearts that decorate and clutter up my refrigerator, it looks like we love here, too.

Hi, y'all! I'm Courtney. I'm a mama of two, married to my high-school sweetheart and making a life in the little town I grew up in. I'm a writer by trade, but a mama by heart. I love chocolate and I love family. Let's navigate this crazy, messy, blessed journey together! 

The pen may be mightier than the sword but don’t underestimate the power of the crayon. Environmental awareness, art education, and social change are just three major lessons you can teach youngsters by helping them start collection drives for their second-hand Crayolas and then getting them into the hands of those in need.

To celebrate National Crayon Day, check out these three non-profits that will have you and your mini Good Samaritans thinking beyond the coloring book.

photo: Ryan via flickr

Crazy Crayons
Mail in your broken, unloved violets, carnation pinks, and burnt siennas here (P.O. Box 683, Lake City, CO 81235) and they will be re-crafted into adorable coloring stars, sticks, worms and more. All proceeds benefit the Crayon Recycle Program, which has been spreading the gospel of the Three R’s (Reduce, Reuse, Recycle) since 1993. To date, the grassroots educational organization has kept over 105,000 pounds of wax sludge (yuck!) out of landfills with help from earth-minded kiddos, educators and community leaders all over the country.

Insider tip: Sorting is fun but not necessary. Just keep the wrappers on, please!

Online: crazycrayons.com

photo: Bryan Ware

The Crayon Initiative
Daddy, where do all the restaurant crayons go? That head-scratcher combined with a passion for creative expression and art therapy led founder Bryan Ware to start The Crayon Initiative. The non-profit remanufactures rescued crayons then donates them to children’s hospitals. If you’ve got a little Florence Nightingale in your midst, it couldn’t be easier for them to help young patients find relief through drawing. They’ll even mail you a box if you need one.  

Insider tip: Get your favorite family-friendly eateries on board by leaving one of these cards behind after the meal.

Online: thecrayoninitiative.org


Crayon Collection
Calling all future philanthropists. In addition to other major partnerships like Denny’s Restaurants, this do-gooder organization joined forces with the National Head Start Association, which provides health and education services to the country’s most vulnerable children. Founder Sheila Morovati was shocked by the math: teachers in underfunded public schools spend upwards of $750 of their own money to provide students with basic school supplies while millions of perfectly good crayons are trashed daily. With a grown-up’s assistance, kiddos can choose a nearby school then coordinate a crayon drop-off, so they can see for themselves where their gently used crayons are going.  Bonus: besides a whole bunch of warm fuzzy feelings, they’ll start to notice and appreciate the things they take for granted.

Insider tip: Don’t overlook the excellent educational and art project curriculum created with the organization’s artist and educator partners here.

Online: crayoncollection.org

How do you recycle your crayons? Share your tip in the comments below!

— Andrea Arria-Devoe


Your imaginative little artist is all about taking out the paints, markers, glue, glitter, yarn and paper. But, what about putting it all away? Um, that kind of never happens. So you end up stashing the supplies in the first empty shopping bag you grab or tossing them into a junk cabinet. Yup, you’re in need of some artsy organization—right now. Before your child’s crafting cascade takes over your home, scroll down to check out these simple (yet totally genius) storage solutions!

photo: Mini Monets and Mommies

1. Tape It Up
You have a zillion used tissue boxes sitting around. You could toss the boxes. Or, you could reuse those boxes and turn them into colorful craft storage. Break out a rainbow of duct tape, and use it to decorate an empty tissue box. Now it’s ready to hold pencils, markers, paintbrushes, pipe cleaners and more.

photo: Lolly Jane

2. Dino Designs
Who has a dino-loving kiddo? Yep, that’s you. Then this rad storage jar DIY from Lolly Jane is your child’s dream. Oh, and you can also store your child’s play dough or modeling clay in it. That makes this crafty storage solution fabulous and totally functional.

photo: Just A Girl Blog

3. Caddy Up
All of those art supplies won’t organize themselves. Just A Girl Blog created this cute caddy that makes storage so, so, so simple. You can separate all of your child’s supplies into individual spaces, and move them from room to room in this portable (and awesome) option.

photo: Mini Monets and Mommies

4. Egg Them On
Wait! Don’t throw away that old egg carton. As long as it’s clean (no random egg shells or gooey drips), you can reuse it as a craft caddy. If you have loads of loose glitter, craft sand or anything that’s similarly small, tame it with this recycled storage “bin”. Just close the top when your littler crafter is done for the day, and pack the carton away.

photo: Sew Many Ways

5. File It Away
The mountain of scrap fabric and felt that your child is amassing may just be taking over. Tossing it all into a box is making your organizer-self go kind of crazy. Instead, sort it all out, and file it away like Sew Many Ways did.

photo: Damask Love

6. Spin a Yarn
Craft storage can look pretty too. Damask Love made this baker’s twine organizer that you can also use for spools of yarn, floss or ribbon. Not only will it organize all of those loose ends, but it makes a sweet little display too.

photo: Ana White

7. DIY Dream
Craft storage gets fantastically functional with this homemade table from Ana White. Your child can sit and draw to her heart’s delight, and it also stores all of the artsy items. That’s right, your child can store their materials inside of the table—and not in a desk type of way.
photo: Gabby Cullen

8. Kit and Caboodle 
Any child of the ’80s and ’90s will remember the Caboodle. With layers of trays, organizing supplies for creative work has never been so easy. Plus, the super solid latch ensures not one bit goes astray.

9. Cute Crayon Caddy
As if traveling doesn’t present enough packing challenges when you have kids in tow, add on a craft bag and you have a recipe for a mega-mess. Don’t lose all of those crayons in the cracks and crevices of the minivan. Instead, load them into a DIY crayon caddy. Simply reuse an old travel diaper wipe container, turning it into a crayon-sized holder. If you have more than a few crayons (or want to store markers and pens too), reuse a regular-sized diaper wipe container.

Do you have your own crafty storage solution? Share it in the comments below!

— Erica Loop

photo: m01229 via Flickr

In honor of National Crayon Day on March 31st, Crayola has announced that it will retire one color from its mainstay 24-count box. The question is, which one?

This will be the first change for the iconic box of crayons, which has inspired so many billions of drawings, in over 100 years. Colors have been retired before, but this will be the first time one has gotten the boot from the two dozen sold in its best-selling box.

While Crayola offers 120 different colors, those currently featured in the 24-count box include: red, yellow, blue, brown, orange, green, violet, black, carnation pink, yellow orange, blue green, red violet, red orange, yellow green, blue violet, white, violet red, dandelion, cerulean, apricot, scarlet, green yellow, indigo and gray. When you consider the fact that some of these are basically just repeats (what exactly is the difference between yellow green and green yellow?!) it might not be so sad to say goodbye.

One must go to make room for a brand new color yet to be unveiled — and you can help make the decision. Crayola has invited fans to post on Instagram which color they simply can’t live without, along with the hashtag #ShareYourFave.

Which color do you think should be the one to go? Tell us in the comments!

No, Thank You!

I rarely get excited when I go to the mailbox these days since it’s usually filled with mailers, bills and a seemingly friendly spider who’s taken up residence in the back corner! But some days I get lucky and amongst all that “junk” I spot a treasure–a small handwritten envelope. Who could it be from? Which of my friends would take the time to sit down amidst their own chaos with a pen in hand and share how grateful and appreciative they are. Once I make my mental list I gently retrieve the note to investigate. I feel the paper and check out the stamp, and yes the stamp matters. I look to see if I recognize the handwriting without peeking at the return address in the left-hand corner. It’s a moment for me…

Usually I wait some time before I open the note, sort of like waiting until after the birthday dinner to open up the presents. Other times I open the note when I need that little kick of happy during my day. For me, receiving a thank you note really feels just like I am being given a gift; wrapped in paper and tied with a zip code and a stamp on top!

As a young girl I recall thank you notes were a necessity. There were no ifs, ands or buts about it, my sister and I had to write thank you notes for every gift we received. So when I became a mom I played that “card” too. Of course I put my own spin on it–there was no playing, using or spending until a thank you note was in the mail. As you might have suspected with me being a teacher and writer, there were other rules as well. The thank you note had to be heartfelt, longer than three sentences and worthy of the reader’s time. It may surprise you but I never checked or corrected grammar, spelling or punctuation. I felt that helped keep the note authentic and endearing. Oh I know, my poor kids–but to this day, that is a mom rule I am still pretty proud of. 

Thanks to a lifetime of thank you notes our family is a bunch of thank you note snobs. I admit that we often times judge the notes that enter our home with our unspoken grading system. The ultimate goal of a thank you note is to make the recipient feel the writer’s gratitude. If the card produces tears–A+. Humor always raises the grade, as does referencing a shared personal moment. If there is never so much as a mention of what the actual gift was–D!  Seriously, don’t even waste a stamp on a note like that! 

Sadly, it seems thank you notes are becoming a thing of the past as younger generations are thanking with a text, snapchat, #thank you or email. I suppose it doesn’t really matter just so long as there is a proper thank you, right? Actually, some of my most memorable thank yous happened right on the spot! Many years ago my kids and I ordered six munchkins and when they opened the bag they found over a dozen. The note on the bag read, “Thanks for being so polite.” Or the time the Verizon phone person waived a fee for me saying, “That’s for being so patient and kind.” 

Being a children’s author my favorite thank you notes of all might be those received from children after I have visited their school. It might be their crayon artwork that adorns the front. It could be their sentiment filled with “invented” spelling words. Maybe I should be a little worried how their pictures depict me, but I’m not. I’m just tickled pink that they took time out of their jampacked school day to write a few heartfelt sentences that often bring about a tear or two! A+

Heartfelt thank you notes from the children at West Rock Authors Academy in New Haven, Connecticut

Moral: It doesn’t matter how you say thank you–just so long as you do!


Allison Jo Stoutland
Tinybeans Voices Contributor

When I'm not being a mom, daughter, sister, wife, teacher, published author, soup lover, dog & home owner, gardener, baker and crafter- I am a writer. The kind who writes from her heart using her daily life experiences. I also travel our country speaking to organizations and schools about being positive, kind and making the world a happier place. 

Got a little tot with an animal obsession? Instead of singing Old MacDonald one more time, how about you create a cool animal mask with a few things we are betting you have in your house. Follow these simple instructions and your kid will be playing pachyderm in no time.

You’ll Need:

  1. A Paper Plate
  2. Glue
  3. String
  4. Scissors
  5. A Paintbrush
  6. A Black Marker or Crayon
  7. Gray Paint (we mixed black and white)

Steps:

Cut the paper plate into the simple shapes pictured below.

Use the gray paint and black marker to color in the pieces. Use the glue stick to attach the them.

Tape or staple the string to the mask, and become a rhino!  

Have fun!!

What are some of your other favorite animal crafts? Tell us in the comments below!

–Erin Feher


Thick layered paint, rich blended colors, heavy brush strokes: we’re not talking about your two-year-old’s latest creation. We’re paying homage to one of the greatest artists in history, Vincent van Gogh, and offering your itty-bitty impressionists some ideas to recreate his masterpiece, The Starry Night, in style. So no matter your kiddos age, read on for ways to make sure this work really leaves an impression.

Start with the Art

Before you dive into any of these projects, learn about the man behind the painting, van Gogh himself, through books. For the toddler crowd, we suggest In the Garden with Van Gogh, a chunky board book with bright pictures and playful rhymes. Older kids will love Camille and the Sunflowers, based on the story of Camille, who befriends Van Gogh when he moves into town. Another winner is Katie and the Starry Night. Not only is it a fun read, but it’s a great intro to the painting they’ll be working with. Now you’ve got the story, let the mess-terpiece begin!

photo: Allison Sutcliffe 

For the Tot Lot
When it comes to this age group, two words are all you need: Finger. Paints. Because let’s be honest, there’s no way to go wrong with this messy medium. And lucky for your aspiring artist, finger paints lend themselves oddly well to van Gogh’s dynamic, thick brushstroke style. Work with your little to find colors in her finger paint collection that match the ones in Starry Night. Then let her swish and swirl out sweeping clouds, windy gusts and twinkling stars until her heart’s content. Or use your paint choices to try this intriguing layered finger paint project from The Imagination Tree. It adds another dimension to the basic dip and swirl technique with framable results. Look out art corner, here comes another masterpiece!

Tip: To keep the moon and stars from becoming brown globs, try working on multiple versions at once to keep the little hands busy while you’re letting the layers dry just a bit. 

photo: In the Playroom

For Preschool Painters

Sponge painting is always a blast for preschoolers. And this Starry Night project developed by Anna at In the Playroom is no exception. To make this mess-terpiece, couple your sponge-worthy art supplies (think: rollers and cut up sponges) with the free printable on the blog and then get creative with colors and textures, just like van Gogh!

Another easy favorite for this age group is crayon resist painting. Pairing these two classics leads to a lovely work of art, worthy of the starring spot on your fridge. It’s probably best to have mom or dad use a crayon to copy out some swirls, treetops and the glowing moon from the original painting onto paper. Or let your kidlet try her hand drawing out some of these key elements herself. Then break out the watercolors, brushes and bowl because it’s time to make this painting come to life. Using the original as a template, brush the vibrant watercolors over the crayon elements for an effect that’s almost as stunning as Van Gogh’s.

photo: Sawyer Pangborn via flickr

For Grade School Artists

Take your cue from Melissa and Doug and create your own sticker mosaic Starry Night with your school-aged munchkin. Start by having your petite painter draw out his own version of this stellar painting. Nothing too fancy. A focus on the simple shapes in the sky and that magnificent tree that really catches your eye in the foreground will do just fine. Then use the pre-cut foam stickers you can find at your local craft store to patch together the colorful patters van Gogh’s pronounced brushstrokes make in the glittery heavens. Voila!

When 8 1/2 x 11 is just too small, go big on the sidewalk. Use sidewalk chalk to blend or create own sidewalk chalk paint like this one from Mommy’s Kitchen. Use white chalk to sketch some of the basic outlines of the painting’s composition: tree, stars, moon, steeple, etc. Work together to mix up the colors you’ll need for the painting. Look closely: there’s more than one shade of yellow, and shadows are more green than black.

Do you plan to try one of these crafts? Tell us how it goes in a comment. 

—Allison Sutcliffe

A family that crafts together stays together. For a darling date-night-in or a bonding crafternoon with your kids, check out our favorite crafts below. They’re known to make hearts swell.

Crepe Flowers
Create a bouquet of flowers with your little one. It requires three easy-to-find materials and takes less than 15 minutes. The best part is that these flowers last forever, meaning you and your kiddo never “forget” to water them. Click here to get Red Tricycle’s very own tutorial.

“Date Night” Jar
“Letting the popsicle sticks decide” is also a fantastic, stress-free and diplomatic way of choosing an activity. All you need is a clean jar, popsicle sticks, a black pen and decorating materials of your choice like ribbons, stickers, paint, etc. Write your activity ideas like “Watch a movie, go to the park,” or “Get ice cream” on the sticks. Keep the jar on the side and whenever you’re ready to spend time together, pull out a stick and go! If you have time, be extra creative and color the popsicle sticks thematically so that you can use the jar for date night ideas with your partner too.

photo: Personalcreations.com

Crayon Candles
What a great way to take all those colors your kids “don’t like” and turn it into a beautiful craft that’ll warm up any room. You will need to grab a bag of shredded wax, candle wicks and candle holders, which can be easily found at any Michael’s store, but the end result is worth it. Pst – Don’t forget to add fragrance to really spice up the experience! Get the full tutorial over at ramannoodles’ Instructable’s page.

photo: Jennifer Longaway via flickr

What kind of crafts do you like to show your love? Tell us in the Comments below!